Clean OCR From Busy Interface Screenshots
A practical workflow for extracting accurate text from complex UI screenshots with annotations, logos, menus, timestamps, and mixed contrast.
Clean OCR From Busy Interface Screenshots
OCR looks simple when the source image is a scanned letter on a white page. It becomes much less predictable when the source is a software screenshot packed with menus, tooltips, icons, logos, badges, cursor highlights, sidebars, and annotation arrows. Product teams run into this constantly: support agents want to turn screenshots into issue notes, documentation writers want to capture interface labels, QA teams want to preserve error messages, and operations teams want searchable records from tools that do not export clean logs.
The problem is not that OCR is bad. The problem is that interface screenshots are visually hostile to OCR. They mix tiny type, nested regions, inconsistent contrast, decorative icons, and text that is meaningful only in context. A human can ignore the irrelevant pieces. OCR usually cannot. It tries to read everything: toolbar labels, badge counts, initials in avatars, sidebar navigation, timestamps, watermark logos, selected text, and half-visible content behind a modal.
This guide is a practical workflow for cleaning busy UI screenshots before extracting text. It is written for product, support, documentation, and QA teams that need reliable text without rebuilding the screenshot in design software. The goal is not a perfect archival scan. The goal is a repeatable process that gives you cleaner OCR, fewer manual corrections, and a source image that still preserves enough context to be useful.
Why UI Screenshots Need a Different OCR Workflow
A screenshot is not a document. It is a visual state of an application at one moment in time. That distinction matters because OCR engines expect text to behave like text in a document: lines are mostly horizontal, contrast is stable, columns are predictable, and decoration is secondary. A UI screenshot breaks those assumptions.
Text may appear in buttons, tabs, menus, modals, badges, input fields, code blocks, browser chrome, toast notifications, empty states, and embedded images. Some of it matters, some of it does not. A screenshot of a billing page might contain the error message you need, but also navigation links, account initials, plan names, graph labels, date ranges, and browser extension icons. If you run OCR across the full image, the output becomes noisy before you even start reviewing it.
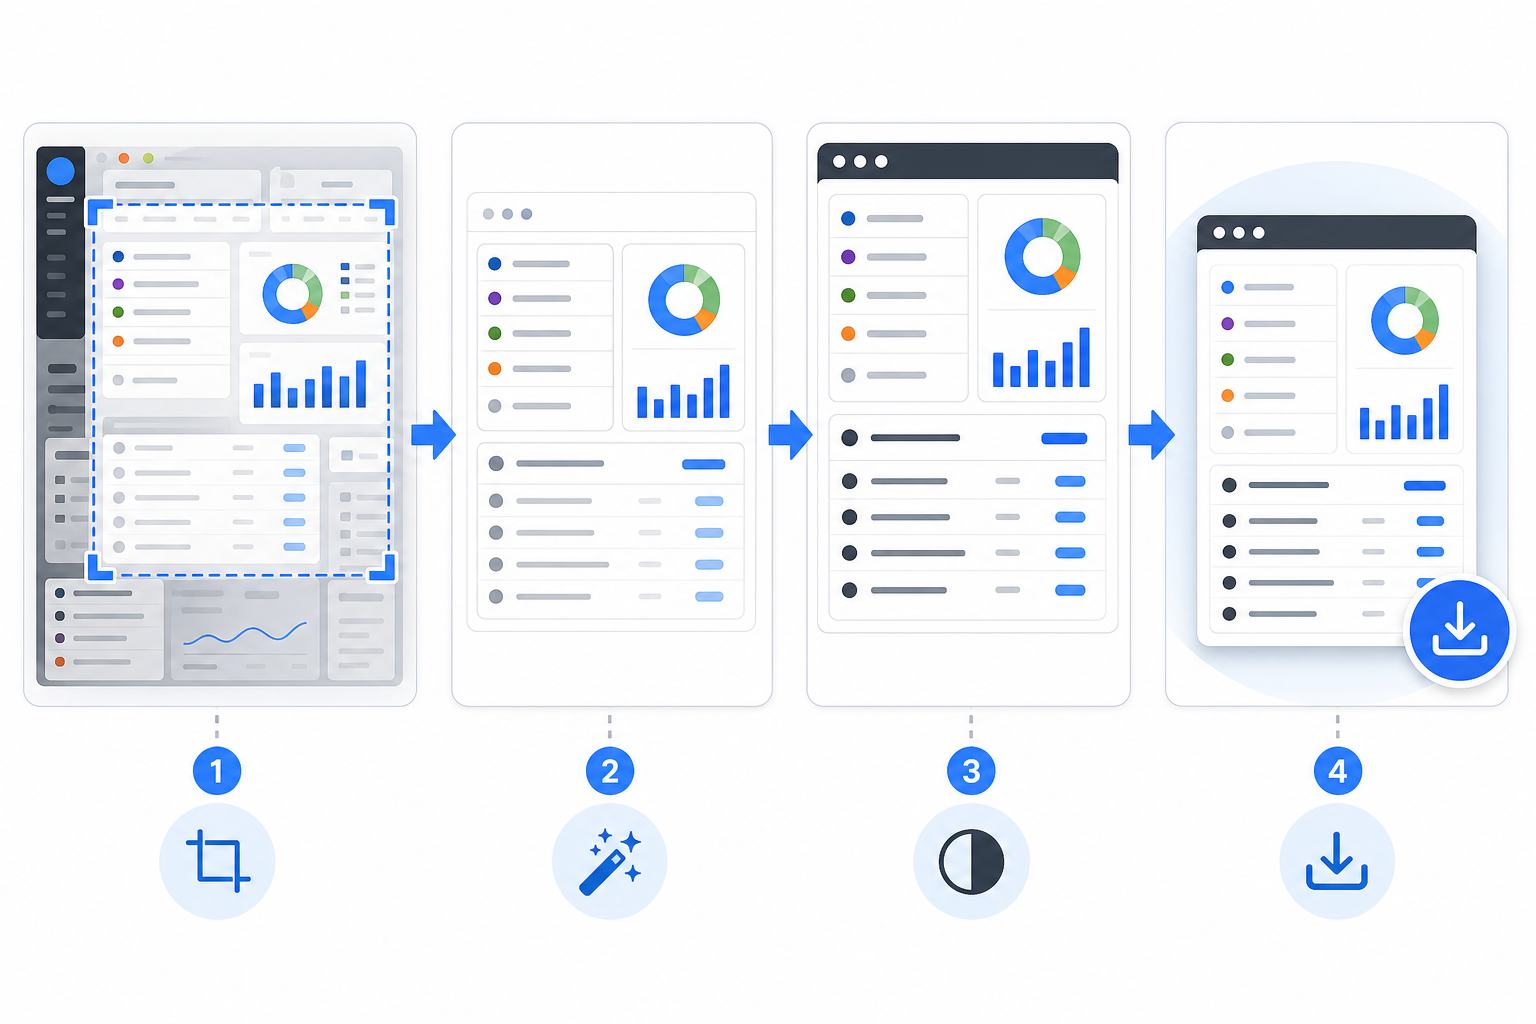
The better approach is to treat OCR as the last step, not the first. Before extraction, decide what the screenshot is meant to prove or preserve. Then prepare the image around that purpose. You can crop, duplicate, mask, sharpen, resize, and convert the screenshot so the OCR engine sees a simpler visual problem.
ConvertAndEdit tools can fit into this workflow without requiring a full design suite. You might use /ai-photo-editor to clean distracting visual clutter, /resize-image to make tiny UI text easier to recognize, /convert-image to standardize formats, /compress-image for final storage, and /image-ocr when the screenshot is ready for extraction.
The Screenshot Problems That Break OCR
The most common OCR failures in UI screenshots come from small visual details that feel harmless to humans. Before cleaning a screenshot, scan for these issues.
Mixed Text Sizes
Interfaces often combine large page titles, medium labels, small metadata, tiny badges, and compact table values. OCR may capture the large headings perfectly while mangling the small labels that actually matter. This is especially common in dashboards, admin panels, analytics tools, and developer consoles.
Small type becomes worse after compression, scaling, or screenshot sharing through chat apps. A screenshot pasted into a support thread may already be softened before anyone tries OCR. If the critical text is under roughly 12 pixels tall in the image, expect errors unless you resize or crop first.
UI Chrome and Browser Noise
Browser tabs, address bars, extension icons, operating system menus, dock items, and desktop notifications add text that usually does not belong in the OCR output. They also confuse layout detection because they create extra horizontal bands above or below the application content.
If you only need the application message, remove the browser chrome. If the browser URL is evidence, keep it in a separate screenshot or crop it into a dedicated region. Mixing evidence and extraction targets in one image often creates messy output.
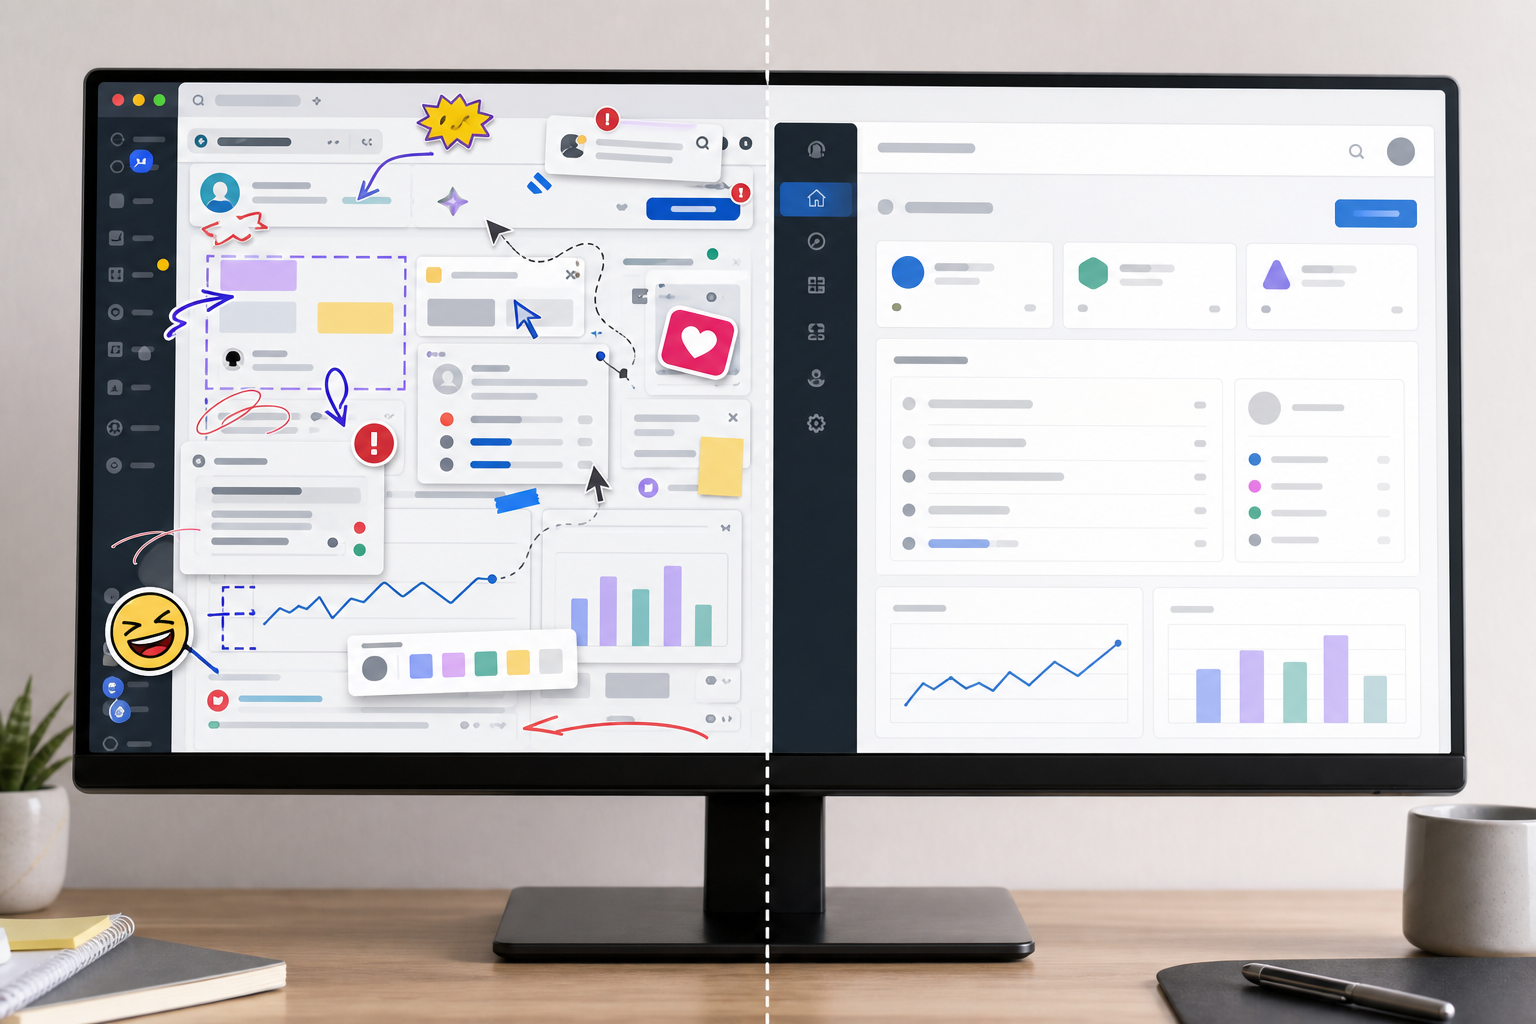
Annotation Clutter
Arrows, circles, highlighter strokes, callout boxes, cursor rings, and numbered markers are useful for humans but risky for OCR. A red arrow crossing a word can turn clean text into broken characters. A highlight behind light text can reduce contrast. A numbered marker can be interpreted as part of a table or list.
Annotations are best added after OCR, not before. If you only have an annotated screenshot, consider creating a cleaned copy for extraction while preserving the annotated version for human review.
Logos, Avatars, and Decorative Text
Logos can contain stylized letters that OCR tries to read. Avatars may include initials. Product badges, trial labels, watermark text, and brand marks can pollute the output. In a support or documentation workflow, these details are often irrelevant.
Mask them out if they are not part of the text you need. This is especially helpful when extracting error messages, settings labels, form field names, or help center UI strings.
Low Contrast and Dark Mode
Dark mode screenshots are visually comfortable, but OCR often performs better on high-contrast dark text over a light background. Some OCR engines handle dark mode well; others misread thin gray text on charcoal backgrounds.
If your screenshot contains dark mode UI, try increasing contrast, brightening the region, or creating a light-background duplicate. Do not over-process it. The goal is to separate text from background, not make the screenshot look dramatic.
Overlapping Panels and Partial Text
Dropdowns, tooltips, modals, cookie banners, chat widgets, and popovers can cover important text. OCR cannot infer what is hidden behind them. It may also read visible fragments as if they are complete words.
Before OCR, decide whether the overlay or the underlying page is the target. If the overlay matters, crop tightly around it. If the underlying page matters, capture a new screenshot without the overlay where possible.
Decide What Kind of OCR Output You Need
Not every screenshot needs the same cleanup. The right preparation depends on the output you want.
| OCR goal | Best screenshot strategy | What to remove |
|---|---|---|
| Extract one error message | Crop tightly around the message and nearby context | Browser chrome, sidebars, unrelated buttons |
| Capture form field labels | Crop the form section and increase size | Navigation, decorative icons, footer text |
| Preserve table values | Use full-width crop, avoid skew, export losslessly | Tooltips, cursor markers, notifications |
| Turn a screenshot into support notes | Keep the relevant panel, mask private data | Avatars, account names, unrelated metadata |
| Create searchable documentation references | Capture clean UI states before annotation | Callouts, highlights, cursor trails |
This decision step prevents wasted cleanup. A screenshot of an entire dashboard might be useful as evidence, but it is usually a poor OCR source. A focused crop of the active error panel will produce better text and take less time to review.
For repeatable team work, use a simple rule: preserve one master screenshot for context, then create a cleaned OCR copy for extraction. The master answers, "What did the user see?" The OCR copy answers, "What text do we need to reuse or search?"
A Repeatable Cleanup Workflow
The most reliable OCR workflow is boring in the best way. It uses the same sequence each time, with small decisions at each step.
Step 1: Duplicate the Original
Never clean the only copy. Keep the original screenshot untouched, especially when it is evidence for a bug report, support ticket, field record, or customer issue. Work from a duplicate named clearly, such as checkout-error-ocr-clean.png or settings-panel-text-source.png.
This matters because OCR cleanup can remove context. Cropping, masking, brightening, and resizing are useful for extraction, but they may make the image less suitable as a factual record. Keeping both versions avoids confusion later.
Step 2: Crop to the Text Region
Cropping is the highest-value cleanup step. It removes irrelevant text before OCR has a chance to read it. Use a tight crop when you need one message, one modal, one form, or one table. Use a wider crop only when neighboring labels explain the target text.
For example, if you are extracting an error from a payment settings page, you probably need the error message, the field label, and maybe the nearby button. You do not need the left navigation, top account menu, or browser tab names.
If the screenshot is too wide, crop first and then resize. Enlarging a full dashboard screenshot will produce a large file full of irrelevant text. Enlarging the focused region makes the actual target easier to read.
Step 3: Remove Private or Distracting Details
Mask anything that should not appear in the extracted text: customer names, email addresses, account IDs, billing references, internal project names, session tokens, and unrelated comments. Also remove decorative text that may confuse OCR, such as logos or avatar initials.
A simple solid block is usually better than blur. Blur can create soft shapes that OCR interprets as characters. A clean rectangle clearly tells both humans and OCR that the content is intentionally removed.
If you need the cleaned image to remain visually polished, use /ai-photo-editor for careful object removal or background cleanup. Keep edits conservative. You are preparing a readable source image, not redesigning the interface.
Step 4: Improve Contrast Without Crushing Detail
OCR needs separation between letters and background. If the screenshot has low contrast, increase it gently. For dark mode, you may get better results by brightening the crop or converting it to a simpler light-background version. For thin gray UI text, avoid aggressive compression before extraction.
Do not apply heavy sharpening across the whole image. Oversharpening can create halos around letters, especially on high-density UI fonts. A small resize upward often works better than sharpening because it gives the OCR engine more pixels per character.
Step 5: Resize Small UI Text Upward
If the target text is tiny, enlarge the cropped image before OCR. A practical starting point is 150% to 200% for compact UI panels. Use /resize-image after cropping so you are scaling only the useful region.
Avoid resizing down before OCR. Downscaling may make a screenshot easier to share, but it destroys fine edges in small text. If you need a compressed version for storage or publishing, create it after extraction.
Step 6: Use a Clean Format for OCR
PNG is a strong default for screenshots because it preserves sharp UI edges. JPEG can work, but compression artifacts around letters may hurt OCR. WebP may be fine at high quality, but if the source already has artifacts, converting it again can make matters worse.
If your screenshots arrive in mixed formats, standardize them before processing. Use /convert-image to move screenshots into a predictable format for your workflow. For most OCR preparation, a clean PNG copy is easier to reason about than a chain of compressed images from different sources.
Step 7: Run OCR and Review in Context
Once the image is cropped, cleaned, resized, and saved in a suitable format, run it through /image-ocr. Review the extracted text beside the cleaned image, not from memory. OCR errors are often subtle: 0 becomes O, 1 becomes l, hyphens disappear, and table columns merge.
For support and QA work, paste the corrected text into the ticket with a link or attachment to the original screenshot. For documentation, compare the OCR text against the current product UI before publishing because interface labels may change between screenshot capture and writing.
Practical Cleanup Patterns by Screenshot Type
Different UI screenshots need different handling. Use these patterns as starting points.
Error Dialogs and Toast Notifications
Error dialogs are usually easy OCR targets if you crop aggressively. Keep the dialog title, message, and action buttons. Remove the app background unless it explains the error.
Toast notifications are harder because they are often small, semi-transparent, and positioned over busy content. If possible, capture a second screenshot with the toast over a plain area. If not, crop tightly and increase contrast around the toast region.
Checklist for error screenshots:
- Keep the error title and message together.
- Include the field label if the error refers to a form.
- Remove unrelated sidebars and page content.
- Resize upward if the toast or modal uses small type.
- Verify punctuation, codes, and capitalization manually.
Settings Pages and Admin Panels
Settings pages contain many labels that look equally important to OCR. The trick is to isolate the section you need. A whole settings page may produce a wall of text with no useful order. A focused crop of one card or field group produces readable output.
When extracting settings labels for documentation, capture the UI without hover states or open dropdowns unless those states are the subject. For dropdown options, take a dedicated screenshot of the open menu and crop to that menu.
Tables, Logs, and Audit Trails
Tables are difficult because OCR may merge columns, skip faint dividers, or read rows out of order. Preserve table structure by cropping the table as a rectangle and keeping row spacing visible. Do not crop so tightly that column headers are removed.
For long tables, split the screenshot into several OCR passes instead of one tall image. Each pass should include the column headers. This makes the extracted text easier to correct and reduces row alignment errors.
If the table is mission-critical, OCR should be a fallback. Look for CSV export, copyable text, or an API first. OCR is useful when the screenshot is all you have, but structured data exports are better when available.
Mobile App Screenshots
Mobile screenshots often have large text but narrow layouts. They also include status bars, navigation bars, and gesture handles. Crop out the phone status area unless the time, carrier, or battery state is relevant.
For mobile UI documentation, keep enough vertical context to show which screen the text belongs to. For issue extraction, crop directly around the message or control. If the screenshot includes a keyboard, decide whether the keyboard text matters. Usually it does not.
Annotated Support Screenshots
Support screenshots frequently include arrows, circles, and comments added by a customer or teammate. Keep the annotated version as context, but create a second OCR source if you need clean text.
If annotations cross the text, try removing or covering only the annotation layer area while preserving the letters underneath where possible. If the text is damaged, do not trust OCR for that region. Re-type it from the original application or ask for a clean screenshot.
Quality Control: What to Check After OCR
OCR review should be systematic. Otherwise, small mistakes slip into tickets, docs, and knowledge bases.
Start with high-risk characters. Product UIs often contain IDs, codes, dates, version numbers, prices, filenames, and error identifiers. These are exactly where OCR mistakes are most damaging.
Check these pairs carefully:
0andO1,l, andI5andS8andB- hyphen, en dash, and minus sign
- slash and pipe
- period, comma, and colon
Then check structure. If the source is a table, confirm rows did not merge. If the source is a form, confirm labels are attached to the correct values. If the source is a modal, confirm the title, message, and buttons are not mixed with background text.
Finally, check omissions. OCR errors are not always wrong characters; sometimes entire words vanish. Low-contrast helper text, disabled buttons, placeholder values, and gray metadata are easy to miss.
A practical review method is to read the OCR output once from top to bottom, then read the image from top to bottom and point at each visible text region. Every meaningful region should be either present in the output or intentionally ignored.
Naming and Storage for Team Workflows
Clean OCR depends on process as much as image quality. When several people handle screenshots, naming and storage conventions prevent confusion.
Use filenames that describe the asset role:
| File role | Example name | Purpose |
|---|---|---|
| Original evidence | billing-error-original.png | Unedited source screenshot |
| OCR source | billing-error-ocr-source.png | Cropped and cleaned image for extraction |
| Extracted text | billing-error-ocr-reviewed.txt | Corrected OCR output |
| Published image | billing-error-docs-compressed.webp | Optimized image for documentation |
This structure makes it clear which file is authoritative for visual evidence and which file was optimized for text extraction. It also prevents teams from compressing or editing the original by accident.
After OCR review, you can create lighter derivatives for publishing or archiving. Use /compress-image when the image needs to be stored in a CMS, attached to a ticket, or embedded in internal docs. Keep the OCR source uncompressed or lightly compressed until extraction is finished.
If the screenshot needs to be shared as part of a report, consider combining the original image and reviewed text into a PDF using /image-to-pdf. That gives reviewers both the visual context and searchable text notes in one handoff package.
A Concrete Example: Extracting a Checkout Error
Imagine a support agent receives a screenshot of a checkout settings page. The customer has drawn a red circle around a failed payment message. The full screenshot includes browser tabs, a sidebar, account initials, plan information, a chat widget, and the error panel.
A weak workflow would be to run OCR on the full screenshot and paste the output into the ticket. The result would likely include navigation labels, browser text, chat widget fragments, and broken pieces of the error message.
A cleaner workflow looks like this:
- Save the original screenshot as evidence.
- Duplicate it as an OCR source.
- Crop around the payment settings panel and error message.
- Remove account initials and unrelated plan metadata.
- Cover the red annotation if it crosses the message.
- Resize the crop to make the error text larger.
- Export as PNG.
- Run OCR.
- Review the error code and punctuation manually.
- Paste the corrected text into the ticket with the original screenshot attached.
The time difference is small, but the quality difference is large. The ticket now contains searchable, corrected text without losing the original visual evidence.
When Not to Use OCR
OCR is useful, but it should not become the default answer for every screenshot. If the application offers selectable text, copy it directly. If a table has CSV export, use that. If logs are available as plain text, attach the log. If a design file or source string file exists, use the structured source.
OCR is best when the screenshot is the only available artifact, when the source system does not export text, or when you need to recover visible UI copy from a captured state. It is also useful for quick triage, searchable notes, and documentation drafts. It is not a substitute for structured data when accuracy is critical.
A good rule: use OCR to unlock trapped text, not to replace better sources.
Build a Small Team Standard
If OCR cleanup happens more than once a week, write down a short standard. It does not need to be a long policy. A lightweight checklist is enough.
A useful team standard might say:
- Keep the original screenshot unchanged.
- Create a separate OCR source image.
- Crop to the smallest useful region.
- Mask private data with solid blocks.
- Resize small UI text before OCR.
- Use PNG for extraction sources.
- Review codes, numbers, and table structure manually.
- Compress only final publishing copies.
This standard helps new teammates avoid the two biggest mistakes: running OCR on a noisy full screenshot and treating raw OCR output as final text.
Final Checklist
Before you run OCR on a UI screenshot, ask these questions:
- What exact text do I need from this image?
- Can I crop away unrelated UI text?
- Are annotations crossing the text?
- Is any private data visible?
- Is the target text large enough for reliable recognition?
- Would PNG preserve the screenshot better than a compressed format?
- Do I need the original screenshot as evidence?
- Have I reviewed high-risk characters and numbers after extraction?
A busy screenshot can still produce clean text, but only if you reduce the visual problem first. Crop with intent, remove distractions, preserve sharp UI edges, resize small text, and review the output against the image. With that routine, OCR becomes less of a guess and more of a dependable step in your support, documentation, and product workflow.