Fountain Pen Nib Macro Photo Cleanup for Reliable Repair Records
Learn how to capture, clean, crop, and compress fountain pen nib macro photos so tine alignment, tipping wear, feed position, and repair results remain easy to compare.
Fountain Pen Nib Macro Photo Cleanup for Reliable Repair Records
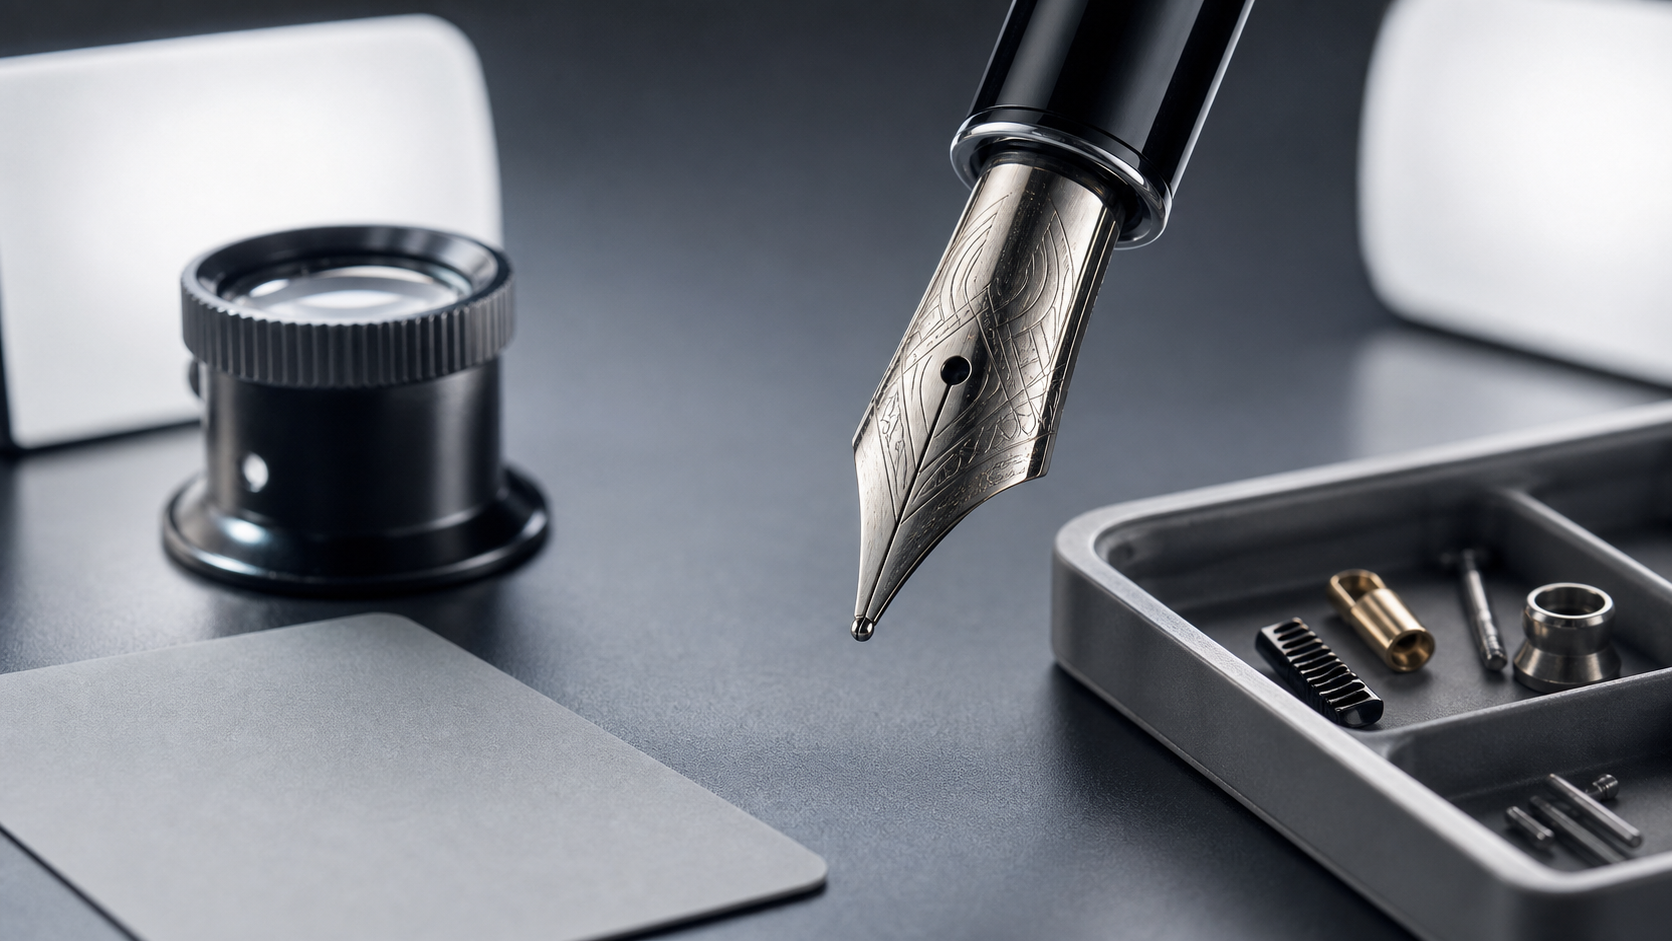
A fountain pen nib can look perfect in an ordinary phone photo while still hiding the defect that matters. One tine may sit slightly higher than the other. The tipping may have a flat spot visible only from the side. The feed may be rotated just enough to create inconsistent ink delivery. After adjustment, a change of a fraction of a millimeter can determine whether the repair succeeded.
That makes nib photography less about producing an attractive image and more about preserving evidence. A useful repair record must show geometry, surface condition, orientation, and scale without introducing misleading edits. It should also remain compact enough to attach to a service ticket, send to a customer, or store beside maintenance notes.
This guide presents a practical system for photographing and cleaning up fountain pen nib images with basic equipment. It is intended for independent repairers, pen clubs, collectors, small retailers, and anyone documenting before-and-after adjustments.
Decide What the Photograph Must Prove
Before setting up a camera, identify the question the image needs to answer. A single dramatic macro photograph rarely documents every relevant condition.
Common inspection questions include:
- Are the tine tips vertically aligned?
- Is the slit centered and consistent?
- Does the tipping material have a flat spot, chip, or asymmetric grind?
- Is the nib centered over the feed?
- Are the nib shoulders distorted?
- Is corrosion, plating loss, or dried ink present?
- Did an adjustment alter the writing angle or contact patch?
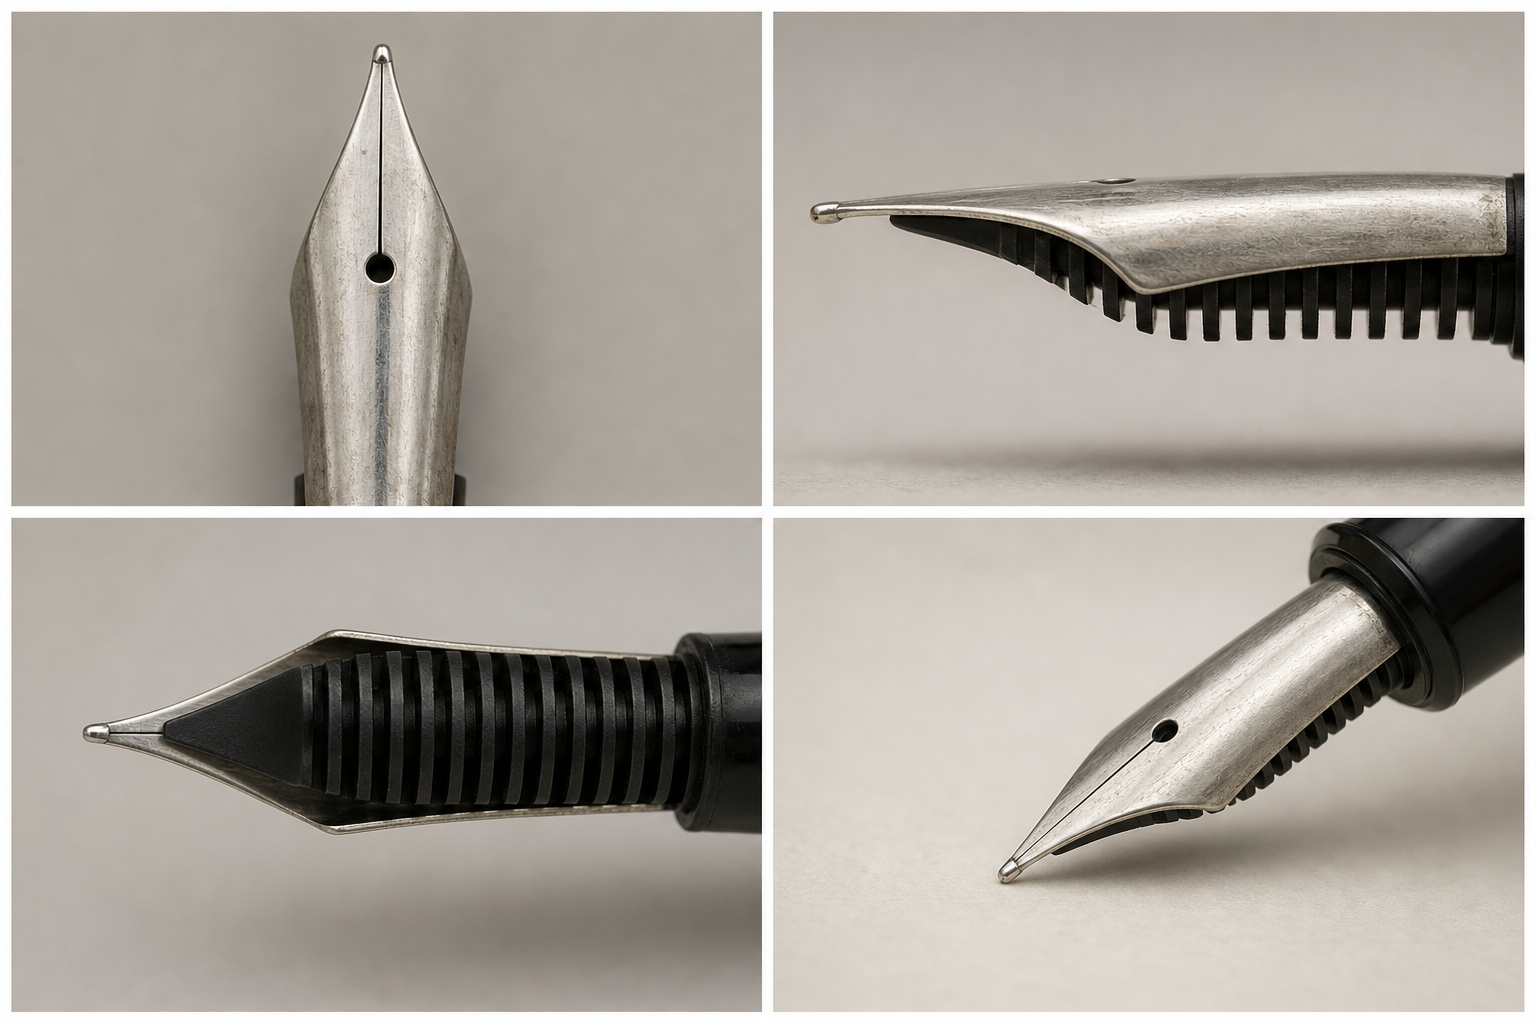
Match the view to the evidence. A head-on view is useful for tine height, while a side view reveals tipping shape. An underside view shows feed position and ink residue. A shallow writing-angle view helps document the contact patch.
| Inspection goal | Most useful view | Common mistake |
|---|---|---|
| Compare tine height | Straight toward the tipping | Camera positioned above the nib |
| Check slit symmetry | Top view centered over the slit | Nib rotated a few degrees |
| Evaluate tipping profile | Exact side view | Excessive digital sharpening |
| Inspect feed alignment | Underside view | Dark feed merging into the background |
| Record surface damage | Oblique light from one side | Ring light hiding shallow scratches |
| Compare before and after | Locked camera and pen position | Changing magnification between images |
Write the inspection goal in the repair note before taking photographs. This small step prevents a folder full of attractive but inconclusive images.
Build a Repeatable Nib Photography Station
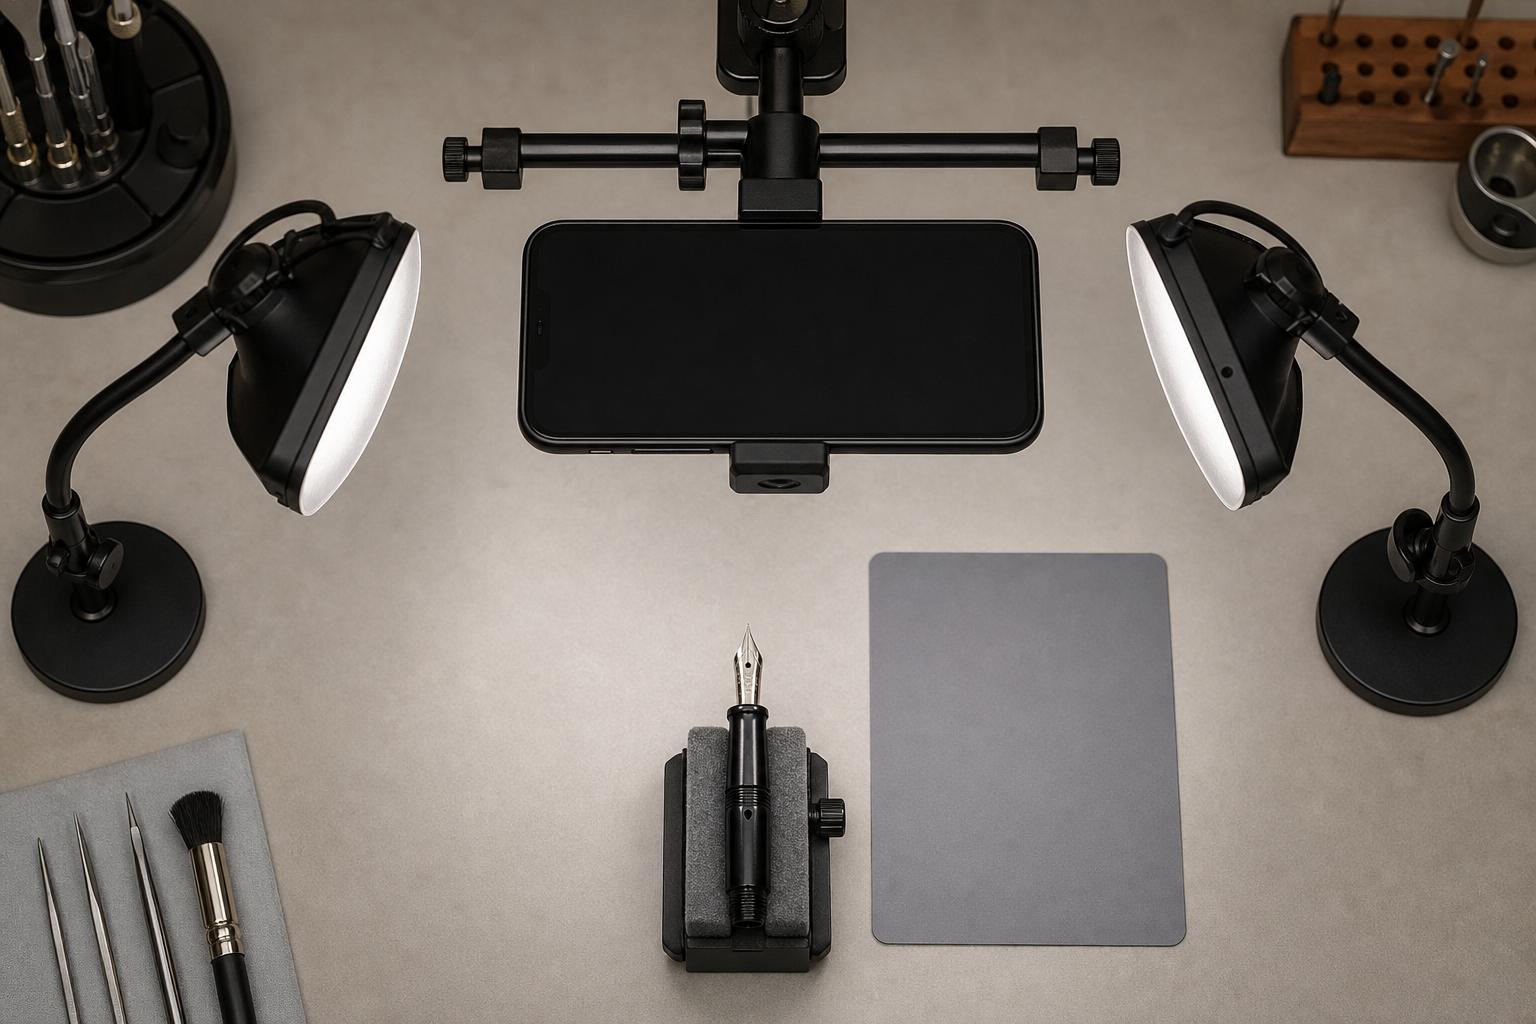
A reliable station does not require a dedicated macro camera. A recent phone, a clip-on macro lens, two small lights, and a stable support can produce useful records. Stability and repeatability matter more than nominal resolution.
Use a matte background that contrasts with the subject. Medium gray works well for polished steel, gold, dark feeds, and most pen sections. Pure white can cause reflective nibs to look underexposed, while black may conceal the feed and dark ink deposits.
Place one diffused light on each side of the nib at approximately 45 degrees. Thin white fabric, tracing material, or a small diffusion panel can soften reflections. Keep hot lamps away from plastic pen parts and flammable diffusion materials.
Secure the pen section in a padded holder. Poster putty can be useful for an inexpensive setup, provided it never touches delicate finishes, feeds, or ink channels. The camera should also be supported. Handholding at macro distance makes alignment inconsistent even when image stabilization prevents obvious blur.
Add a small neutral-gray reference card to the first frame of every series. It provides a consistent target for exposure and color correction. If measurements are relevant, include a millimeter scale beside the nib, positioned in approximately the same plane as the feature being measured. A scale far below the nib cannot support accurate size estimates because perspective changes its apparent dimensions.
Control Reflections Without Erasing Surface Evidence
Polished nibs behave like curved mirrors. They reflect lamps, walls, clothing, and the camera itself. The goal is not to eliminate every reflection; controlled reflections describe the nib's curvature.
Large, soft light sources create broad gradients that make bends and dents easier to see. Small bare lights produce bright hotspots and deep shadows. A ring light can evenly expose the nib, but its uniform reflection may hide scratches, ripples, or shallow depressions.
For condition records, capture at least two lighting variations:
- A balanced image with soft light on both sides.
- An oblique-light image with one lamp lowered or moved farther to the side.
The second image may look less polished, yet it often reveals the damage that prompted the repair. Do not discard it simply because it is not visually elegant.
Capture a Complete Inspection Set
Clean loose dust from the station before mounting the pen. Do not polish the nib merely to improve the photograph when residue, oxidation, or staining forms part of the condition record. Photograph the object as received first. Cleaning can then be documented as a separate repair stage.
A useful initial set contains these views:
- Full pen or section for identity and orientation
- Top view of the nib and slit
- Straight-on tipping view
- Left side profile
- Right side profile
- Underside view showing the feed
- Oblique surface view under directional light
- Writing-angle view if tipping work is planned
Use the camera's standard photo mode unless a manual mode is genuinely helpful. Portrait mode and synthetic background blur can erase nib edges, feed fins, or the fine gap between the tines. Disable beauty filters and automatic object enhancement.
Tap to focus on the tipping material, then check the image at full size. The engraved brand name may appear crisp while the tip remains outside the focus plane. When the phone permits it, lock focus and exposure so consecutive views do not shift in brightness.
Avoid extreme digital zoom. Move the camera closer only until the lens can still focus, or use an optical macro attachment. Leave a modest margin around the nib because aggressive framing makes later straightening and standardized cropping difficult.
Use Focus Stacking Cautiously
At macro distances, only a thin slice of the nib may appear sharp. Focus stacking combines frames focused at different distances, potentially keeping both the tipping and breather hole clear.
Stacking is helpful for general documentation, but it can create false edges around the tines, slit, and feed fins when the pen or camera moves between frames. Automated stacking can also blend reflections inconsistently.
Keep an unstacked photograph focused on the feature under inspection. Treat a stacked version as a supporting overview rather than the sole piece of evidence. If the software creates a doubled edge or an interrupted slit, reject the composite instead of retouching the artifact into a plausible shape.
Clean Up Images Without Changing the Nib
Editing should improve legibility while preserving the physical evidence. Begin with reversible, global corrections: rotation, crop, exposure, white balance, and restrained contrast.
Straighten the top view so the slit follows a consistent vertical or horizontal axis. Standard orientation makes before-and-after comparison much easier. Crop each inspection view to the same aspect ratio, but retain enough surrounding area to show that the nib has not been clipped or composited.
If the original is much larger than needed, use the image resizer to create a practical working copy. Preserve the original camera file separately. For service records, an image around 1600 to 2400 pixels on its long side is often easier to inspect and share than an unmodified multi-megapixel capture, although the appropriate size depends on the detail you need to retain.
Adjust white balance using the gray reference frame, then apply the same correction to the related set. Gold nibs should not shift from warm yellow to pale silver between views. Likewise, blue ink residue should not become purple because automatic white balance reacted to a different background area.
Use local editing sparingly. The AI photo editor can help remove an irrelevant background distraction or improve presentation copies, but evidentiary repair images should not have nib edges, scratches, stains, gaps, or tipping material regenerated. Keep any presentation edit separate from the untouched inspection record.
Distinguish Safe Cleanup From Misleading Retouching
Safe corrections generally affect the entire image or remove something demonstrably outside the object. Misleading corrections alter the condition being documented.
| Edit | Appropriate use | Risk |
|---|---|---|
| Rotation | Standardize orientation | Cropping away an important edge |
| Global exposure | Reveal underexposed detail | Clipping reflective highlights |
| White balance | Correct a color cast | Making plating look newer or different |
| Mild sharpening | Counter normal resizing softness | Creating halos that resemble tine edges |
| Background cleanup | Prepare a separate presentation copy | Accidentally modifying the nib boundary |
| Spot removal | Remove confirmed sensor dust | Erasing corrosion or ink deposits |
| Generative fill | Extend an empty background | Inventing part of the nib or feed |
When uncertain whether a mark is dust or damage, leave it in place and capture another frame after carefully cleaning only the lens and background. Differences between the two frames usually reveal where the mark originated.
Protect Thin Edges During Compression
Nib photographs contain details that compression handles poorly: narrow slits, polished boundaries, engraved lines, and fine feed fins. Heavy JPEG compression can add ringing around these features or block together nearby dark areas.
Inspect exports at 100 percent magnification. Look especially for:
- Bright halos beside the slit
- Jagged tipping edges
- Blocky gradients on polished metal
- Engraving that breaks into fragments
- Feed fins merging into a solid mass
- Color noise mistaken for corrosion
PNG preserves hard edges well but may be unnecessarily large for full-color photographs. High-quality JPEG is usually practical for routine sharing. WebP can provide smaller files, but confirm that the recipient's ticketing or archive system displays it correctly. The image converter can create compatibility copies without replacing the original.
Use the image compressor only after resizing and visual correction. Compressing the full-resolution file first and resizing it later subjects fragile details to two transformations. Export one candidate, inspect it, and increase quality if the slit or tipping boundary becomes ambiguous.
A sensible archive can contain three layers:
- Original camera file, unchanged
- Edited inspection master at high quality
- Smaller delivery copy for email or ticket systems
Do not repeatedly open and resave the delivery JPEG. Every lossy save can introduce additional artifacts.
Create a Minimum Repair Record
Images become far more useful when paired with concise metadata. A cryptic filename such as IMG_4837.jpg gives no clue which pen, view, or repair stage it represents.
Use a consistent naming pattern such as:
jobID_pen_view_stage_sequence.ext
For example:
R184_pelikanM400_tipfront_before_01.jpg
Avoid relying on the customer's name as the primary identifier. Names can be misspelled, duplicated, or unnecessarily exposed when files are shared. A repair or intake number is easier to manage.
For each set, record:
- Repair or collection identifier
- Pen make and model, if known
- Nib material and marked width
- Date photographed
- Before, during, or after stage
- Camera and macro attachment used
- Relevant adjustment or cleaning action
- Whether an image is stacked, enhanced, or presentation-only
If several images must travel together, assemble delivery copies into a simple PDF in a fixed order: identity view, top, front, sides, underside, and after-repair comparison. The image-to-PDF tool can package the set without forcing the recipient to open files individually. Retain the separate images because a PDF viewer may scale or recompress pages.
Make Before-and-After Comparisons Defensible
A convincing comparison uses the same camera position, magnification, lighting, orientation, and crop. Otherwise, a small angle change can make aligned tines appear uneven or conceal an existing flat spot.
Mark the camera-support position and pen-holder position on the bench. Record which side light was active for directional images. If the setup must be dismantled, take a wide reference photograph of it before moving anything.
During editing, place before and after frames on the same canvas size, but do not stretch one image independently to force a match. Align stable landmarks such as the breather hole, nib shoulders, and feed centerline. If perspective differs too much, present the images separately and state that they are not geometrically matched.
Never claim a dimensional change from photographs alone unless the scale, camera geometry, and measurement method support it. Images are excellent for showing visible condition and relative alignment, but they do not automatically become precision metrology.
Run a Final Evidence Check
Before sending or archiving the record, review it as if you had not handled the pen. Can you identify the object, understand its orientation, find the defect, and distinguish the pre-repair state from the result?
Use this final checklist:
- The title image or identity frame clearly shows which pen is documented.
- Every detail photograph has an understandable orientation.
- The tipping is genuinely in focus in the critical views.
- Highlights retain texture instead of becoming blank white patches.
- The feed remains visible against the background.
- Before and after files use consistent names and ordering.
- Global corrections are consistent across the set.
- No automated edit has reconstructed a nib edge or removed condition evidence.
- Compression has not blurred the slit, tipping, engraving, or feed fins.
- Original files are preserved separately from edited copies.
- Any stacked or presentation-only image is clearly identified in the notes.
- The delivery format opens correctly on the intended system.
The best nib repair photograph is not necessarily the most beautiful one. It is the image that answers a specific inspection question without exaggerating, concealing, or inventing detail. With stable positioning, controlled reflections, standardized views, restrained cleanup, and careful exports, even a modest phone-based station can produce repair records that remain useful long after the pen leaves the bench.