OCR Workflow for Scanned Packaging Labels With Tiny Text and Curved Surfaces
A practical workflow for turning imperfect packaging label photos into cleaner OCR input, with capture rules, crop decisions, contrast checks, and review steps.
OCR Workflow for Scanned Packaging Labels With Tiny Text and Curved Surfaces
Packaging labels look simple until someone needs to extract the text. A nutrition panel, warning block, batch code, cosmetic ingredient list, compliance mark, or multilingual sticker can contain hundreds of tiny characters packed into a curved, glossy, colored surface. The human eye can usually compensate for glare, distortion, and decorative backgrounds. OCR software is less forgiving.
This workflow is for small teams that need practical, repeatable OCR from packaging photos without a full scanning rig. It fits operations teams auditing supplier products, ecommerce teams building product records, local retailers digitizing shelf inventory, compliance reviewers collecting label evidence, and content teams turning physical packaging into structured notes.
The goal is not to make every label beautiful. The goal is to create an image that gives OCR the least confusing input possible, then review the extracted text in a controlled way. A few capture and cleanup decisions can save far more time than retyping ingredient lists by hand.
The Core Problem: Labels Are Not Normal Documents
Most OCR advice assumes a flat white page with dark text. Packaging rarely behaves like that. A label may wrap around a bottle, sit under glossy plastic, use metallic ink, mix icons with tiny legal copy, or place white text over a saturated color block. Even a good phone camera can produce an image that looks readable to a person but fails during OCR.
The main problems are usually predictable:
| Label issue | What it does to OCR | Practical fix |
|---|---|---|
| Curved surface | Bends lines and changes character spacing | Capture smaller sections instead of the full label |
| Gloss and glare | Erases strokes or creates fake white shapes | Move the light source and shoot at a slight angle |
| Colored backgrounds | Reduces contrast between text and label | Convert a working copy to high-contrast grayscale |
| Tiny type | Makes letters merge or disappear | Capture closer, resize carefully, avoid heavy compression |
| Icons and logos | Add non-text shapes that OCR may misread | Crop to text blocks before OCR |
| Multiple languages | Creates dense blocks with mixed symbols | Separate sections and label them during review |
| Seams and folds | Break words or create false columns | Shoot overlapping crops from different angles |
The mistake is treating the label as one document. A better workflow treats it as several evidence zones: front claim, nutrition panel, ingredients, warnings, manufacturer details, batch code, and any special stickers. Each zone gets captured, cleaned, OCRed, and reviewed according to its importance.
When This Workflow Is Worth Using
Not every packaging photo needs OCR cleanup. If you only need a visual record, a clear photo may be enough. Use a structured workflow when the extracted text will be searched, compared, copied into another system, translated, archived, or used as part of a review process.
This workflow is especially useful for:
- Ingredient lists on food, supplements, cosmetics, and cleaning products.
- Safety warnings with small icons and dense legal text.
- Multilingual packaging where each language block needs to stay separate.
- Product catalog enrichment from physical samples.
- Supplier intake checks where labels arrive as inconsistent photos.
- Local inventory records for stores that do not receive perfect digital assets.
- Field reports where packaging evidence needs to be combined into a PDF.
It is less useful when the label is badly damaged, handwritten, embossed without ink contrast, or printed on a highly reflective metallic surface. In those cases, OCR may still help, but manual verification becomes the real task.
Capture Rules Before You Touch Any Tool
OCR quality starts before editing. The cleanest crop cannot fully recover letters that were blurred, hidden by glare, or photographed from too far away.
Use these capture rules when photographing labels:
| Capture choice | Better option | Why it matters |
|---|---|---|
| One full product photo | Several close section photos | Small text gets more pixels per character |
| Direct flash | Soft side light | Reduces glare and blown-out strokes |
| Steep angle | Slight angle with minimal perspective distortion | Keeps rows straighter |
| Handheld only | Rest elbows or use a small stand | Reduces blur |
| Product held in air | Product stabilized on a table | Keeps focus consistent |
| Single shot | Two or three overlapping shots | Gives a backup for glare or curvature |
For curved bottles and jars, rotate the product instead of trying to capture the entire label at once. Shoot the center of each section while it faces the camera. A curved label captured in three readable parts is better than one impressive but distorted full wraparound image.
For tiny batch codes, expiration dates, and stamped lot numbers, take a separate close-up. These markings often use low-contrast ink, dot-matrix characters, or curved plastic. They should not be hidden inside a wide product shot.
Build a Label Zone Map
Before OCR, decide what you are trying to extract. A label zone map is a simple list of the text regions you expect to capture. It prevents random cropping and makes review easier.
A basic packaged food map might look like this:
| Zone | Example content | Priority |
|---|---|---|
| Front panel | Product name, flavor, main claims | Medium |
| Nutrition panel | Serving size, calories, nutrient values | High |
| Ingredients | Ingredient list and allergens | High |
| Manufacturer | Company name, address, website | Medium |
| Storage and warnings | Safety or handling instructions | High |
| Batch code | Lot, date, production code | High |
| Certifications | Icons, symbols, marks | Low to medium |
This does not need to be formal. Even a short note such as “front, ingredients, nutrition, warning, batch code” is enough. The value is that each image crop has a purpose.
For OCR, purpose matters because not every area should be processed the same way. A nutrition panel may benefit from straight rectangular cropping. A front label with decorative typography may need manual review. A batch code may require a close-up and contrast enhancement, but no aggressive smoothing.
A Practical Label OCR Workflow
The workflow below assumes you already have label photos. It uses browser-friendly steps and avoids specialized desktop publishing software.
1. Separate Evidence Images From Working Copies
Keep the original photos untouched. Create working copies for cropping, resizing, contrast changes, and compression. This matters because cleanup can sometimes remove useful visual evidence. If a reviewer questions a character, you want to compare it against the untouched source.
A simple folder structure works:
| Folder | Contents |
|---|---|
| originals | Raw phone photos or supplier images |
| crops | One image per label zone |
| ocr-ready | Cleaned versions used for text extraction |
| review | OCR output, notes, and final files |
If you use a shared drive or team workspace, keep naming consistent. A filename like sample-042-ingredients-crop-01.png is much easier to audit than IMG_8842_final_new.png.
2. Crop by Zone, Not by Product
Crop each label zone tightly enough that OCR does not waste effort on logos, illustrations, table borders, product photos, and background surfaces. You do not need to crop every word separately. Aim for logical blocks.
Good crop boundaries include:
- The full ingredients paragraph.
- The complete nutrition panel.
- A single warning box.
- The manufacturer block.
- A close-up of the lot or date code.
Avoid crops that cut through a line of text. OCR can recover from extra margin more easily than from missing letters.
If you need a quick browser tool for format conversion after cropping, a general image converter such as Convert Image is useful when source files arrive as HEIC, TIFF, WebP, JPEG, or PNG and you need a consistent working format.
3. Resize Only When It Helps Legibility
Small text needs enough pixels. If a crop is tiny because it came from a wide product photo, resizing can help your own review and may help some OCR engines. But resizing cannot create real detail that was never captured.
Use resizing carefully:
| Situation | Resize decision |
|---|---|
| Crop is readable but physically small on screen | Enlarge 150 to 250 percent |
| Letters are blurred in the original | Retake if possible; resizing will not fix blur |
| Thin text looks jagged | Resize with a clean, standard method and avoid sharpening too hard |
| OCR engine has file size limits | Resize to a practical width while preserving text clarity |
For label crops with dense text, prioritize width over compression. A nutrition panel crop that is 1600 pixels wide is often more useful than one squeezed down to 600 pixels. If you need controlled dimensions, Resize Image can help standardize crops before OCR.
4. Make a High-Contrast OCR Copy
Create a separate OCR-ready copy from the crop. For many labels, this version does not need to preserve brand color. It only needs to make letters easier to distinguish.
Common cleanup choices:
- Convert to grayscale when color distracts from text.
- Increase contrast when gray text sits on a tinted background.
- Slightly brighten dark photos before OCR.
- Avoid heavy filters that break thin strokes.
- Do not over-sharpen glossy glare; it can create false edges.
For colored packaging, test two versions: one original-color crop and one high-contrast grayscale crop. Run OCR on both if the text is important. Sometimes the color version preserves faint characters better; sometimes grayscale simplifies the background enough to win.
Use lossless or low-loss formats while cleaning. PNG is usually safer than a heavily compressed JPEG for tiny text, especially around ingredient lists and nutrition tables.
5. Compress Last, and Keep an OCR Master
Compression is useful for sharing and archiving, but it should not be the first operation. Aggressive compression can blur small letters, introduce blocky edges, and turn punctuation into noise.
A practical rule is:
| File version | Compression approach |
|---|---|
| Original photo | Do not edit |
| OCR master crop | Minimal compression, keep text crisp |
| Shared review image | Moderate compression after OCR is complete |
| Web preview | Compress for page speed only after creating review assets |
When you need smaller images for delivery or upload, Compress Image is better used after the OCR-ready master has already been created and checked. That way, compression does not become the hidden reason your text extraction fails.
6. Run OCR by Section
Instead of sending one full label image to OCR, process each cleaned zone separately. Section-based OCR gives you better control and makes errors easier to find.
Use Image OCR for each important crop, then paste or save the text under a clear heading in your review document. Keep the image filename near the extracted text so someone can trace errors back to the source.
A simple review note can look like this:
Sample: sample-042
Zone: Ingredients
Source image: sample-042-ingredients-crop-01.png
OCR status: needs manual check
Reviewer notes: verify allergen line and final preservative name
This structure is not fancy, but it prevents the common problem where OCR text floats around without evidence.
7. Review Against the Image, Not Memory
OCR review should be visual. Read the extracted text while looking at the crop. Do not rely on what the product “probably” says, especially for ingredients, legal warnings, and numbers.
Check these details slowly:
- Similar letters:
I,l,1,O,0,S,5. - Punctuation in ingredient lists.
- Decimal points in nutrition values.
- Units such as
mg,g,ml, and%. - Allergen statements.
- Accented characters in multilingual labels.
- Lot codes and expiration dates.
- Line breaks that change meaning.
For high-risk content, use a two-pass review. One person runs the OCR and corrects obvious issues. Another person checks the final text against the original crop. This is especially important when the text will be used in compliance records, customer-facing pages, or import documentation.
Decision Table: Best Format for Each Label Stage
Packaging workflows often fail because teams use one format for everything. The best format depends on the stage.
| Stage | Recommended format | Reason |
|---|---|---|
| Phone capture | Original camera format or high-quality JPEG | Preserves source evidence |
| Working crop | PNG or high-quality JPEG | Keeps small text readable |
| OCR-ready image | PNG | Avoids extra compression artifacts |
| Review bundle | PDF or organized folder | Easier to share and audit |
| Web catalog image | WebP or compressed JPEG | Better for page speed after text work is complete |
If the final handoff needs to combine multiple crops, notes, and source photos into a single document, Image to PDF can help create a review packet. That packet should not replace the original image folder, but it is useful for stakeholders who want one file.
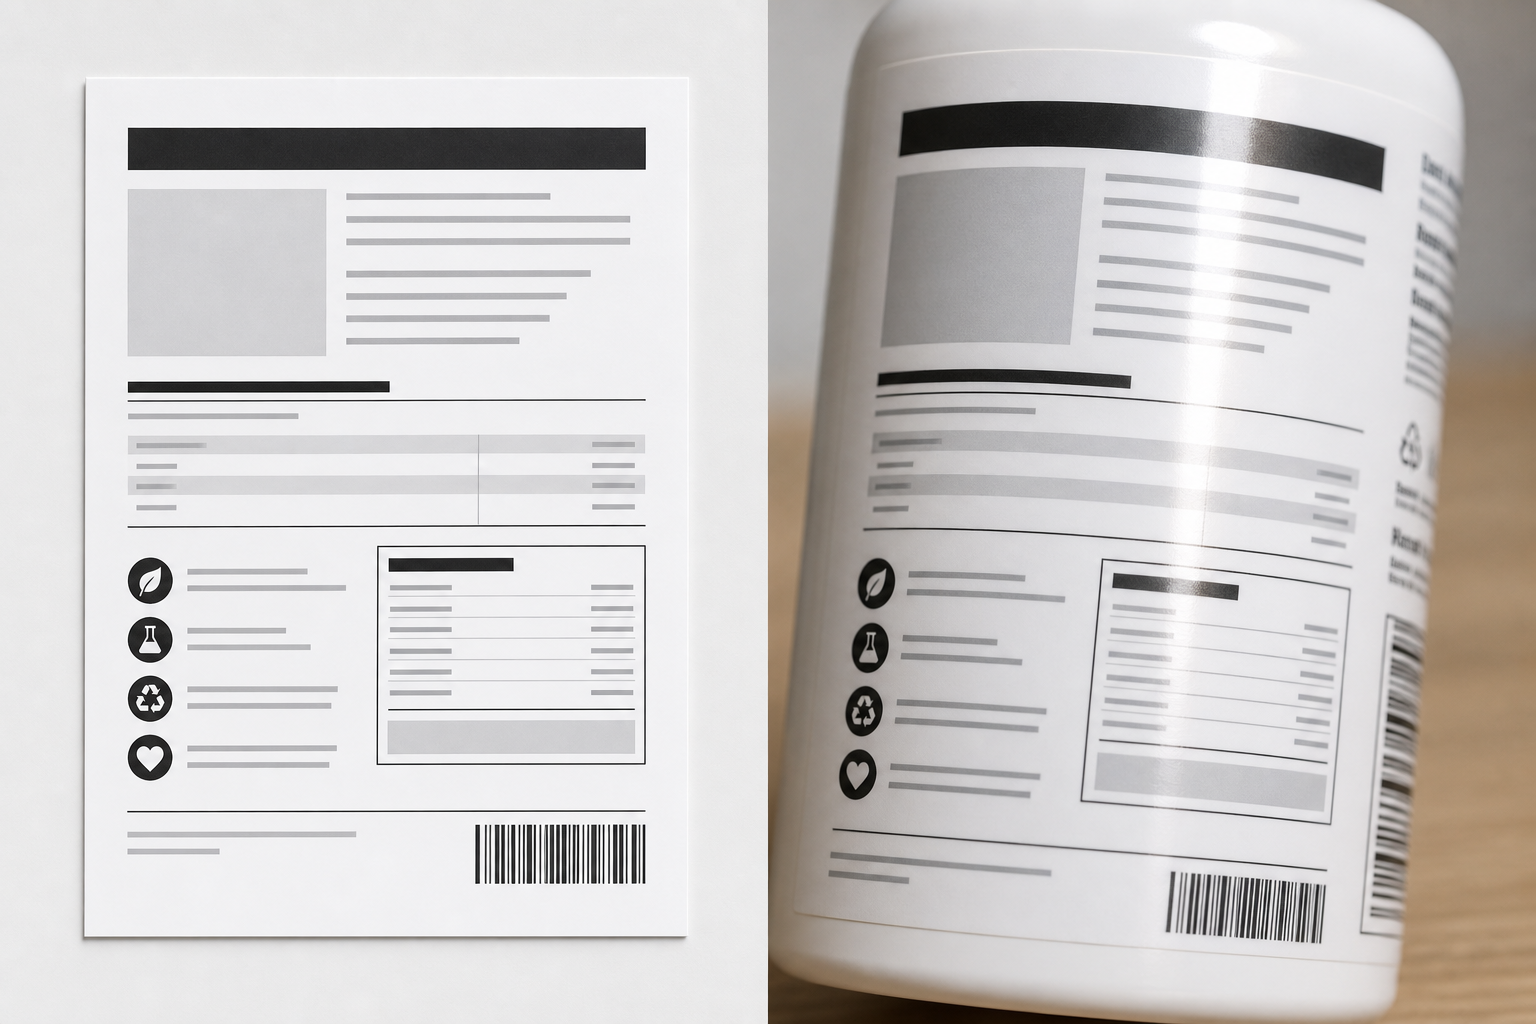
Handling Curved Bottles and Jars
Curved surfaces deserve their own strategy. The wider the label section, the more the edges bend away from the camera. OCR may read the center and fail at the sides.
Use this approach:
- Place the product on a stable surface.
- Capture the center-left section with that area facing the camera.
- Rotate the product slightly and capture the center section.
- Rotate again and capture the center-right section.
- Crop each section separately.
- OCR each crop and combine the text manually.
Do not worry if the photos overlap. Overlap is useful because it lets you verify words that sit near the edge of one image. The review document can note that the same line appears across multiple crops.
For shrink-wrapped bottles or glossy jars, move the product rather than the camera when possible. Small rotations often remove glare without changing the scale of the text too much.
Handling Nutrition Panels and Tables
Nutrition panels are structured, but OCR can still mishandle them. Tables contain borders, numbers, units, percent values, and nested indentation. A clean-looking OCR result can still place values on the wrong row.
For nutrition panels:
- Crop the entire panel with a little margin.
- Keep the panel as straight as possible.
- Avoid cutting off table borders if they help visual review.
- Run OCR once on the full panel.
- Manually verify each number row by row.
- Consider entering the final values into a structured table yourself.
Do not trust row alignment blindly. If OCR turns a table into plain text, values may drift away from their labels. The correct output format depends on your downstream use. For search, plain text may be enough. For product data, a manually checked table is safer.
Handling Ingredients and Allergen Statements
Ingredient lists are usually the highest-value OCR target because they are long, dense, and tedious to type. They are also easy to corrupt. A missing comma, changed parenthesis, or misread allergen can matter.
Use a close crop that includes the full paragraph and any bold allergen line immediately below it. If the ingredient list wraps around a curved package, split it into overlapping sections.
Review in layers:
| Review pass | What to check |
|---|---|
| First pass | Obvious OCR mistakes and missing words |
| Second pass | Punctuation, parentheses, and separators |
| Third pass | Allergens, warnings, and emphasized phrases |
| Final pass | Compare against the original crop at full zoom |
If the label uses multiple languages, keep each language as its own block. Mixing them into one paragraph makes later review and translation harder.
Handling Batch Codes, Dates, and Stamps
Batch codes and expiration dates often look unlike the rest of the label. They may be stamped, dotted, embossed, or printed over a seam. OCR engines can struggle because there are few surrounding words to provide context.
Capture these markings separately. Use close-up photos, steady focus, and multiple angles. Keep the surrounding area visible enough to prove where the code came from, but crop tightly for OCR.
For review, never accept OCR output for a batch code without visual confirmation. A single wrong character can point to the wrong production lot.
A useful convention is to store batch-code images with extra care:
sample-042-batch-front-neck-01.png
sample-042-batch-front-neck-02-angle.png
sample-042-batch-review.txt
The second image gives you a fallback if glare, ink gaps, or surface texture hide a character.
Quality Checklist Before Final Handoff
Before you send extracted packaging text to another team or system, run a short quality check.
| Check | Pass condition |
|---|---|
| Originals preserved | Raw photos are still available |
| Zones named | Each crop has a clear label zone |
| OCR masters saved | Clean images used for OCR are retained |
| Critical text reviewed | Ingredients, warnings, dates, and numbers checked visually |
| Ambiguous characters marked | Uncertain text is flagged instead of guessed |
| Final output traceable | Extracted text links back to image filenames |
| Delivery file prepared | Review packet or folder is organized |
The most important habit is marking uncertainty. If a character cannot be confirmed, write that down. A flagged uncertainty is easier to resolve than a confident wrong entry.
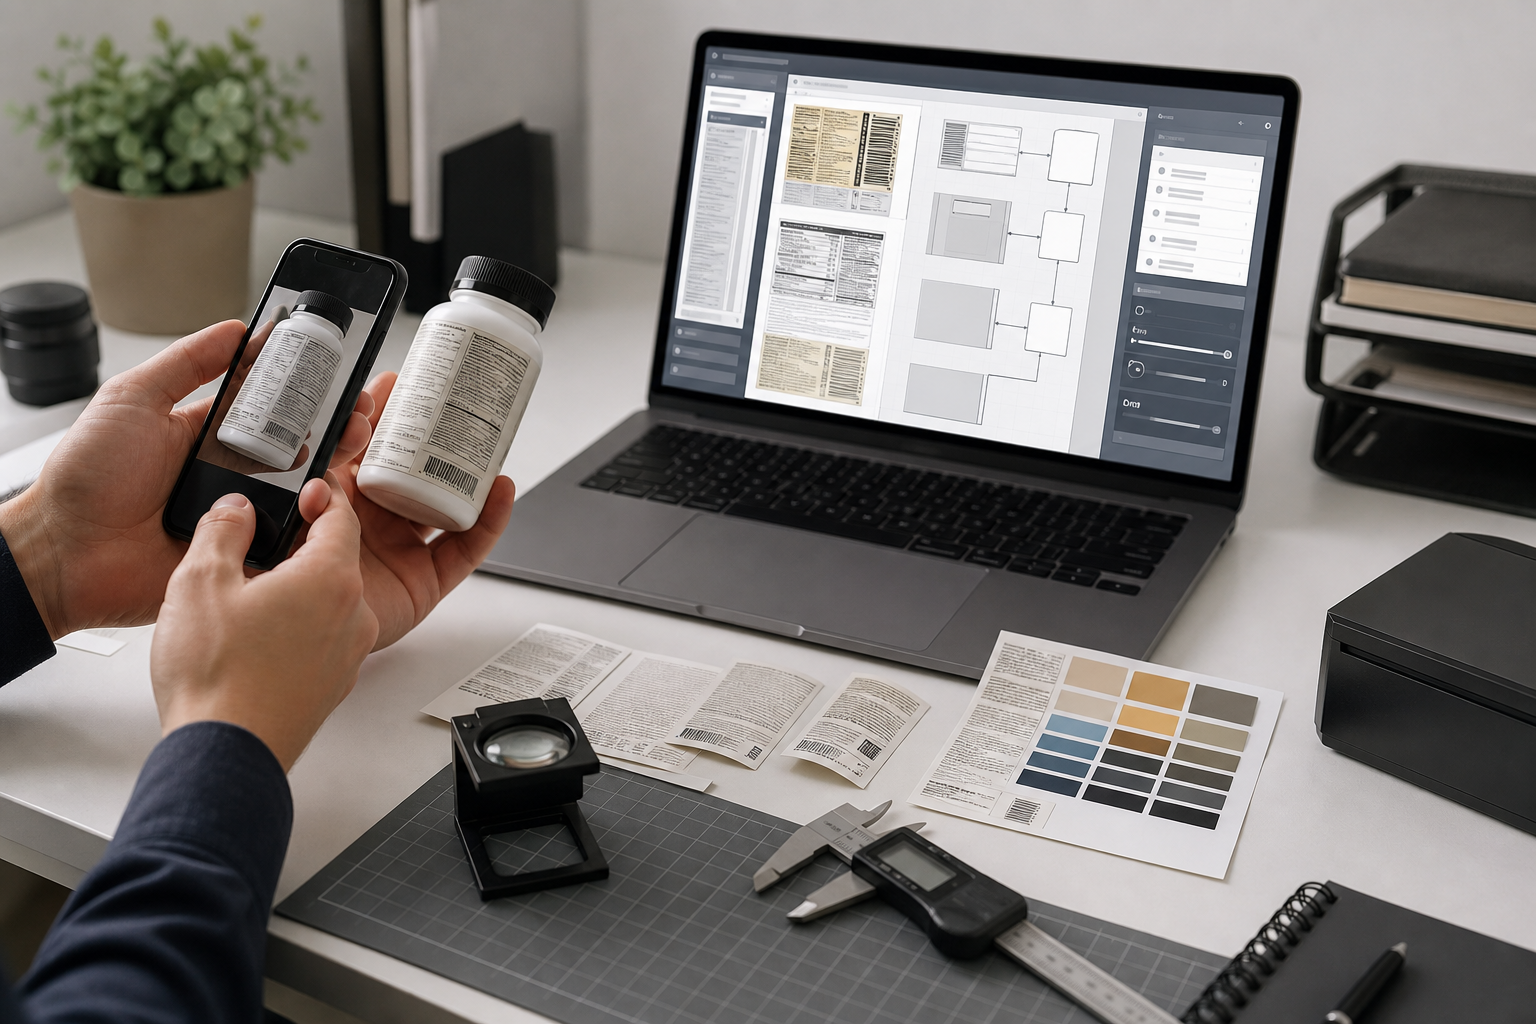
Example Workflow: Supplier Sends Three Phone Photos
Imagine a supplier sends three phone photos of a small cosmetic bottle. The front label is readable, the ingredient list curves around the side, and the batch code is stamped on the bottom.
A practical workflow would be:
- Save the original supplier photos unchanged.
- Create crops for front claims, ingredients left, ingredients center, ingredients right, manufacturer block, and batch code.
- Convert any unusual source formats into PNG or high-quality JPEG working files with Convert Image.
- Resize the ingredient crops only if the text is too small to review comfortably.
- Create grayscale high-contrast OCR copies for the ingredient crops.
- Run Image OCR on each ingredient crop separately.
- Combine the overlapping ingredient text manually.
- Review allergen or warning language against the crops.
- Add the original photos and cleaned crops to a review PDF if another person needs to approve them.
This workflow is slower than dropping one photo into OCR, but it is much faster than repairing a messy full-label extraction afterward.
Common Mistakes That Waste Time
The biggest mistake is trying to fix everything after OCR. Most errors are cheaper to prevent during capture and cropping.
Avoid these habits:
- Running OCR on a full product photo with large empty background areas.
- Compressing images before checking tiny text.
- Cropping so tightly that letter edges are cut off.
- Trusting OCR for batch codes without manual inspection.
- Combining several languages into one unlabeled text block.
- Editing the only copy of the original photo.
- Using a beautified image when a plain high-contrast image would read better.
- Assuming a nutrition table remained aligned after OCR.
Another subtle mistake is over-cleaning. If you push contrast too far, thin characters can close up or disappear. If you sharpen too much, background texture can look like punctuation. Keep the OCR copy simple and compare it with the original crop.
A Repeatable Naming Pattern
Good filenames make packaging OCR workflows less fragile. They also help when a project has dozens or hundreds of samples.
Use a pattern like:
project-sample-zone-version.extExamples:
spring-audit-042-ingredients-crop-01.png
spring-audit-042-ingredients-ocr-01.png
spring-audit-042-nutrition-crop-01.png
spring-audit-042-batch-bottom-02.png
Keep the zone names short and predictable:
| Zone name | Use for |
|---|---|
| front | Product name and front claims |
| ingredients | Ingredient list |
| nutrition | Nutrition or supplement facts |
| warning | Safety and handling text |
| maker | Manufacturer or distributor block |
| batch | Lot, batch, or expiration code |
| sticker | Added importer or translation sticker |
This makes it easier to sort files, rebuild a review packet, or locate the source image behind a disputed OCR result.
Where ConvertAndEdit Fits in the Workflow
ConvertAndEdit tools are most useful when the workflow needs fast, browser-based preparation rather than a heavyweight document system.
A typical tool chain might be:
| Need | Tool path |
|---|---|
| Normalize source formats | Convert Image |
| Standardize crop dimensions | Resize Image |
| Reduce file size after OCR prep | Compress Image |
| Extract text from label crops | Image OCR |
| Package crops into a review document | Image to PDF |
The key is using each tool at the right stage. Convert first if the source format is inconvenient. Resize when the crop is too small for review. OCR from the cleanest crop you can make. Compress after extraction, not before. Create a PDF when the review process benefits from one organized file.
Final Takeaway
Packaging label OCR is not a single-click problem because packaging is not a single flat document. The reliable approach is to divide the label into zones, preserve the originals, create clean OCR-ready crops, extract text section by section, and review the result against the image.
For small teams, that structure is enough. You do not need a scanning department to get useful text from imperfect packaging photos. You need steady capture habits, conservative image cleanup, clear filenames, and a review process that treats OCR as a draft rather than a final source of truth.