Consignment Auction Photo Sheets: A Practical Image-to-PDF Guide for Small Auction Houses
A detailed guide for turning mixed consignment item photos into clear PDF review sheets for auction intake, catalog checks, seller approvals, and internal lot planning.

Consignment Auction Photo Sheets: A Practical Image-to-PDF Guide for Small Auction Houses
Small auction houses often receive consignments in a messy middle ground: not chaotic enough to justify enterprise catalog software, but too varied to manage comfortably with loose image folders and long email chains. A single estate intake may include furniture, coin trays, signed prints, tools, costume jewelry, ceramics, watches, boxed electronics, and a few pieces that need specialist review before the catalog goes live.
The photos become the first shared record of what exists. They help staff group items into lots, help sellers approve descriptions, help specialists identify issues, and help marketing decide what needs a better hero shot. But if those photos stay as phone dumps, they are hard to review. People scroll past details, duplicate shots get mistaken for separate items, and email attachments split across messages.
A consignment photo sheet solves a narrow but painful problem: it turns a set of item photos into a compact PDF that can be reviewed, marked up, archived, and shared without needing layout software. The goal is not to replace a catalog. The goal is to create a practical review document before cataloging decisions are final.
This guide explains how to prepare auction intake images, choose the right sheet layout, preserve details that matter, and create PDFs that remain useful after the sale is over. It is written for small auction teams, estate sale operators, charity auction coordinators, and appraisers who handle photo sets in batches.
Why Auction Photo Sheets Are Different From Catalog Pages
A catalog page is public-facing. It needs polished images, final lot numbers, complete descriptions, estimates, terms, and branding. A photo sheet is operational. It needs speed, clarity, traceability, and enough visual detail to support decisions.
That difference matters. If you treat photo sheets like catalogs, you will spend too much time making them pretty. If you treat them like random contact sheets, they may fail the people who need to identify condition, count items, or confirm that the right objects were included.
A useful auction photo sheet should answer four questions quickly:
- What object or group of objects is being reviewed?
- Is the image sharp enough to support a cataloging decision?
- Does the set include identifying marks, signatures, labels, serial numbers, or damage?
- Can the PDF be traced back to the original intake folder if questions come up later?
The best format is usually plain: consistent image sizes, predictable ordering, readable file names, and enough white space for notes. In many cases, a basic PDF made from cleaned images is more useful than a highly designed document.
Build A Photo Sheet That Matches Auction Review Needs
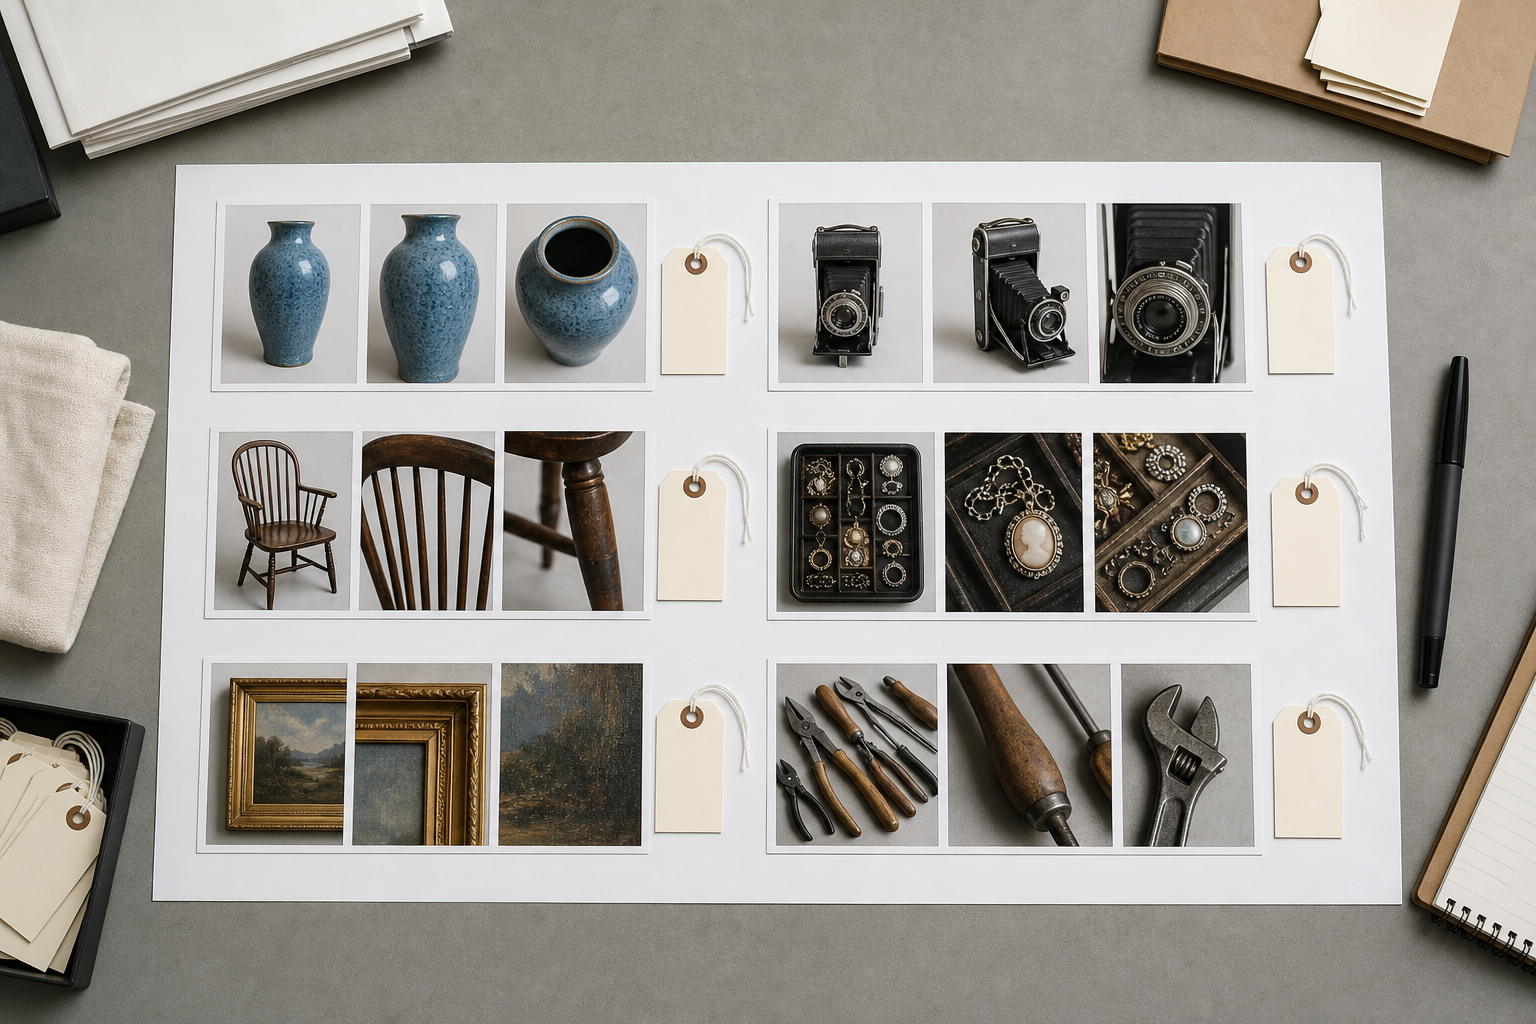
Before touching the files, decide what the sheet is for. The same photos may need different layouts depending on who will read the PDF.
| Review purpose | Best layout | Image priority | Notes |
|---|---|---|---|
| Seller approval | 2 to 4 images per page | Recognizable overview shots | Keep lots grouped so sellers can confirm what is included. |
| Specialist review | 1 to 2 images per page | Detail shots and marks | Prioritize signatures, labels, hallmarks, damage, and close-ups. |
| Internal lot planning | 6 to 12 images per page | Fast scanning | Use compact grids for grouping and duplicate detection. |
| Condition dispute record | 1 to 3 images per page | Damage clarity | Include wide shot plus close-up so context is preserved. |
| Charity auction donation review | 4 to 8 images per page | General appearance | Keep files small enough for committee sharing. |
A small team can use the same basic method for all of these. The difference is image selection and page density.
For example, a specialist reviewing a silver tea set may need a full-page close-up of hallmarks. A seller approving grouped garage tools may only need a grid showing that the tool lot is represented accurately. A staff member planning sale order may prefer dense sheets to compare categories across an entire estate.
The mistake to avoid is creating one giant PDF that tries to serve every reader. If the file is too long, too heavy, or too dense, it becomes another place where information gets lost.
Choose A File Naming Pattern Before You Sort
File names are boring until a seller asks why a certain item is missing, or a cataloger needs to find the original image from a proof sheet. Then file names become the spine of the whole record.
For auction intake, a useful naming pattern should contain enough context without becoming unreadable. Keep it short, consistent, and sortable.
Good examples:
smith-estate_box03_tools_001.jpgmarch-consignment_045_watch-front.jpglot-draft_112_ceramic-mark.jpgdonor-lee_artwork_006_signature.jpg
Weak examples:
IMG_7421.jpgnew final image.jpgauction stuff 3.jpgscreenshot_2026-06-12_at_9.14.02.png
If you already have a folder full of phone images, do not rename everything manually one by one unless the batch is tiny. Instead, sort photos into folders first, then use a simple sequence when exporting or renaming. The folder names can carry the intake context, while the files carry order and subject.
A practical folder structure might look like this:
2026-07-smith-estate/
  01-furniture/
  02-artwork/
  03-jewelry/
  04-tools/
  05-documents/
  pdf-review-sheets/
The photo sheet PDF should inherit that structure. A file named smith-estate_artwork_review-sheet_v1.pdf is much easier to discuss than photos.pdf.
Prepare Images Before Turning Them Into PDFs

The PDF is only as useful as the images inside it. You do not need studio-quality editing for every intake photo, but you do need enough consistency that reviewers can compare items without fighting exposure, rotation, and accidental clutter.
Start with a fast preflight pass:
- Remove obvious duplicates unless they show different condition details.
- Rotate sideways images.
- Crop away table clutter when it distracts from the item.
- Keep important context, such as a full view before a close-up.
- Separate blurry images that must be retaken.
- Preserve original files in a separate folder before editing copies.
For simple resizing, use a tool like Resize Image to bring oversized phone photos down to a review-friendly dimension. Many modern phones create images far larger than needed for an internal PDF. Reducing the longest edge to a practical size can make the final document easier to email and faster to open.
For mixed formats from different consignors, Convert Image can help standardize files before assembly. A PDF built from a jumble of HEIC, PNG, WebP, and JPEG files may behave unpredictably depending on the software used later. Standardizing to JPEG or PNG copies is usually safer for review sheets.
For images that are too dark, badly cropped, or visually distracting, an editor such as AI Photo Editor can help clean the presentation. Keep edits conservative for auction records. Brightening a shadowed label is useful. Removing a scratch, hiding damage, or making an item appear cleaner than it was is not appropriate for condition review.
Keep Original Evidence Separate From Review Copies
Auction photos can become evidence in disputes. A buyer may ask about condition. A seller may question whether an item was included. Staff may need to confirm whether a mark was visible before cataloging.
For that reason, never let edited review images become the only copy. Use two layers:
| File type | Purpose | Editing allowed? |
|---|---|---|
| Originals | Evidence and archive | No, preserve as received or captured. |
| Review copies | PDF sheets, internal notes, seller approval | Yes, conservative cleanup only. |
| Catalog selects | Public listing images | Yes, polished but truthful. |
This separation prevents confusion. If a PDF image is cropped tightly around a signature, the original wide shot still proves which artwork it belonged to. If a review image is brightened, the original still shows the capture conditions.
A simple naming convention helps:
originals/
review-copies/
catalog-selects/
pdf-review-sheets/
Small teams often skip this because it feels formal. The first time a consignment includes a disputed object, the structure pays for itself.
Decide How Many Images Belong On Each Page
Page density is one of the most important choices. Too many images per page and details vanish. Too few and the PDF becomes long, heavy, and slow to review.
Use the object category as a guide.
| Item type | Suggested density | Reason |
|---|---|---|
| Jewelry, coins, watches | 1 to 4 images per page | Small marks and condition details matter. |
| Furniture | 2 to 4 images per page | Wide views need space; damage close-ups need context. |
| Books and documents | 2 to 6 images per page | Covers, title pages, inscriptions, and condition details vary. |
| Tools and equipment | 4 to 9 images per page | Reviewers often need grouped comparison more than fine detail. |
| Box lots | 6 to 12 images per page | The point is item count and grouping, not individual beauty shots. |
| Fine art | 1 to 3 images per page | Include front, back, signature, frame, and labels. |
If the PDF is for seller approval, lean toward fewer images per page. Sellers are often reviewing on laptops or tablets, and a dense grid can cause unnecessary questions. If the PDF is for internal sorting, denser pages are acceptable because staff can refer back to originals.
A good practical rule: if the reader needs to judge condition, use fewer images. If the reader needs to confirm presence or grouping, use more images.
Use Image-To-PDF For Clean Review Packets
Once the review copies are ready, combine them into a PDF using Image To PDF. This is the simplest way to turn intake photos into a document that can be shared, printed, annotated, or archived.
A useful image-to-PDF packet should have:
- A clear file name with estate, consignor, category, and version.
- Images in the same order as the intake folder or draft lot list.
- Consistent orientation.
- Reasonable page density for the review purpose.
- No accidental personal photos, unrelated screenshots, or duplicate camera bursts.
If you need separate category packets, create them separately instead of merging everything too early. For example:
smith-estate_artwork_review-sheet_v1.pdfsmith-estate_jewelry_review-sheet_v1.pdfsmith-estate_tools_review-sheet_v1.pdf
Later, if a manager or seller wants one complete packet, combine the category PDFs with PDF Merge. This keeps the source packets manageable while still allowing a single handoff file.
Compress Without Destroying Identification Details
Auction photo PDFs can become huge because phone images are large. Compression is helpful, but the wrong compression can destroy precisely the details reviewers need: signatures, maker marks, labels, cracks, chips, and serial plates.
Use compression based on the review purpose. A committee viewing donated baskets does not need the same detail level as a specialist reviewing a watch movement.
| Detail type | Compression caution | Practical approach |
|---|---|---|
| Signatures and inscriptions | High | Keep larger images and check at 100% zoom. |
| Hallmarks and serial numbers | Very high | Use separate close-up pages if needed. |
| General furniture views | Medium | Moderate compression is usually fine. |
| Box lot overview photos | Low to medium | Compress more aggressively if no small text matters. |
| Damage close-ups | High | Preserve texture and edges. |
If the final PDF is too large, compress the images before assembling the PDF with Compress Image, then inspect the result. Do not judge only by file size. Open the compressed image and confirm the smallest important details still read clearly.
A good test is to zoom to the size your reviewer will actually use. If a hallmark looks blocky, a label becomes smeared, or a crack disappears into artifacts, compression went too far.
Include OCR Only When Text Actually Helps
Some auction photo sets include labels, certificates, receipts, title pages, gallery stickers, serial plates, or handwritten notes. In those cases, OCR can help pull visible text into a searchable reference. But OCR should not be treated as an authority. It is a finding aid, not a cataloging decision.
Use Image OCR when you need to extract text from:
- Artist labels on the back of framed works.
- Manufacturer plates on equipment.
- Book title pages or inscriptions.
- Certificate numbers.
- Serial numbers on electronics or tools.
- Handwritten inventory notes, when legible enough.
After OCR, compare the extracted text against the photo. This is especially important for serial numbers, dates, edition numbers, and names. OCR can confuse O and 0, I and 1, or handwritten letters that look similar.
For review sheets, it can be useful to keep OCR output in a separate notes document rather than embedding it into the PDF. That keeps the photo packet visually clean while still giving staff a searchable text reference.
Add Notes Without Turning The PDF Into A Catalog
There is a temptation to add descriptions, estimates, and long comments to every image. Resist that unless the packet is specifically meant to become a draft catalog.
For most review sheets, notes should be short and functional:
retake neededcheck signaturepossible set of 6damage close-up includedseller says original box existsconfirm if sterling
If you need more than a few words per item, keep a spreadsheet or catalog draft beside the PDF. The photo sheet should remain easy to scan.
A strong review packet has a clean division of labor:
| Asset | Best use |
|---|---|
| Photo sheet PDF | Visual confirmation and review. |
| Spreadsheet | Lot numbers, notes, estimates, consignor details. |
| Original image folder | Evidence and high-resolution reference. |
| Catalog system | Final public listing data. |
This keeps the PDF from becoming overloaded and reduces the risk of outdated notes circulating after catalog decisions change.
Build Seller Approval Packets Carefully
Seller approval packets need a slightly different mindset from internal staff packets. Sellers are often checking whether their property is represented correctly, not analyzing every cataloging detail.
Make seller packets easier by grouping items in a way that matches how the seller remembers them. Estate categories may be more useful than draft lot order at this stage.
For example:
Dining room furnitureFramed artworkJewelry and watchesGarage toolsCollectible glassDocuments and photographs
Avoid showing internal uncertainty too loudly. A note like maybe fake? should not appear in a seller-facing packet. Use neutral language such as specialist review needed or keep sensitive evaluation notes in internal files.
Seller-facing PDFs should also avoid unnecessary compression artifacts. A seller who sees a blurry photo may assume the auction house is being careless, even if the original is sharp. Use moderate page density and confirm the PDF opens cleanly before sending.
Build Specialist Packets Around Evidence
Specialists need context and detail. For them, the strongest packet often uses repeating groups: overview first, then marks, then condition.
For a painting, that might be:
- Full front view.
- Full back view.
- Signature close-up.
- Frame corner.
- Gallery label.
- Damage or restoration detail.
For a watch, it might be:
- Dial.
- Case back.
- Crown side.
- Clasp.
- Movement if safely opened.
- Box and papers if present.
For equipment, it might be:
- Full machine.
- Manufacturer plate.
- Controls.
- Accessories.
- Wear or damage.
- Power label or serial plate.
A specialist packet may be longer, but it should not be random. Put related images together so the reviewer does not have to infer which close-up belongs to which item.
Avoid Common Photo Sheet Mistakes
Most auction photo sheet problems come from haste rather than complexity. The fix is usually a short checklist before exporting.
Check for these issues:
- Sideways images mixed into otherwise clean pages.
- Duplicate images that make one item look like two.
- Missing detail shots for signatures, labels, or damage.
- Over-compressed images where small text is unreadable.
- Seller-facing packets that include internal comments.
- Category PDFs named too vaguely to identify later.
- Photos from different consignors accidentally combined.
- Crops that remove scale, context, or item relationships.
- PDFs so large they cannot be emailed or opened on older devices.
- Version confusion, such as
final,final2, andfinal-new.
Use version numbers instead:
smith-estate_jewelry_review-sheet_v1.pdf
smith-estate_jewelry_review-sheet_v2.pdf
smith-estate_jewelry_seller-approval_v1.pdf
Version numbers are less emotional than words like final. They also make it easier to explain what changed.
A Practical Packet Checklist
Before sending or archiving a consignment photo sheet, run through this checklist.
Image preparation:
- Originals are preserved in a separate folder.
- Review copies are rotated correctly.
- Blurry images are removed or marked for retake.
- Important detail shots are included.
- File names are consistent enough to trace back.
PDF structure:
- The PDF name includes consignor or estate, category, purpose, and version.
- Page density matches the review purpose.
- Images appear in a logical order.
- Category packets are separate unless one combined packet is requested.
- The PDF opens correctly on a second device or browser.
Quality control:
- Signatures, labels, serial numbers, and damage remain visible.
- Compression has not destroyed important details.
- No unrelated personal images are included.
- Seller-facing packets do not reveal internal evaluation notes.
- The final PDF is stored beside the source image folder.
This checklist is intentionally simple. A tool that staff will actually use is better than a perfect procedure that gets ignored during a busy intake day.
When To Use Separate PDFs Instead Of One Large File
One large PDF feels tidy, but it is not always the best choice. Separate PDFs are often better when different people need different parts of the consignment.
Use separate PDFs when:
- Jewelry needs specialist review but furniture does not.
- Seller approval should exclude internal condition notes.
- A charity committee only needs donation highlights.
- One category has many detail shots and would overwhelm the rest.
- The final packet would be too large to share easily.
Use one combined PDF when:
- A manager wants a full estate overview.
- The consignment is small.
- The packet is being archived as a single intake record.
- The recipient needs to print the complete set.
A hybrid approach works well: create category PDFs first, then merge copies into a full packet when needed. This gives you both control and convenience.
Archiving Photo Sheets After The Sale
After the auction, the photo sheet can still be useful. It may help answer seller questions, support condition records, assist with unsold item handling, or guide future research.
Archive the PDF with the same care as the original image folder. At minimum, keep:
- Original intake photos.
- Final review sheet PDFs.
- Seller approval packets, if used.
- Final catalog exports or lot lists.
- Any specialist notes that informed cataloging.
Do not rely on email attachments as the archive. Email is a delivery method, not a records system. Store the files in the consignment or sale folder where staff can find them later.
A simple archive path might be:
sales/2026-07-estate-auction/consignments/smith-estate/photo-records/Inside that folder, keep the same structure used during preparation. Future staff should be able to understand the record without asking the person who created it.
Final Thoughts
Consignment photo sheets do not need to be fancy. They need to be clear, traceable, and appropriate for the decision at hand. A good PDF review packet helps small auction teams move from loose image piles to shared visual records without introducing heavy software or layout work.
The strongest approach is simple: preserve originals, prepare clean review copies, choose page density based on the reader, convert images into PDFs, compress carefully, and keep category packets organized. That gives sellers, specialists, and staff a document they can actually use.
For small auction houses, this is the practical middle layer between phone photos and finished catalog pages. Done well, it reduces confusion, speeds up review, and creates a better record of what came through the door.