Embroidery Design Preview GIFs for Faster Client Approvals
Learn how to build lightweight embroidery design preview GIFs that clearly show placement, stitch order, thread changes, fine details, and production risks before approval.
Embroidery Design Preview GIFs for Faster Client Approvals
A static embroidery proof can confirm color, dimensions, and placement, but it often fails to communicate how a design will actually build on the machine. Customers may approve a polished vector mockup without understanding the stitch order, the density of a filled area, the visibility of an underlay, or the way small lettering changes once translated into thread.
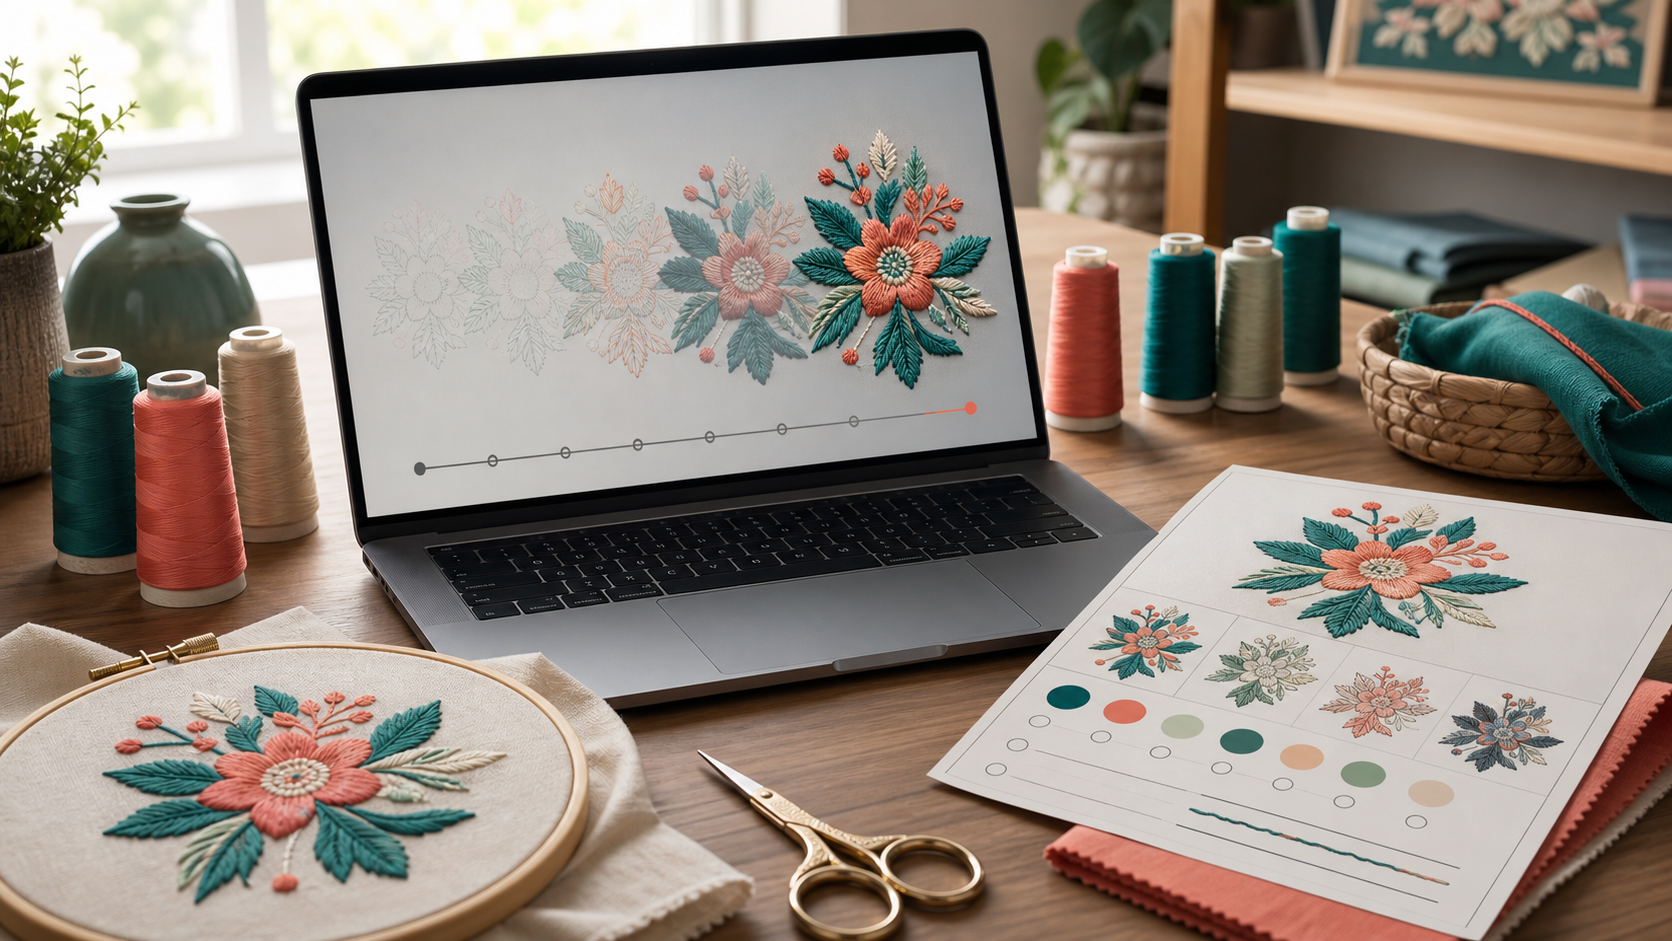
A short animated preview closes part of that gap. It can show the design appearing in stitch order, pause at meaningful thread changes, and finish with a realistic view of the completed mark. For a small embroidery shop, digitizer, apparel decorator, or merchandise team, this is a useful approval aid that does not require sending a large video or exposing production software to every reviewer.
The goal is not to make a cinematic animation. The goal is to produce a compact, honest visual that helps a client notice the right things before a garment reaches the machine.
Why an Animated Proof Is Different From a Static Mockup
A static mockup answers one question well: what should the finished design resemble? An animated proof can answer several additional questions:
- Which elements sew first, and which elements sit on top?
- Where do thread-color changes occur?
- Does an outline appear late enough to cover the edge of a fill?
- Is a small detail visible for long enough to inspect?
- Does the final design occupy the expected area on the garment?
This matters when artwork contains overlapping shapes, outlined lettering, appliqué placement steps, or several similar thread colors. A client who sees only the finished composite may not realize that two adjacent areas require separate color stops. Likewise, an account manager may not recognize that a thin line in the source art becomes a thicker stitched column.
Animation should supplement, not replace, a production sew-out. Fabric stretch, stabilizer choice, thread tension, needle selection, and machine speed cannot be proven by a screen simulation. Treat the GIF as a communication layer between artwork review and physical testing.
Decide What the Approval Must Cover
Before exporting frames, define the decision you need from the viewer. An animation becomes confusing when it tries to prove placement, color accuracy, stitch quality, garment fit, and logo compliance simultaneously.
Use the following table to choose the emphasis:
| Approval question | Best visual emphasis | Useful final frame |
|---|---|---|
| Is the design in the right location? | Garment or hoop context | Full placement view |
| Is the sewing order acceptable? | Progressive stitch build | Completed design |
| Are thread changes understood? | Brief pauses at each color | Thread palette beside design |
| Will small details remain legible? | Slow close-up near the end | Actual-size detail crop |
| Does the outline register correctly? | Fill followed by outline | Tight edge close-up |
| Is an appliqué step clear? | Longer hold before placement | Completed appliqué view |
For most customer approvals, placement, overall appearance, and major thread colors deserve priority. Stitch order is more useful for internal production review or for clients who understand embroidery construction.
Write the approval request separately from the image. For example: “Please confirm left-chest placement, navy and cream thread selection, and the removal of the small tagline.” Do not expect animation alone to define the commercial decision.
Build a Preview That Answers Production Questions
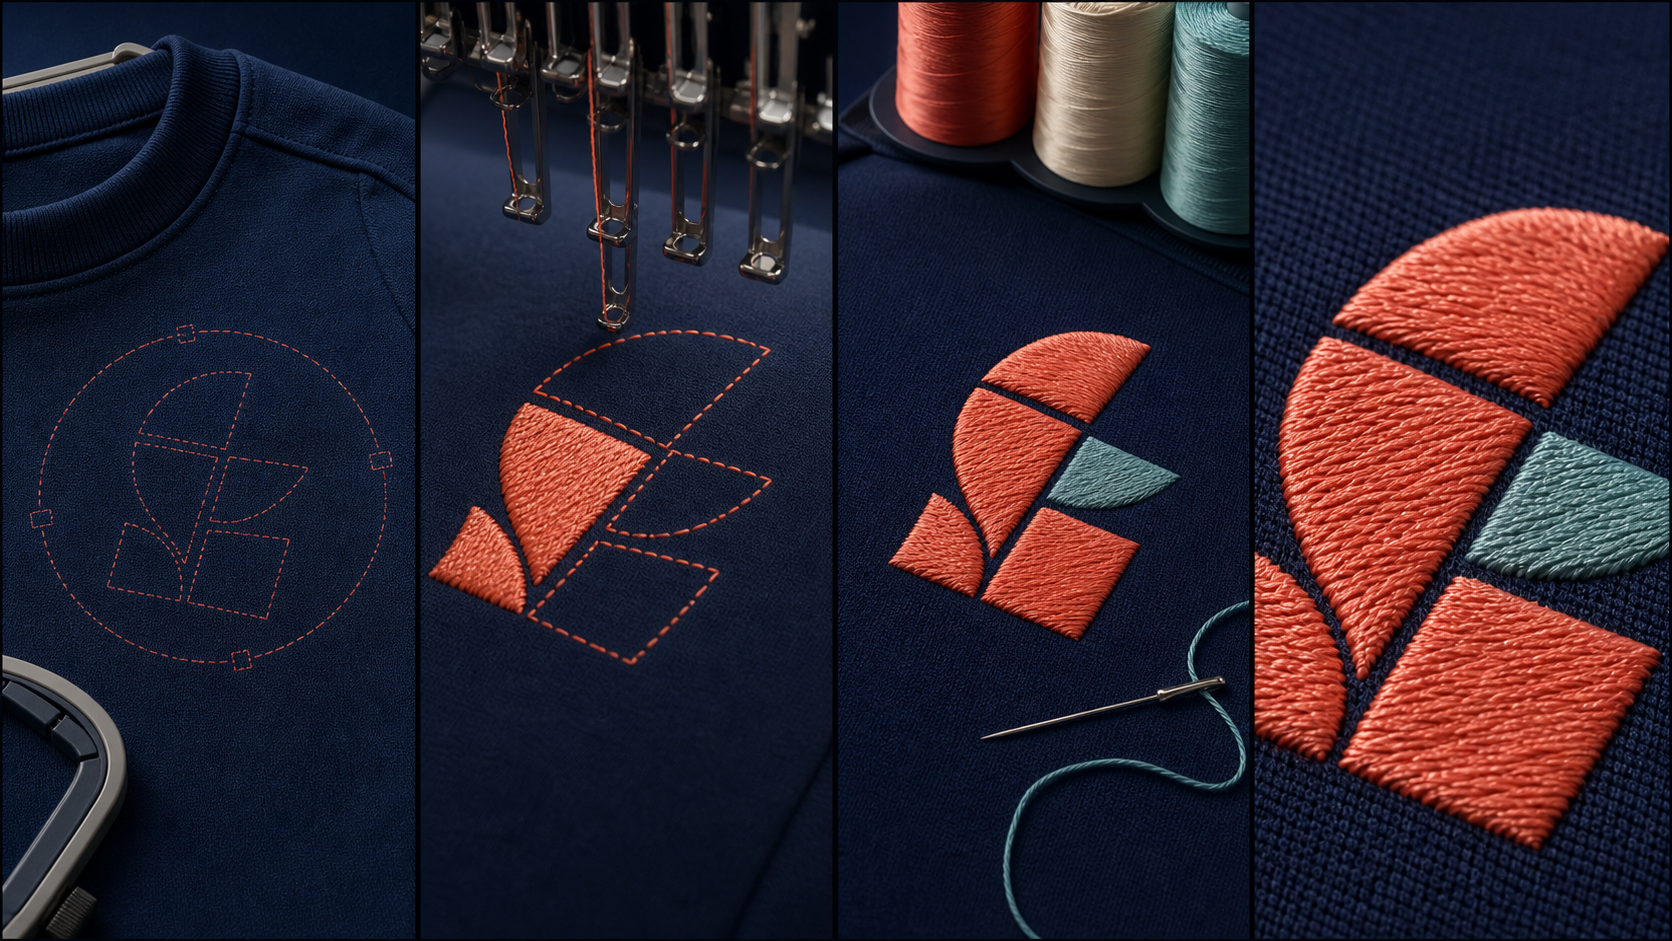
A useful preview usually needs four visual stages rather than hundreds of exported machine-simulation frames.
1. Begin With Placement Context
Open with the design shown on the relevant garment area, patch shape, cap panel, or hoop boundary. The first frame should establish scale quickly. Avoid an enormous logo floating on an empty background because it can make small lettering look more viable than it really is.
If a full garment photograph makes the embroidery too small, use two views: a brief placement frame followed by a closer construction view. Prepare the source image with the image resizer so both views have consistent dimensions. This prevents the animation from jumping between differently sized canvases.
2. Show Meaningful Stitch Progress
Do not export every movement of the virtual needle. At normal GIF frame rates, extremely granular progress creates visual noise and an unnecessarily large file. Instead, capture milestones:
- Underlay or initial registration elements, if relevant to the review.
- The first major fill or lettering group.
- Each important color change.
- Outlines and details that sew over earlier elements.
- The complete design.
A six-color logo does not automatically need six equally timed stages. Combine minor areas when they do not affect the approval decision. Give extra time to a color stop that changes the character of the design or reveals a registration concern.
3. Hold on Thread Changes
Thread changes are easier to understand when the animation pauses briefly after a color is completed. A hold of roughly half a second is often enough for a simple design; a dense or detailed stage may need longer.
Keep the background stable during these transitions. Changing garment photos, zoom levels, and thread colors at the same time makes comparison difficult. If you need to zoom, do it between clearly separated sections rather than during the stitch build.
4. Finish With Inspection Time
The completed design should remain visible longer than any intermediate frame. A final hold gives reviewers time to inspect the result and prevents the GIF loop from feeling frantic.
For a complex mark, include a close-up before returning to the placement view. The close-up should focus on a real approval risk: tiny lettering, a narrow border, negative space, or overlapping fills. Decorative zooms add file size without improving the decision.
Keep Thin Lines and Small Lettering Honest
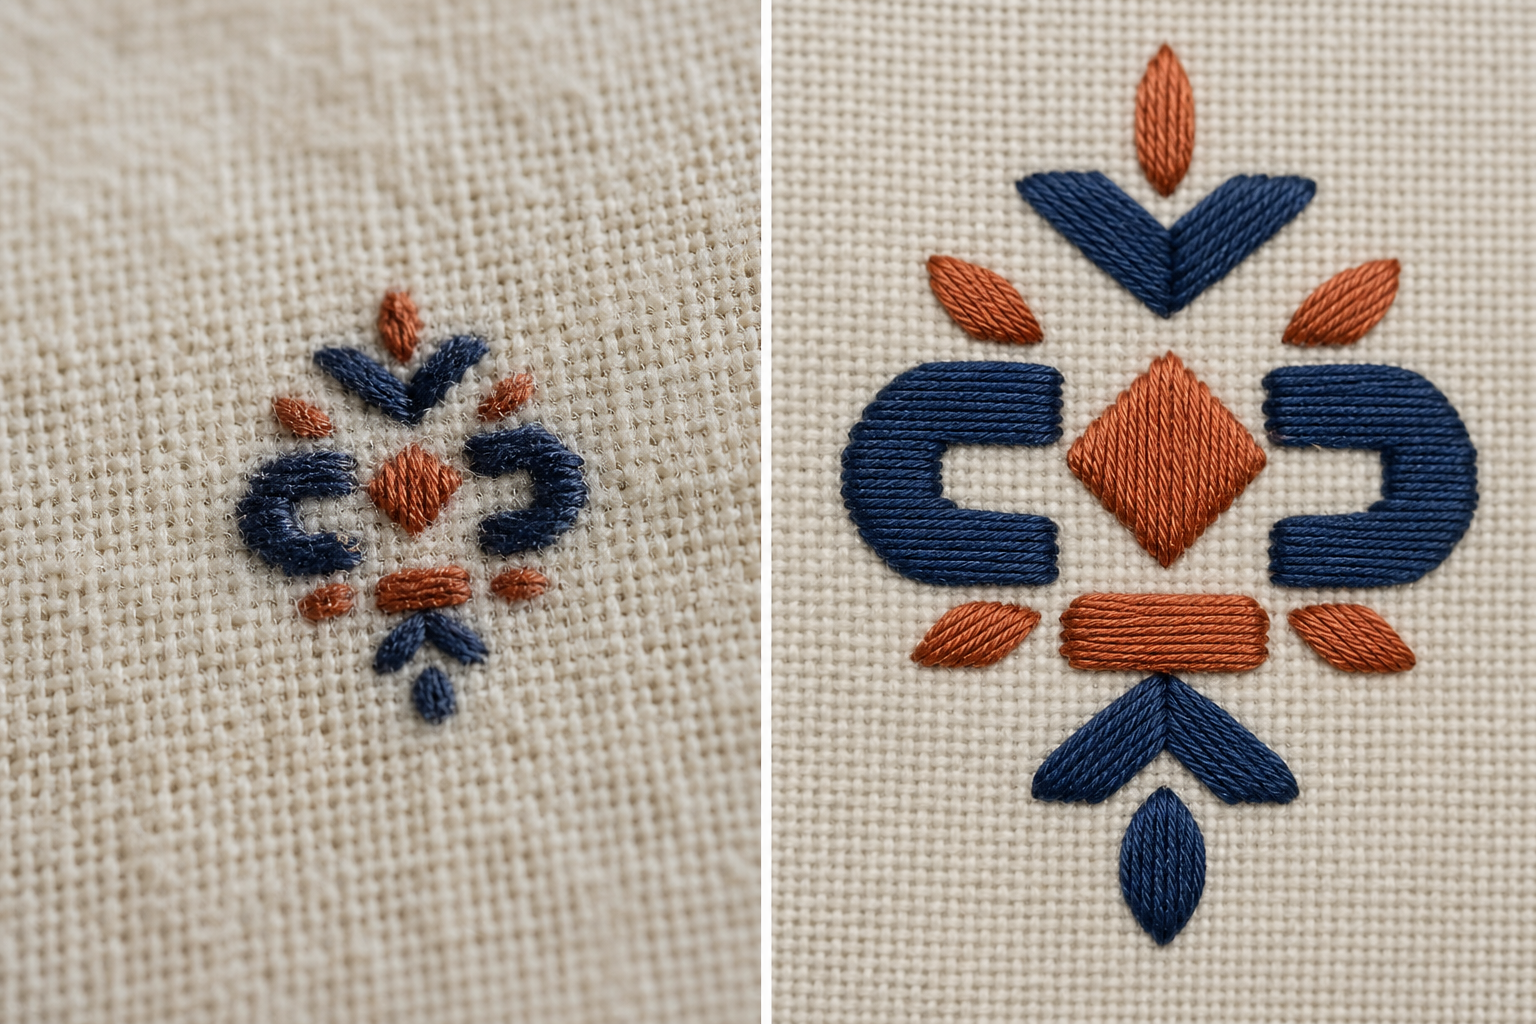
Embroidery previews become misleading when clean source artwork is displayed at a scale that hides production limitations. A one-pixel digital line can look precise on screen even though it cannot be sewn as shown. Tiny counters inside letters may appear open in the artwork but close after stitching.
Use these safeguards:
- Preview the design at its intended physical dimensions, not only as a large close-up.
- Include fabric texture or a realistic sew-out photograph when one is available.
- Avoid sharpening that makes thread edges look unnaturally crisp.
- Do not animate details that the digitized file has already removed.
- Show revised lettering rather than placing the original vector lettering over the simulation.
- Flag elements that still require a physical test.
When a client supplies a low-resolution logo, first create a reviewable reference without pretending that automatic enhancement has solved its construction problems. The AI photo editor can help clean distracting backgrounds or prepare a visual mockup, but digitizing decisions still require embroidery judgment.
Small lettering deserves an explicit check. Review letter height, spacing, open counters, column width, and the contrast between the thread and fabric. If a tagline is marginal, show both the supplied version and a simplified alternative in separate proofs. Do not alternate between them inside one looping GIF; reviewers may approve the wrong state.
Choose Canvas Size, Frame Rate, and Color Carefully
Embroidery previews contain repeated texture and many small color variations. Those qualities can make GIF files grow quickly. The format also uses a limited color palette, so gradients, photographic garments, and subtle thread shading may develop banding or speckled patterns.
A practical starting point is a canvas between 720 and 1000 pixels wide for documentation or email-linked approvals. Use a smaller canvas for an email signature or ticket attachment, and retain a larger still image for detailed inspection.
Frame rate should follow the content. A staged proof may need only two to six frames per second because most frames are deliberate milestones. A smooth simulation can use more frames, but it will cost more bytes and may pass too quickly for review.
Before creating the GIF, standardize every frame:
- Use identical pixel dimensions.
- Lock the garment or fabric position.
- Keep the design anchored to one reference point.
- Use the same crop and background color.
- Preserve one color profile where possible.
- Remove duplicate or nearly duplicate frames.
Convert inconsistent source exports with the image converter. PNG is a sensible intermediate format for flat simulations and transparent design layers. JPEG may be adequate for garment photographs, but repeated JPEG compression can create noise around stitched edges.
A Compact Frame Plan for a Left-Chest Logo
Consider a 90 mm-wide left-chest design containing cream lettering, a rust-colored icon, and a dark outline. A clear preview could use the following sequence:
| Frame | Content | Suggested hold |
|---|---|---|
| 1 | Garment view with final placement | 1.2 seconds |
| 2 | Close view with cream lettering partially built | 0.5 seconds |
| 3 | Completed cream lettering | 0.7 seconds |
| 4 | Rust icon completed | 0.7 seconds |
| 5 | Dark outline and final details | 0.9 seconds |
| 6 | Actual-size completed design | 2 seconds |
| 7 | Return to garment placement | 1.2 seconds |
This sequence is short enough to scan but slow enough to review. It reveals construction without forcing the client to watch a real-time simulation of every stitch.
If the outline is the main production risk, add one tight crop after frame five. If placement is the only decision, remove most construction frames and spend more time on the garment view.
Create the GIF Without Letting File Size Take Over
Export the selected frames, arrange them in the intended order, and use the GIF maker to assemble the animation. Start with the slowest timing that still feels coherent. Approval media benefits from clarity more than speed.
Then reduce size in this order:
- Delete redundant frames.
- Crop unused canvas space.
- Reduce pixel dimensions modestly.
- Simplify photographic backgrounds.
- Reduce the palette only as far as the thread colors remain distinct.
- Lower the frame rate if the preview still contains smooth simulation footage.
This order protects the information reviewers need. Aggressive palette reduction at the beginning can merge two similar thread colors, while indiscriminate frame deletion can hide the exact moment an outline covers a fill.
Use a plain or softly textured fabric crop instead of a full lifestyle photograph when the garment context is not essential. A static placement frame can carry the photographic context, while the construction section uses a simpler background.
If the animation remains too large for a particular communication channel, send a link to the GIF and attach a compressed final still. The still acts as a dependable fallback for mail clients or ticket systems that display only the first frame.
Test the First Frame, Loop, and Fallback Still
Some viewers will see the animation once, some will see it loop continuously, and some will see only its first frame. Your preview must remain understandable in all three cases.
The first frame should therefore be meaningful on its own. A blank fabric square or an isolated underlay is a poor fallback. Begin with placement context or the finished design, then transition into the build. Showing the finished state first does not spoil the animation; it establishes what the viewer is evaluating.
Watch the loop at least three times. Look for sudden scale changes, a flash caused by mismatched backgrounds, and a final frame that disappears too quickly. Also inspect the file at 100% scale on both a desktop display and a phone.
Compress any separate final still with the image compressor, but check thin outlines after compression. High-contrast thread against textured fabric can develop halos when a still is compressed too aggressively.
Add an Approval Record Around the Animation
A GIF demonstrates the proposed result, but it is not a complete approval record. Pair it with a concise specification containing:
- Design or job identifier.
- Revision number and date.
- Intended garment and placement.
- Finished dimensions.
- Thread color names or internal references.
- Elements intentionally removed or simplified.
- Items that remain subject to a sew-out.
- A clear approval or revision request.
Keep identifiers outside the image when possible. Text embedded in GIF frames may become hard to read after palette reduction, and changing a job number can require rebuilding the animation. A nearby HTML message, project note, or PDF approval sheet is easier to search and archive.
For higher-risk jobs, save the animation, final still, specification, and sew-out photograph together. Matching revision names matter more than elaborate folder structures. A practical set might be club-mark-r03-preview.gif, club-mark-r03-final.png, and club-mark-r03-sewout.jpg.
Never overwrite an approved preview with a later revision. The ability to reconstruct what the client actually saw is valuable when artwork, placement, or thread selection changes.
Pre-Send Quality Checklist
Before sharing the proof, verify the following:
- The title and message identify the correct job and revision.
- The first frame works as a static fallback.
- Placement is shown at a believable scale.
- Stitch stages follow the current digitized file.
- Thread colors remain visually distinguishable.
- Small lettering is not enlarged in a misleading way.
- The final frame is held long enough to inspect.
- The loop has no blank flash or accidental jump.
- The file opens correctly on desktop and mobile.
- A final still is available for channels that suppress animation.
- Physical variables are not presented as digitally guaranteed.
- The approval request names the exact decisions required.
An embroidery preview GIF succeeds when it removes ambiguity, not when it reproduces every machine movement. By choosing a few meaningful construction stages, preserving realistic scale, and pairing the animation with a clear revision record, small production teams can make approvals easier without turning each proof into a video-editing project.