Laser-Cut Material Test Grid Photography: A Guide to Searchable Settings Records
Turn scorched, reflective, and handwritten laser-cut test grids into consistent photos, searchable settings records, and compact PDF references for the workshop.
Laser-Cut Material Test Grid Photography: A Guide to Searchable Settings Records
A laser-cut material test grid is useful for only as long as its settings remain connected to the physical sample. Unfortunately, workshop reality works against that connection. Masking-tape notes fall off, plywood darkens with age, acrylic collects scratches, and handwritten labels become difficult to interpret. A test grid photographed under poor lighting may preserve the object while hiding the differences that made the test valuable.
A more dependable record combines three things: a carefully photographed sample, a small set of structured settings, and a file that can be found months later. This guide explains how to build that record without requiring specialized cataloging software. It is designed for small fabrication studios, school makerspaces, prop departments, repair shops, and individual makers who test many unfamiliar materials.
The aim is not to identify one supposedly perfect setting. Laser behavior varies with machine condition, optics, ventilation, material composition, and even the finish on a particular sheet. The useful outcome is a visual history that helps you choose a sensible starting point and recognize why an earlier result worked.
Why Physical Test Grids Become Unreliable Records
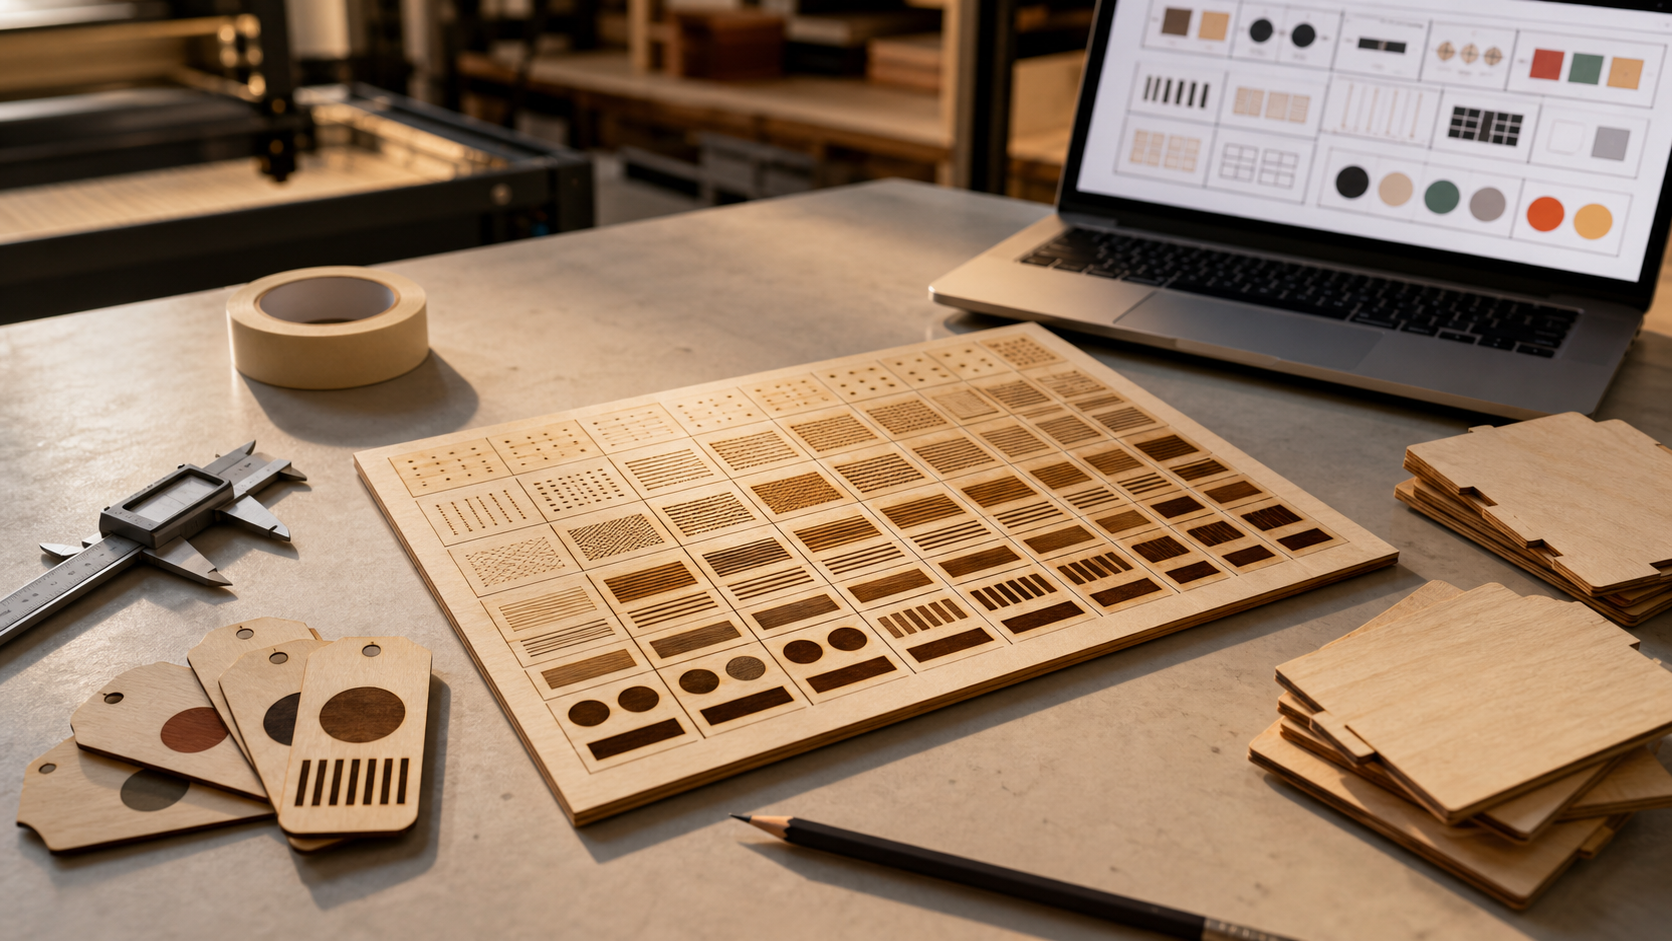
A typical grid varies speed along one axis and power along the other. Some grids add frequency, interval, passes, or focus offset. The sample may clearly show which cells cut through, which produced clean engraving, and which caused excessive charring. Yet the grid itself rarely captures all the surrounding conditions.
Common gaps include:
- The material name is recorded, but not its thickness or supplier.
- Percent power is visible, but the machine or tube wattage is unknown.
- A photograph shows the grid, but glare hides engraved detail.
- The filename contains a date but no material identifier.
- Settings are handwritten outside the photographed area.
- The useful cell is marked with an arrow that OCR cannot interpret.
- Two similar-looking samples are stored in different drawers with identical labels.
A photograph cannot replace the physical sample. It cannot reliably convey edge roughness, flexibility, odor, residue, or whether a cut barely penetrated the back surface. It can, however, preserve visible evidence and connect that evidence to searchable notes.
Decide What the Record Must Answer
Before photographing anything, decide what questions the archive should answer. This prevents a collection of attractive images that contains little operational information.
A practical record should let another person determine:
- What material was tested?
- Which machine performed the test?
- What operation was evaluated: cutting, engraving, scoring, or marking?
- Which variables changed across the grid?
- Which result was preferred, and for what reason?
- Where is the physical sample stored?
- Can the material be traced to a supplier, batch, or purchase date?
The preferred result deserves context. A deeply engraved cell might be appropriate for a tactile sign but unsuitable for fine artwork. A fast cut with minor edge discoloration may be acceptable for an internal jig and unacceptable for a presentation model. Record the intended use instead of assigning an unexplained rating such as “best.”
Use a Minimum Metadata Set
Avoid turning documentation into a burden. Begin with fields that meaningfully affect interpretation.
| Field | Example format | Why it matters |
|---|---|---|
| Record ID | LT-2026-0042 | Connects images, notes, and physical storage |
| Material | Birch plywood | Provides the broad material family |
| Thickness | 3.1 mm measured | Distinguishes nominal from actual thickness |
| Source | Supplier and product code | Helps identify formulation changes |
| Machine | Cutter name or asset ID | Gives settings machine-specific context |
| Operation | Vector cut | Separates incompatible test types |
| Variables | Speed × power | Explains the grid axes |
| Fixed settings | Focus, air assist, passes | Captures conditions outside the grid |
| Preferred cell | Row C, column 4 | Links the conclusion to visible evidence |
| Evaluation | Clean front, slight rear soot | Explains the selection |
| Storage | Drawer B, sleeve 12 | Locates the original sample |
If your controller reports power as a percentage, retain that percentage but also identify the machine. Do not treat the same percentage as equivalent across different lasers.
Prepare the Sample Before Photography
Document the sample before heavy cleaning. Loose debris can be removed carefully, but soot patterns and masking residue may be part of the result. If you need both an as-tested and a cleaned view, photograph both and label their relationship.
Use a soft air blower or clean brush for loose particles. Avoid wiping engraved acrylic with a dirty cloth, which can add scratches that resemble process defects. Handle glossy material by the edges where practical.
Make sure the record ID appears beside the sample rather than covering it. A small card or removable tag is safer than writing directly on a test piece, particularly when both faces must be inspected. Keep handwritten observations on a separate note card if they would obscure the grid.
Photograph the front, back, and an edge when those views reveal different evidence:
- The front shows engraving character and surface smoke deposits.
- The back reveals incomplete cuts, flashback, and masking behavior.
- The edge shows kerf shape, charring, melting, or layered construction.
For thick stock, an oblique edge view may be more informative than another overhead photograph.
Build a Repeatable Photography Station
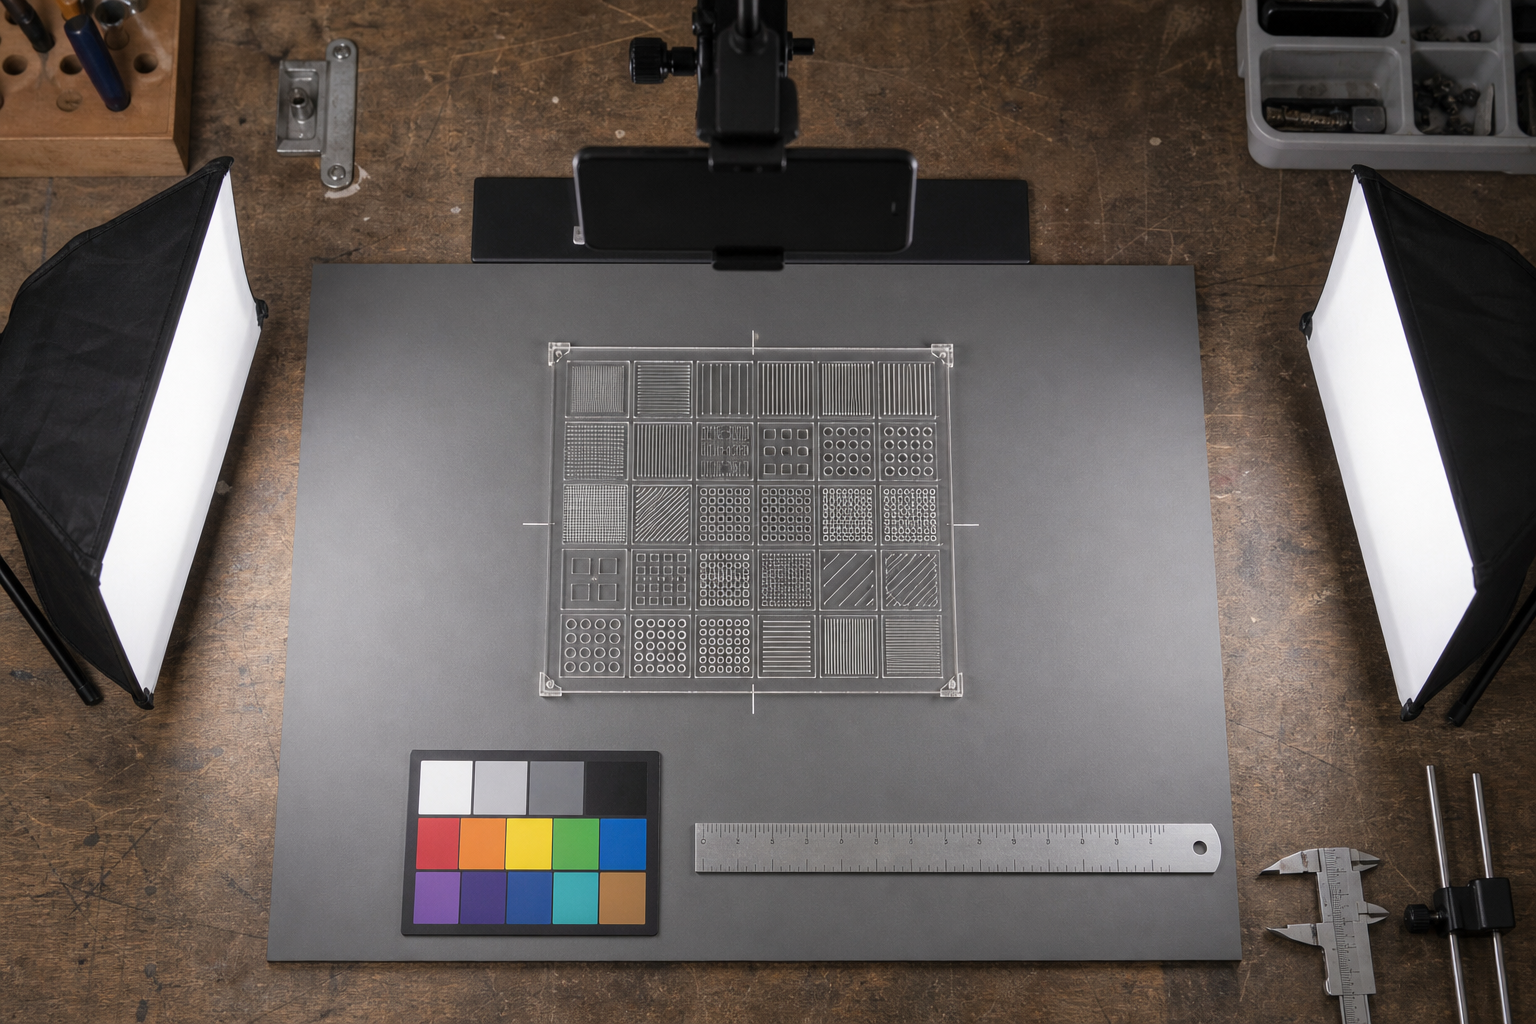
Consistency makes comparisons easier. You do not need an expensive camera, but you do need stable geometry, controlled light, and a background that does not interfere with the material.
Mount a phone or camera directly above the sample. A copy stand is ideal, although a rigid horizontal arm can work if it does not vibrate. Use the standard camera rather than an extreme wide-angle lens. Keep the sensor parallel to the sample so square test cells remain square.
Choose a matte, neutral background that contrasts with the sample. Medium gray is versatile, but no single background suits everything. Clear acrylic may need a darker surface to reveal edges, while black material may require a lighter one. Avoid textured cutting mats when their grids or scars compete with the test pattern.
Place a ruler or scale beside the sample, not on top of it. Include a small neutral color reference in one master image when color changes are relevant. You can remove these reference objects from later presentation copies, but retain the original photograph.
Control Reflections Without Hiding Engraving
Glossy acrylic and coated metals are difficult because the camera, ceiling, and lights can appear in the surface. Use broad diffused light rather than a small bare lamp. Two lights positioned symmetrically can produce an even record, but perfectly flat lighting may conceal shallow engraving.
Capture two versions when necessary:
- An even reference image for shape, color, and grid alignment.
- A low-angle detail image that emphasizes engraving depth and texture.
For reflective material, place large white diffusion panels outside the frame and adjust their angles until reflections become simple and controlled. A black card can create a deliberate dark reflection along an edge, making clear acrylic easier to see.
Do not rely on automatic exposure for a long series. A camera may brighten black foam and darken white card, making separate tests difficult to compare. Lock exposure and white balance for samples photographed under the same lighting. If a substantially different material requires a new exposure, note that the images are not directly comparable in brightness.
Prevent Blur and Perspective Errors
Use a timer or remote shutter release so pressing the device does not move it. Check focus at the engraved surface rather than at the background. For an angled edge photograph, confirm that the important depth range is acceptably sharp.
Perspective correction is helpful when a slight alignment error makes the grid trapezoidal. It should not be used to disguise a strongly oblique photograph because aggressive correction can soften small labels and distort the scale reference. Repositioning the camera usually produces a better source image.
Capture Details That Show the Decision
One full-sample image provides context, but it may not show why one cell was selected. Add close views of the region around the preferred setting and any failure boundary.
Useful details include:
- The transition from incomplete to complete cuts.
- Fine text where engraving begins to fill in.
- Corners showing heat accumulation.
- Narrow bridges that reveal material deformation.
- The rear surface around successful and unsuccessful cells.
- Edge sections showing melt, soot, or delamination.
Keep neighboring cells in the close-up. A single isolated cell loses the comparison that gives a test grid meaning. If you mark a preferred cell digitally, retain an unmarked master and create a separate annotated copy.
Clean the Images Conservatively
Editing should make recorded evidence easier to inspect, not make the result look better than it was. Begin by duplicating the original or exporting a derivative. Never overwrite the only camera file.
A practical adjustment sequence is:
- Correct rotation and mild perspective error.
- Crop while retaining the entire sample and its record ID.
- Set neutral white balance using the reference card when available.
- Adjust exposure without clipping light acrylic or dark burn marks.
- Apply modest contrast to separate engraved and untouched areas.
- Use restrained sharpening at the final output size.
- Inspect the front, back, and detail images together.
The AI Photo Editor can help with localized cleanup or background simplification, but avoid removing scorch marks, scratches, debris, or surface irregularities that are relevant to the test. If an edited image changes anything beyond exposure, color, crop, or perspective, identify it as a presentation copy.
Choose Resolution Before Sharpening
Archive a full-resolution master, then make smaller access copies for browsing and PDF sheets. Resize only after perspective correction and cropping. This avoids repeatedly resampling the same image.
For a catalog thumbnail, the grid only needs to be recognizable. For a technical reference, cell labels and small engraved features must remain legible at normal viewing size. Test the actual output rather than choosing dimensions from habit. The image resizer is useful for producing consistent access copies once you have selected an appropriate target size.
Compression should be evaluated against the smallest meaningful feature. Thin engraved lines and light soot gradients can disappear before the overall image looks obviously damaged. Compare a compressed file at 100 percent magnification with the master. If the record is primarily photographic, a carefully compressed photographic format may be efficient. If it contains sharp digital annotations or flat diagram elements, a lossless or near-lossless format may preserve them better. Use the image compressor to test several outputs rather than assuming the smallest file is acceptable.
Make Notes Searchable Without Trusting OCR Blindly
OCR can index typed labels, controller screenshots, and neatly printed setting cards. It is less dependable on burned wood, reflective acrylic, handwritten arrows, condensed engraving, and text crossing grid lines.
Use OCR as an extraction aid, not as the sole record. The image OCR tool can provide a starting transcription, after which a person should compare important values with the source image.
Prioritize verification of characters whose confusion could change a setting:
- Decimal points in thickness measurements.
- Zero versus the letter O.
- One versus lowercase l or uppercase I.
- Units such as mm, in, mm/s, and percent.
- Negative focus offsets.
- Row and column identifiers.
- Material codes that differ by one digit.
Do not expect OCR to understand spatial meaning. It may capture “20, 30, 40” without knowing whether those numbers represent speed, power, or frequency. Store axis meanings in structured notes.
Pair the Photo with a Plain-Text Summary
A short text sidecar makes the archive searchable even when image recognition fails. It can be a text file, spreadsheet row, database entry, or metadata field in an asset manager.
Use a consistent summary pattern such as:
LT-2026-0042 | birch plywood | 3.1 mm | vector cut | machine L2 | speed-power test | preferred C4 | clean front, slight rear soot | drawer B sleeve 12
This line is deliberately compact. Detailed observations can follow below it. Searchability comes from consistent vocabulary, so choose standard forms for recurring materials and operations. For example, do not alternate unpredictably among “ply,” “plywood,” and “birch sheet” if they refer to the same category.
Use Filenames That Survive Handoffs
A file should remain understandable after it leaves its original folder. Build filenames from stable facts rather than temporary judgments.
A useful pattern is:
recordID_material_thickness_operation_view_sequence.ext
Examples include:
LT-2026-0042_birch-plywood_3p1mm_cut_front_01.jpgLT-2026-0042_birch-plywood_3p1mm_cut_back_02.jpgLT-2026-0042_birch-plywood_3p1mm_cut_detail-c4_03.jpg
Use 3p1mm instead of 3.1mm if your systems treat extra periods unpredictably. Keep the actual measured value in the record, even when the filename must be compact.
Avoid putting “final,” “best,” or “new” in the stable portion of a filename. Those labels age badly. If you create annotated and clean versions, use explicit suffixes such as _master, _access, and _annotated.
Create a Contact Sheet for Fast Comparison
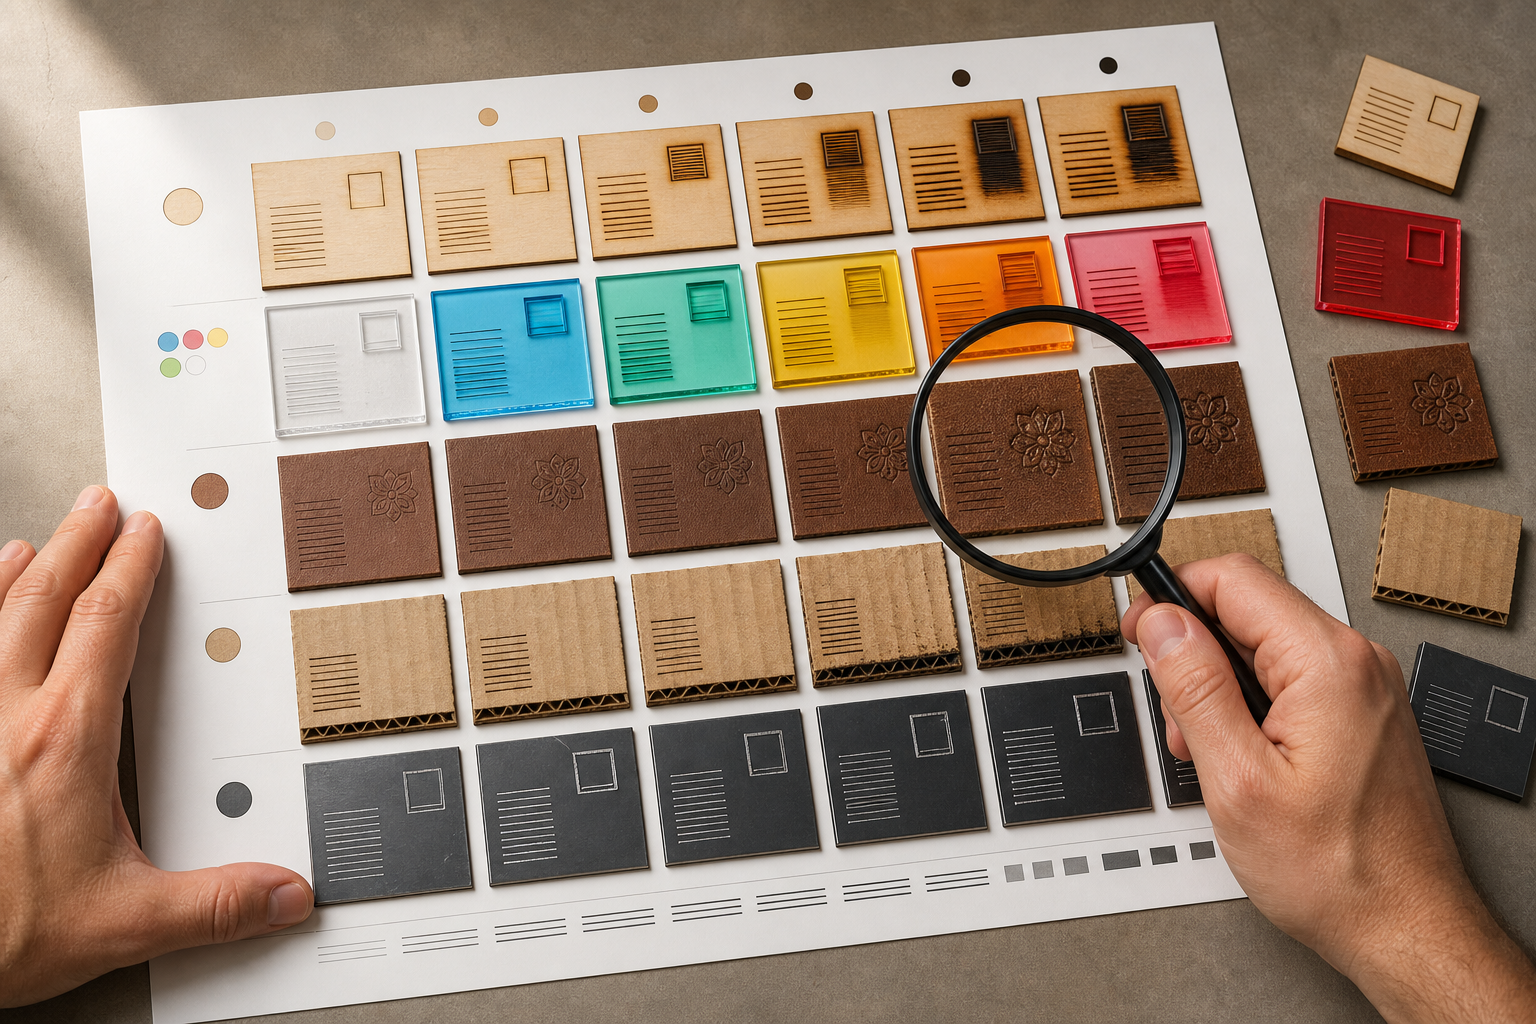
A folder of individual photographs is useful for detail, but it is slow for comparing materials. A contact sheet places standardized views together so patterns become visible.
Group sheets by a question rather than by arbitrary date. Examples include:
- All 3 mm plywood cutting tests on one machine.
- Engraving tests for coated metals from several suppliers.
- Focus-offset tests for thick clear acrylic.
- Before-and-after maintenance tests using the same reference material.
Each thumbnail should include the record ID, material, thickness, machine, and selected setting. Keep notes short enough that the images remain useful. Put extended observations in the associated record.
A contact sheet is also valuable for detecting inconsistencies. If one image is dramatically warmer, darker, or more tightly cropped than its neighbors, check whether the difference came from the material or the photography.
Keep Comparisons Honest
Do not place samples side by side as if they were directly comparable when major conditions changed. Clearly separate tests performed on different machines, with different lenses, after optics maintenance, or under different air-assist conditions.
A useful comparison sheet distinguishes three types of information:
| Information type | Examples | Treatment |
|---|---|---|
| Directly observed | Cut completed, rear soot visible | Preserve in photographs and notes |
| Measured | Thickness, speed, power setting | Store in structured fields |
| Interpreted | Suitable for model parts | Label as an evaluation, not a fact |
This distinction keeps later users from treating a subjective preference as a universal machine setting.
Assemble a Compact PDF Reference
A PDF is practical for a machine-side tablet, a shared folder, or a printed workshop binder. It should complement the image archive rather than replace the master files.
Use one page per material test when detail matters. A dependable page order is:
- Record title and identifier.
- Full front photograph.
- Back or edge photograph when relevant.
- Close view of the preferred region.
- Settings table.
- Evaluation and limitations.
- Physical storage location.
For a brief review pack, place several standardized access images on each page. The image-to-PDF tool can combine prepared images after they have been cropped, resized, and named in the desired order.
Check the finished PDF at realistic viewing size. Confirm that identifiers are readable, images are not stretched, pages are in sequence, and important tonal differences survive export. Keep the source images separately because PDF recompression may discard detail.
Record Machine Changes and Retest Triggers
Settings records become misleading when machine condition changes. Add an event note whenever you replace a tube, lens, mirror, nozzle, bed, air-assist component, or other part likely to affect results. Optics cleaning and alignment can also shift performance enough to justify a reference test.
Retest when:
- A new material batch behaves differently.
- Actual thickness differs meaningfully from the archived sample.
- The same setting no longer produces the documented result.
- A supplier changes coating, adhesive, or core construction.
- Major maintenance alters power delivery or focus behavior.
- The archive lacks a rear or edge view needed for evaluation.
Do not silently update an old record with new results. Create a linked record so the history remains visible. A pair of records made before and after maintenance can be more informative than one overwritten entry.
Final Capture Checklist
Before filing a test, confirm the following:
- The sample has a unique record ID.
- Material, thickness, source, machine, and operation are recorded.
- Grid axes and fixed settings are explained.
- The photograph includes the complete sample.
- Front, back, and edge views exist where relevant.
- Glare does not hide the preferred or failed cells.
- Close-ups include enough neighboring cells for comparison.
- OCR-derived values have been checked against the image.
- The preferred cell includes a reason tied to intended use.
- Original and edited files are distinguishable.
- Filenames remain understandable outside the folder.
- A physical storage location is recorded.
- Access images and PDFs have been inspected at normal size.
Build a Record That Outlasts the Sample
Laser-cut test grids are consumable workshop objects. They get handled, compared, loaned, broken, and occasionally discarded. A well-made photographic record preserves more than the pattern of squares: it preserves the conditions, observations, and decisions that gave the sample meaning.
Start small. Create one identifier, one consistent photography station, one metadata template, and one contact sheet for a material family you use frequently. Test whether another person can find a relevant record and understand its limitations without asking the person who created it. Any missing context revealed by that exercise should become part of the next record.
The result is not a library of universal cutting recipes. It is a traceable body of local evidence—specific to your materials, machines, and standards—that makes future testing faster and more deliberate.