Museum Specimen Jar Label Photography for Searchable Collection Records
A practical guide to photographing curved, faded, and liquid-obscured specimen jar labels, preparing OCR-ready images, and preserving reliable links to original collection records.
Museum Specimen Jar Label Photography for Searchable Collection Records
Glass specimen jars create an unusually difficult digitization problem. A single record may be divided among an external label, writing visible through preservative liquid, a lid inscription, an internal tag, and a catalog number applied directly to the glass. Reflections obscure ink, curved surfaces stretch characters, and pale handwriting can disappear against the specimen behind it.
The goal is not to make an old jar look new. It is to create a faithful, searchable documentation set while preserving the original photographs as evidence. That distinction matters: adjustments intended to reveal an existing inscription are useful, but invented characters, reconstructed label edges, or removed collection marks can corrupt the record.
This guide presents a practical capture and image-preparation system for small museums, university collections, natural history clubs, and volunteer archives. It is designed for teams using ordinary cameras or recent phones rather than specialized museum imaging rigs.
Why Specimen Jar Labels Defeat Ordinary Photography
A paper label on a flat folder can usually be photographed with even light and corrected in seconds. A jar combines several optical problems:
- The cylindrical wall acts like a weak lens and stretches writing near its edges.
- Curved glass reflects the room, photographer, lights, windows, and nearby shelves.
- Preservative liquid changes contrast and can create a second distorted view of an internal tag.
- Condensation, scratches, sediment, and bubbles resemble punctuation or character strokes.
- The specimen itself may form a visually busy background behind pale writing.
- Several identifiers may be visible in different focal planes.
OCR software expects relatively flat, high-contrast character shapes. It may interpret a reflected shelf edge as the numeral 1, merge two characters across a highlight, or ignore faded pencil entirely. Treat OCR as a transcription assistant, not as the authority.
Define the Documentation Set Before Photography
Decide what must be recorded before moving a jar. This prevents a team from capturing hundreds of attractive front views only to discover that lid numbers and internal tags were omitted.
A useful minimum set contains:
- A full-jar context view.
- A straight-on external label view.
- One or more angled views that suppress glare.
- A close view of every catalog number on the glass.
- A lid or closure view.
- An internal-tag view when it can be photographed without moving the contents.
- A scale or color reference frame when required by collection policy.
Do not rotate, open, clean, top up, or relocate fluid specimens unless the collection manager has approved the action. Aging closures can fail, inscriptions can flake, and some historical preservatives require specific safety controls. Photography should follow the institution's handling and chemical-safety procedures.
Create a temporary capture identifier that cannot be mistaken for an original accession number. Place it beside the jar rather than over any historic label. Record the identifier in the capture log before taking the first frame.
Build a Reflection-Controlled Capture Station
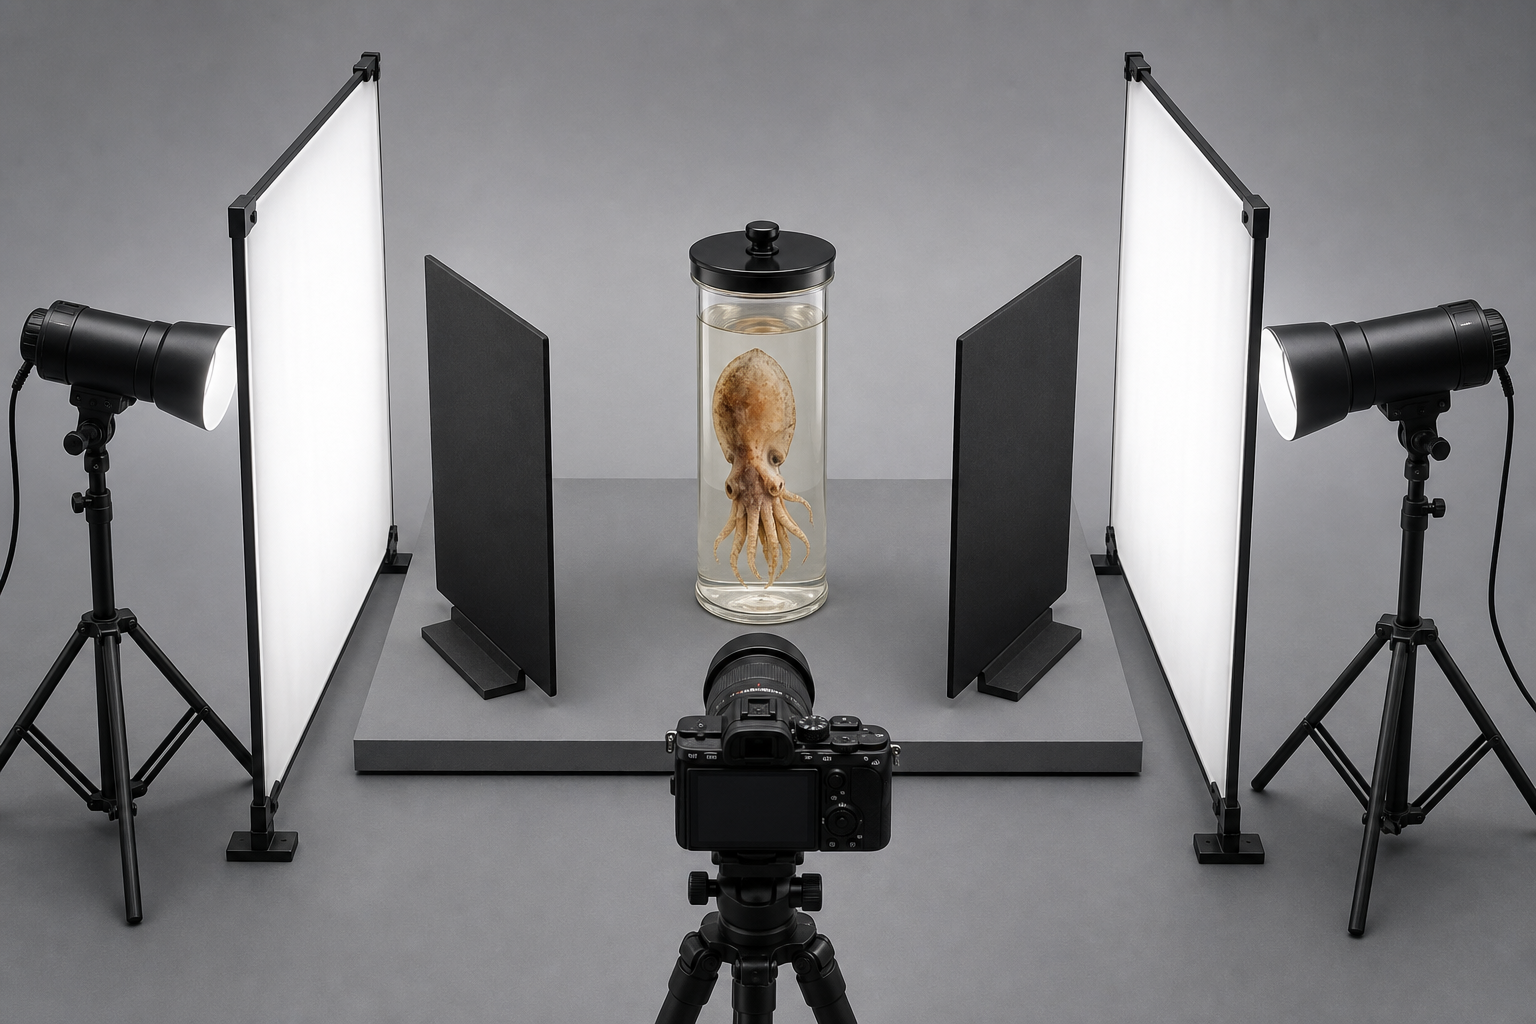
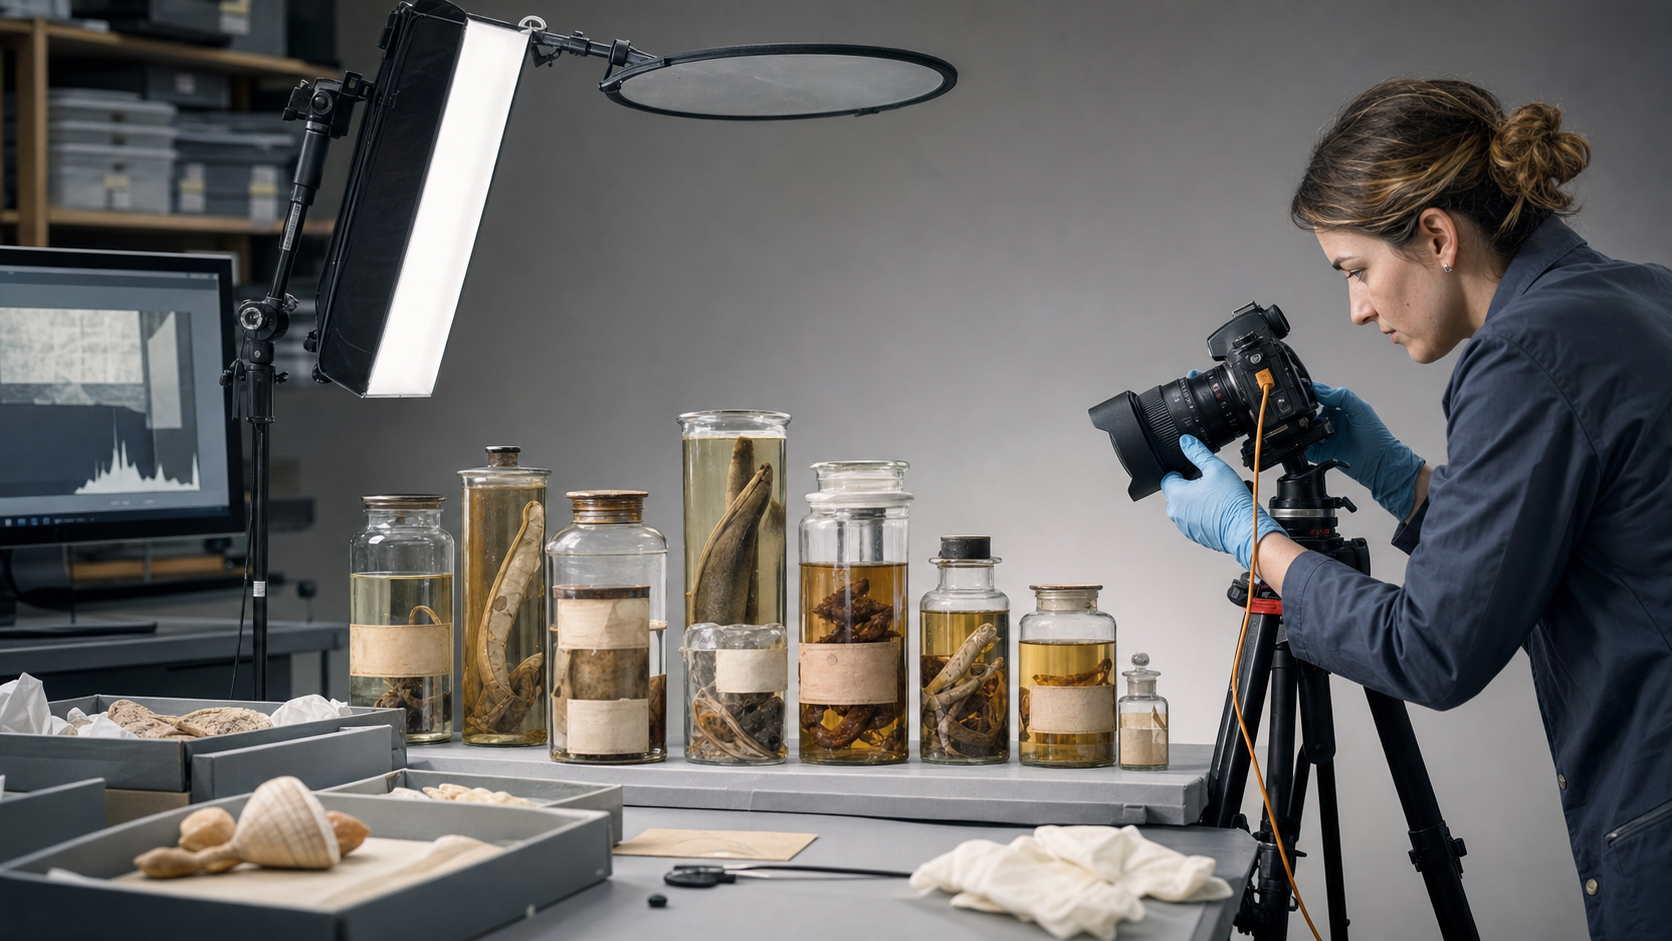
A repeatable station gives better results than chasing reflections around a collection room. Start with a stable table, a matte neutral background, and a camera or phone mounted on a tripod. The lens should be approximately level with the center of the label.
Place two diffused lights to the left and right of the jar. Begin with each light roughly 45 degrees from the camera axis, then move them outward until the brightest vertical reflections leave the important writing. Large diffusion panels produce broader, softer highlights than bare bulbs.
Black foam board or dark fabric can serve as reflection flags. Position narrow flags beside the camera to replace bright room reflections with controlled dark bands. Keep those bands away from the inscription. White cards can instead lift shadows around a dark label, but they may produce new highlights.
Cross-polarization can reduce glare further. This uses polarizing material over the lights and a circular polarizer on the lens, rotated until reflections diminish. It also reduces exposure, so use a tripod and a longer shutter time rather than raising sensitivity excessively. Polarization will not remove every reflection from curved glass, and it may change the appearance of iridescent surfaces. Capture at least one conventional reference frame if color or surface character matters.
Turn off ceiling lights and block nearby windows when possible. A person wearing a bright shirt can appear clearly in the glass, so dark, plain clothing is surprisingly helpful.
Set Exposure and Focus Conservatively
Use the camera's lowest practical sensitivity setting to limit noise in faint handwriting. On a supported camera, choose a moderate aperture that keeps both edges of the curved label acceptably sharp without forcing an extremely long exposure. Trigger the shutter remotely or use a short timer.
Phones often switch lenses or apply aggressive sharpening automatically. Lock focus and exposure if the camera application permits it. Avoid portrait mode, digital zoom, beauty filters, and automatic object removal. These features can soften or reconstruct exactly the small strokes needed for transcription.
Expose for the label rather than the brightest reflection. Check the histogram or highlight warning and make sure pale paper has not become featureless white. If dark writing and bright glass cannot fit into one exposure, take a short bracket: normal, slightly darker, and slightly brighter. Keep all frames because the darker image may preserve ink beside a highlight while the brighter image reveals pencil in a shadow.
Focus on the character strokes. For a strongly curved label, take a central frame plus separate left-edge and right-edge frames with focus adjusted for each area. Trying to force the entire circumference into one image usually produces smaller, less legible writing.
Photograph Curved Labels in Overlapping Segments
A catalog label wrapped around a cylinder should be treated as a sequence of views, not as a flat page waiting to be captured. Photograph the center first. Rotate the jar only if handling rules permit it, using small, consistent increments and enough overlap to repeat several recognizable marks in adjacent frames.
Never digitally stitch curved label segments without retaining the originals. A stitched reference can help a cataloger read a long inscription, but projection errors may duplicate, stretch, or omit characters. Mark the composite clearly as a derivative image in the asset record.
If rotating the jar is prohibited, change the camera position instead. Move around the stationary object while maintaining a similar distance and height. This is slower, but it reduces handling risk.
For labels visible through liquid, try a slight vertical or horizontal change in camera angle. A few centimeters can move a bubble or specimen edge away from critical writing. Do not tilt or shake the jar to move an obstruction.
Choose the Best Frame for OCR
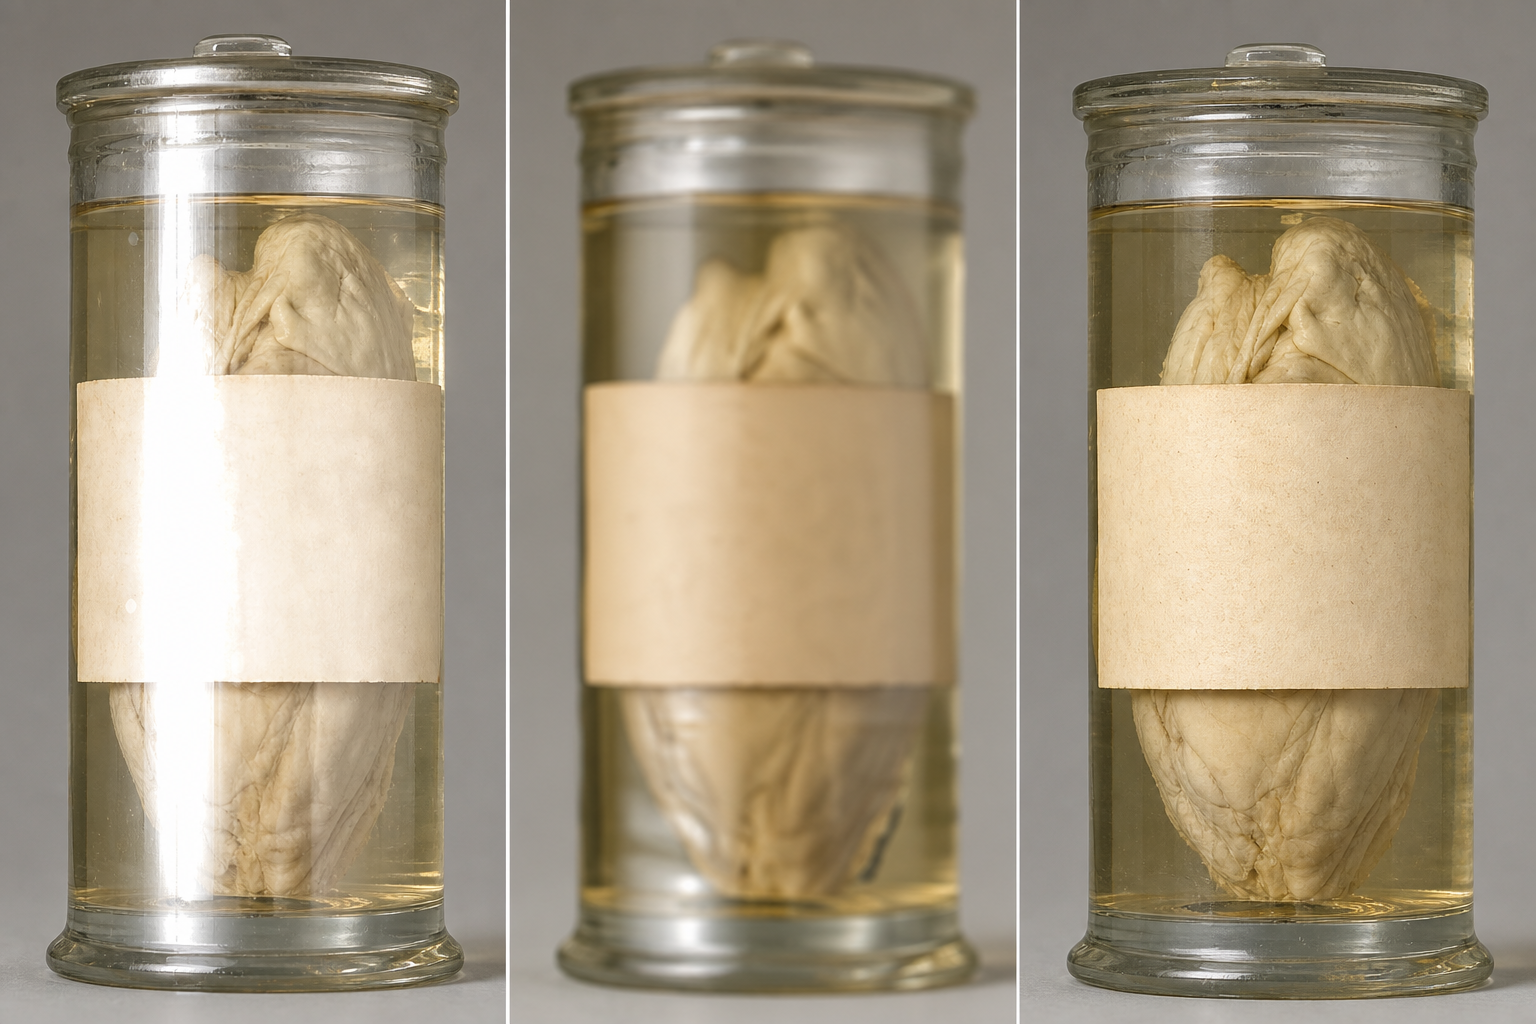
The most visually pleasing frame is not necessarily the best OCR source. Select an image according to character evidence.
| Image condition | Human reading | OCR suitability | Recommended action |
|---|---|---|---|
| Even illumination and crisp strokes | High | High | Use as the primary OCR frame |
| Mild curvature with no glare | High | Medium | Crop into smaller label segments |
| Strong highlight crossing characters | Low | Low | Use an alternate angle or darker exposure |
| Faded pencil on pale paper | Medium | Low | Create a grayscale contrast derivative |
| Writing seen through liquid | Variable | Low | Transcribe manually and compare multiple frames |
| Sharpening halos around letters | Medium | Low | Return to the unsharpened original |
Start with the frame containing the most uninterrupted letters, not necessarily the entire label. OCR often improves when a long curved label is divided into two or three overlapping crops. Preserve the overlap so a reviewer can establish the reading order.
Use Image OCR on a derivative crop, then compare every extracted field with the photograph. Names, dates, locality abbreviations, coordinates, accession numbers, and collector initials deserve character-by-character review. A single mistaken digit can link the image to the wrong specimen.
Prepare a Faithful OCR Derivative
Copy the selected frame before editing. The original should remain unchanged, including its metadata when retention is permitted by institutional policy.
Crop closely enough to remove distracting shelves and neighboring jars, but leave a narrow border around the label. That border shows that no edge text was accidentally excluded. Straighten using a genuine horizontal or vertical reference when one exists. Avoid extreme perspective correction on cylindrical surfaces; it may make the label rectangular while altering character proportions.
Next, test a restrained series of adjustments:
- Correct the overall exposure.
- Set neutral white balance using a reference target or an unprinted area of label paper.
- Increase local contrast gently.
- Reduce color distraction by making a grayscale copy when ink color is not evidential.
- Apply mild sharpening at final size.
- Inspect at 100 percent magnification for halos, false edges, and lost punctuation.
The AI Photo Editor can help create a clearer working derivative, but generative removal, replacement, and content-aware reconstruction should not be used on documentary label regions. If an adjustment cannot be described as revealing existing pixels, keep it outside the transcription copy.
For oversized camera files, make the archival master first and then use Compress Image to produce lighter review copies. Compression should happen after cropping and tonal correction. Thin pencil marks, decimal points, and diacritics are the first details to disappear, so compare the compressed copy with the master before distribution.
Use File Formats for Distinct Purposes
One file does not need to satisfy preservation, OCR, and convenient review simultaneously.
| File role | Practical format | Key priority |
|---|---|---|
| Camera original | Native raw or original JPEG/HEIF | Preserve the untouched capture |
| Archival derivative | TIFF or high-quality PNG | Stable pixels and minimal loss |
| OCR crop | PNG or high-quality JPEG | Clear character edges |
| Staff review copy | Compressed JPEG or WebP | Fast opening and sharing |
| Multi-page record packet | Ordered context for reviewers |
Use Convert Image when a collection system or OCR service cannot accept the camera's original format. Conversion is not a substitute for retaining that original. Record the source filename and conversion date in the asset log.
If reviewers need a single packet, arrange the context frame, label crops, lid view, and transcription page with Image to PDF. The PDF is a convenient presentation object, not the sole preservation copy. Individual images retain more flexible links to fields in a collection database.
Transcribe with an Evidence Ladder
A disciplined transcription separates what is visible from what seems likely. Review evidence in this order:
- The clearest primary label frame.
- Alternate angles and exposure brackets.
- Overlapping label segments.
- OCR output from more than one crop treatment.
- Existing catalog records or field notebooks.
- Domain knowledge about collectors, localities, and taxonomic names.
Do not silently replace an unclear inscription with a plausible database value. Instead, record uncertainty according to the collection's convention, such as brackets, a question mark, or an explicit illegible marker. The image and transcription should allow another person to challenge the reading.
Keep a distinction between verbatim transcription and normalized data. A label might contain an obsolete place name, abbreviated date, or historical spelling. The verbatim field preserves that evidence; separate normalized fields can support modern search and mapping.
Review High-Risk Character Pairs
Certain characters fail repeatedly in jar photography:
- 0, O, and Q
- 1, I, lowercase l, and a vertical scratch
- 5 and S
- 6 and G
- 8 and B
- 2 and Z
- decimal points and glass dust
- hyphens and reflected shelf lines
Read accession numbers from at least two frames whenever possible. For handwriting, compare repeated letters within the same label rather than relying only on a generic handwriting model.
Establish a Naming and Linking Convention
Filenames should connect every derivative to its specimen and view without pretending that the filename is the full catalog record. One practical pattern is:
captureID_view_sequence_derivative.ext
Examples include TMP042_front_01_original.jpg, TMP042_label-left_02_ocr.png, and TMP042_lid_01_review.webp. Use only identifiers approved for filenames, and avoid personal interpretations such as probably-1897.
The capture log should record:
- Temporary capture identifier
- Confirmed accession or catalog number, if available
- Original filename
- View type
- Photographer and capture date
- Whether the jar was moved or rotated
- Derivative operations
- OCR engine or method
- Transcriber and reviewer
- Unresolved ambiguities
- Final storage location or database link
Checksums and managed backups may be appropriate for preservation masters, depending on institutional policy. At minimum, avoid keeping the only copy on a camera card or volunteer's laptop.
Quality-Control Checklist
Before returning the jar and closing the record, verify the following:
- The full jar and every known identifier were photographed.
- The main label is readable in at least one frame without a highlight crossing critical characters.
- Curved text has sufficient overlapping coverage.
- Focus was checked at full resolution.
- Original captures remain unchanged.
- OCR was run on derivatives rather than treated as ground truth.
- Dates, names, coordinates, and catalog numbers received manual review.
- Uncertain readings are visibly marked.
- Verbatim and normalized fields remain separate.
- Derivatives can be traced to their source files.
- Review copies retain punctuation and thin strokes after compression.
- The record is stored in the designated collection location.
Common Mistakes and Better Alternatives
Cleaning the glass immediately is a common mistake. Dust may seem harmless, but cleaning can disturb labels, coatings, closures, or collection marks. Ask a conservator or responsible collection manager before touching the surface.
Another mistake is placing a light directly beside the camera. This produces a bright reflection over the center of a cylindrical jar. Move and diffuse the lights, then use flags to control the remaining vertical bands.
Heavy contrast is also tempting. It can make dark ink look impressive while erasing pencil, paper texture, and faint overwritten characters. Save several modest variants and let the reviewer compare them with the original.
Finally, avoid keeping only a tightly cropped label. A crop may support OCR, but the context frame proves which jar, closure, and specimen were present. The strongest record combines context, detail, and a transparent history of derivative preparation.
A Small-Collection Pilot Plan
Test the method on ten jars representing the collection's hardest conditions: clear and amber glass, pale pencil, dark ink, internal tags, curved labels, cloudy liquid, and reflective lids. Time each capture and review session. Note which lighting positions, camera settings, crop sizes, and file formats perform consistently.
Have a second person review the first transcription set without seeing the OCR output initially. Disagreements reveal which characters require better images or clearer uncertainty rules. Update the capture checklist before scaling to an entire cabinet.
A successful pilot does not produce perfect OCR. It produces reliable images, traceable derivatives, explicit uncertainty, and a repeatable method that protects the specimens. Those qualities make an old handwritten label genuinely more searchable without weakening its value as collection evidence.