Sticker Sheet Transparency Audit for Print-on-Demand Sellers
A practical guide for checking transparent PNG and WebP sticker sheets before upload, with edge cleanup, export settings, proof images, and print-ready review steps.
Sticker Sheet Transparency Audit for Print-on-Demand Sellers
Sticker sheets look simple from the buyer's side: a few cute shapes, a clean backing sheet, and a kiss-cut outline that peels away without drama. For a print-on-demand seller, the file behind that product has more places to fail than most people expect. Transparent edges can carry pale halos. Semi-transparent shadows can print muddy. Tiny isolated pixels can create unwanted cut bumps. A sheet that looks sharp on a store preview can still produce disappointing samples once it moves through a print provider's upload, preview, rasterization, and cutting steps.
This guide is for sellers preparing sticker sheets without a full prepress department. It focuses on transparent raster artwork, especially PNG and WebP files used for print-on-demand marketplace uploads, proof previews, and product mockups. The goal is not to turn every seller into a print technician. The goal is to build a repeatable audit that catches the common issues before customers see them.
You can use this process whether your artwork starts in Procreate, Illustrator, Photoshop, Affinity Designer, Canva, Figma, or an AI editing tool. The important part is what you inspect before upload: canvas size, transparent padding, edge quality, color visibility, export format, compression, and proof readability.
Why Sticker Sheets Need a Separate Transparency Check
A single die-cut sticker usually gives you room to hide mistakes. One shape, one boundary, one cut line, one preview. Sticker sheets are less forgiving. A sheet can include ten, twenty, or thirty small designs, each with its own edge, tiny gaps, and overlapping visual styles. One bad shadow or leftover background patch can affect the whole sheet.
Sticker sheets also get previewed in several different contexts:
- The print provider's production preview.
- Your marketplace product gallery.
- A social post or launch graphic.
- A compressed thumbnail on mobile search results.
- A buyer's downloaded proof, if you sell digital sticker sheets.
Those contexts do not treat transparency the same way. A marketplace might place your transparent PNG on white. A print provider might show it on gray. Your listing mockup might place it on cream paper. A buyer might view it in dark mode. A faint matte halo that hides on white can become obvious on a colored backing.
That is why the audit should not be limited to a single export preview. A good sticker sheet file needs to survive multiple backgrounds, multiple sizes, and at least one compressed preview.
The Transparency Problems That Cause Real Production Issues
Most sticker sheet defects are not dramatic. They are small enough to miss during design and obvious enough to bother a buyer after printing. The common issues fall into a few practical groups.
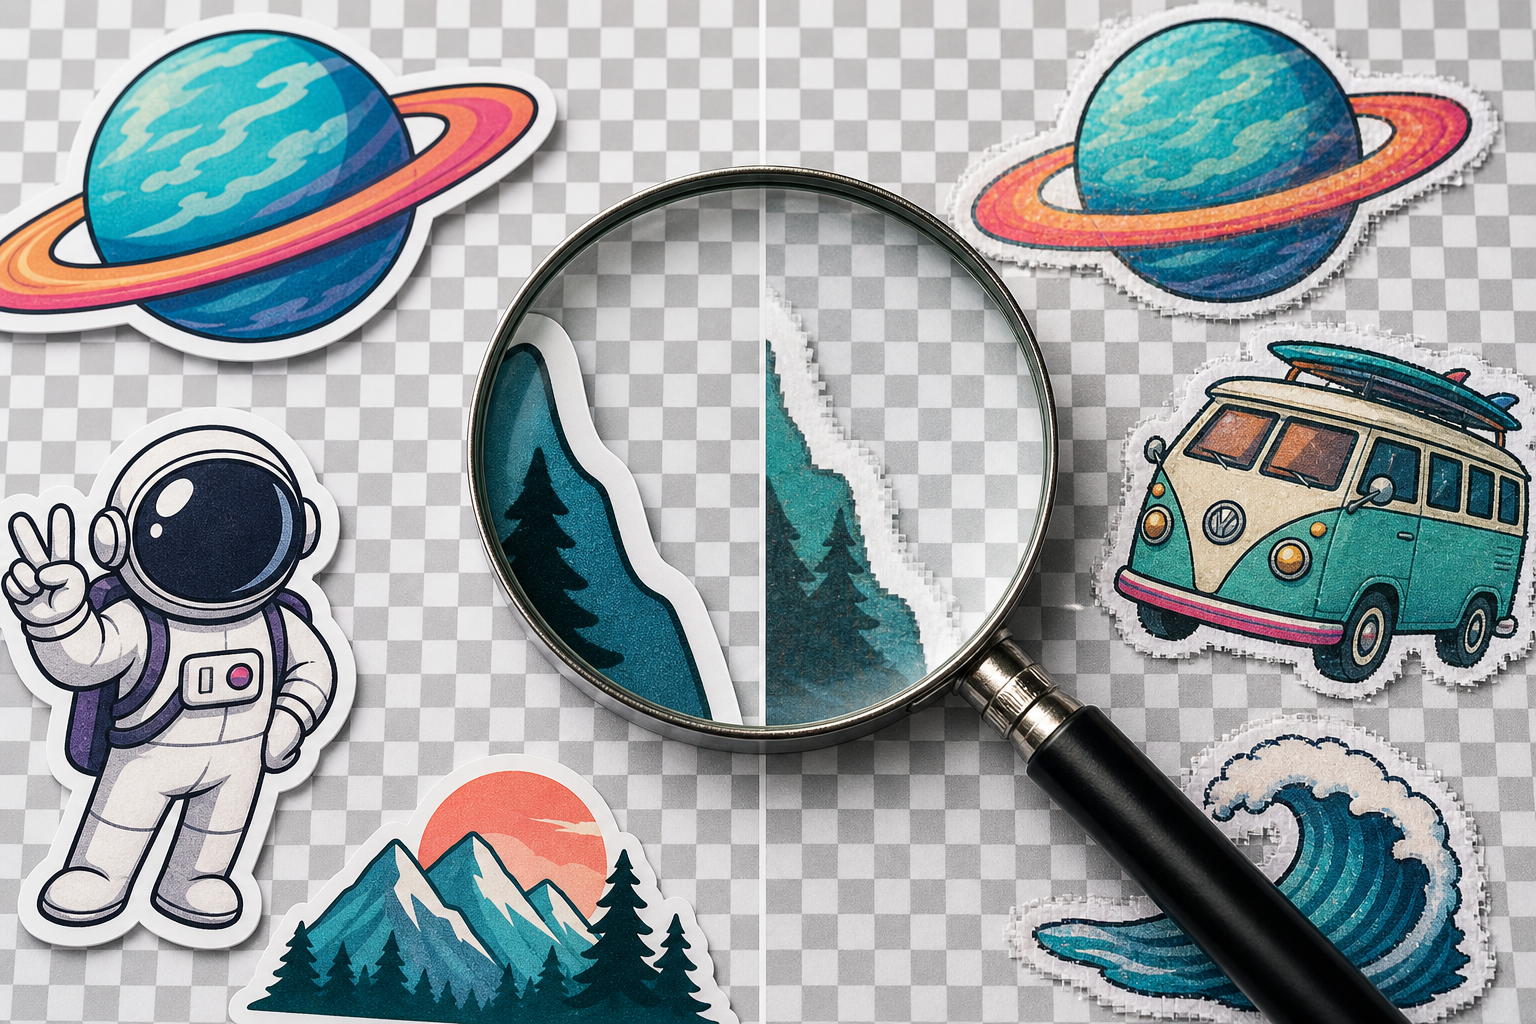
White Halos Around Artwork
White halos appear when artwork was cut out from a white or light background and the edge pixels remain partially visible. They often show up around hair, hand-drawn outlines, brush textures, scanned drawings, and soft shadows.
A halo is easy to miss if you only view the file on a white canvas. To find it, place the artwork on dark gray, saturated blue, muted red, and warm beige backgrounds. If the edge has a pale glow that does not belong to the design, it needs cleanup.
For quick edge correction, you can inspect the image at a large zoom, remove the background more carefully, and then export a fresh transparent file. If you need a fast cleanup pass, the AI Photo Editor can help isolate subjects or refine background removal before you return to manual inspection.
Dark Fringing From Anti-Aliased Edges
Dark fringing is the opposite problem. It often appears when dark artwork was extracted from a black or shadowed background. Instead of a white glow, the sticker edge carries a thin smoky outline. This can make cute sticker art look dirty, especially on pastel backing sheets.
Dark fringing is common in art that uses soft brushes, scanned ink, or exported screenshots. It is also common when a design was resized too many times before final export. The fix is usually to clean the edge at the largest practical source size, then export only once at the final dimensions.
Stray Pixels Outside the Intended Shape
Stray pixels are tiny, isolated marks sitting away from the sticker artwork. They can come from eraser misses, dust in scanned art, low-opacity brush marks, or accidental layer fragments. On a transparent checkerboard they may be nearly invisible. In production, they can become part of the printed area or confuse a cutting preview.
A simple way to catch them is to temporarily add a loud background color behind the sheet, then zoom out and scan the entire canvas. Bright magenta, electric green, and near-black are useful because they expose different kinds of leftovers. Remove any mark that is not part of the design.
Transparent Shadows That Print Poorly
Soft drop shadows can make mockups look polished, but they are risky in production art. A semi-transparent shadow might print as a faint smudge, especially around small stickers. It can also create a larger print area than intended.
For actual sticker sheet uploads, keep shadows separate from the print file unless the print provider specifically expects them. Use shadows in listing images and mockups, not in the production artwork. If the sheet itself needs a printed shadow effect, make it intentional, opaque enough to reproduce, and consistent across the entire sheet.
Inconsistent Padding Between Stickers
Sticker sheets depend on breathing room. If designs sit too close to each other, the sheet can feel cramped, and cut lines may become awkward. If padding varies wildly, the sheet looks amateur even when the individual illustrations are strong.
A practical rule is to inspect spacing at three levels: between neighboring stickers, between each sticker and the sheet edge, and around detailed protrusions such as tails, leaves, handles, stars, or speech shapes. The most delicate protrusion on the sheet usually defines the minimum safe spacing.
File Types: PNG, WebP, and When to Convert
Transparent sticker artwork is most commonly exported as PNG because it preserves transparency cleanly and is widely accepted by print services. WebP can also support transparency and smaller file sizes, but not every production upload system treats it equally. JPEG should not be used for transparent sticker production files because it does not preserve transparency.
| Format | Best use | Transparency | Main risk |
|---|---|---|---|
| PNG | Production uploads and master transparent exports | Yes | Large files if artwork is high resolution |
| WebP | Lightweight previews, web galleries, documentation images | Yes | Some print platforms may reject it or rasterize it unexpectedly |
| JPEG | Flat mockups with a solid background | No | Background becomes permanent and edges may compress badly |
| Proof sheets, client review, bundled visual checks | Depends on export | Transparency may flatten depending on settings |
If your design app exports only one format cleanly, keep that as your master and convert copies only for specific uses. For example, keep a production PNG, create a compressed WebP preview for your store guide or documentation, and export a PDF proof sheet for review.
ConvertAndEdit's Convert Image tool is useful when you need a clean copy in another format without reopening the design file. Use it for duplicates, previews, and handoff versions, not as a replacement for keeping your original source file.
Canvas Size, Resolution, and Padding
Before you inspect artistic details, confirm the file's basic geometry. Sticker sheet problems often start with a canvas that is too small, too tightly cropped, or exported at an odd scale.
Your print provider's template should always win over general advice. If the provider gives exact pixel dimensions, bleed requirements, safe zones, or DPI expectations, use those numbers. If you are building a generic sheet for multiple platforms, create a master file large enough to downsize later rather than stretching a small file upward.
Practical Canvas Checks
Use this checklist before edge cleanup:
- The sheet uses the provider's required aspect ratio.
- The canvas has enough transparent or background padding around the outside.
- No artwork touches the sheet boundary unless the design intentionally bleeds.
- Small stickers remain readable at the final printed size.
- The sheet is not upscaled from a small flattened preview.
- The transparent background is actually transparent, not white.
A transparent canvas can trick you into thinking there is more margin than there really is. Add a temporary border or colored background while checking spacing. Remove it before final export unless the product needs a printed backing color.
Small Details Need Print-Size Review
Do not judge sticker detail only at 200 percent zoom. Zooming in is useful for cleanup, but sticker buyers experience the final printed size. After the technical inspection, view the sheet at approximate physical size on your monitor. If a tiny phrase, icon, sparkle, or pattern becomes mushy on screen, it may not print well either.
This is especially important for planner stickers, label stickers, miniature icons, habit trackers, and decorative sheets with many small elements. A crowded sheet can look generous in the listing but disappointing in use.
Edge Cleanup Without Over-Smoothing the Art
The best sticker edges are clean without looking artificially melted. Over-smoothing can remove the charm from hand-drawn art. Under-cleaning leaves halos, roughness, and noise. The goal is to preserve the artist's line while removing pixels that do not belong.
Use Background Swaps Instead of Guessing
Check the same transparent file against at least four temporary backgrounds:
| Background | What it reveals |
|---|---|
| White | Dark dirt, gray smudges, rough ink edges |
| Black or charcoal | White halos, pale leftovers, weak transparent pixels |
| Saturated color | Semi-transparent edge contamination |
| Warm neutral | How the art may look on product mockups or paper |
A checkerboard is helpful for confirming transparency, but it is not enough for judging edge quality. Real buyers rarely view artwork on a checkerboard. They view it on paper, product pages, mobile backgrounds, and previews.
Resize Only After Cleanup
If the artwork needs resizing, clean it before the final resize whenever possible. Edge defects become harder to fix after scaling because the bad pixels blend with good pixels. Once the sheet is clean, use a controlled resize to create final upload dimensions or listing images. ConvertAndEdit's Resize Image tool can help create consistent copies for store galleries, platform thumbnails, and preview packs.
Keep a naming distinction between master files and resized versions. For example:
sticker-sheet-cats-master-transparent.pngsticker-sheet-cats-upload-4500px.pngsticker-sheet-cats-preview-1600px.webpsticker-sheet-cats-marketplace-thumb.jpg
The exact names are less important than the habit. You should be able to tell which file is safe for production and which file is only a preview.
Compression Rules for Listing Images and Previews
Production files should prioritize quality and platform requirements. Listing images and previews have a different job: they need to load quickly, look sharp, and represent the product honestly.
A huge PNG preview can slow down a product page. A heavily compressed JPEG can ruin thin outlines and make the sticker art look worse than it is. Use the lightest file that still preserves edges, color, and readability.
What to Compress and What to Leave Alone
| Asset | Compress? | Notes |
|---|---|---|
| Production transparent PNG | Usually no | Follow the print provider's requirements first |
| Marketplace gallery image | Yes | Compress carefully after flattening onto a clean background |
| WebP product preview | Yes | Useful for fast-loading pages and help content |
| PDF proof for internal review | Sometimes | Keep readable enough for checking edges and placement |
| Source design file | No | Never treat compressed exports as your source |
For web-facing previews, test compression with visible outlines, not just file size. The Compress Image tool can reduce preview weight, but inspect the result at mobile size and full size before publishing. Sticker art often contains thin lines and flat color fields, which can show compression artifacts quickly.
Mockups Versus Production Files
One of the most useful habits for sticker sellers is separating production art from selling art.
Production art is the file intended for printing and cutting. It should be technically clean, accurately sized, and free of decorative mockup effects unless those effects are meant to print.
Selling art is the file used to communicate the product online. It can include a paper texture, soft lighting, shadows, a hand holding the sheet, packaging context, or a styled background. Selling art should be attractive, but it should not hide defects or misrepresent the physical result.
Keep These Layers Separate
If your design tool supports layers, keep the following items separate until export:
- Sticker artwork.
- Cut guide or safe-zone reference.
- Temporary background colors.
- Mockup shadows.
- Paper texture.
- Watermark or shop branding for previews.
- Export notes or measurement guides.
Flattening too early creates problems. A white background can become trapped. A shadow can become part of the sticker. A guide line can accidentally appear in the listing. A watermark can leak into a production upload. Export separate files for separate jobs.
A Pre-Upload Audit You Can Repeat Every Time
A repeatable audit matters more than a complicated one. The point is to catch mistakes even when you are tired, batching multiple products, or rushing a seasonal launch.
Use this sequence for every sticker sheet before upload.
1. Open the Final Export, Not the Design File
Do not audit only inside your design app. Open the exported PNG or WebP you actually plan to upload. Export settings can change transparency, scale, color, and edge behavior. If the final file is wrong, it does not matter that the source looked correct.
2. Check Transparency on Multiple Backgrounds
Place the export on white, black, saturated color, and warm neutral backgrounds. Look for halos, dark fringing, unplanned shadows, and stray pixels. Scan the full canvas at a zoomed-out view, then inspect each sticker edge at a larger view.
3. Verify Sheet Margins and Sticker Spacing
Check the outer margin first, then the space between each sticker. Pay special attention to small protruding details. If one element feels too close, it probably is. A sheet can be visually dense without being cramped.
4. Review at Approximate Print Size
View the sheet at the size buyers will hold in their hands. Tiny details should still feel intentional. If the sheet includes functional planner icons, labels, or decorative micro-elements, confirm that the shapes remain understandable.
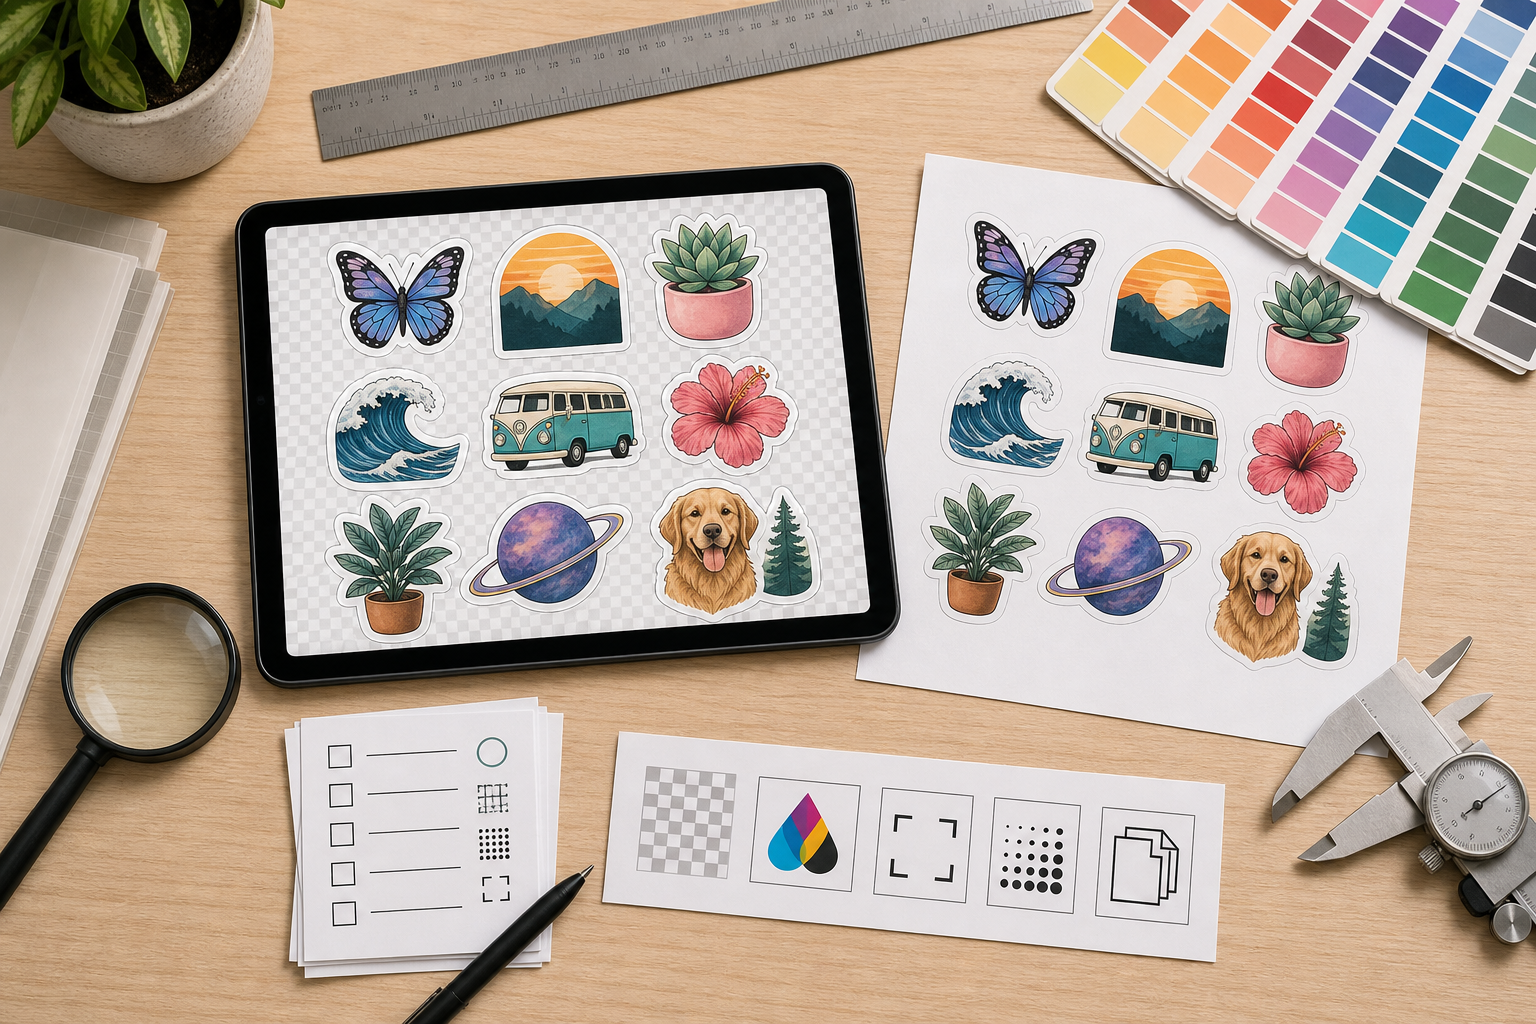
5. Create a Flattened Proof Image
Make a copy of the sheet on a neutral background for review. This is not the production file. It is a proof image that helps you catch spacing, color, and balance issues. If you need to create a simple printable proof packet, Image to PDF is useful for turning one or more review images into a shareable document.
6. Compress Only the Preview Copies
Create smaller preview files for product pages, social posts, or help articles. Keep the original production file intact. If compression changes fine outlines, color blocks, or small details, reduce the compression or use a different format.
7. Upload and Compare the Platform Preview
After upload, compare the print provider's preview against your local proof. Look for unexpected background fills, scaling changes, edge clipping, color shifts, and cut boundary surprises. If the platform preview looks wrong, stop and fix the file rather than assuming it will print correctly.
Decision Table: Fix, Re-Export, or Redesign
Not every issue deserves the same response. Some problems need a quick cleanup. Others point to a design that is too detailed for the product size.
| Problem found | Likely cause | Best next step |
|---|---|---|
| Pale outline around every sticker | Background removal left white edge pixels | Clean edges and re-export transparent PNG |
| One sticker has random specks nearby | Leftover layer fragments or brush marks | Remove stray pixels and inspect full canvas again |
| Tiny design details disappear at print size | Artwork is too detailed or scaled too small | Simplify the design or enlarge that sticker |
| File uploads with a white rectangle | Transparency lost during export or conversion | Export as transparent PNG and verify alpha channel |
| Preview looks blurry after compression | Preview copy is too compressed or too small | Recreate preview at larger size with lighter compression |
| Cut preview seems too close to artwork | Insufficient spacing or provider interpretation | Increase padding or adjust sheet layout |
| Colors look dull on proof | Color mode, paper simulation, or provider preview | Compare with provider guidance and order a sample if needed |
This table also helps when you work with assistants, freelancers, or production partners. Instead of saying the file looks off, you can name the problem and request a specific correction.
Special Cases: Planner Stickers, Labels, and Tiny Icons
Functional sticker sheets need a stricter audit than purely decorative ones. Planner stickers, tab labels, pantry labels, classroom labels, and tiny icon sets often contain small shapes or lettering. Even if your production file is technically clean, the design can fail if the information is too small.
For these products, create a separate readability proof. Place the sheet on a neutral background and view it at actual size. Then step back from the screen or print a draft on a home printer if you have one. The draft does not need perfect color; it only needs to reveal whether the layout is readable.
If your sheet includes text, avoid placing words too close to cut edges. Lettering needs margin. Thin script fonts, tiny all-caps labels, and low-contrast color combinations are especially risky. A design can be beautiful as a digital preview and still be frustrating as a physical sticker.
Special Cases: AI-Assisted Sticker Art
AI-assisted art can be useful for ideation, texture, and style exploration, but it often needs careful cleanup before it becomes sellable sticker artwork. Common issues include uneven outlines, fake paper texture, strange semi-transparent patches, inconsistent lighting, and tiny details that do not make sense at print size.
When using AI-assisted edits, treat the output as a draft, not a final production file. Inspect the edges, simplify overly busy areas, and make sure the sheet has a coherent visual style. If different stickers on the same sheet have different line weights, shadow directions, or texture density, the product may feel assembled rather than designed.
The AI Photo Editor can be useful for background cleanup or subject isolation, but the final judgment still needs a human pass. Sticker sheets are tactile products. Buyers notice when the set feels consistent.
Building Proof Packs for Shop Records
Once a sticker sheet is ready, keep a small proof pack for your records. This is especially helpful if you sell across multiple marketplaces or update listings seasonally.
A simple proof pack can include:
- The final transparent production PNG.
- A flattened proof image on white or light gray.
- A dark-background edge inspection image.
- A compressed marketplace preview.
- A PDF contact sheet for quick review.
- Notes about provider template size and upload date.
This pack protects you from confusion later. If a platform changes its preview system, a customer reports a defect, or you redesign part of the sheet, you can compare the current file against the approved version.
For multi-image proof records, Image to PDF can turn review images into a compact document. If you collect several proof PDFs from different products, PDF Merge can combine them into one seasonal catalog review file.
Common Mistakes That Waste Samples
Ordering samples is still the best way to confirm a physical product, but you should not use paid samples to discover basic file mistakes. Catch these before ordering:
- Uploading a flattened white-background image instead of a transparent file.
- Leaving mockup shadows inside the production artwork.
- Exporting from a low-resolution screenshot.
- Compressing the production PNG to reduce file size without checking edge quality.
- Forgetting to remove temporary guide layers.
- Using inconsistent padding between stickers.
- Assuming the platform preview is decorative rather than diagnostic.
- Reusing a listing image as a print file.
A sample should answer production questions: paper feel, finish, cut quality, color behavior, and packaging. It should not be the first time you notice a white rectangle behind the whole sheet.
Final Checklist Before You Publish
Before you push the listing live, run one last pass with this checklist:
- The production file is the correct format for the print provider.
- Transparency has been checked on light, dark, saturated, and neutral backgrounds.
- No stray pixels appear outside the intended artwork.
- Edges are clean without over-smoothed lines.
- Mockup effects are not included in the production upload unless intentionally printed.
- Sticker spacing feels consistent across the sheet.
- Small details are readable at approximate physical size.
- Preview images are compressed only after the production file is saved separately.
- File names clearly distinguish master, upload, preview, and proof versions.
- The provider preview matches your local expectation.
Sticker sheets reward careful preparation. The artwork may be playful, but the file handling should be disciplined. A transparent PNG that has been checked against multiple backgrounds, reviewed at print size, and separated from mockup assets is far less likely to produce surprises.
For small shops, this kind of audit is not busywork. It is the difference between spending sample orders on real product decisions and spending them on preventable file cleanup. Build the habit once, repeat it for every sheet, and your sticker catalog becomes easier to expand without letting quality drift.