Stop-Motion Frame Contact Sheets for Continuity Review: A Practical Studio Guide
Build compact stop-motion contact sheets that reveal prop drift, lighting flicker, focus errors, and timing problems before they become expensive editing surprises.
Stop-Motion Frame Contact Sheets for Continuity Review: A Practical Studio Guide
A stop-motion shot can look convincing during capture and still contain a continuity problem that becomes obvious in the edit. A prop rotates by a few degrees. A sleeve slowly creeps up an armature. The background brightness pulses. Focus softens halfway through a take. Individually, the frames appear acceptable; viewed as a sequence, the error becomes impossible to ignore.
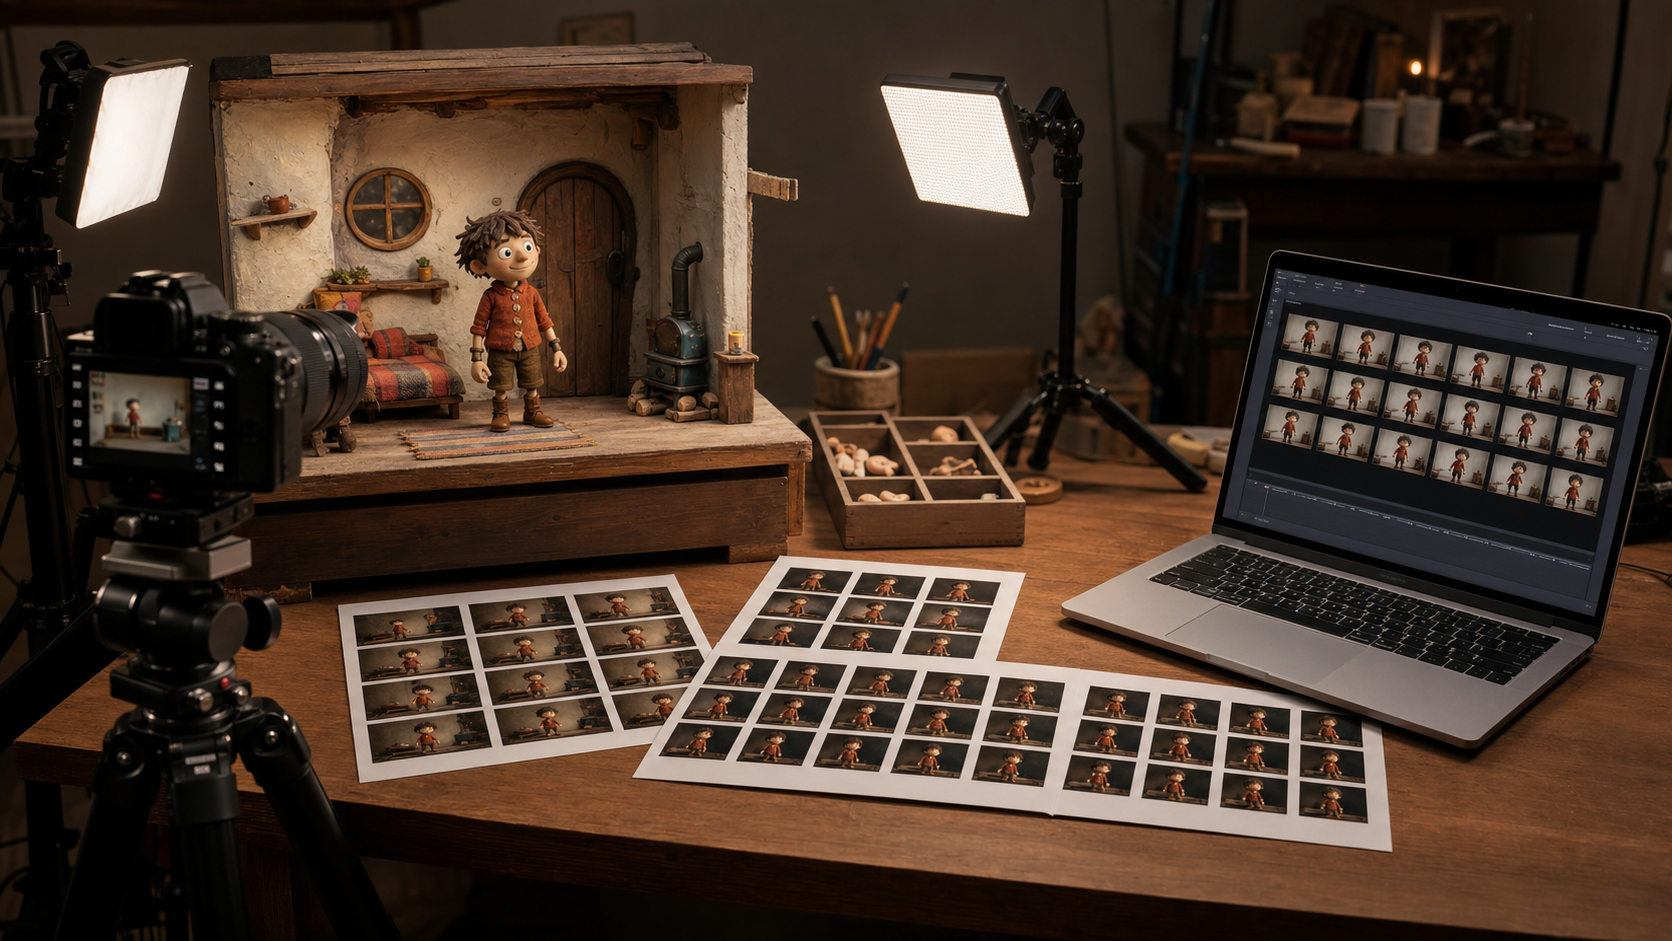
A frame contact sheet turns that sequence into a single review surface. Instead of scrubbing repeatedly through a clip, an animator, director, model maker, or remote client can compare selected frames at once. The sheet is especially useful for small studios that need reliable review materials without maintaining a specialized production database.
The challenge is not merely placing thumbnails in a grid. A useful sheet must sample the right moments, preserve enough detail to expose defects, remain legible when printed, and identify frames without overwhelming the page. This guide explains how to create one for continuity review, including selection intervals, image preparation, page design, compression, and practical inspection methods.
What a Stop-Motion Contact Sheet Can Reveal
Video playback is excellent for judging performance and overall rhythm. It is less dependable for locating gradual visual drift because the eye follows the action. A contact sheet removes motion and makes spatial comparison easier.
It can expose:
- Unintended movement in props, scenery, tie-down covers, or replacement faces
- Changes in puppet scale caused by movement toward or away from the camera
- Lighting flicker, moving shadows, or shifts in practical lights
- Focus breathing or accidental changes to aperture and exposure
- Set vibration after the animator touched a platform
- Costume chatter, fur movement, fingerprints, and seam visibility
- Uneven increments that produce pops or stalls during playback
- Camera bumps that shift every object in the composition at once
- Paint, clay, dust, or adhesive changes accumulating through the take
The sheet is not a substitute for watching the animation. It is a diagnostic companion. Playback tells you whether the movement feels right; a contact sheet helps explain why it does not.
Decide the Review Question Before Exporting Frames
Start with a specific question. A generic sheet containing dozens of tiny images often creates more effort than insight.
For example, a lighting review needs enough frames to reveal brightness variation across time. A facial replacement review needs larger thumbnails that show the mouth, eyelids, and registration points. A set-stability review may prioritize the edge of the stage and fixed background references.
Use the following table to choose an emphasis:
| Review goal | Best sampling approach | Thumbnail priority | Useful page orientation |
|---|---|---|---|
| Prop and set continuity | Regular intervals plus suspected incidents | Full composition | Landscape |
| Facial replacement alignment | Every replacement or expression change | Tight character crop | Portrait or landscape |
| Lighting consistency | Regular intervals across the entire take | Full frame with shadow areas | Landscape |
| Costume or fur chatter | Closely spaced frames around movement | Medium or tight crop | Landscape |
| Camera stability | First, last, and evenly spaced frames | Full frame with fixed edges | Landscape |
| Animation spacing | Consecutive frames around a pop or stall | Character silhouette and contacts | Landscape |
A single shot may need two sheets: one full-frame overview and one detail sheet. That is usually more effective than forcing both purposes into one crowded page.
Choose Frames That Expose Continuity Problems
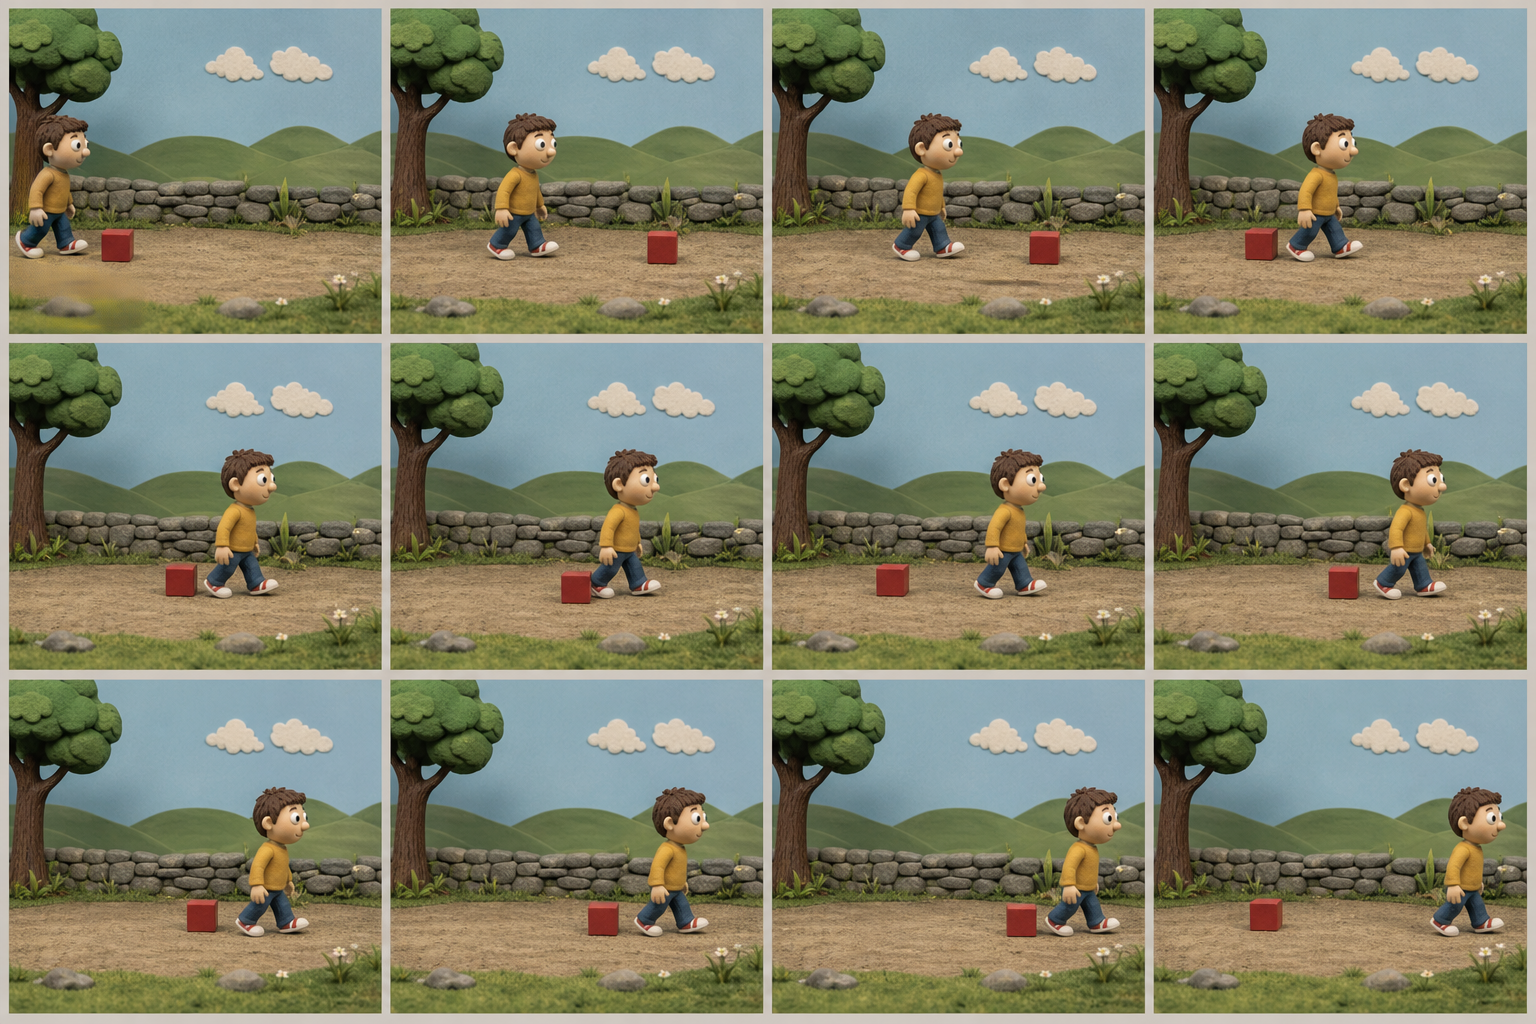
The selection interval determines what the sheet can reveal. Sampling too sparsely hides brief disturbances. Sampling every frame can produce an unreadable wall of thumbnails.
Begin with an evenly spaced overview
For a short shot, select approximately 12 to 24 frames distributed from beginning to end. Always include the first and final frame. These endpoints make accumulated drift easier to recognize.
Suppose a take contains 192 captured frames. A 16-image overview could use one frame every 12 frames, with the final frame added if the interval does not land on it exactly. This creates a compact map of the shot without pretending to document every movement.
Frame rate does not change the underlying visual evidence, but it affects how you describe intervals. At 24 frames per second, every 12 frames represents half a second. If the animation is shot on twos, each photographed pose may be held for two output frames. Use capture-frame identifiers when possible so reviewers do not confuse repeated output frames with separate poses.
Add dense samples around suspicious moments
Once the overview reveals a jump, create a second selection containing consecutive frames before and after it. A useful local range might include three frames before the suspected error, the affected frame, and three frames after it.
This denser sample helps distinguish among several causes:
- One object jumps while the background remains fixed: likely an animation or contact error
- The entire composition shifts: likely a camera or stage bump
- Fine detail becomes soft without changing position: likely focus movement
- Brightness changes across the whole image: likely exposure or light variation
- The shadow changes but the object does not: likely a moved lamp, flag, or crew obstruction
Preserve the original frame order
Never sort exported images by file size, modification date, or a filename convention that lacks zero padding. A sequence named frame-1, frame-2, and frame-10 may be ordered incorrectly by some applications.
Prefer identifiers such as shot07_frame0001, shot07_frame0002, and shot07_frame0010. If files arrive in mixed formats, normalize them with the image converter while retaining a separate record of their original names.
Prepare the Frames Without Hiding Evidence
Contact-sheet preparation should improve legibility without cosmetically repairing the shot. If you remove a flicker, erase a rig, or replace a background before review, the sheet no longer documents the captured material.
Keep a protected source set
Duplicate the selected exports into a review directory and leave the camera originals untouched. A simple structure is enough:
source-framesfor untouched exportsreview-full-framefor normalized overview imagesreview-detailsfor diagnostic cropscontact-sheetsfor finished pagesnotesfor shot identifiers and findings
This separation prevents resized thumbnails from being mistaken for production frames.
Standardize orientation and dimensions
All thumbnails in a row should share the same aspect ratio. Mixed dimensions create uneven cells and make camera shifts harder to judge.
Correct accidental orientation first. Then use Resize Image to create consistent review copies. For a printable overview, a long edge between roughly 1200 and 1800 pixels per source image usually leaves ample detail before the images are reduced into cells. There is little benefit in feeding full-resolution camera frames into a modest contact sheet unless you also need zoomable digital inspection.
Avoid stretching an image to fit. Use proportional resizing and either retain the complete frame or crop every image to identical boundaries.
Treat diagnostic crops as separate evidence
A crop can make costume chatter or face registration much easier to inspect, but it removes spatial context. Keep full-frame and cropped sheets separate, and use the same crop rectangle throughout a sequence.
For example, if a puppet occupies the center third of the scene, crop every selected frame to that same fixed region. Do not recenter the crop on the puppet from frame to frame. Recentring can conceal unintended movement because the subject appears artificially stable.
If a small obstruction or distracting mark makes inspection difficult, an editor such as the AI Photo Editor may help produce a clearly labeled presentation copy. The untouched review sheet should remain available whenever the material is being used to diagnose capture errors.
Avoid aggressive sharpening
Sharpening can create halos around wire armatures, replacement-face seams, and high-contrast miniature edges. Those halos may be mistaken for movement or compositing defects. Apply only restrained, identical adjustments across the sequence.
The same rule applies to noise reduction. Temporal or AI-based cleanup may change fine textures differently in each frame, creating false chatter. For continuity assessment, consistency is more important than polish.
Build a Contact Sheet That Remains Useful on Paper
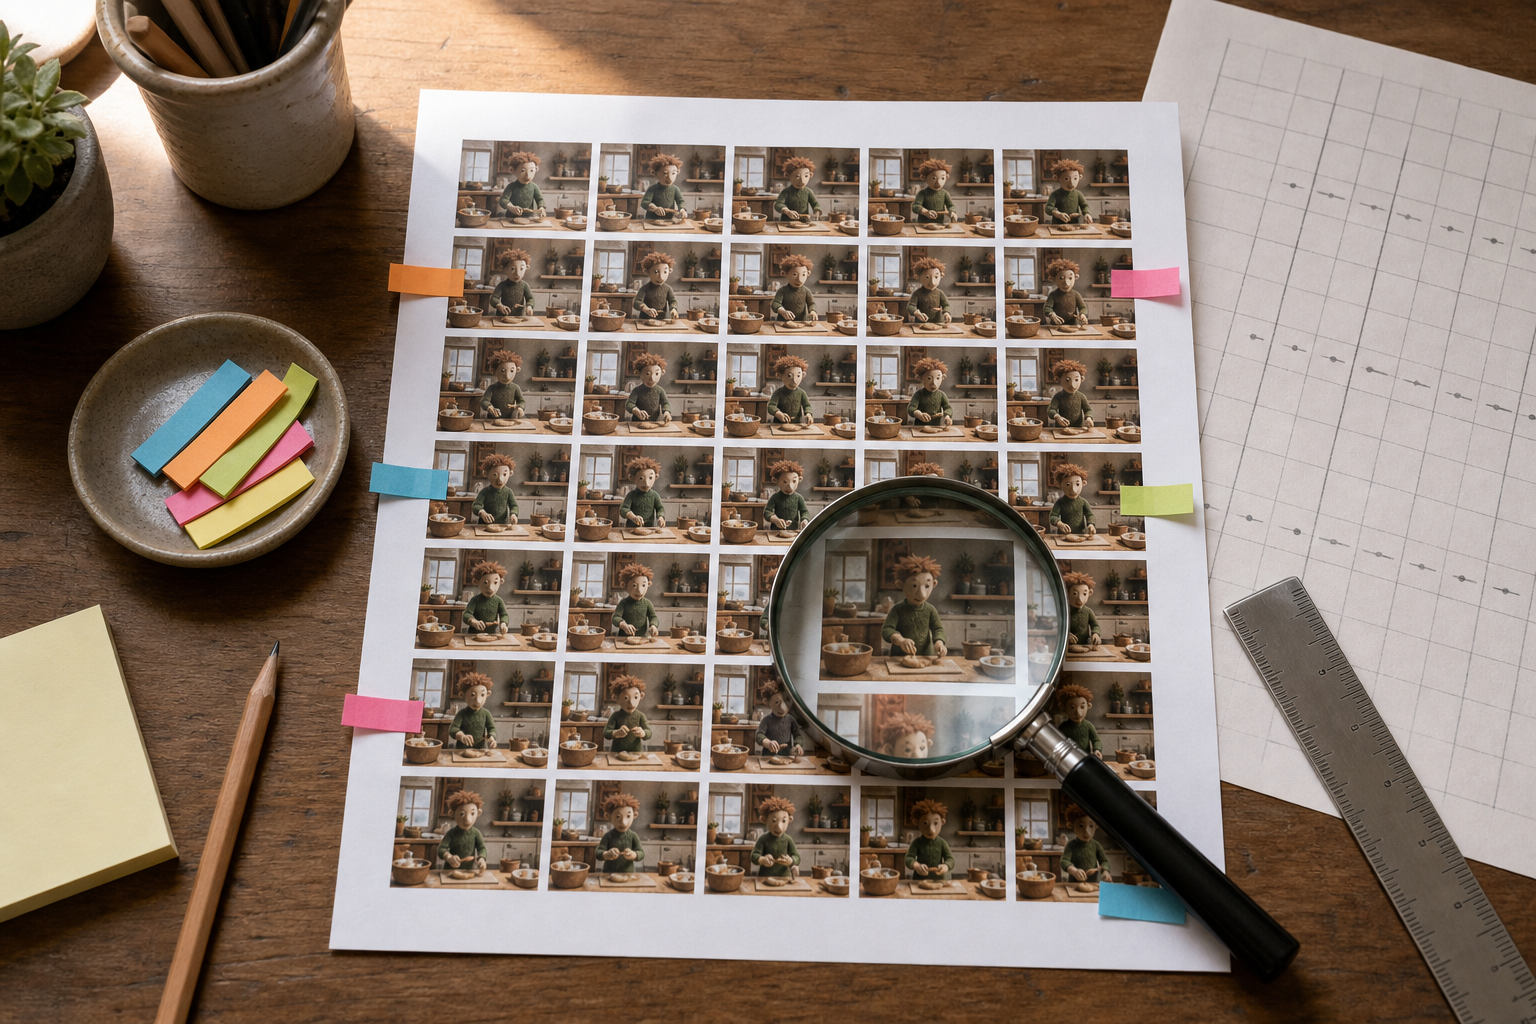
A contact sheet should be designed for its final viewing condition. A page that looks spacious on a large monitor may become illegible on office paper.
Select a practical grid
For a landscape A4 or US Letter page, a 4-by-4 grid is a dependable starting point for 16:9 or similarly wide frames. A 5-by-4 grid accommodates 20 frames but reduces space for notes. Portrait pages work better for vertically framed scenes or sheets with fewer, larger images.
Use fewer cells when reviewers must inspect facial parts, tiny props, or rigging. Four large images can be more useful than twenty-four uninspectable thumbnails.
A good cell contains:
- One image at a consistent scale
- A short frame identifier beneath or beside it
- Enough border to prevent adjacent frames from visually merging
- Optional room for a small handwritten mark
Keep captions outside the image. Covering the photographed area with frame numbers can obscure precisely the defect being reviewed.
Maintain predictable reading order
Use left-to-right, top-to-bottom order unless the entire production team has agreed on another convention. Place a clear visual gap between rows. Avoid decorative arrangements, overlapping frames, or alternating sizes.
When a sheet continues onto a second page, repeat the shot identifier and include the page number. Overlap one frame between pages if the transition matters. The repeated image acts as a continuity anchor and makes accidental page reversal easier to detect.
Add only useful metadata
A contact sheet benefits from a small amount of production context:
- Project or episode code
- Shot identifier
- Take number
- Capture date when relevant
- Frame range and sampling interval
- Full-frame or diagnostic-crop designation
- Page number
- Review status or revision label
Do not bury the page in camera metadata unless the review depends on it. Aperture, shutter, ISO, lens, and light settings may belong in a technical incident sheet rather than every animation review.
Use neutral borders and backgrounds
A medium neutral gray is effective for mixed light and dark scenes because it does not compete with either extreme. White is convenient for office printing, while black may help evaluate edge spill or dark-set compositing.
Whatever you choose, keep it consistent across related sheets. Changing the surrounding tone can alter the perceived brightness of the frames and complicate lighting comparisons.
Inspect the Sheet in Deliberate Passes
Trying to spot every defect simultaneously is tiring. Review the sheet several times, assigning one question to each pass.
Pass 1: fixed reference points
Choose two or three objects that should never move: a set corner, registration mark, window edge, or background feature. Compare their positions across rows. If every fixed point moves together, investigate the camera, tripod, stage, or image stabilization settings.
Pass 2: puppet contacts and silhouette
Inspect feet, hands, seated contact points, and any area where the puppet touches scenery. Look for sliding, sudden gaps, compression changes, or tie-down covers shifting between poses.
Then compare the outer silhouette. A shoulder, finger, accessory, or garment edge that oscillates can produce distracting chatter even when the main action is smooth.
Pass 3: props and replacement parts
Track props that the character handles as well as supposedly static dressing. For replacement faces, inspect eye-line, mouth position, color, seam alignment, and scale. A replacement may be correctly registered but visibly brighter because it was printed, painted, or lit differently.
Pass 4: exposure, shadow, and focus
Squint slightly or view the page from a greater distance. Broad brightness changes often become easier to see when fine detail is suppressed. After checking exposure, return to close inspection for focus shifts and local shadow movement.
A useful technique is to compare the first and last thumbnails, then compare every other thumbnail. Alternating frames can make slow drift more apparent.
Pass 5: spacing and arcs
Trace the character's major positions across the grid. The sheet will not reproduce motion timing, but it can reveal irregular spacing. A hand that advances in small increments and then suddenly leaps deserves closer playback inspection.
For precise animation analysis, create a dense sheet of consecutive frames around the questionable action. The overview identifies the region; the dense sheet supports the diagnosis.
Turn Observations Into Actionable Notes
A note such as “frame looks wrong” does not help the animator or compositor. Record what changed, where it appears, when it begins, and what remains stable.
A strong note might read: “From capture frame 0084, the red toolbox rotates clockwise while the rear wall and camera framing remain stable.” Another might say: “Frames 0112–0115 soften across the entire puppet, but the background stays sharp, suggesting the subject moved outside the intended focus plane.”
Use a compact issue table:
| Frame or range | Area | Observation | Likely category | Next check |
|---|---|---|---|---|
| 0084 | Toolbox | Rotation begins | Prop continuity | Compare source frames 0082–0086 |
| 0112–0115 | Puppet face | Detail becomes soft | Focus or depth | Inspect full-resolution exports |
| 0140 | Entire frame | Composition shifts right | Camera stability | Overlay 0139 and 0140 |
| 0168–0174 | Back wall | Brightness pulses | Lighting | Review exposure data and lamps |
Keep “observation” separate from “likely category.” The visible evidence may be certain while the cause remains unknown.
Export a Review PDF Without Losing Thin Detail
PDF is convenient for distribution because it preserves page order and grid layout. It also makes printing more predictable than sending a folder of individual images.
Export contact-sheet pages as high-quality images, then combine them with Image to PDF. If overview and detail pages were created separately, Merge PDF can assemble them into one review packet.
Before sending the file, check it at three levels:
- Fit the entire page on screen and confirm that the sequence order is obvious.
- View at approximately normal print size and verify that frame identifiers are readable.
- Zoom into a thumbnail and confirm that thin puppet parts, set edges, and facial details have not dissolved into compression artifacts.
Do not repeatedly export and recompress JPEG pages. Each generation can soften texture and introduce blocks around miniature edges. Keep a high-quality master, then make a smaller delivery copy if necessary. The image compressor can help reduce page-image size, but inspect the result rather than choosing the smallest possible file.
For email or chat delivery, favor a moderate file that opens reliably over an oversized archive of camera-resolution pages. If a reviewer needs pixel-level evidence, send the relevant original frames separately and reference their identifiers in the PDF.
Common Contact-Sheet Mistakes
Sampling only attractive poses
A presentation sheet often favors key poses. A diagnostic sheet should include awkward transitions, holds, and suspicious frames. Its purpose is evidence, not promotion.
Allowing automatic per-image correction
Auto exposure, white balance, contrast, or enhancement can treat each frame differently. That may hide real flicker or manufacture variation that was absent from the source.
Mixing takes on one unlabeled page
Two takes of the same shot can look nearly identical. Without persistent take labels, notes may be applied to the wrong sequence. Use one take per section and repeat its identifier on every page.
Using inconsistent crops
Following the puppet with a moving crop conceals position drift. Establish one crop rectangle and apply it identically to all frames in the diagnostic set.
Printing before checking scale
Printer margins and scaling options can shrink a carefully designed grid. Export a one-page test, print at the intended setting, and confirm that thumbnails and captions remain useful before producing a larger packet.
Treating the sheet as the final verdict
A contact sheet reveals patterns but cannot fully represent timing, motion blur, flicker frequency, or the emotional quality of a performance. Confirm every significant finding against playback and, when necessary, the full-resolution source frames.
A Compact Pre-Delivery Checklist
Before distributing a stop-motion contact sheet, verify the following:
- The title identifies the project, shot, and take.
- Frames appear in correct chronological order.
- The first and final frames are included.
- The sampling interval is stated or easily inferred.
- Full-frame and cropped views are clearly distinguished.
- Every diagnostic crop uses identical boundaries.
- No automatic correction has altered individual frames differently.
- Frame identifiers remain readable at the expected print size.
- The grid leaves enough space to separate adjacent images.
- Page numbers and revision labels appear on multipage packets.
- PDF compression has not erased thin edges or miniature texture.
- Original frames remain untouched and separately available.
- Notes describe visible changes rather than unsupported causes.
Make the Sheet Part of the Capture Discipline
The most useful contact sheets are created while a shot is still fresh. A small studio can export an overview after each completed take, inspect fixed references and lighting, and create a dense diagnostic page only when something appears questionable.
This habit creates a compact visual history of the production. It helps an animator explain a recapture, allows a model maker to see where an accessory failed, and gives remote reviewers a stable artifact they can annotate without specialized playback software.
More importantly, the sheet slows observation down. Stop-motion is built from tiny intentional changes, so its failures often arrive as tiny unintentional ones. A well-sampled, consistently prepared contact sheet makes those changes visible while there is still time to act on them.