Auction Lot Photo Proof Sheets: A Practical Guide for Estate Sale Cataloging
Build consistent auction lot photo proof sheets that help estate sale teams identify objects, verify lot numbers, review condition, and publish cleaner catalogs.
Auction Lot Photo Proof Sheets: A Practical Guide for Estate Sale Cataloging
Estate sale cataloging often happens under awkward conditions: dozens or hundreds of unrelated objects, limited staging space, changing daylight, incomplete provenance, and a sale deadline that will not move. A photographer may capture perfectly usable images, yet the cataloging team can still struggle to determine which detail belongs to which lot.
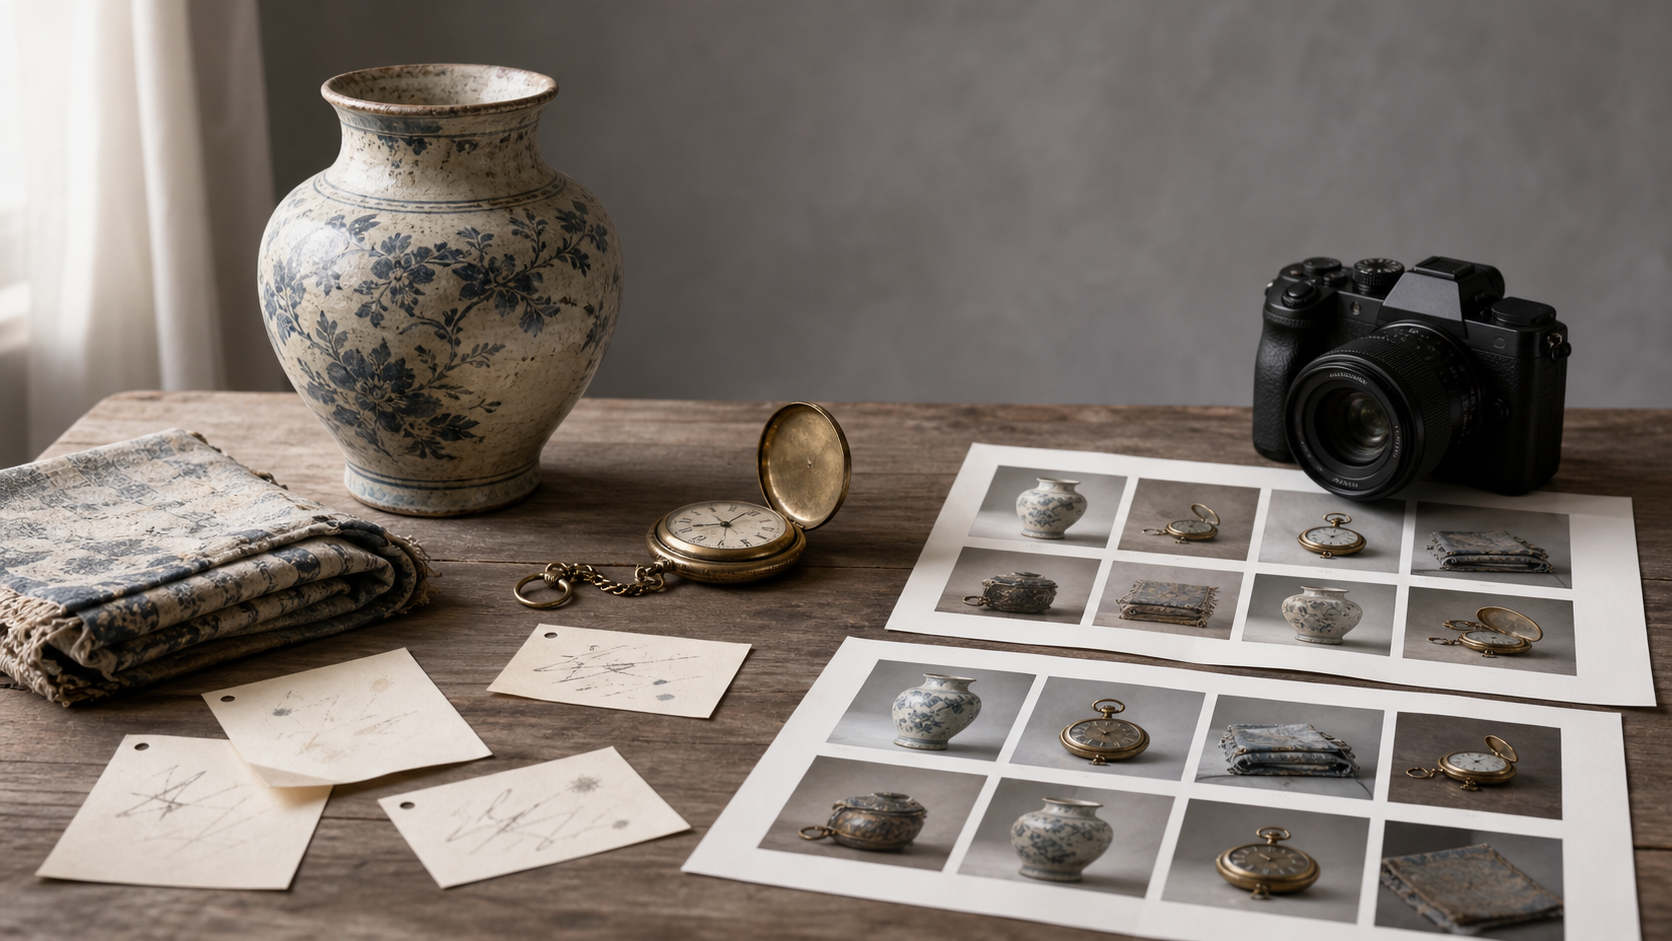
A photo proof sheet solves a different problem from a polished listing. It groups the evidence for a lot into a compact, reviewable page. The page can show the complete object, identifying marks, dimensions, components, and condition details together. Catalogers can then verify records without opening a folder full of nearly identical files.
This guide presents a practical system for small auction houses, estate sale companies, appraisers, and independent catalogers. It focuses on ordinary equipment and browser-based image and PDF tools rather than specialized auction software.
Why ordinary photo folders become unreliable
A folder of sequential camera files looks organized until several similar objects appear in succession. Consider four porcelain figurines photographed on the same table. Each has a front view, base mark, ruler shot, and close-up of damage. If a lot card is missing from one sequence, every later image can be associated with the wrong object.
The risk grows when files pass between people. The photographer remembers that image 1842 belongs to the blue figurine, but the remote cataloger sees only a thumbnail. A condition specialist may download selected images and lose the original folder order. Someone may rename the hero photos while leaving the detail images untouched.
Proof sheets reduce this ambiguity by preserving context. They are particularly useful for:
- Matching maker marks to the correct object.
- Checking that grouped lots contain every stated component.
- Comparing a condition note with the photographed defect.
- Confirming that measurements were taken from the intended item.
- Reviewing photography before objects are moved to storage.
- Keeping a compact visual record after a listing is published.
A proof sheet is not a substitute for original photographs. It is an index and review artifact. Keep the full-resolution source images separately for publication, valuation, and later inspection.
Decide what each sheet must prove
Before choosing a grid, define the question the page should answer. Trying to make one layout serve every purpose usually produces small, unhelpful pictures.
| Review purpose | Images to prioritize | Suitable page structure |
|---|---|---|
| Lot identity | Overall view, lot card, alternate angle | One large image plus two supporting images |
| Maker verification | Overall view, signature, label, base mark | Large identity image with enlarged detail frames |
| Condition review | Overall view and several defect close-ups | Four- or six-image balanced grid |
| Group completeness | One group view and individual components | Large group image above a component row |
| Rapid intake audit | One image per lot | Dense index sheet with generous identifiers |
| Measurement review | Overall view, ruler shots, dimensions | Three- or four-image layout with uncropped scale references |
For valuable, fragile, or disputed objects, create a dedicated condition sheet instead of squeezing evidence into the listing overview. A hairline crack, retouched area, or missing veneer corner may disappear when twelve photos are reduced to one page.
Create a dependable lot identifier
The identifier is the anchor connecting the object, images, spreadsheet row, and proof sheet. It should be short enough to place in a photograph but distinctive enough to survive a busy sale.
A useful structure combines the sale code and lot number, such as HBR-0247. If items are cataloged before final lot numbers are assigned, use a stable intake ID rather than a temporary description like blue vase. Descriptions change; identifiers should not.
Avoid encoding too much information in the ID. Category, room, consignor, and estimated value belong in the catalog database. If those details are embedded in filenames, later corrections create competing versions.
Use leading zeros when the sale contains many lots. Files named LOT-008, LOT-027, and LOT-114 sort more predictably than files using unpadded numbers.
Photograph the lot card at both boundaries
Begin each lot sequence with the identifier card and end it with the same card. The opening card marks the start of the sequence. The closing card confirms that no unrelated object was inserted before the next lot.
The card does not need to appear in the public listing. It exists to preserve associations during intake and review. Use large, dark characters and a matte surface. Glossy laminated cards can reflect lights and become unreadable.
For grouped lots, place the card beside the complete group, then photograph individual pieces. If components have sub-identifiers, keep them simple: HBR-0247-A, HBR-0247-B, and so forth.
Build a repeatable shot list for every lot
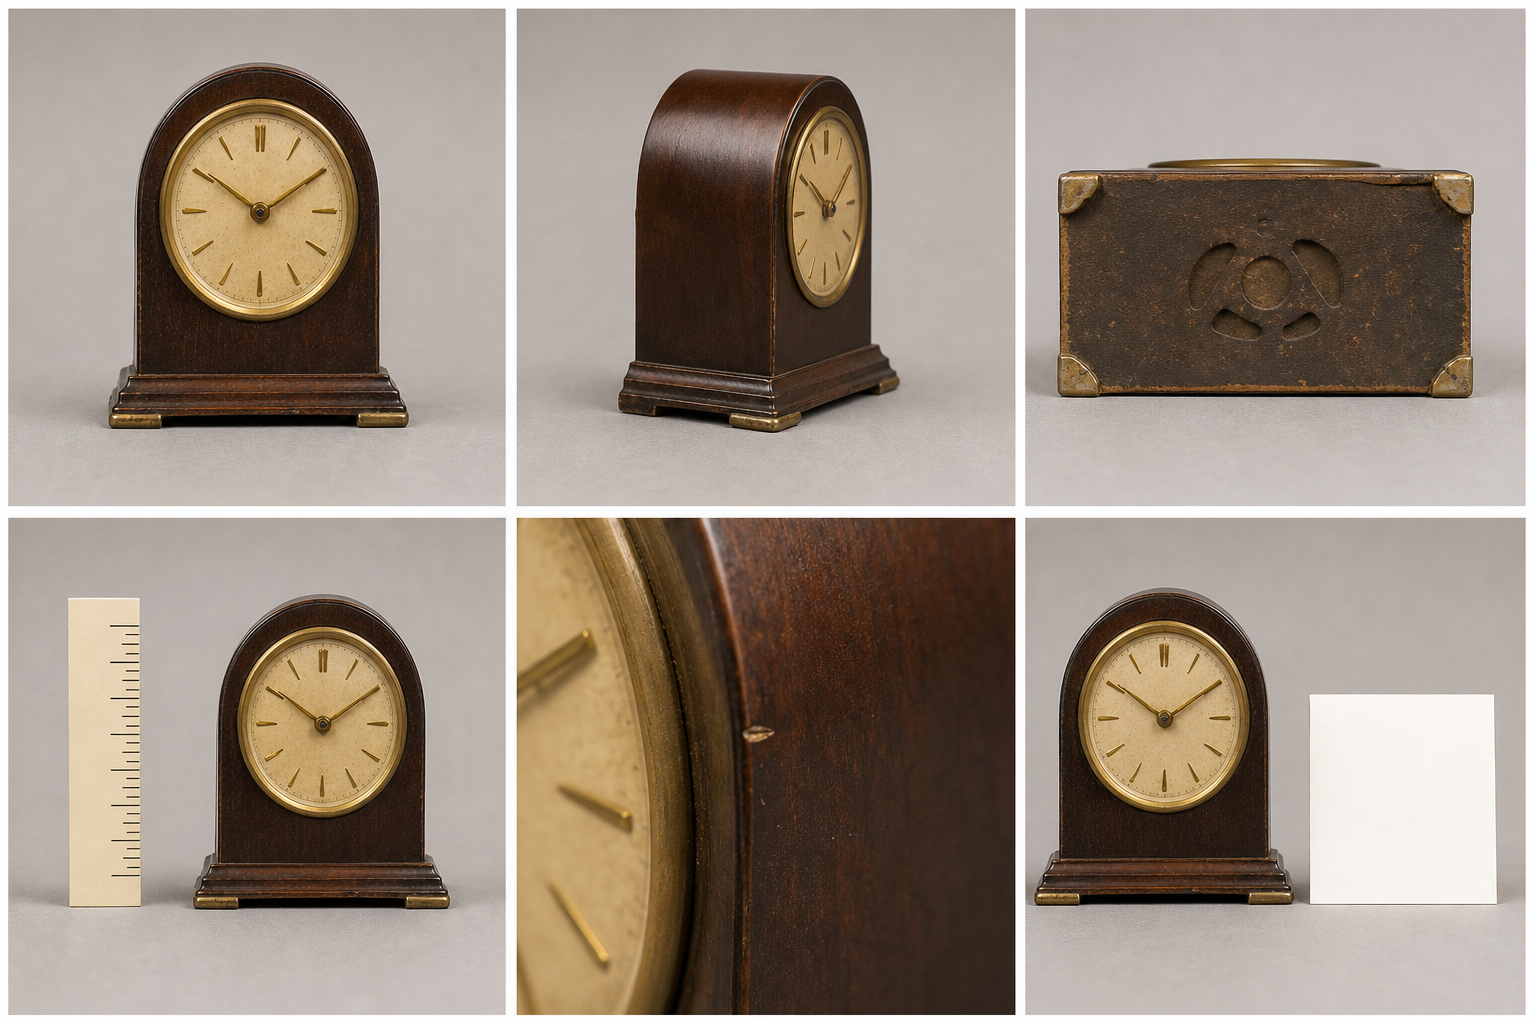
Consistency is more valuable than taking an arbitrary number of pictures. A standard sequence tells reviewers what to expect and makes omissions obvious.
A strong six-image sequence is:
- Overall three-quarter view.
- Opposite or rear view.
- Maker mark, signature, label, or identifying construction detail.
- Scale or measurement view.
- Most important condition detail.
- Object with the lot card.
Adapt the sequence to the category. Furniture may require underside, drawer-joint, and back-panel photographs. Jewelry may need clasp, hallmark, and stone-setting views. Books benefit from title page, copyright page, binding, and representative condition images.
Do not let the shot list become a reason to photograph meaningless angles. If an unsigned glass bowl has no mark, use that frame for the pontil, rim, or another diagnostic feature. The goal is consistent evidence, not mechanical repetition.
Separate identity images from condition evidence
An identity image should make the item recognizable at a glance. A condition image should make a specific feature assessable. These are rarely the same photograph.
For damage, capture one contextual view and one close detail. A tight photograph of a chip may show severity but not location. A wider frame shows location but may conceal its shape. Pairing the two prevents confusion.
Keep condition lighting honest. Strong side lighting can reveal scratches and planar distortions, while soft frontal light may represent color more evenly. When a surface changes dramatically under different light, include both views and do not present either as the only truth.
Control the capture area before editing
A small, consistent capture station saves more time than aggressive correction later. It does not need to resemble a commercial studio.
Use a neutral, nonreflective background that contrasts with the object. Mid-gray is flexible for pale and dark items, while white may cause translucent glass or polished silver edges to disappear. Leave enough empty space around the object to permit a standardized crop.
Keep the camera position stable for repeatable objects. A tripod or copy stand reduces perspective changes and makes proof sheets appear calmer. For handheld work, enable a grid and use a consistent camera height.
Add a scale only when it supports the record. A ruler should sit in the same plane as the measured feature. A ruler placed several centimeters in front of an object can create a misleading comparison because of perspective.
Before leaving the location, inspect marks and condition details at full size. A blurred hallmark may look adequate as a camera thumbnail but fail completely when a cataloger attempts to identify it.
Cull images without deleting evidence too early
The first cull should remove only unmistakable failures: accidental shutter presses, frames obscured by a hand, and exact duplicates with poorer focus. Preserve uncertain images until the catalog record is complete.
Select one primary image for each lot and mark it consistently. For example, add _01_overall rather than labels such as _best, _newbest, or _final2. A predictable sequence might be:
HBR-0247_01_overall.jpgHBR-0247_02_reverse.jpgHBR-0247_03_mark.jpgHBR-0247_04_scale.jpgHBR-0247_05_condition.jpgHBR-0247_06_card.jpg
Keep edits nondestructive when possible. The untouched originals should remain available even if publication copies are cropped, resized, or converted.
Normalize dimensions without hiding important details
Mixed portrait and landscape images can make a proof sheet look chaotic. Standardization helps, but blind cropping can remove handles, feet, signatures, and rulers.
Start by rotating every image correctly. Then crop excess background while maintaining a small safety margin. Use the same aspect ratio for repeated views only when the objects tolerate it. A tall candlestick and a wide serving tray should not be forced into identical crops if that means cutting off their extremities.
For a consistent output set, use the image resizing tool to create review copies with a common long-edge dimension. Keep original aspect ratios and avoid enlarging small source files. Upscaling does not restore missing focus or maker-mark detail.
A practical proof-sheet set often needs two classes of files:
- Medium-sized overall views for page composition.
- Larger detail crops for marks, signatures, and defects.
This distinction keeps the PDF manageable without sacrificing the frames that reviewers need to magnify.
Protect color and shape from unnecessary correction
Auction images are records, not advertising fantasies. Correct a visible color cast if you have a trustworthy neutral reference, but avoid edits that make patina, fading, oxidation, or stains appear less significant.
Straighten obvious camera tilt when it distracts from the object. Be cautious with perspective correction on irregular antiques: an automated correction can subtly change proportions and create false expectations.
If a distracting temporary element must be removed, such as a background cable outside the object boundary, preserve the unedited photograph. Never remove cracks, losses, inscriptions, repairs, or other object features from a catalog record.
Make marks and labels readable before OCR
Maker marks are often small, curved, embossed, reflective, or partially worn. Automated text recognition may help create searchable notes, but it should not be treated as authoritative identification.
Prepare a duplicate detail crop rather than modifying the only record. Rotate the mark so its baseline is approximately horizontal. Crop closely enough that the mark occupies a meaningful portion of the frame, while retaining a little surrounding material for context.
Try restrained adjustments first: mild exposure correction, local contrast, or grayscale conversion. Excessive sharpening can turn glaze texture, paper fibers, or engraved scratches into letter-like artifacts.
You can test a prepared crop with image OCR, then compare the result character by character against the photograph. Record uncertainty explicitly. If a letter might be B, 8, or S, do not silently choose the most convenient interpretation.
OCR is most useful for printed inventory labels, publisher information, model plates, and clearly struck marks. It is less dependable for signatures, monograms, cursive inscriptions, and shallow embossing. Those details still benefit from a large proof-sheet frame even when no reliable transcription is possible.
Choose a proof-sheet layout that matches the review task
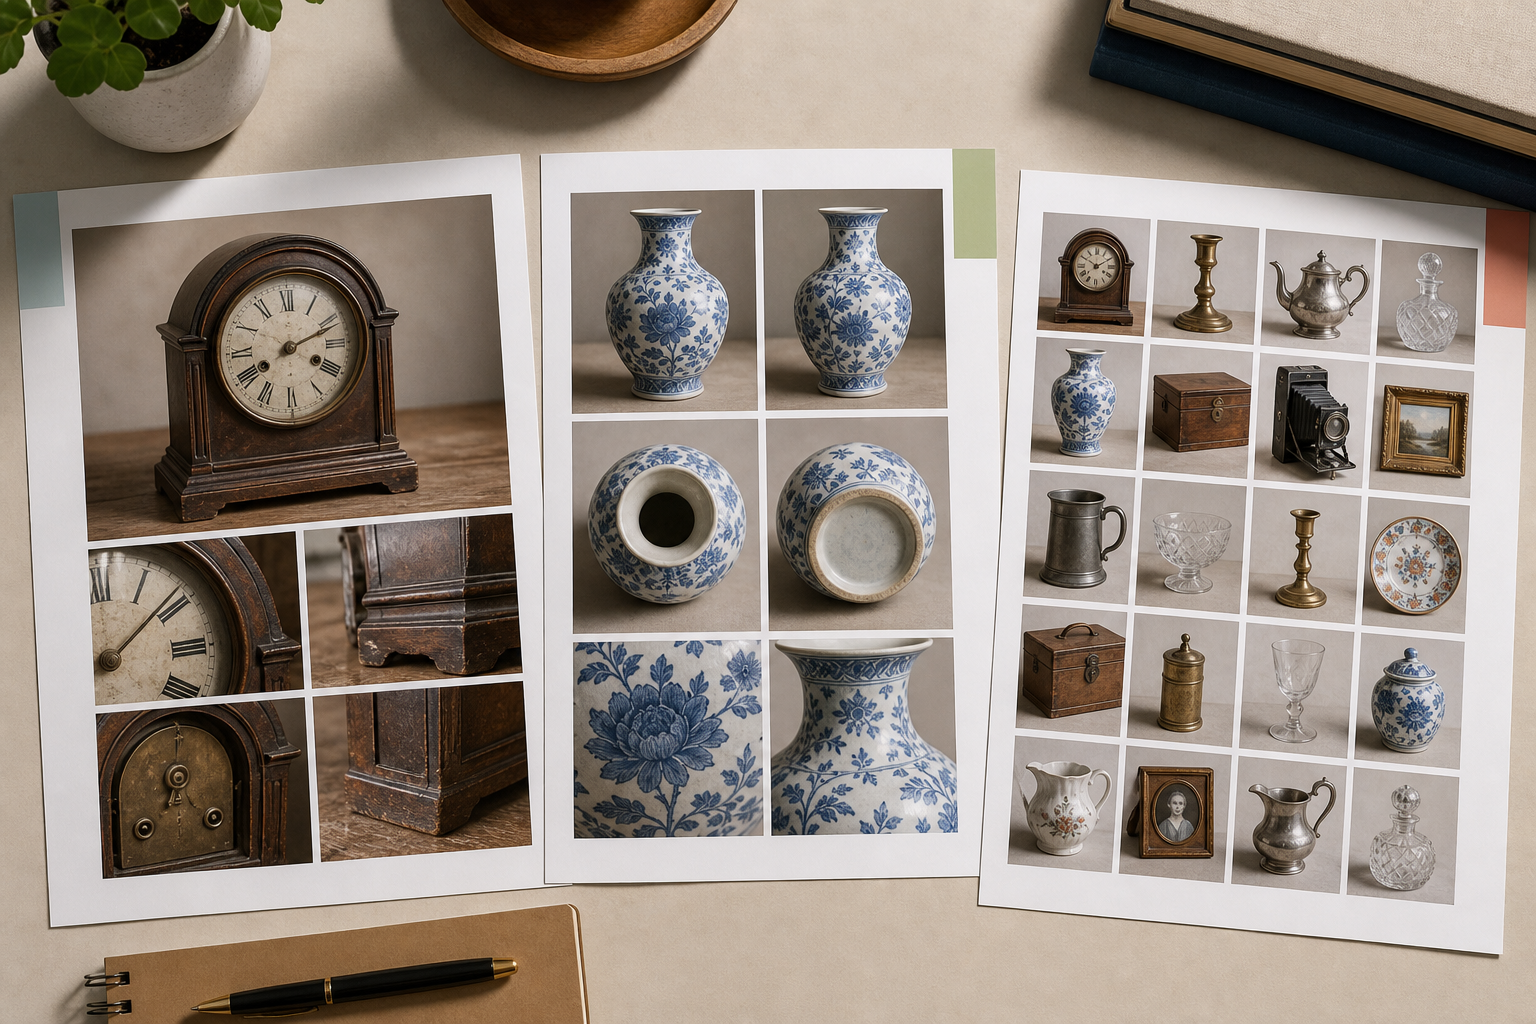
Page design should direct attention rather than merely fit a maximum number of files.
For a standard single lot, place the overall view in the largest frame. Arrange the reverse, mark, scale, and condition photographs beneath or beside it. This establishes a visual hierarchy: identity first, evidence second.
For a grouped lot, give the complete group at least half the page. Place individual component views in a row below it. Keep their order consistent with the catalog description or sub-identifiers.
For an intake index, one image per lot may be enough. Use four to nine lots per page depending on object complexity. A dense index is suitable for locating objects, but not for judging condition.
Avoid layouts that:
- Mix multiple lots without unmistakable boundaries.
- Reduce every image to the same tiny size.
- Place identifiers over the object itself.
- Crop scale references or condition context.
- Depend on color alone to distinguish categories.
- Leave no margin for printing or handwritten review notes.
Use captions as evidence labels
Captions should state what the image represents, not make unsupported conclusions. Prefer Base mark, photographed before cleaning to Authentic factory mark. Prefer Small edge loss at rear left corner to Minor damage.
If the sheet will circulate outside the catalog team, include the lot ID, short object name, capture date, and page purpose. Do not crowd the page with estimates, consignor details, or private contact information unless the recipient genuinely requires them.
When the page is likely to be printed, use type large enough to remain readable on an ordinary office printer. Always print or preview at actual size before approving a template.
Assemble the review PDF
Once the selected images are ordered and consistently named, combine the prepared sheets with the image-to-PDF tool. Use one orientation throughout a packet unless an exceptional object clearly needs a different page shape.
Keep page order aligned with the sale list. If lots are reorganized after photography, regenerate the packet rather than relying on handwritten corrections across many pages. Add a version date to the filename, not only inside an email message.
For large sales, split packets into sensible ranges such as lots 001–075 and 076–150. Smaller packets open faster, are easier to replace, and reduce the chance that reviewers comment on an obsolete page from a massive document.
If separate specialists return annotated PDFs, preserve each version and combine approved pages only after resolving conflicting notes. The PDF merge tool can assemble finalized sections in the correct order.
Set a file-size budget based on use
A proof sheet intended for screen review does not need the same resolution as a print catalog or conservation record. Define the use before compression.
| Destination | Main priority | Sensible check |
|---|---|---|
| Internal screen review | Fast opening with readable details | Magnify marks and defects to confirm they remain legible |
| Email attachment | Moderate total size | Test the complete packet, not one page |
| Office printout | Clear labels and object edges | Print one representative page at actual size |
| Long-term record | Preservation of evidence | Retain originals separately from the PDF |
| Public preview | Privacy and presentation | Remove internal cards, notes, and unrelated background details |
Use image compression on review copies rather than camera originals. Inspect thin engraved lines, small labels, fabric texture, and hairline cracks after compression. These are usually the first details to suffer.
Do not judge quality only from the full-page view. Zoom into the smallest evidence frame. If compression blocks obscure a mark or turn a crack into a vague smudge, increase quality for that image or give it a larger frame.
Run a lot-by-lot quality audit
A short audit catches expensive mistakes before objects are moved, sold, or returned. Review each sheet against the catalog record and the source folder.
Identity checks
- The lot ID matches the spreadsheet or catalog entry.
- Every photograph on the page belongs to the same lot.
- The overall image clearly identifies the object or complete group.
- Similar adjacent lots have not been swapped.
- Sub-identifiers match individual components.
Evidence checks
- The maker mark is in focus and oriented for inspection.
- Scale images show the relevant dimension without misleading perspective.
- Every stated condition issue has adequate visual context when practical.
- The page does not hide a known defect through cropping or correction.
- Group photographs and component photographs contain the same pieces.
Output checks
- Captions remain readable at actual page size.
- Images are not stretched or disproportionately scaled.
- Page order follows the current lot list.
- The filename includes a useful version or date.
- The PDF opens on a second device.
- Original photographs remain stored separately.
Ask a person who did not take the photographs to review several difficult lots. Fresh eyes are more likely to notice an ambiguous sequence, a missing component, or a caption that assumes undocumented knowledge.
Handle corrections without creating competing packets
Corrections become dangerous when revised pages circulate beside the original packet with nearly identical filenames. Use a simple version convention such as sale-code_proofs_2026-07-14_v02.pdf. Avoid calling a file final until the review is genuinely closed, and never use names like final-final-new.
Maintain a brief correction log. It can record that lot 247 received a replacement mark photograph, lot 251 was split into two lots, and lot 260 had its condition caption clarified. The log does not need specialized software; its purpose is to show what changed between packets.
When only one page changes, decide whether recipients can reliably replace it. For a small internal team, a replacement page may be sufficient. For external reviewers or a long packet with many annotations, issuing a complete revised PDF is safer because it establishes one authoritative version.
A practical standard for small teams
A useful proof-sheet standard should be strict about identity and flexible about aesthetics. Require stable lot IDs, boundary card photographs, predictable file sequences, honest condition images, legible detail frames, and versioned PDFs. Allow the layout, background, and number of images to vary with the object.
The payoff is not merely a tidier document. Proof sheets create a visible chain between the physical object and its catalog record. They help a remote specialist inspect the correct mark, let a coordinator catch missing components before publication, and give the photographer a clear list of replacement shots while the estate is still accessible.
Start with a modest template and test it on ten varied lots: a reflective object, a tall object, a grouped lot, a signed item, a damaged item, and several similar objects. Review the pages at normal size and under magnification. Adjust frame sizes and captions based on actual mistakes, then apply the standard to the rest of the sale.
A good auction proof sheet is not the page with the most photographs. It is the page that lets another person identify the lot, understand the available evidence, and spot what still needs attention without guessing.