Industrial Nameplate Photo OCR: A Field Guide for Legacy Equipment Registers
Turn difficult machinery nameplate photos into dependable equipment records with better lighting, perspective correction, OCR checks, and evidence-preserving file practices.
Industrial Nameplate Photo OCR: A Field Guide for Legacy Equipment Registers
A machinery nameplate may contain only a few lines of text, yet those lines can decide whether a maintenance team orders the correct bearing, identifies a hazardous voltage, finds a compatible manual, or distinguishes two nearly identical assets.
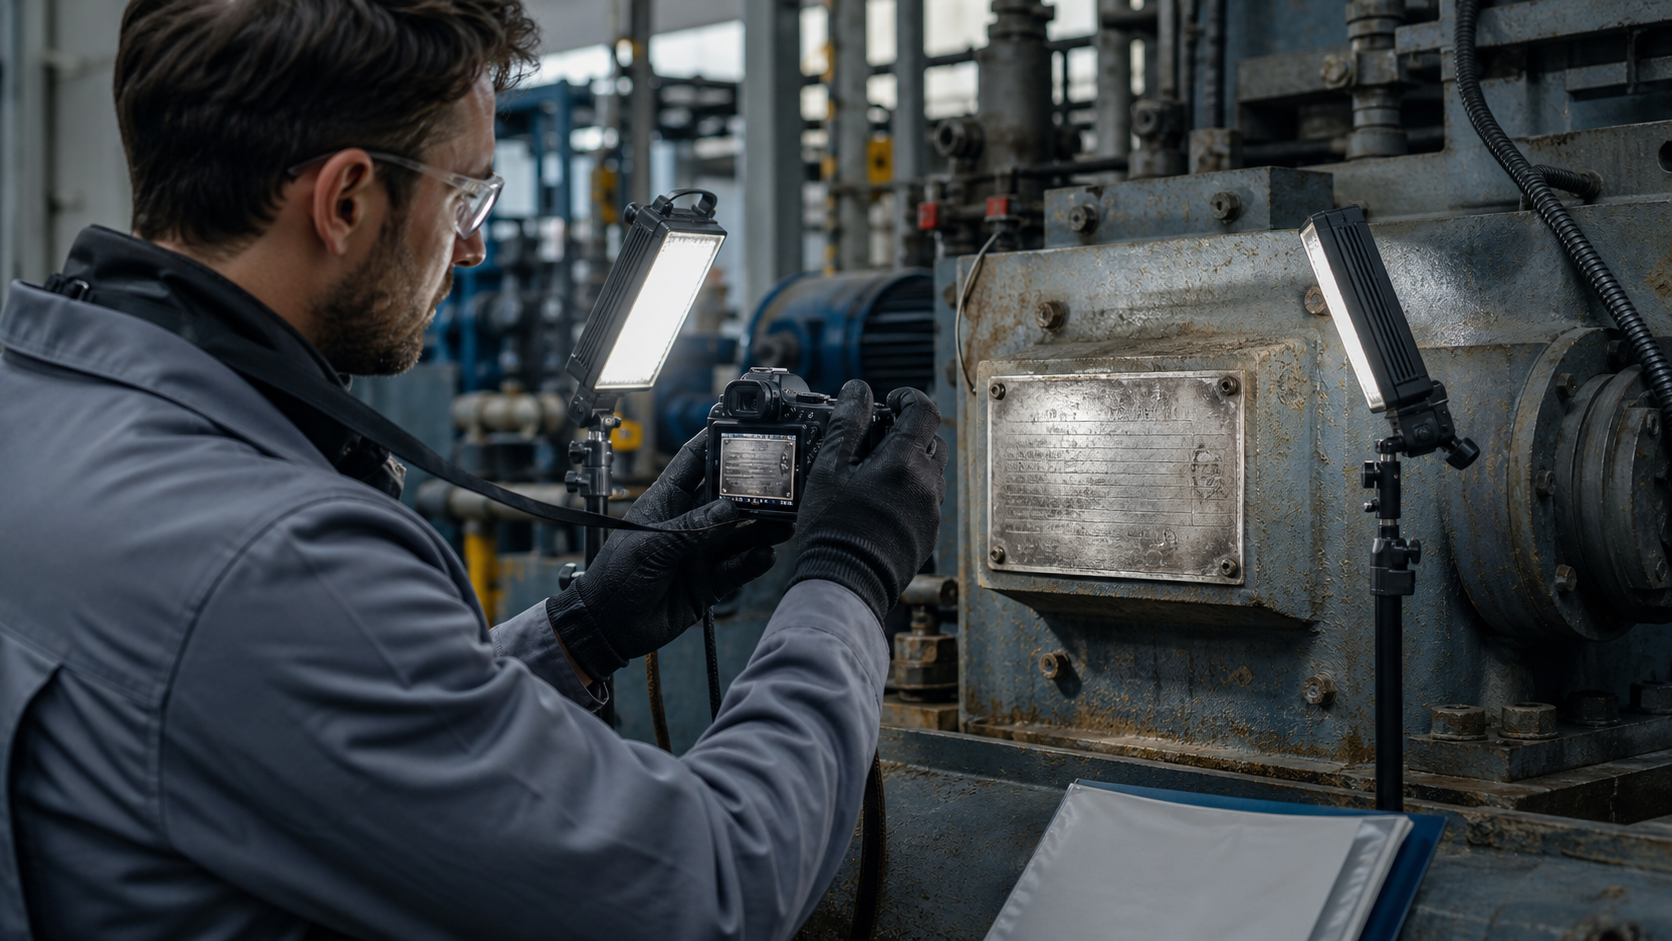
Unfortunately, legacy nameplates are unusually hostile to both cameras and optical character recognition. Their characters may be stamped rather than printed. Aluminum reflects nearby lights. Paint fills shallow engraving. Corrosion removes parts of serial numbers. Curved housings introduce distortion, while years of grime can turn an ordinary zero into something that resembles an eight.
The practical goal is therefore not simply to extract text. It is to create a defensible equipment record in which every important value can be traced back to visual evidence. This guide explains how to capture difficult plates, prepare OCR-friendly images, verify ambiguous characters, and store the result without losing the original context.
Why nameplate OCR fails in distinctive ways
Ordinary document OCR expects dark, flat characters on a light, evenly illuminated page. Industrial identification plates violate nearly every part of that assumption.
| Nameplate condition | What the camera records | Typical OCR error |
|---|---|---|
| Brushed aluminum | Bright directional streaks | Characters split into fragments |
| Stamped characters | Shadows instead of solid strokes | Missing or duplicated digits |
| Curved housing | Uneven scale and focus | Lines merge or bend |
| Corrosion pits | Random high-contrast marks | Extra punctuation and false letters |
| Painted engraving | Irregular stroke thickness | Confusion between 3, 8, 5, and 6 |
| Glossy laminate | Reflections of lamps or clothing | Entire words disappear |
| Embossed text | Contrast changes with light direction | Correct in one image, unreadable in another |
A single enhancement preset rarely handles all these conditions. Aggressive contrast may reveal engraving while making corrosion look like text. Heavy sharpening may clarify a model number but close the gap inside a 6. The most reliable approach combines deliberate capture, conservative image preparation, OCR, and human verification.
Decide what the register actually needs
Before photographing anything, define the fields that matter. Otherwise, an operator can produce a technically sharp image that omits the one identifier needed later.
A general equipment register might request:
- Asset or site identifier
- Manufacturer
- Model or type
- Serial number
- Manufacturing year or date code
- Electrical supply and phase
- Rated power, current, speed, pressure, or capacity
- Protection or enclosure rating
- Certification markings
- Plate location on the equipment
- Capture date and inspector initials
- Confidence or review status
Do not assume that every visible symbol should become a database field. A compact register is easier to verify than a transcript of every mark. Preserve the complete plate image so specialists can revisit secondary details later.
It also helps to classify fields by consequence. A serial number used only for searching old records may tolerate a provisional character. A voltage, pressure limit, or hazardous-area classification should never be accepted from uncertain OCR alone. Define which fields require a second reviewer or comparison with another source.
Capture context before the close-up
Start with an overview photograph showing the entire asset and its surroundings. Then take a medium view showing where the plate sits, followed by the close plate image.
This three-level sequence prevents a common failure: obtaining an excellent plate photograph that can no longer be matched confidently to a machine. This is particularly important in rooms containing several similar pumps, motors, switchgear cabinets, or air-handling units.
A useful capture set contains:
- A wide view of the asset in its installed location.
- A medium view connecting the nameplate to a recognizable part of the asset.
- A square-on close-up that fills most of the frame.
- One or more alternate-light close-ups for stamped or reflective characters.
- A location marker or asset tag when site rules permit it.
Keep the original sequence intact until the files are renamed. If dozens of assets are being documented, place a temporary job card in the first contextual frame rather than over the nameplate. Never cover permanent markings or safety information.
A repeatable capture setup for reflective metal plates
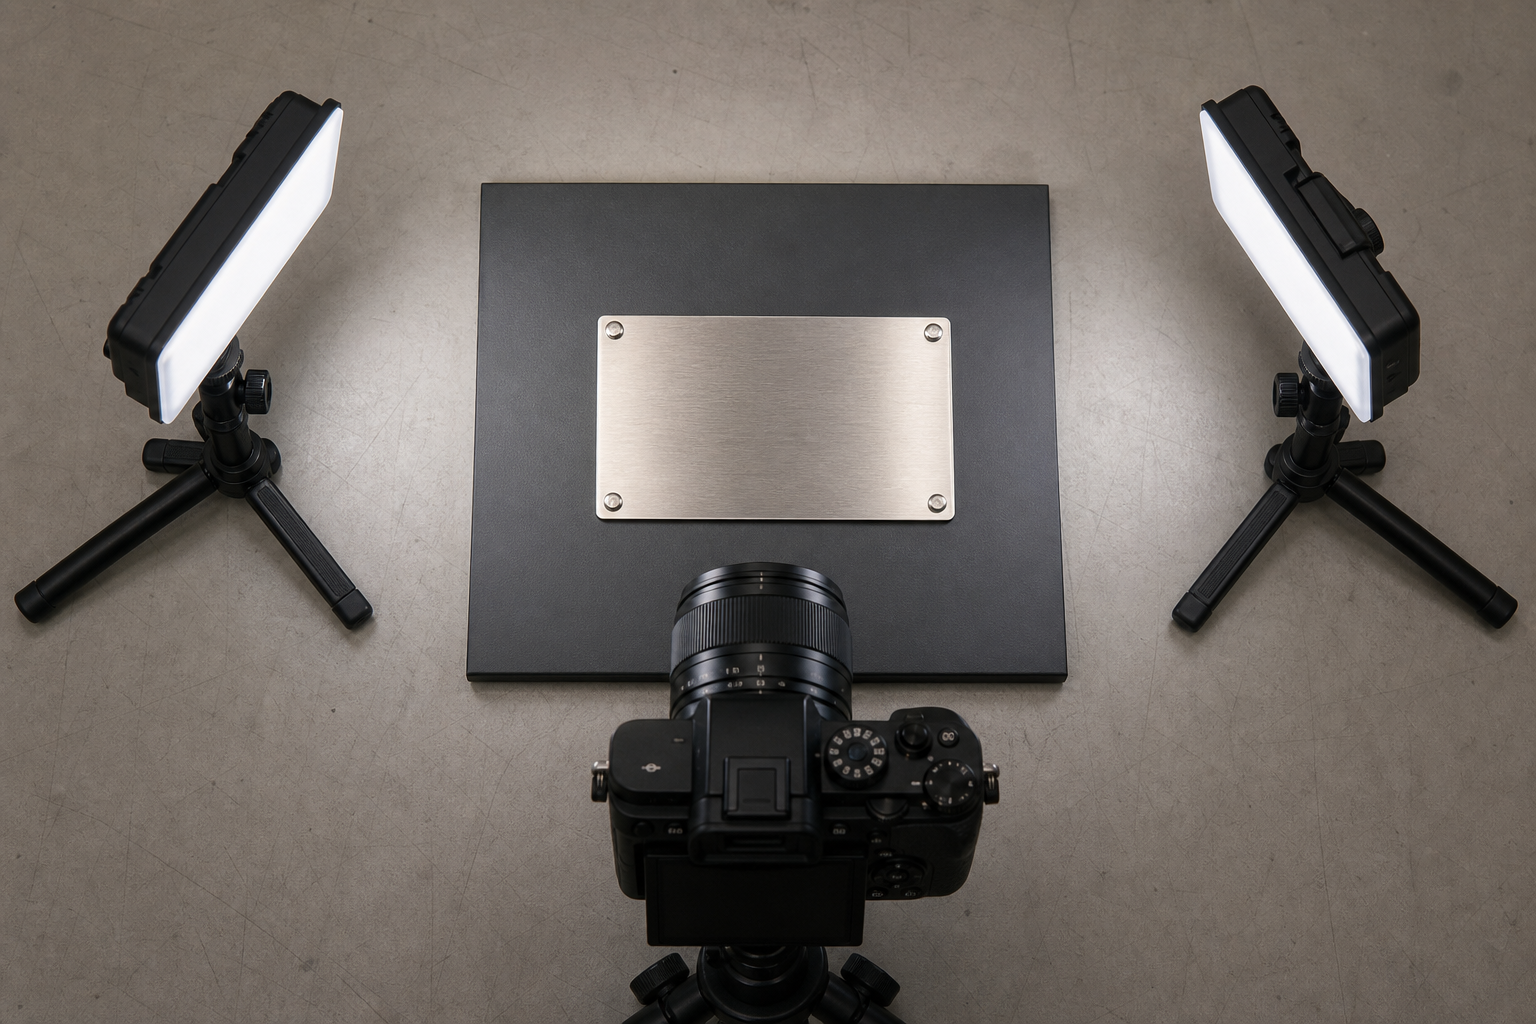
The best improvements happen before OCR. A modest phone camera with controlled lighting often beats an expensive camera pointed at a glaring plate.
Keep the camera square to the surface
Place the lens directly in front of the plate and make the sensor plane as parallel as possible. Check that opposite edges appear parallel in the preview. Perspective correction can repair modest convergence later, but it cannot fully restore characters that were too small or blurred at one edge.
Fill the frame while leaving a narrow border around the plate. That border helps with perspective correction and proves that no line was accidentally cropped. Use the main rear camera rather than a low-resolution digital zoom. If access is restricted, capture a wider sharp image and crop it afterward.
Stabilize the camera
Low light encourages long exposures, and tiny movements soften stamped strokes. Brace the phone against a stable support, use a small tripod, or enable a short timer so pressing the shutter does not move the camera. Capture several frames because vibration from operating machinery can affect only part of a burst.
Never place yourself, a tripod, or loose equipment where it creates an operational hazard. Follow the site's access, isolation, and personal protective equipment rules. Image quality is not a reason to bypass a guarded area.
Move reflections instead of fighting them in software
For reflective plates, use two diffused lights positioned to the left and right at shallow, opposing angles. Adjust them until neither lamp appears as a bright patch in the camera preview. A sheet of white diffusion material made for photography can soften small lights, provided it is kept away from hot surfaces and moving equipment.
If the text is stamped or embossed, take additional images with light coming predominantly from different directions. Side lighting creates tiny shadows that reveal character shapes. A digit hidden under left-side illumination may become obvious when lit from the right.
Avoid relying on the phone's direct flash. It sits close to the lens axis and commonly produces a central reflection. If direct flash is the only option, photograph from the most square position available and take several slightly varied exposures.
Include a neutral reference when color matters
Nameplate transcription rarely requires precise color, but color can distinguish faded warning bands, conductor legends, or plate families. Include a small neutral gray reference near the plate in one supplementary frame. Do not cover any characters. Remove the reference for the primary evidence image.
Clean without erasing evidence
Physical cleaning can improve readability, but it can also destroy fragile paint, corrosion patterns, or residue relevant to an inspection. Only clean a plate when site procedures allow it.
Begin with the least invasive option: remove loose dust with a clean, soft brush or dry air approved for the setting. Do not apply solvents, oils, abrasives, chalk, marker, or metal polish merely to improve a photograph. These substances can alter the plate and may be incompatible with the equipment environment.
If an authorized technician performs cleaning, preserve a before-and-after pair. The before image documents the original condition; the after image may be better for transcription. Record that cleaning occurred rather than silently replacing the evidence.
Prepare an OCR-friendly derivative
Retain the untouched original and make enhancements on a copy. This distinction matters because image processing changes pixels and can accidentally change how a character appears.
Correct geometry first
Crop around the plate with a small border, then correct perspective so the plate becomes rectangular. Rotate text lines until they are horizontal. Geometry should be corrected before resizing or sharpening, since later operations otherwise amplify distorted strokes.
When the source is large enough, the image resize tool can create a practical derivative for OCR or review. Upscaling does not invent missing detail, but moderate enlargement can make character boundaries easier for an OCR engine to sample. Avoid repeated resizing, which compounds interpolation artifacts.
Test color and grayscale versions
A grayscale copy often suppresses distracting color variation. However, do not discard the color version: rust, old paint, and colored printing may separate more clearly by color than by brightness.
Create a small comparison set rather than searching for one perfect edit:
- Original color crop
- Neutral grayscale crop
- Mild high-contrast grayscale crop
- Alternate-light crop
If file compatibility is a problem, use Convert Image to make a standard PNG or JPEG derivative while preserving the camera original separately. PNG is useful for intermediate crops and annotations because repeated saves do not introduce JPEG block artifacts.
Apply contrast locally and conservatively
Global contrast can erase faint strokes in bright regions while making dark regions too dense. Prefer gentle local adjustments. Watch small counters and gaps inside characters such as 0, 6, 8, 9, B, and R. If a gap closes after editing, the derivative is no longer trustworthy for that character.
Sharpening should clarify existing edges, not create halos. Inspect at 100 percent magnification. Bright and dark outlines around every stroke indicate excessive sharpening. Noise reduction also requires restraint because fine engraving may be mistaken for noise.
An AI photo editor can help produce a clearer viewing copy, but generative reconstruction should not be treated as evidence. Any tool capable of filling, rebuilding, or interpreting missing visual material can make a plausible character that was not present in the source. Use such a copy for orientation only, label it clearly, and verify every extracted value against non-generative images.
Compress only after verification
Keep a high-quality master for inspection. A smaller sharing copy can be made with Compress Image, but check thin strokes and punctuation after compression. Serial-number hyphens, decimal points, degree symbols, and the diagonal in a 7 are often the first details to degrade.
Run OCR as a comparison, not a verdict
Submit more than one derivative to OCR. The Image OCR tool can provide a starting transcript, but the most valuable signal is agreement across independent views.
For example, imagine three variants produce these strings:
| Source | OCR result |
|---|---|
| Neutral grayscale | MTR-1086-SB |
| Side-lit image | MTR-1O86-S8 |
| Mild contrast | MTR-1086-S8 |
The stable portions are MTR-1 and 86-S. The ambiguous positions are the third numeric character and final character. OCR frequency alone does not settle them. Return to the original close-ups, compare character shapes elsewhere on the same plate, and consult a manual or existing record if available.
Capture OCR output exactly before normalizing it. If the engine produces 230V and the plate appears to show 230 V, preserve the visible formatting in the raw transcript. A normalized database field can be created separately.
Resolve ambiguous characters systematically
Serial and model identifiers frequently mix letters and digits. Common confusions include:
0andO1,I, andL2andZ5andS6,8, andB8andBGand6- Hyphen, slash, and shallow scratch
- Decimal point and corrosion pit
Use these checks in order:
- Compare alternate-light photographs.
- Inspect the unsharpened original at native resolution.
- Compare the uncertain character with repeated characters on the same plate.
- Check whether the manufacturer uses a known model-number pattern.
- Compare the asset with purchase records, manuals, or service reports.
- Ask a second reviewer to inspect the images without seeing the first interpretation.
- Record the character as uncertain if evidence remains insufficient.
Do not silently force a value into the expected pattern. If a manufacturer usually uses six digits but the plate appears to contain a letter, retain the discrepancy for investigation.
A useful notation is to keep three separate values: the raw OCR string, the reviewed transcription, and a normalized register value. Add a confidence field such as confirmed, probable, or unresolved. This prevents a cleaned database value from being mistaken for a direct reading.
Build an evidence-preserving file set
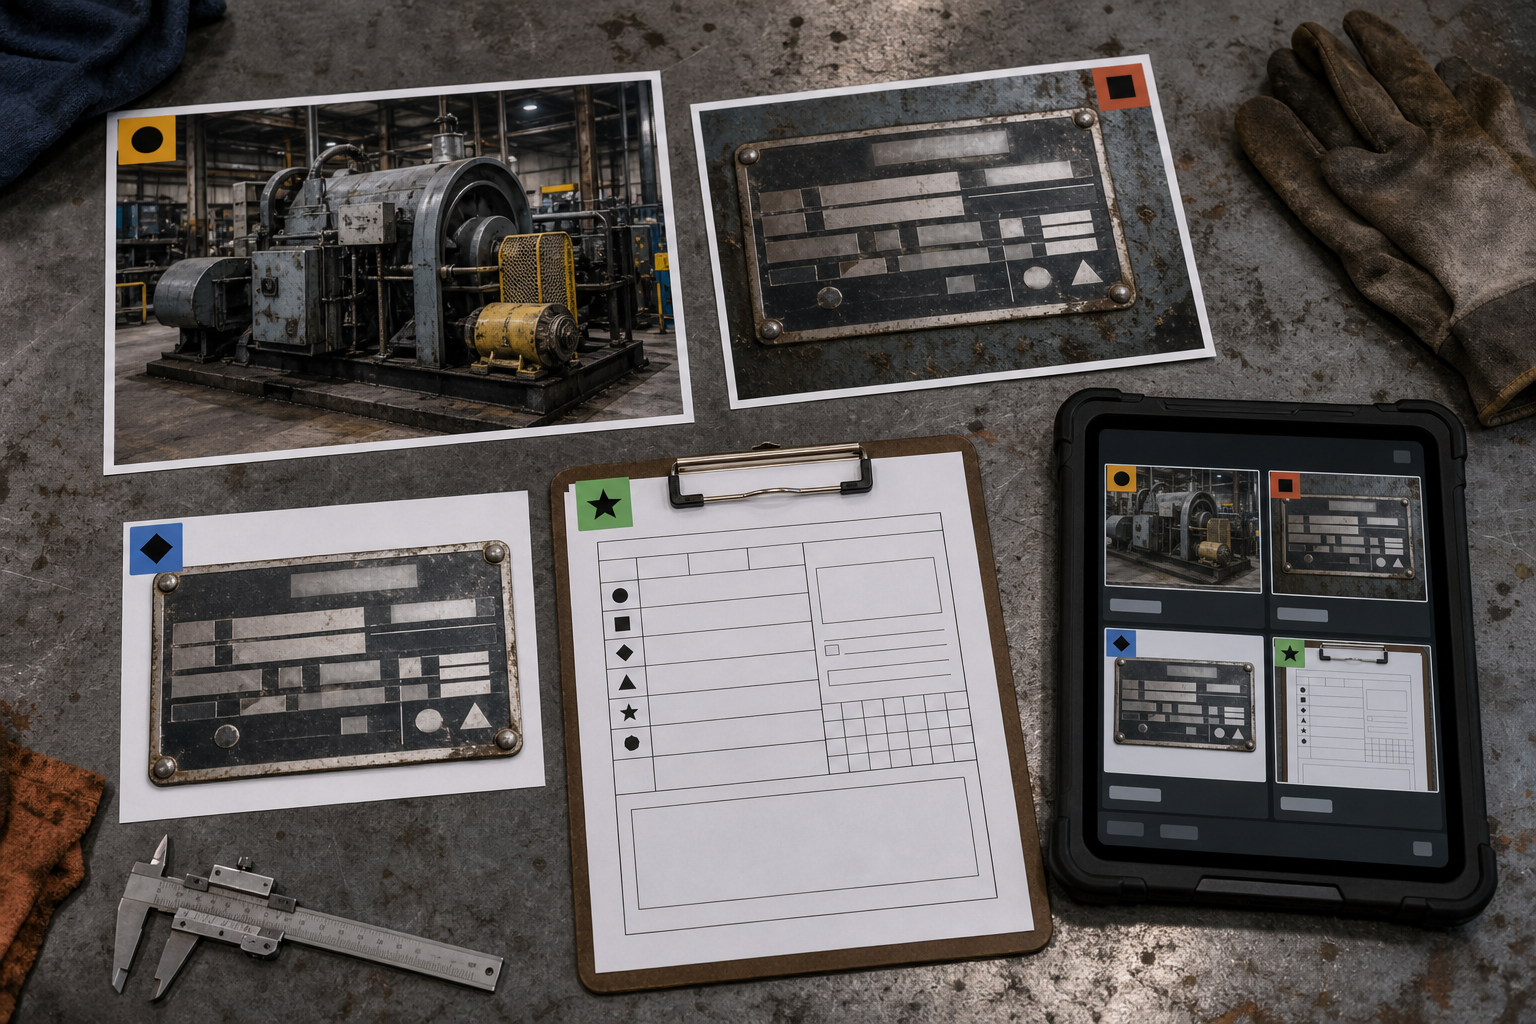
Each asset should have a compact package that another person can understand without relying on memory. A sensible structure is:
- Original overview photograph
- Original location photograph
- Original nameplate close-ups
- Corrected plate crop
- OCR transcript
- Reviewed field record
- Notes about cleaning, lighting, or uncertainty
Use stable filenames that connect every file to the same asset. For example:
SITE3-AHU-014_overview_2026-07-27.jpg
SITE3-AHU-014_plate_original_01.jpg
SITE3-AHU-014_plate_sidelight-right_02.jpg
SITE3-AHU-014_plate_corrected.png
Avoid placing the serial number in every filename until it has been verified. An early OCR mistake can otherwise become embedded across folders and exported records.
For a portable review packet, combine selected images and the inspection sheet with Image to PDF. Keep the original image files as well; a PDF is convenient for review but may resize or recompress photographs. Put the overview before the close-up so the relationship between asset and plate remains clear.
Use a two-pass review for consequential fields
A reliable review separates capture quality from transcription accuracy.
Pass one: image adequacy
The first reviewer checks whether:
- The correct asset is identifiable.
- The entire plate is visible.
- Text is in focus across the frame.
- Reflections do not cover critical fields.
- At least one alternate-light image exists when engraving is faint.
- Originals are present and distinguishable from edited copies.
If these conditions are not met, recapture is usually better than elaborate enhancement.
Pass two: field verification
The second pass compares each register value directly with the images. Review high-consequence fields character by character. Reading the value aloud in grouped segments can reduce skipped characters. For example, review a serial as A7K / 04B / 1836 rather than as one long string.
When two people review the same field, have the second person transcribe independently before seeing the first result. Independent agreement is more meaningful than a reviewer merely approving a displayed value.
A compact decision table for difficult plates
| Situation | Best next action | Avoid |
|---|---|---|
| Central white glare | Move lights off-axis and recapture | Trying to recover a fully clipped area |
| Faint stamped digits | Capture from two side-light directions | Treating one enhanced image as definitive |
| Plate on curved housing | Increase distance and use optical reach | Extreme close-up with uneven focus |
| Heavy corrosion | Preserve several exposures and flag uncertainty | Painting or tracing characters |
| Tiny but sharp text | Make one moderate enlarged derivative | Repeated upscaling and sharpening |
| Blurred text | Stabilize and recapture | Assuming AI reconstruction restores evidence |
| Conflicting OCR strings | Compare originals and external records | Selecting the most common output automatically |
| Safety rating unclear | Escalate for specialist verification | Entering a guessed value into the register |
Field checklist
Before leaving the asset location, confirm the following:
- The overview identifies the correct machine.
- The plate-location image connects the plate to that machine.
- The close-up includes every edge and line.
- Critical characters are sharp at full resolution.
- No reflection obscures a model, serial, rating, or certification field.
- At least one alternate angle or lighting direction was captured.
- The asset identifier was recorded separately.
- Files were checked before moving to the next asset.
Before importing data, confirm:
- Originals are preserved unchanged.
- Edited derivatives are clearly labeled.
- OCR output is stored separately from reviewed text.
- Ambiguous characters are flagged rather than guessed.
- Consequential ratings received the required review.
- The register links back to the evidence package.
- Any physical cleaning or unusual capture condition is documented.
What a dependable result looks like
A strong nameplate record is not necessarily a beautiful photograph or a flawless block of OCR text. It is a small chain of evidence: the asset can be identified, the plate can be located, important characters can be inspected in more than one view, edits are distinguishable from originals, and uncertainty remains visible until it is resolved.
That discipline is especially valuable with legacy equipment. Old records are often incomplete, manufacturers may no longer exist, and one damaged plate may be the closest thing the organization has to a primary source. Careful capture and conservative processing protect that source while still making its contents searchable and useful.
Treat OCR as an assistant for transcription, not as the authority. When lighting, geometry, file structure, and review rules are designed together, even scratched and reflective nameplates can become dependable entries in an equipment register.