Insurance Photo Evidence Workflow: Clean, Resize, and Package Claim Images Without Losing Detail
A practical workflow for preparing insurance claim photos: choose the right shots, clean distractions, resize safely, preserve readable detail, and package images for adjuster review.
Insurance Photo Evidence Workflow: Clean, Resize, and Package Claim Images Without Losing Detail
Insurance claim photos have a strange job. They need to be small enough to upload through a portal, clear enough for an adjuster to inspect, organized enough to tell a story, and untouched enough that nobody wonders whether the image was manipulated. That combination is where many otherwise careful claim packets fall apart.
A contractor may upload twenty oversized phone photos with duplicate angles. A homeowner may crop too aggressively and remove the context that proves where the damage occurred. A facilities manager may compress everything into a blurry PDF because the email attachment limit is too small. None of these mistakes are dramatic, but they create friction: follow-up questions, slower review, and sometimes a request to resubmit the same evidence in a cleaner format.
This guide is a practical workflow for preparing insurance photo evidence before it leaves your hands. It is useful for property damage claims, appliance failures, shipment damage, maintenance incidents, and small business documentation. It does not cover legal strategy or policy interpretation. The goal is simpler: make your visual evidence easier to understand while keeping the original facts intact.
Why Claim Photos Need a Workflow
Most people treat claim photos like ordinary images: take the picture, upload it, move on. That works when the issue is obvious and the upload system is forgiving. It breaks down when there are multiple damaged areas, mixed lighting, tiny serial numbers, reflective surfaces, or a strict file-size limit.
A good workflow solves four problems at once.
First, it preserves context. A close-up crack in a wall is more useful when paired with an overview photo that shows which wall, room, or fixture it belongs to. Second, it keeps details readable. Labels, model numbers, dates, water lines, and impact marks often matter more than the overall scene. Third, it controls file size without turning the evidence into mush. Fourth, it creates an order that a reviewer can follow without guessing.
The key is to separate evidence preparation from image decoration. You are not trying to make the damage look more dramatic. You are trying to make the existing damage easier to inspect.
The Evidence Photo Set: What to Capture Before Editing
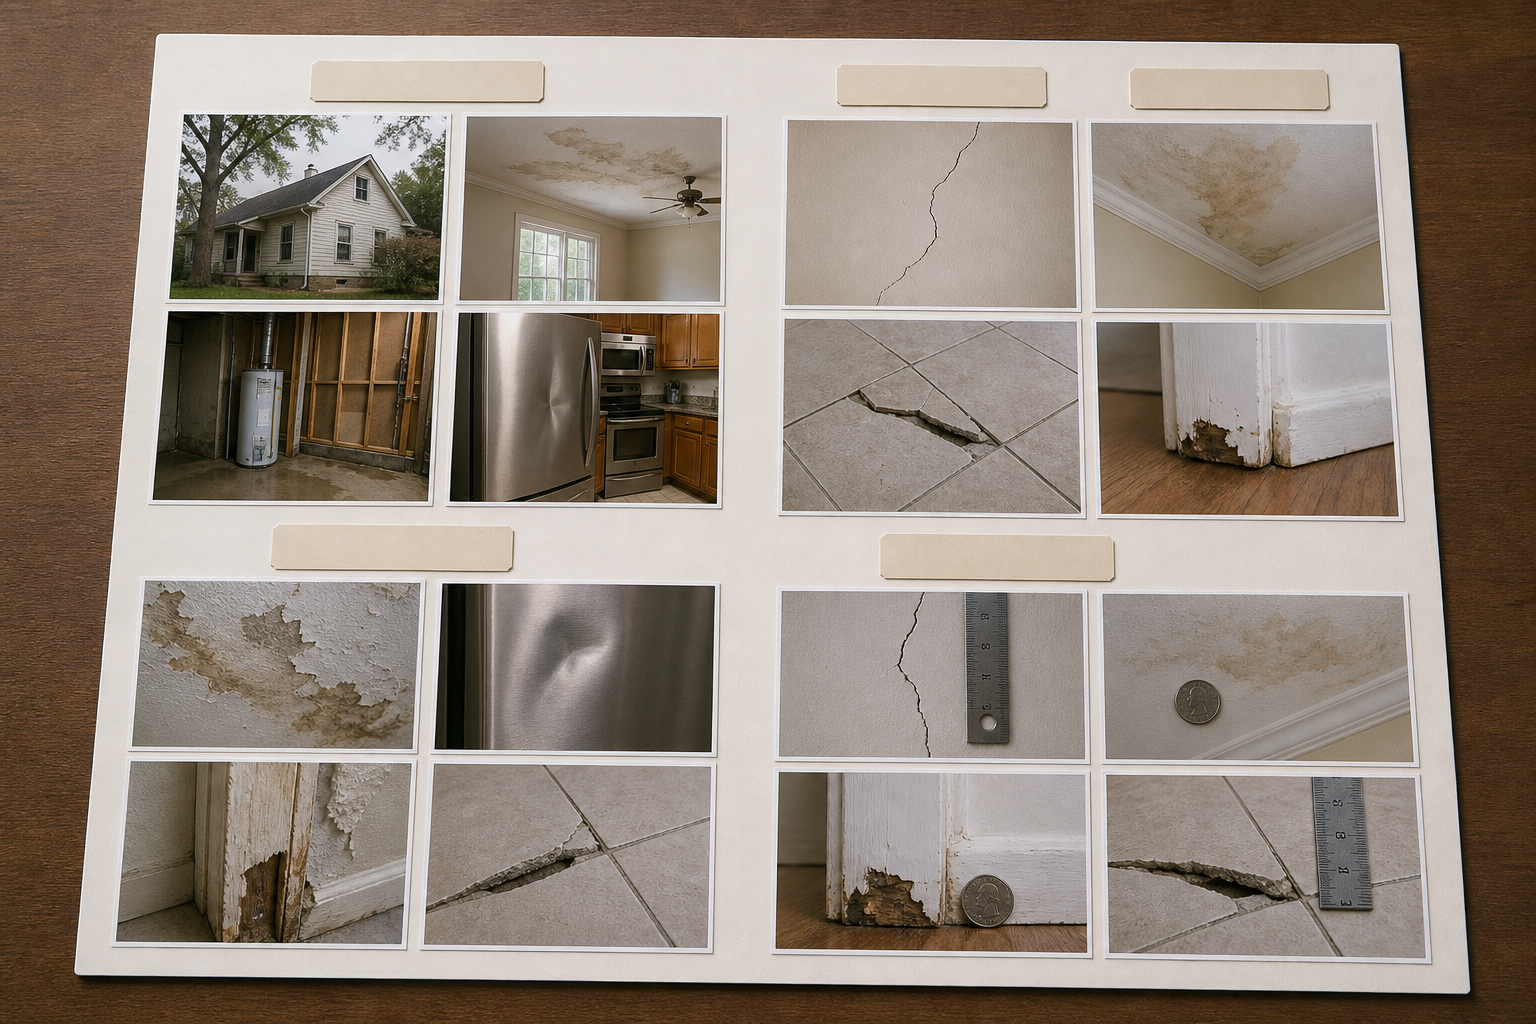
Editing cannot rescue a weak photo set. Before resizing, compressing, or packaging anything, gather a complete sequence of images. For each damaged item or area, aim for four useful views.
| Photo type | Purpose | Common mistake |
|---|---|---|
| Overview | Shows the location and surrounding context | Standing too close so the adjuster cannot identify the area |
| Medium shot | Connects the damaged area to the object or surface | Cropping out nearby reference points |
| Close-up | Shows the damage detail | No scale reference, poor focus, glare |
| Identifier | Captures model number, serial number, receipt, label, or asset tag | Blurry text or reflections |
For property damage, take the overview first. Show the room, exterior wall, ceiling section, floor area, or vehicle panel. Then move closer. The sequence should answer: where is it, what is it, what happened, and how can someone verify the item?
For appliance or equipment claims, include the asset tag, manufacturer plate, control panel, damaged component, and a wider shot showing the appliance in place. If there is water, soot, corrosion, impact damage, or warping, photograph it from multiple angles because one light direction can hide important texture.
For shipment damage, capture the outer packaging before opening further, the shipping label if appropriate, the internal packaging, the damaged item, and any broken pieces. Do not clean up the scene before documenting it. You can make a tidy packet later, but the first photos should show the actual condition.
A simple naming pattern helps even before you start editing:
kitchen-ceiling-overview-01.jpgkitchen-ceiling-waterline-02.jpgdishwasher-serial-plate-03.jpgshipping-box-corner-impact-04.jpg
The names do not need to be elegant. They need to be understandable when viewed outside your camera roll.
Keep Originals Untouched
Before making any working copies, create a folder named originals and put the unedited photos there. Do not crop, rotate, brighten, or compress those files. If a portal or adjuster later asks for original images, you will have them.
Then create a second folder named prepared or upload-ready. All edits happen there. This small discipline prevents the most common evidence mistake: accidentally overwriting the only high-resolution version of a photo.
A clean folder structure might look like this:
claim-photos/
  originals/
  prepared/
  packet/
If you are documenting a larger incident, add subfolders by room, item, or date. Keep the structure boring. Boring folders are easier to audit when the claim has been open for three weeks and someone asks for one specific photo again.
Make Only Evidence-Safe Edits
For claim documentation, every edit should have a defensible purpose. Rotate a sideways image. Crop empty space while preserving context. Adjust exposure so existing details are visible. Resize a copy for upload. Compress a copy so the portal accepts it. Convert formats when required.
Avoid edits that change the meaning of the scene. Do not remove debris that was present. Do not clone out objects. Do not intensify stains, cracks, or burn marks. Do not apply dramatic filters. If you need to obscure private information, make that action obvious and keep an original copy separately.
A practical rule: if an edit helps the reviewer see what the camera already captured, it is usually appropriate. If an edit changes what was captured, it is not appropriate for the evidence copy.
For careful cleanup of distracting but non-evidentiary issues, use restraint. For example, if a phone photo is slightly dark, a mild brightness adjustment can help. If a document label is skewed, rotating it is fine. If an image has a large unrelated background area, cropping it may improve focus. But when in doubt, include both the original and the prepared version in your working folder.
Crop for Context, Not Drama
Cropping is useful when the subject is lost in a wide phone photo, but aggressive cropping can remove evidence. If you crop a close-up of a cracked tile so tightly that no surrounding tile pattern remains, the reviewer may not know which surface it belongs to. If you crop a dented appliance panel but remove the control panel and model badge, you may make the image harder to verify.
Use a two-photo approach instead. Keep one medium shot that shows context, and create one close-up that shows detail. The close-up can be tighter because the medium shot anchors it.
Good crop decisions:
- Remove empty ceiling or floor space while keeping the damaged area and nearby reference points.
- Crop a serial plate so the text is readable, but keep enough border to show it is attached to the item.
- Straighten a receipt or label image so OCR or human review is easier.
- Keep a scale object visible if it was included in the shot.
Weak crop decisions:
- Cutting out the surrounding object completely.
- Cropping away the edge where water, impact, or smoke damage begins.
- Removing timestamps, labels, or reference markers that explain the image.
- Creating one isolated damage close-up with no companion overview.
If the image dimensions are inconsistent after cropping, resize the working copies with a tool such as Resize Image. Resize for readability, not just smaller numbers. A 1600- to 2400-pixel long edge is often a practical upload copy range for visual inspection, but always follow the requirements of the specific portal or recipient when they provide them.
Preserve Readable Text and Fine Detail
Claim photos often contain small text: model numbers, appliance plates, shipping labels, invoices, dates, safety stickers, meter readings, and product identifiers. These areas are fragile. Heavy compression can make them unreadable even when the overall photo still looks acceptable.
Before compressing a batch, identify the images where text matters. Treat them separately from general scene photos. A wide shot of a room can tolerate more compression than a serial number plate. A close-up of a crack in drywall can tolerate less compression if the texture of the crack matters.
Use this decision table when preparing upload copies:
| Image content | Priority | Suggested handling |
|---|---|---|
| Serial plate, receipt, label, meter | Text readability | Crop gently, resize moderately, compress lightly |
| Water line, crack, corrosion, impact mark | Texture detail | Avoid heavy compression and over-sharpening |
| Room overview or exterior context | Scene clarity | Resize and compress more aggressively if needed |
| Duplicate angles | Packet simplicity | Remove weaker duplicates before compression |
| Dark or reflective image | Visibility | Retake if possible; adjust only enough to reveal captured detail |
If you need to extract text from labels or receipts for your own notes, try Image OCR. OCR output should not replace the image evidence, but it can help you name files, build an item list, or verify that serial numbers were captured clearly.
Resize Before Compressing
A modern phone photo may be 3000 to 6000 pixels wide and several megabytes in size. Uploading originals can be slow, and some portals reject large files. The mistake is jumping straight to aggressive compression. Compression alone may create artifacts while still leaving the image larger than necessary.
Resize first, then compress. Resizing reduces pixel dimensions; compression reduces encoded file weight. Together, they produce a cleaner result than crushing a huge original with maximum compression.
A practical sequence:
- Duplicate the original into the prepared folder.
- Rotate and crop only when needed.
- Resize the working copy to a reasonable long edge.
- Compress the resized copy.
- Open the result and zoom into the important area.
For general evidence photos, Compress Image can help reduce file size after resizing. Check the important details after compression, especially text, edges, stains, cracks, and reflective areas. If the image looks blocky around the evidence, use lighter compression or a larger resized copy.
Do not judge quality only from a thumbnail. Many bad claim images look fine in a grid view and fail when opened full size.
Choose the Right Format for Upload
Most claim portals accept common image formats such as JPEG or PNG, but requirements vary. Use the format that fits the content and the destination.
JPEG is usually appropriate for ordinary photos: rooms, vehicles, packages, appliances, walls, and objects. It keeps file size low and is widely accepted.
PNG can be useful for screenshots, scanned documents, or images with sharp interface text. It may be larger than JPEG for camera photos.
PDF is useful when you want to send a structured packet instead of loose images. It is also helpful when a recipient wants one attachment rather than twenty files.
WebP can be efficient, but some claim portals and email workflows still prefer JPEG, PNG, or PDF. If compatibility matters, use the boring format.
When you need to convert a prepared copy from one image format to another, use Convert Image. Keep the original format in your originals folder and convert only the upload-ready copy.
Handle Redaction Without Creating Confusion
Insurance evidence sometimes includes private information: home addresses, license plates, faces, account numbers, email addresses, or unrelated documents visible in the background. Redaction may be appropriate, but it should be done carefully.
Use obvious redaction for information that should not be shared. A clean solid block over an unrelated account number is easier to understand than a blurred patch that looks like a photo defect. Do not redact information that is necessary to evaluate the claim, such as an item model number, shipment tracking label, or location marker, unless you have a clear reason and a separate unredacted copy available for the appropriate recipient.
Keep a note of what was redacted and why. The note can be as simple as redacted unrelated bank account number visible on receipt. This helps if someone asks why two versions of a file exist.
For visual cleanup and careful edits, AI Photo Editor can be useful for creating presentable supporting images, but claim evidence should stay conservative. Avoid generative changes to the damaged area itself. When evidence integrity matters, use AI edits only for non-evidentiary presentation copies, not the primary proof image.
Build a Review Packet That Opens Cleanly
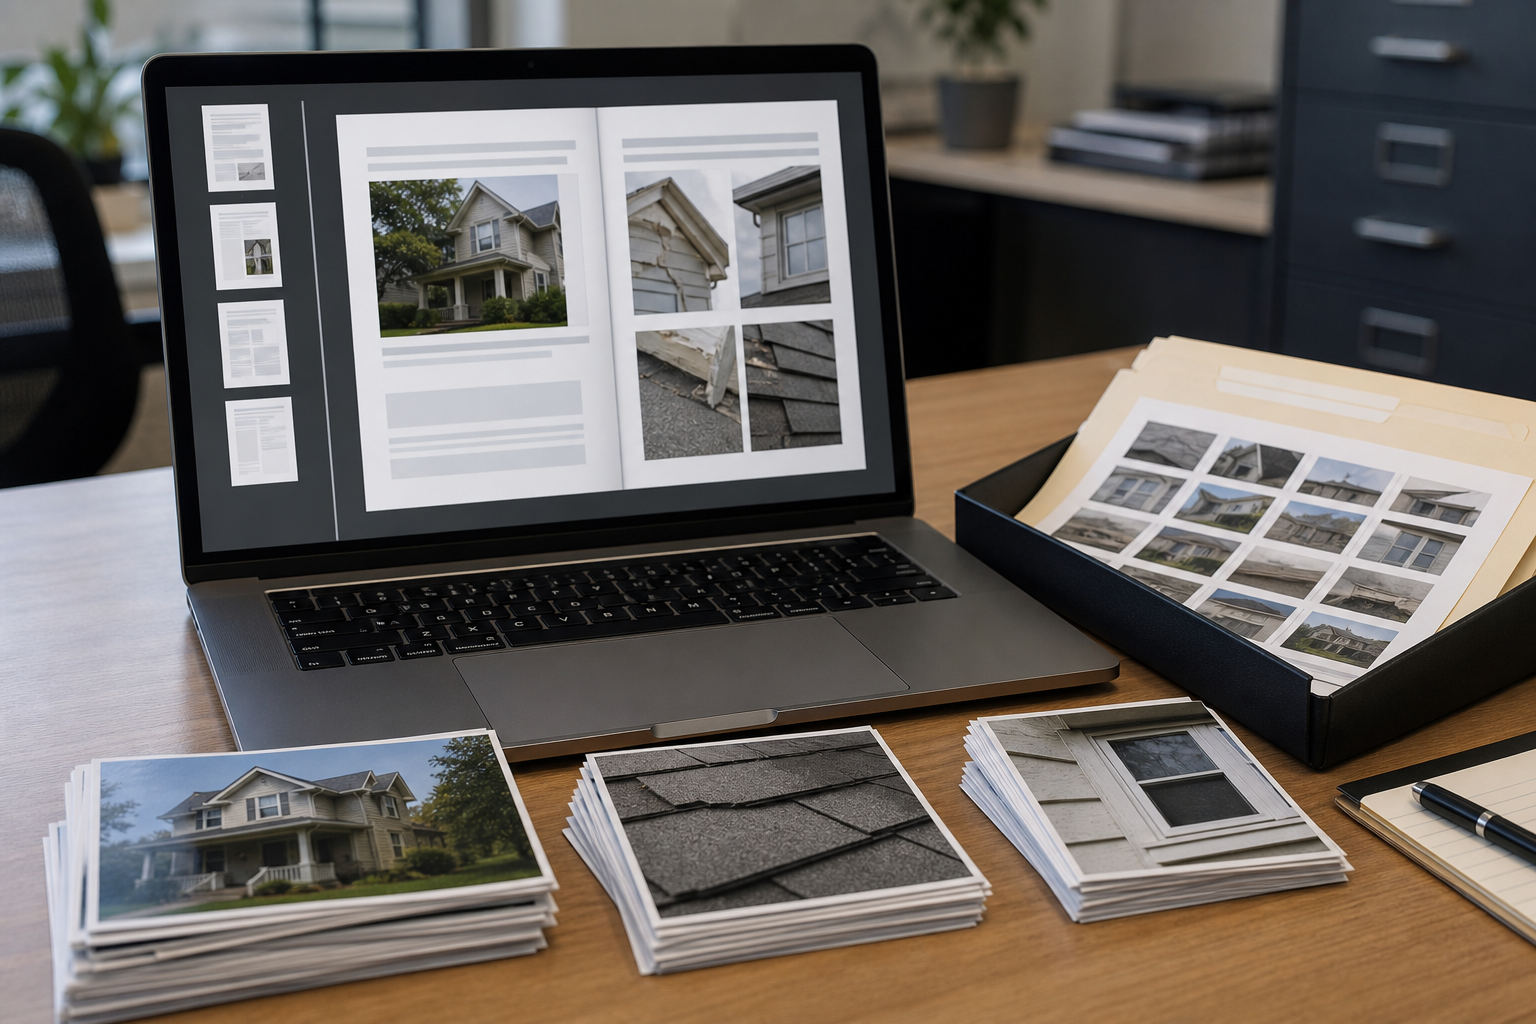
Loose image uploads are fine when the portal expects them. But for email handoff, contractor coordination, internal records, or adjuster review, a single PDF packet can be easier to follow.
A good evidence packet has a simple order:
- Overview photos first.
- Medium shots grouped by room, item, or package.
- Close-ups immediately after their related context image.
- Identifier photos near the item they verify.
- Receipts, labels, or supporting documents at the end.
If you convert images into a PDF, avoid placing too many small photos on one page when detail matters. A contact-sheet layout is useful for quick scanning, but not for reading serial plates or inspecting damage texture. Use larger image placement for important evidence.
You can use Image to PDF to package prepared images into a document. If you have multiple PDFs from contractors, receipts, or inspection notes, PDF Merge can help combine them into one review copy.
Before sending, open the PDF and check three things:
- The first page makes the incident or item easy to understand.
- The close-ups are large enough to inspect.
- The file size is acceptable for the destination.
If the PDF is too large, compress the source images first rather than repeatedly exporting the PDF at lower quality. Repeated PDF compression can make fine image details degrade faster than expected.
A Practical End-to-End Workflow
Here is a complete workflow you can reuse for a small claim packet.
Start by collecting the originals. Move the camera photos into an originals folder and do not edit them. Remove obvious accidental shots from the prepared set, but keep them in originals if they were part of the capture session.
Next, select the evidence sequence. For each damaged item or area, choose one overview, one medium shot, one close-up, and one identifier image if available. If two images show the same thing, keep the sharper one unless the second angle reveals important texture or context.
Then prepare working copies. Rotate sideways photos. Crop only to improve focus while preserving context. Resize large photos to upload-friendly dimensions. Compress general scene photos more than detail-critical photos. Convert formats only when the portal or recipient requires it.
After that, inspect the results. Open each prepared file. Zoom into the damaged area and any relevant text. If a label is unreadable after compression, go back to a larger or less-compressed copy. If a close-up lacks context, add the medium shot next to it in the packet.
Finally, package for the destination. If the portal wants individual uploads, upload the prepared image files in order. If the reviewer wants a document, build a PDF packet and keep the source images available. Store the final packet in a packet folder along with any notes you used to prepare it.
File Naming That Reduces Follow-Up Questions
File names are not decoration. They are part of the workflow. A reviewer may download your files, forward them, or compare them to notes. Names like IMG_4821.jpg force everyone to open every file. Names like garage-door-impact-closeup-03.jpg carry useful context.
Use a consistent pattern:
location-item-view-number.extExamples:
basement-wall-waterline-overview-01.jpg
basement-wall-waterline-closeup-02.jpg
washer-serial-plate-03.jpg
front-door-frame-crack-medium-04.jpg
Keep names short enough to scan. Avoid special characters that may cause upload issues. Use lowercase letters, numbers, and hyphens. If the claim has multiple dates, add the date at the beginning in YYYY-MM-DD format.
For larger packets, number files in the order you want them reviewed:
01-living-room-overview.jpg
02-living-room-ceiling-stain-medium.jpg
03-living-room-ceiling-stain-closeup.jpg
04-roof-exterior-overview.jpg
This helps when a portal lists uploads alphabetically.
Quality Control Checklist Before Upload
Run through this checklist before submitting or sending the packet.
- Originals are stored separately and untouched.
- Every close-up has a related context image.
- Important text is readable after compression.
- File names explain location, item, and view.
- Duplicate or weak images were removed from the prepared set.
- Private unrelated information is redacted only where appropriate.
- The upload copies meet the recipient's size and format requirements.
- The final PDF, if used, opens correctly and shows images in the intended order.
- The prepared folder contains only the files you plan to submit.
The checklist takes a few minutes, but it catches the problems that usually trigger resubmission: unreadable labels, missing context, oversized uploads, and confusing file order.
Common Mistakes to Avoid
The most common mistake is sending too many photos without a sequence. More evidence is not always clearer evidence. Thirty images of the same damaged corner can be less useful than six images ordered from overview to close-up.
Another mistake is over-compressing the entire batch. If one portal limit pushes you toward smaller files, compress scene photos first and protect detail photos. Serial plates, receipts, and close-up texture images deserve more pixels and less compression.
A third mistake is editing for visual impact. Claim photos should be clear, not dramatic. Oversaturated colors, heavy sharpening, and strong contrast can make evidence look less trustworthy even when the underlying damage is real.
Finally, do not rely on the PDF packet as your only archive. Keep the prepared images and the originals. A PDF is a delivery format; the originals are your reference point.
When to Retake Instead of Repair
Sometimes the best edit is a retake. If an image is badly out of focus, no resizing or compression setting will restore the missing detail. If glare hides a serial number, retake from an angle. If a dark photo hides water staining, add light and capture the area again. If a close-up has no scale, take a second photo with a ruler, coin, or other appropriate reference object where allowed.
Retake when:
- The important text cannot be read at full size.
- The damage is hidden by glare, shadow, or motion blur.
- The image shows detail but no location context.
- The photo was taken after cleanup and no longer shows the original condition.
- Compression artifacts appear around the evidence even at moderate settings.
Retakes are especially valuable before repairs begin. Once an item is moved, cleaned, patched, or discarded, the original visual condition may be impossible to recreate.
Final Working Pattern
A reliable insurance photo workflow is not complicated. Capture context, protect originals, prepare conservative copies, resize before compressing, check readability, and package the images in an order that makes sense.
The best claim photo packet feels almost boring. The reviewer can see where the damage is, what it affects, how severe it appears, and which item or location it belongs to. No one has to guess why a close-up matters. No one has to request a clearer serial number. No one has to download a giant folder only to find duplicate phone images.
That is the real value of preparation: not prettier images, but fewer avoidable questions. When your evidence is organized, readable, and easy to open, the review process has a much better chance of focusing on the claim itself instead of the files around it.