Laminated Safety Card OCR Cleanup Guide for Field Teams
Turn glossy laminated safety cards into readable, searchable PDFs with practical capture, cleanup, OCR, compression, and review steps for field training teams.

Laminated Safety Card OCR Cleanup Guide for Field Teams
Laminated safety cards are built to survive rough handling, not to be scanned cleanly. They live in trucks, workshops, storage cages, site offices, kitchens, clinics, school labs, pool rooms, and maintenance closets. They get wiped down, bent, clipped to binders, taped near equipment, and photographed under whatever light is available.
That durability creates a quiet documentation problem. When a field training team needs to turn those cards into a searchable digital packet, the glossy surface fights the camera. Glare hides words. Curved corners warp tables. Colored warning blocks confuse OCR. Tiny emergency steps become soft after compression. The result may look acceptable as a photo, but fail as a practical reference document.
This guide is for turning laminated safety cards into clean, readable, searchable PDFs without needing a flatbed scanner or layout software. It is written for operations coordinators, trainers, maintenance leads, safety officers, and small teams that need a repeatable method for a pile of existing cards.
The goal is not to create a perfect archival reproduction. The goal is a useful digital version: readable on a phone, searchable by keyword, small enough to share, and faithful enough that nobody mistakes the meaning of a safety instruction.
Why Laminated Cards Are Harder Than Normal Paper
A laminated card has three traits that make ordinary scanning advice less useful.
First, the surface reflects light as a broad sheet. A paper form usually has localized shadows. Laminate can create a white streak across an entire hazard table or emergency phone section. If glare covers text, OCR cannot recover what the camera never captured.
Second, many safety cards use dense visual hierarchy. They may combine icons, colored bands, small tables, checkboxes, bold warnings, pictograms, and condensed fonts. OCR tools can read text better when the page is visually simple. Laminated safety cards are rarely simple.
Third, the cards are often small. A pocket card or machine tag may contain more text per square inch than a normal letter page. A photo that looks sharp in the gallery can still be too soft for reliable OCR after upload, resizing, or PDF compression.
The practical answer is to treat capture, cleanup, OCR, and PDF packaging as separate decisions. Each step should protect legibility before reducing file size or combining pages.
Decide What the Digital Copy Must Do
Before photographing anything, decide how the final file will be used. A packet for internal training has different needs than a document attached to an inspection record.
| Use case | Main priority | Suggested output |
|---|---|---|
| Field reference on phones | Fast loading and readable zoom | Compressed searchable PDF |
| Training update review | Visual comparison with old cards | One PDF per card plus a combined packet |
| Safety binder backup | Faithful page order and clear labels | Full-resolution PDF archive |
| Maintenance knowledge base | Searchable text by equipment name | OCR text plus PDF images |
| Vendor or contractor handoff | Small file and simple navigation | Merged PDF with table-style filenames |
If the card contains emergency instructions, chemical handling steps, lockout details, medical guidance, or compliance language, do not paraphrase it during cleanup. Preserve the card visually and use OCR as a search layer, not as a rewritten replacement.
Gather the Cards and Sort the Set
Start with a quick inventory. Do not photograph the pile in random order. The order will become the order of review, naming, PDF pages, and later updates.
A simple sorting pass prevents confusion:
- Group cards by location, department, equipment type, or training module.
- Separate damaged cards from clean cards.
- Put double-sided cards into a separate stack.
- Flag cards with tiny print, tables, or colored backgrounds.
- Remove duplicates unless the duplicate shows a different revision date.
Use a temporary naming pattern before capture. For example: forklift-card-front, forklift-card-back, spill-response-front, or boiler-room-emergency-card. Even if the final PDF has clean titles, plain filenames help during review.
If the cards have revision dates, photograph those clearly. If the date is on the back, include the back page even when the front contains most of the safety content.
Capture the Card Without Fighting the Laminate
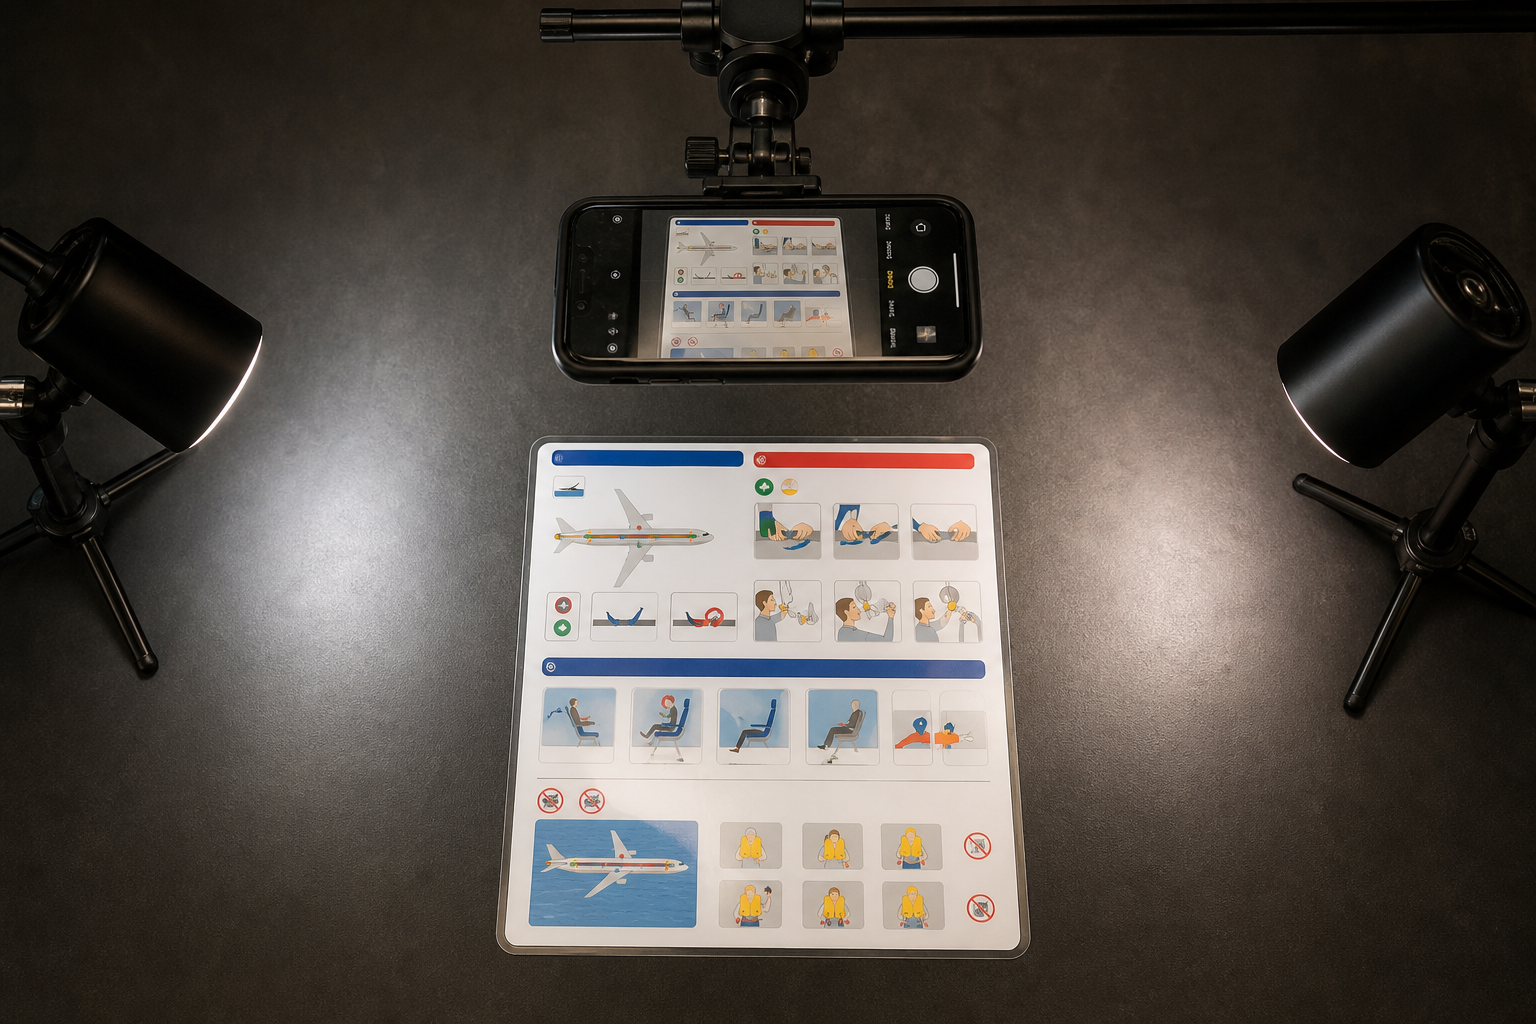
The best OCR cleanup happens before the image is uploaded. A few capture choices can remove most of the problems that later editing cannot fix.
Use indirect light. Do not aim a desk lamp straight at the card. Put the light to the side, then angle the card slightly until reflections move away from the text. If the card is very glossy, two softer light sources from opposite sides are better than one bright source.
Place the card on a matte, dark background. A black notebook, dark clipboard, or non-reflective table makes it easier to see the card edges and crop precisely. Avoid patterned fabric because OCR and auto-crop tools may treat background texture as document content.
Keep the camera parallel to the card. Perspective distortion makes text lines lean, and OCR may split words incorrectly. If possible, rest the phone on a simple stand or stack of books. The camera should face the card directly, not from the user’s seated angle.
Leave a margin around the card. Do not crop too tightly in the camera app. A small border gives you room to straighten, rotate, and crop cleanly later.
Take more than one photo. For glossy cards, capture at least two angles with the glare falling in different empty areas. If one image hides a corner instruction, the second may save it.
Capture Checklist
Use this checklist before moving to cleanup:
- The card fills most of the frame but has a visible border.
- No glare crosses important text, icons, dates, or tables.
- The camera is parallel to the card.
- Small print remains readable when zoomed in.
- The entire card is in focus, including corners.
- Front and back images use the same orientation.
- The filename or sequence makes the card easy to identify.
If you are photographing many cards, do one test card first. Upload it, run OCR, and inspect the result. A five-minute test can prevent recapturing fifty cards.
Clean the Image Before OCR
OCR works best when the image has strong text edges, even lighting, and minimal clutter. The cleanup stage should make the text easier to read without making the card look artificial.
Start with rotation and crop. Straighten the card so horizontal lines are truly horizontal. Crop to the card boundary but keep a thin edge if it helps show the original shape. If the card is curved or warped, prioritize the text area over perfect edges.
Next, adjust brightness and contrast gently. Laminated cards often have gray reflections that lower contrast. Raising contrast can help, but too much contrast can crush fine print and turn colored warning blocks into dark rectangles.
If the photo has a strong color cast, correct it before OCR. Yellow indoor lighting can make black text appear muddy. A neutral white balance usually improves recognition.
For files that are too large to handle comfortably, resize after cleanup, not before. Use resize image only when the original photo is far larger than needed. For text-heavy cards, keep enough resolution for small print. A common practical target is around 2000 to 3000 pixels on the long edge for a single card, depending on print size.
If the image format is inconvenient, use convert image to standardize the set. JPG is usually fine for photographed cards, while PNG may be better for screenshots or digitally exported card artwork. For camera photos, avoid repeatedly saving JPG files at low quality because each save can soften text edges.
Handle Glare, Shadows, and Curved Corners
Some cards need extra attention because their physical condition blocks clean OCR.
Glare is the most serious issue. If the glare covers text, recapture the image whenever possible. Editing can reduce a shine patch, but it cannot reliably rebuild missing letters. If the glare sits only on a blank area, crop or tone it down and continue.
Shadows are easier to repair than glare. A soft shadow along one edge may not hurt OCR if the text remains clear. A hard phone shadow across a table is more damaging. Move the light, raise the phone, or use a timer so your hand is not over the card.
Curved cards create focus differences. The center may be sharp while edges blur upward. Press the card flat only if it is safe to do so and will not damage it. A transparent weight can create more glare, so a better method is often to photograph from farther away with better light, then crop.
Damaged corners usually do not matter unless they contain revision numbers, page labels, or hazard icons. If a corner has missing information, photograph a duplicate card or keep a note in the final review record.
Use OCR as a Search Layer, Not a Replacement
For safety cards, OCR should support search and accessibility, but the original card image should remain visible. Do not replace the card with OCR text unless someone qualified has reviewed every instruction.
Run OCR on the cleaned image with image OCR. Then compare the extracted text against the visible card. Focus on the parts where mistakes matter most:
- Emergency phone numbers
- Chemical names
- Equipment names
- Lockout or shutdown steps
- Units of measure
- Personal protective equipment requirements
- Time limits, temperatures, voltages, and pressure values
- Warning labels and exception notes
OCR errors often appear in predictable places. A zero can become the letter O. A lowercase l can become 1. Condensed fonts can merge letters. Colored text on dark backgrounds may disappear entirely. Vertical labels may be skipped.
If the OCR text will be copied into a training system, correct it manually. If the OCR is only embedded into a PDF search layer, still inspect keywords that users are likely to search. A searchable PDF is only helpful when the important words are recognized.
OCR Review Table
| Card feature | Risk | Review action |
|---|---|---|
| Glossy warning band | White glare hides letters | Recapture if text is blocked |
| Tiny revision date | Misread numbers | Zoom and verify manually |
| Equipment model name | Broken search results | Compare against asset list |
| Icons with labels | Labels may be skipped | Check icon-adjacent text |
| Vertical side text | Often ignored | Add manual metadata if needed |
| Tables | Cells may be read out of order | Verify row-by-row meaning |
This review does not need to be slow. For each card, pick the five or ten terms someone would search for during a real incident or training session. If those terms are present and the image is readable, the packet is usually fit for purpose.
Create a Searchable PDF That Still Looks Like the Original
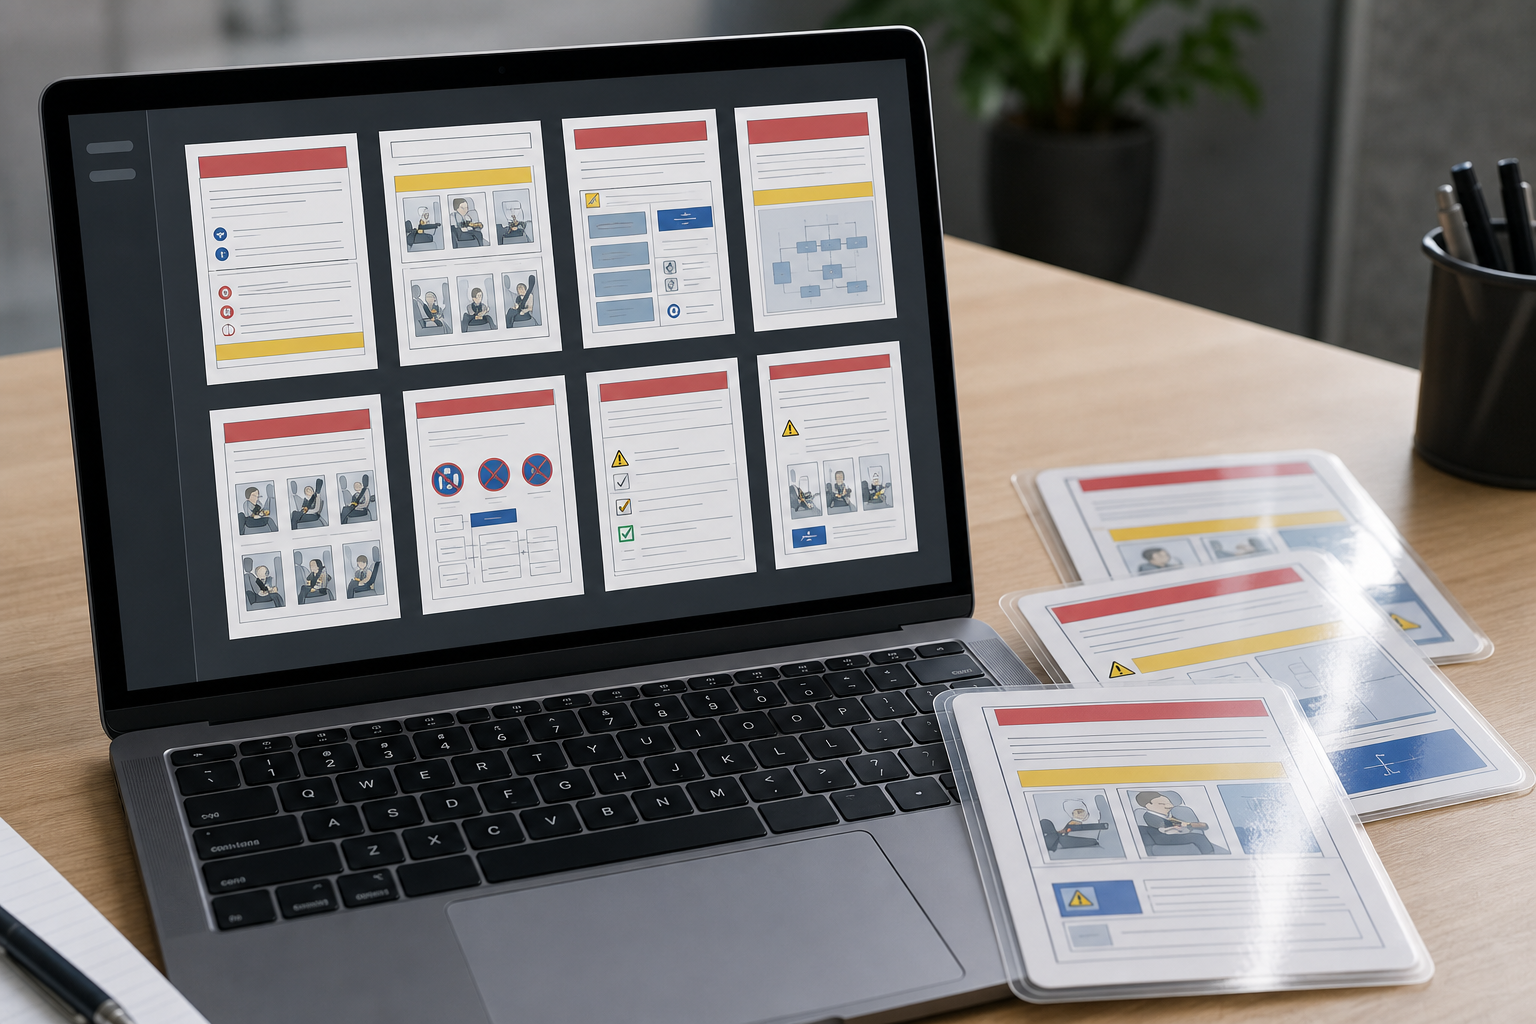
Once the cleaned images and OCR text are ready, combine the pages into a PDF. For a set of photographed cards, image to PDF is usually the most direct path.
Keep page order predictable. A double-sided card should appear front then back. If the packet contains several categories, group them clearly rather than mixing all fronts first and all backs later.
Use one page per card side. Do not create a dense contact sheet for the main reference copy. Small card thumbnails may be useful for review, but field users need to zoom into one card at a time.
If you need a single packet for distribution, merge related PDFs with PDF merge. A good pattern is to create separate PDFs by department or equipment group first, then merge them into the final packet only after review.
For page size, choose consistency over decoration. Letter or A4 is usually fine, with each card centered and large enough to read. If the card is landscape, keep it landscape rather than forcing it into portrait with wasted space.
Add a simple cover page only if your existing document system expects one. Avoid adding new interpretive content that could be mistaken for official safety language. The card images should remain the authority.
Compress Without Destroying Small Text
Compression is necessary when packets must be emailed, uploaded to a learning platform, or opened on phones with weak connections. But aggressive compression can ruin the very details that make the cards useful.
Compress at the end, after cropping, OCR, and PDF assembly. If you compress early, then edit, export, and compress again, text edges degrade with each step.
Use compress image for image files before PDF assembly only when the originals are extremely large and slow to handle. For final packets, use the PDF or export settings available in your document tool. Always inspect the result at phone size and at zoom.
A practical review method is to test three pages:
- The page with the smallest text.
- The page with the darkest colored warning block.
- The page with the most tables or numbers.
If those pages survive compression, the rest of the packet likely will too. If they fail, increase quality or reduce dimensions less aggressively.
Do not judge only by file size. A 2 MB PDF that blurs emergency steps is worse than an 8 MB PDF that opens reliably and stays readable. For internal safety materials, clarity usually matters more than hitting the smallest possible file.
Name Files So Updates Are Boring
Good filenames make future updates easier. Bad filenames create duplicate packets, outdated attachments, and unclear references.
Use names that include the location or group, topic, and revision clue when available. Keep them short enough for email and file managers.
Good examples:
warehouse-forklift-safety-cards-2026-05.pdfpool-chemical-handling-card-set-rev-3.pdfclinic-sharps-disposal-laminated-cards.pdfmaintenance-lockout-pocket-cards-may-2026.pdf
Avoid names like scan-final-final.pdf, safety cards new.pdf, or all cards.pdf. These names force people to open the file just to understand it.
For individual images, use the same stem with page labels:
warehouse-forklift-card-01-front.jpgwarehouse-forklift-card-01-back.jpgwarehouse-forklift-card-02-front.jpg
The naming structure should be simple enough that another person can continue it without asking you.
Build a Review Pass for Safety-Critical Details
A safety card digitization pass should include human review. OCR and image cleanup are useful, but they do not understand legal meaning, site policy, or operational risk.
Ask one reviewer to inspect readability and another reviewer, when possible, to inspect content fidelity. The first reviewer checks whether the file opens, pages are ordered, and text is readable. The second reviewer checks whether the digital packet matches the physical cards.
Use a short review sheet:
| Check | Pass criteria |
|---|---|
| Page completeness | Every card side appears once |
| Page order | Fronts and backs are paired correctly |
| Readability | Smallest text is readable on phone zoom |
| OCR search | Key terms return the right pages |
| Dates and revisions | Revision details match physical cards |
| File size | Packet opens quickly in normal conditions |
| Visual fidelity | No cleanup changed meaning or hid warnings |
If a card fails review, do not try to fix everything in the final PDF. Go back to the source image when possible. Recapture is often faster and more reliable than repairing a bad page.
When AI Editing Helps and When It Should Stay Out
AI image editing can be useful for non-substantive cleanup, but safety documents require restraint. The goal is to improve visibility, not reinterpret the card.
The AI photo editor can help with background cleanup, mild glare reduction in blank areas, or making a photographed set look more consistent. It should not be used to rewrite instructions, invent missing text, replace hazard symbols, or make a damaged label look official without verification.
A practical rule is simple: if the edit changes only the capture environment, it may be acceptable. If the edit changes the card content, it needs formal review or should be avoided.
Acceptable examples:
- Remove a distracting table texture outside the card.
- Reduce a reflection in a blank laminated margin.
- Clean a shadow that does not touch text.
- Even out background tone for a more readable crop.
Risky examples:
- Reconstruct missing letters under glare.
- Replace a damaged warning icon.
- Sharpen text until characters change shape.
- Remove stains that may cover actual printed marks.
- Generate a cleaner-looking card from a partial photo.
For training and safety materials, authenticity beats cosmetic perfection.
Common Mistakes to Avoid
The most common mistake is photographing too quickly. A blurry or reflective original image creates problems through every later step. Spend more time on capture than on repair.
Another mistake is over-compressing because the first PDF feels too large. Test readability before chasing a smaller number. Thin text, tables, and warning labels are fragile.
A third mistake is trusting OCR without spot checks. Searchability feels binary, but OCR quality exists on a scale. The PDF may contain some searchable text while missing the exact terms people need.
Teams also create confusion by mixing old and new card versions in one packet. If a card has been replaced, archive the old file separately. Do not leave both versions in the main field reference unless the distinction is clearly required.
Finally, avoid making the digital packet look more official than the source. If the card is worn, outdated, or ambiguous, digitization is not the fix. It is a signal that the physical safety material may need review.
A Practical End-to-End Checklist
Use this condensed checklist for a small batch of laminated cards:
- Sort cards by location, equipment, or training topic.
- Separate double-sided, damaged, and tiny-print cards.
- Photograph each side on a matte background with indirect light.
- Check focus and glare before moving to the next card.
- Crop, rotate, and lightly correct brightness and contrast.
- Standardize formats with convert image if needed.
- Run OCR with image OCR.
- Verify safety-critical numbers, names, and instructions.
- Assemble pages with image to PDF.
- Merge related packets with PDF merge when needed.
- Compress only after readability is confirmed.
- Test the final PDF on a phone and a desktop screen.
- Store the source images beside the final PDF for later updates.
This list is intentionally plain. The simpler the system, the more likely a busy team will repeat it correctly when new cards arrive.
Final Quality Bar
A finished laminated safety card packet should pass four tests.
It should look like the real card. Users should recognize the physical material they have seen on site.
It should be readable under normal conditions. Someone should be able to open it on a phone, zoom in, and read the smallest practical text without guessing.
It should be searchable for the terms that matter. Equipment names, hazards, emergency actions, and revision clues should return useful results.
It should be easy to update. The next person should understand the filenames, page order, and source image folder without needing a long explanation.
When those four tests are met, the digital packet becomes more than a pile of scans. It becomes a dependable reference that supports training, audits, maintenance, and field access while preserving the safety card as the source of truth.