SMD Component Reel Label OCR: A Practical Inventory Guide for Small Electronics Labs
Turn inconsistent SMD reel label photos into searchable inventory records with better capture, careful OCR cleanup, field validation, and reliable image archiving.
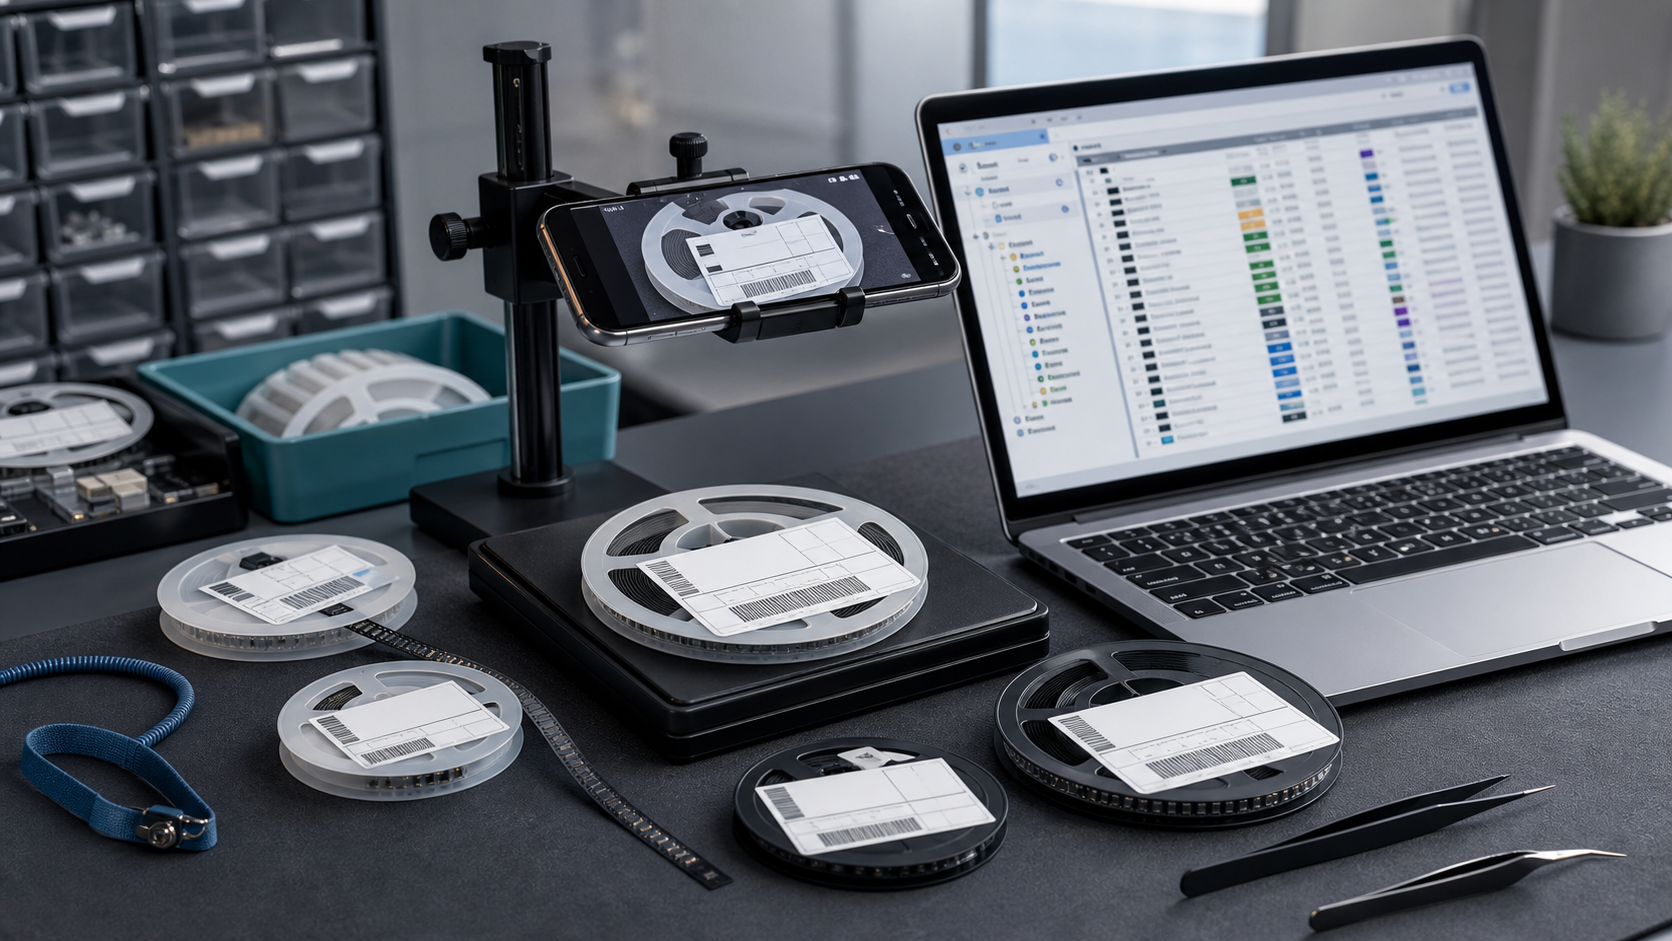
SMD Component Reel Label OCR: A Practical Inventory Guide for Small Electronics Labs
A drawer full of surface-mount component reels can represent thousands of dollars in usable stock, yet the inventory may be only as reliable as a handwritten note taped to the cabinet. Small electronics labs, repair benches, prototype teams, and makerspaces often receive parts from several distributors over many years. Their reels accumulate manufacturer labels, distributor stickers, internal notes, barcodes, date codes, moisture warnings, and partial quantity markings.
Photographing those labels and extracting their text sounds simple. In practice, automated reading is easily confused by glossy coatings, narrow type, dense barcodes, curved reels, similar part numbers, and abbreviations that make sense only in context. A single substitution—such as 0 for O, 1 for I, or 5 for S—can point to a completely different component.
This guide presents a practical system for producing searchable label records without treating OCR output as unquestionable truth. It covers capture, image preparation, field design, validation, exception handling, and long-term storage. The objective is not merely to recognize characters. It is to preserve enough evidence that another person can verify what is actually on the reel.
Why SMD Reel Labels Are Difficult to Read Reliably
A reel label is a compact logistics document. Depending on its origin, it may contain:
- Manufacturer and series name
- Full manufacturer part number
- Distributor stock number
- Lot, batch, or date code
- Quantity at the time of packing
- Package designation
- Value, tolerance, voltage, or temperature rating
- Country of origin
- Moisture sensitivity information
- One or more linear or two-dimensional barcodes
- Internal purchasing or receiving references
The same field may appear more than once and in different formats. A distributor could add its own number while retaining the manufacturer's original label underneath. A partial reel may still display its initial quantity even though only a fraction remains. Handwritten corrections can cross printed fields. Labels may also wrap around a curved flange, placing one end outside the camera's focus plane.
OCR engines do best when characters are large, level, evenly illuminated, and separated from graphical elements. Reel labels offer almost the opposite: tiny condensed fonts, low margins, reflective surfaces, and barcode patterns that compete with nearby text. The correct response is not aggressive filtering. It is better source photography followed by conservative preparation and field-aware review.
Decide What the Inventory Record Must Prove
Before taking photographs, define the minimum record that someone needs to identify, locate, and safely use a reel. Capturing every visible string can create a cluttered database without improving decisions.
A useful baseline schema is shown below.
| Field | Purpose | Typical authority | Review priority |
|---|---|---|---|
| Manufacturer | Distinguishes equivalent-looking catalog numbers | Original manufacturer label | High |
| Manufacturer part number | Identifies the exact component | Original manufacturer label | Critical |
| Package | Confirms physical compatibility | Label plus visual inspection | High |
| Value or description | Supports quick searching | Label or trusted catalog | Medium |
| Lot or date code | Supports traceability | Original label | High when traceability matters |
| Recorded quantity | Describes current stock | Physical count or estimate | High |
| Original quantity | Preserves packing information | Printed label | Low |
| Storage location | Makes the item retrievable | Internal assignment | High |
| Photo reference | Connects data to evidence | File identifier | Critical |
| Review status | Shows whether a human checked the record | Internal process | High |
Keep original quantity separate from current quantity. OCR can transcribe what the label says, but it cannot know how many components have already been removed. For cut tape, opened reels, and manually spliced carriers, a physical estimate or counting method must take precedence.
It also helps to distinguish a transcription from an interpretation. If a label says 10K 1% 0402, those characters belong in a source transcription field. A normalized description such as 10 kΩ resistor, ±1%, 0402 belongs in a separate field. This separation preserves evidence and makes later corrections easier.
Build a Repeatable Reel Photography Station
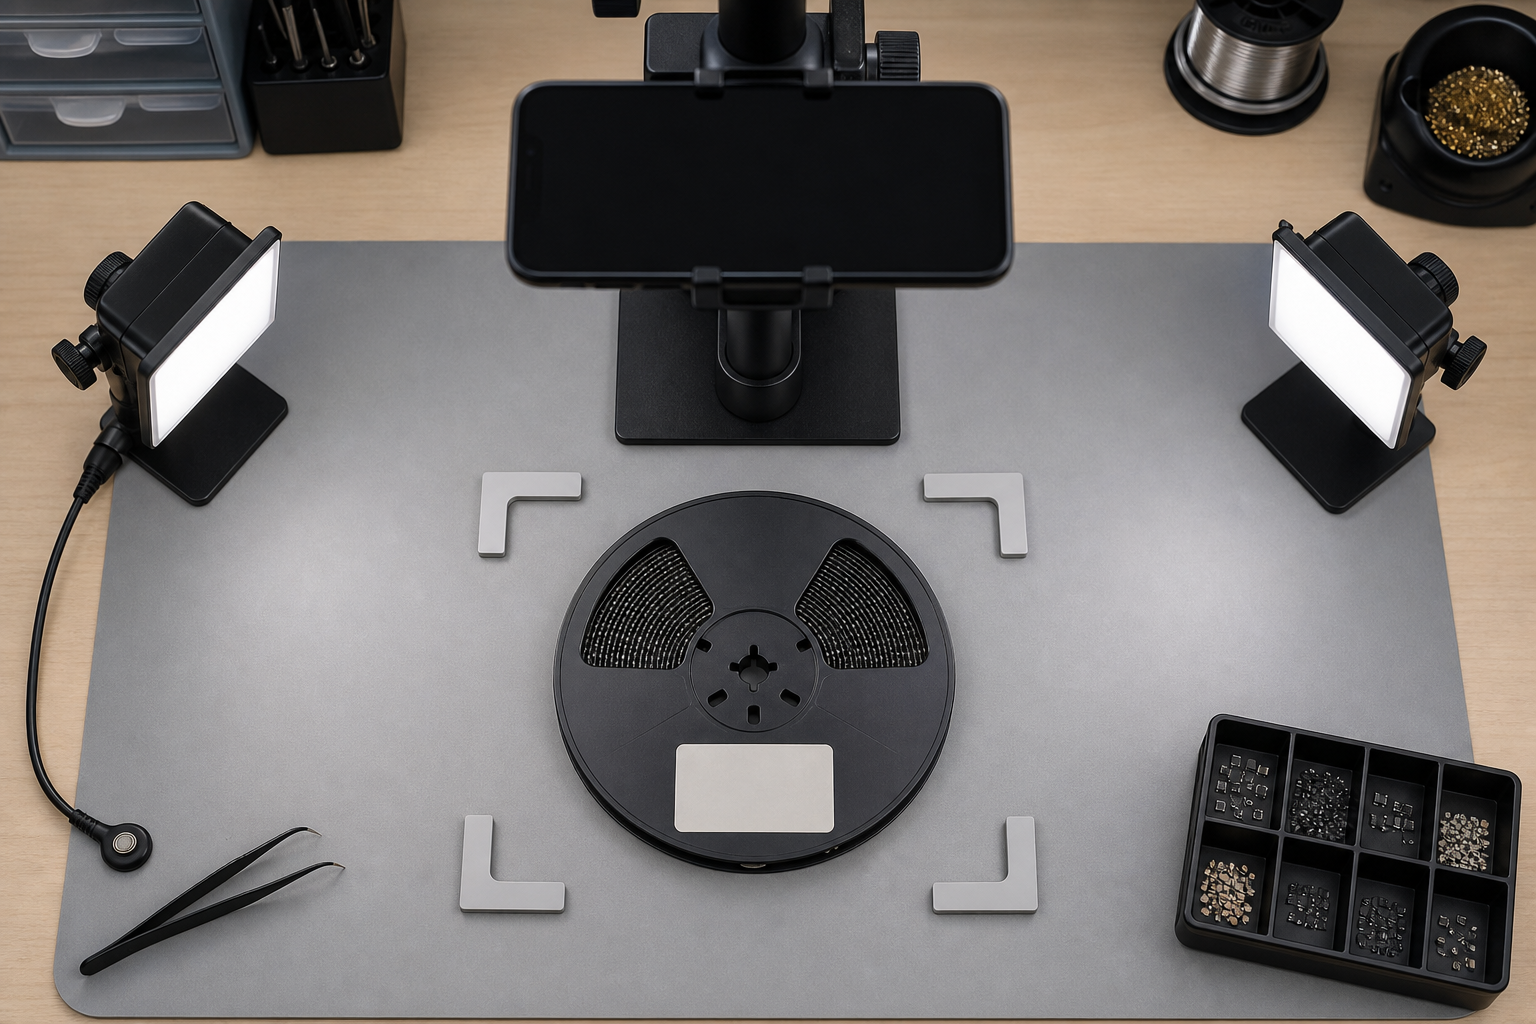
A stable capture station produces a larger improvement than most post-processing tricks. It can be assembled on a small bench with a phone holder, two lights, a neutral surface, and a few positioning guides.
Place the camera directly above the label so its sensor is parallel to the printed surface. Perspective distortion makes characters at one edge smaller and can turn rectangular barcode modules into trapezoids. A copy stand is ideal, but a rigid phone arm works if it does not drift when the shutter is pressed.
Use two diffused lights positioned on opposite sides. Large, soft sources reduce sharp reflections from thermal labels and glossy over-laminates. If a bright patch remains, move the lights farther sideways rather than making the image darker. The label should be evenly exposed without losing pale gray printing.
A medium-gray or matte black backing helps a white label remain visually distinct. Avoid strongly colored mats when a phone is applying automatic white balance. Blue silicone repair mats, for example, can introduce a color cast that reduces separation between faded ink and the label stock.
Add simple alignment marks for common reel diameters. Consistent placement makes later cropping faster and keeps labels at approximately the same scale. Do not force a warped label flat if doing so could damage it or disturb moisture-sensitive packaging. Photograph it in place and take a second angled view if curvature hides part of the print.
Capture a Record Set, Not Just One Image
For each reel, aim to retain three kinds of evidence:
- A context photograph showing the full reel and its physical condition.
- A close, square photograph of the primary manufacturer label.
- An additional photograph for distributor stickers, handwritten notes, or obscured areas.
The context image prevents mix-ups when several close-ups are processed together. It may reveal reel diameter, carrier width, remaining quantity, splices, or damage that the label crop cannot show. If the manufacturer label and distributor sticker overlap, photograph them from more than one angle instead of assuming one source is sufficient.
Use the highest practical camera resolution, but do not rely on digital zoom. Move the camera closer while keeping the entire label within the sharp region. Tap to focus on the smallest printed characters, lock exposure if the camera permits it, and use a short timer to avoid vibration.
After a test shot, inspect actual letter edges at full size. A photo can look acceptable when fitted to a phone screen while its tiny type is softened beyond recovery. If the characters have halos or watercolor-like edges, disable beauty filters, document enhancement, or excessive noise reduction.
Prepare Label Images Conservatively
Image preparation should make existing information easier to inspect, not manufacture shapes that resemble characters. Keep the untouched camera file and produce a separate derivative for OCR.
Begin by rotating the label until its text lines are horizontal. Then crop closely enough to remove the reel and workbench, but retain the complete label boundary. That boundary is useful evidence: it shows whether a field has been cut off or covered by another sticker.
If the label occupies only a small portion of the frame, use Resize Image to create a larger derivative for reading. Enlargement does not restore missing detail, but it can help an OCR engine segment small characters and makes manual review less tiring. Preserve the aspect ratio and avoid repeated resizing.
Next, create one or two controlled variants rather than a dozen heavily filtered copies:
- A neutral color or grayscale version with corrected brightness
- A higher-contrast version for faded thermal printing
- Optionally, a tightly cropped region for a critical part number
Do not immediately convert every image to pure black and white. Thresholding can erase decimal points, hyphens, the diagonal stroke in 7, or the open center of 8. It can also merge nearby barcode bars into letters. Grayscale is usually the safer first input.
If storage size matters, use Compress Image only after checking the smallest printed line at 100% zoom. Fine text is a poor place for severe compression. Preserve a high-quality evidence master and compress only access copies or contact sheets.
Choose Formats According to Purpose
JPEG is acceptable for camera originals when it is what the device produces, provided the quality is high. PNG is useful for processed crops containing sharp text and flat label backgrounds. WebP can reduce access-copy size, but compatibility with the lab's inventory software should be tested before adopting it as the only derivative format.
Use Convert Image when a receiving system requires a consistent format. Conversion should create a new file rather than replace the original. A sensible file set might include:
R00427_context_original.jpgR00427_label_original.jpgR00427_label_ocr.pngR00427_secondary_label.jpg
The stable record identifier is more important than an elaborate descriptive filename. Part numbers can be corrected later; the identifier should remain unchanged.
Extract Text by Region Instead of Reading Everything at Once
A full-label OCR pass is useful for discovery, but it often produces a noisy block containing barcode fragments and reordered columns. Better results usually come from dividing the image into meaningful regions.
Create separate crops for the manufacturer part number, lot or date code, quantity block, and secondary distributor label. Submit each crop to Image OCR, then store the returned text beside the relevant field. Regional reading reduces layout ambiguity and makes it easier to apply field-specific rules.
For example, a manufacturer part number might allow letters, digits, hyphens, and slashes but no spaces. A quantity should generally be numeric. A date code may follow a known four-digit year-week pattern, although not every manufacturer uses the same convention. These expectations help flag suspicious results, but they must never silently rewrite the source.
Retain raw OCR output even when it looks messy. It provides a record of what the engine produced before human edits. Store the reviewed transcription separately, along with the reviewer and date if traceability is important.
Watch for High-Risk Character Pairs
Part identifiers are especially vulnerable to visually similar characters:
0andO1,I, and lowercasel2andZ5andS6,G, and8Band8CandG- Hyphen, en dash, and faint underscore
- Decimal point and dust speck
Never resolve these only by choosing the most familiar-looking part. Compare the OCR result with the enlarged image, the barcode data if available, and an authoritative manufacturer source. A distributor search can provide a useful clue, but similar stock numbers should not override visible evidence.
When the image truly cannot distinguish two characters, record an exception rather than guessing. Mark the field as uncertain, retain both possible readings in a note, and move the reel to a review location. Honest uncertainty is safer than false precision.
Validate Fields According to Their Risk
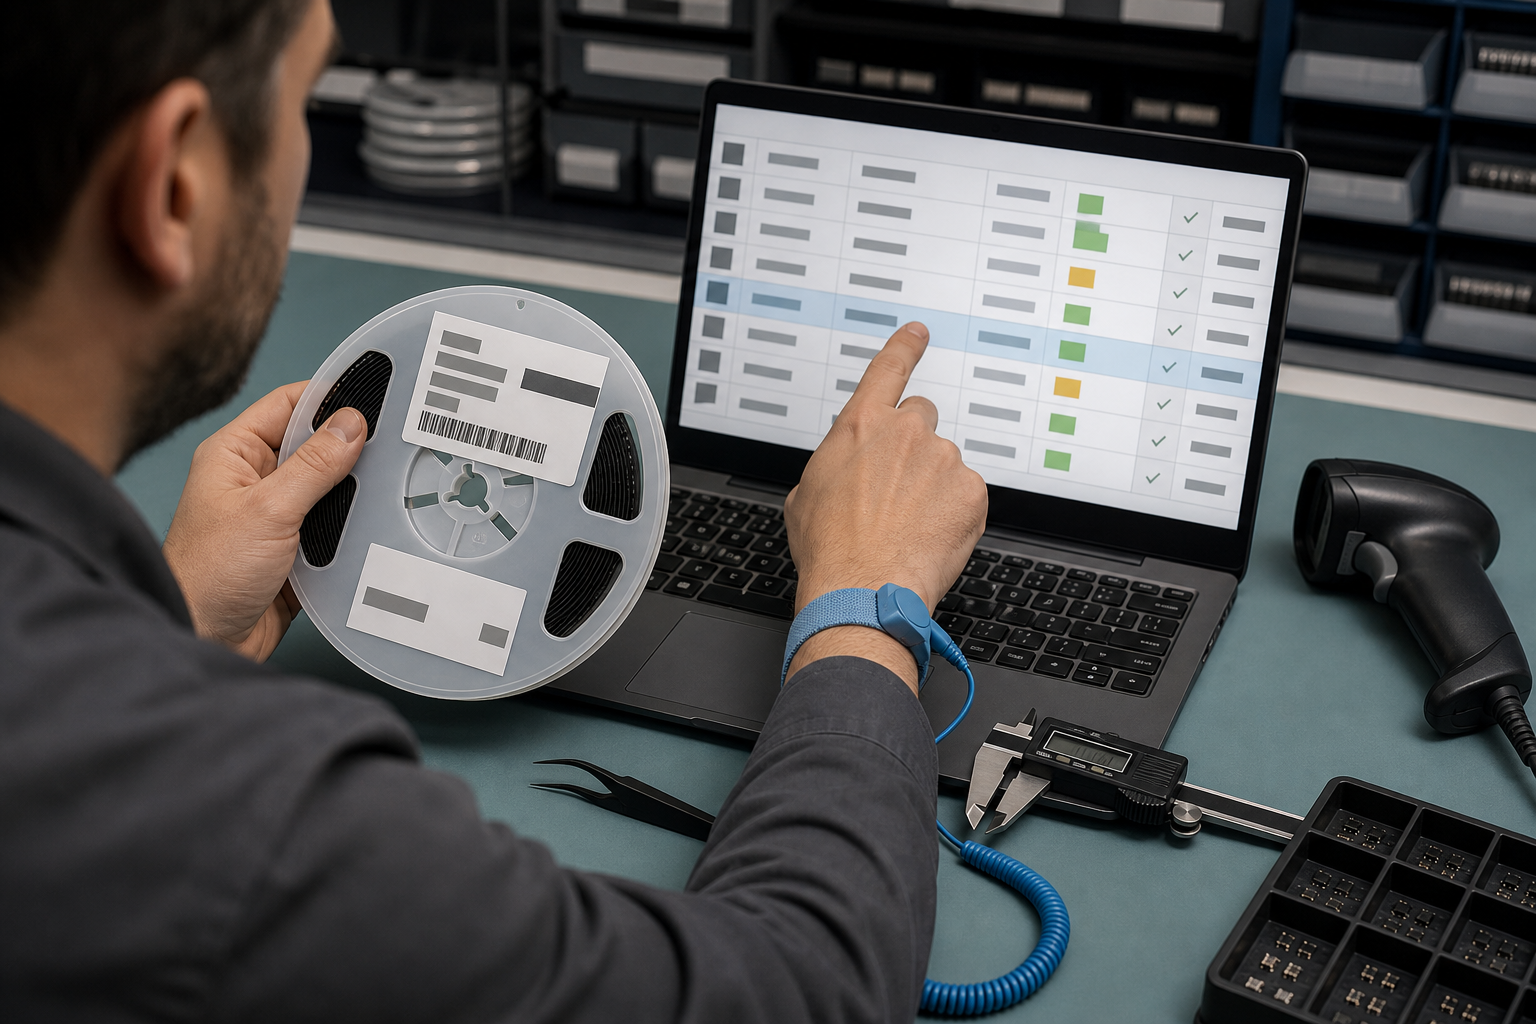
Not every field deserves the same amount of checking. A mistaken marketing description may be inconvenient; a mistaken voltage rating or package can damage a prototype. Set review effort according to how the data will be used.
Use a two-source rule for critical identification fields. The manufacturer part number should agree with at least two of the following:
- Human reading of the original label image
- Decoded barcode or data matrix
- Manufacturer catalog or datasheet
- Distributor record linked to the original purchase
- Marking and package evidence from the component itself
Agreement is valuable only when the sources are genuinely independent. Printed text and a barcode generated from the same incorrect packing record are not fully independent, though their agreement still helps detect OCR errors.
Package data deserves separate verification. Terms such as 0402 are ambiguous across metric and imperial naming systems, and generic descriptions may omit reel pitch or termination details. Compare physical dimensions and carrier width when the package affects assembly setup.
Quantities require a different approach. Mark the printed quantity as original pack information. Determine current quantity through a reel counter, weight-based estimate, pocket count, or an explicitly labeled visual estimate. Include the method and date, because stock changes over time.
Use Confidence States That People Can Understand
Avoid storing a mysterious decimal confidence score as the only quality indicator. A simple review state is more actionable:
| State | Meaning | Allowed use |
|---|---|---|
| Captured | Images exist but fields are not checked | Awaiting processing |
| OCR draft | Text was extracted automatically | Search aid only |
| Reviewed | A person compared fields with the image | General inventory use |
| Verified | Critical fields agree with a second source | Purchasing or assembly preparation |
| Exception | Conflict, ambiguity, or damage remains | Do not issue without review |
This structure prevents an OCR draft from quietly becoming trusted inventory data. It also gives teams a manageable queue: exceptions first, then high-value unreviewed reels, then ordinary drafts.
Handle Overlabels, Faded Print, and Partial Reels
Real collections rarely contain clean, unopened reels. Establish rules for common exceptions before processing hundreds of items.
If one label covers another, never peel it away merely to improve the photograph unless removal is safe and authorized. Capture the top label, photograph any visible edges of the underlying one, and consult purchase records. Destructive label removal can eliminate traceability or damage antistatic packaging.
For faded thermal labels, try changes in lighting angle and careful grayscale contrast before applying sharpening. An oblique light can sometimes reveal pressure impressions, but it may also emphasize surface texture. Record the result as supplemental evidence, not a replacement for the normal image.
For cut tape wound onto a reused reel, treat the tape and reel label as separate objects. The reel's original label may describe a component no longer present. Create an internal identifier, photograph any handwritten splice note, and verify the device from trusted receiving records or component markings.
For mixed lots, do not merge date codes merely because the part number matches. Keep lot-level records if shelf life, moisture exposure, traceability, or production quality requires them. Otherwise, record that multiple lots share a location and retain photographs for each label.
Create Contact Sheets for Fast Human Review
Reviewing files one at a time is slow and makes comparisons difficult. A PDF contact sheet can place each label image beside its record identifier and selected transcription fields. Reviewers can scan for mismatches, truncated photographs, inconsistent rotations, and duplicate identifiers.
Create the sheet from derivative images, not the only evidence copies. If necessary, combine page sets with PDF Merge. Keep enough resolution for the smallest relevant type to remain readable when zoomed. A compact thumbnail sheet may be useful for navigation, but critical review needs larger crops.
Organize review pages by storage location or capture batch rather than alphabetically by OCR-derived part number. If OCR is wrong, an alphabetic arrangement can hide a reel in an unexpected section. Physical order also makes it easier to return to the cabinet and resolve an exception.
A strong review page includes the stable identifier, storage position, primary label crop, OCR draft, reviewed part number, and status. Avoid crowding it with every database field. The contact sheet is a verification aid, not a replacement for the inventory register.
Apply a Practical Quality Checklist
Before accepting a batch, inspect both the images and the structured records.
Capture checks
- The complete label boundary is visible.
- Small characters are sharp at full resolution.
- Glare does not cover any critical field.
- The camera is approximately parallel to the label.
- A context image connects the crop to the physical reel.
- Secondary stickers and handwritten notes are documented.
Data checks
- Manufacturer and manufacturer part number occupy separate fields.
- Raw OCR and reviewed transcription are both retained.
- Current quantity is not copied blindly from original quantity.
- Ambiguous characters are flagged instead of guessed.
- Package naming follows an agreed convention.
- Lot and date codes are preserved when relevant.
- Every record links back to its evidence images.
Batch checks
- Record identifiers are unique.
- Filenames use the correct identifiers.
- Image orientation is consistent.
- A sample of ordinary records receives a second review.
- All exception reels are moved to a known holding location.
- Originals and derivatives are backed up according to lab policy.
Sampling should include more than the cleanest labels. Deliberately choose glossy, faded, handwritten, overlabelled, and partial-reel examples. Those cases reveal whether the system is robust.
Keep the Archive Useful After the First Capture
A label archive loses value if images become detached from inventory updates. Use immutable identifiers and avoid renaming evidence files every time a description changes. The database can point from the stable reel identifier to the latest location, quantity, review state, and image set.
Track important changes as events: received, opened, counted, moved, merged, split, depleted, or quarantined. If material from one reel is divided between locations, create child container records rather than pretending the original photograph describes both current states perfectly.
Set a recapture trigger. A new photograph may be warranted when a label is damaged, a reel is split, a questionable identification is resolved, or a new internal label replaces temporary handwriting. Routine quantity changes do not require a new label photo if the identity evidence remains valid.
Finally, test retrieval. Choose several physical reels and confirm that their records can be found from a part number, value, location, and image identifier. Then choose database records and locate the corresponding reels. This two-way test catches failures that image quality checks alone cannot reveal.
A Safer Result Than Blind Automation
SMD reel label OCR is most effective as assisted transcription backed by strong photographs and explicit review states. The camera preserves evidence, OCR accelerates entry, field rules expose suspicious strings, and human validation resolves the cases where a single character matters.
For a small lab, the best system is not necessarily complex. A fixed capture station, stable identifiers, conservative image derivatives, regional OCR, risk-based checks, and a clear exception queue can turn an uncertain drawer of reels into a searchable inventory without pretending that automation is infallible.
Start with one cabinet or a single receiving batch. Measure how often critical fields need correction, refine the capture setup, and document the naming conventions before expanding. The result will be more than a collection of label photos: it will be an evidence-backed parts register that remains understandable when the person who created it is no longer standing at the bench.