Dental Shade Tab Photography for Clear Lab Case Handoffs
A practical guide to photographing dental shade tabs with consistent exposure, useful framing, color references, file naming, and compact PDF case sheets.
Dental Shade Tab Photography for Clear Lab Case Handoffs
A shade-tab photograph can look perfectly adequate on a phone and still be frustrating at the dental laboratory. The tooth may occupy only a small part of the frame, the tab may catch a bright reflection, automatic processing may warm the entire scene, or an image may arrive without enough context to connect it to the correct case view.
The problem is rarely a lack of camera resolution. It is usually inconsistency. When the capture distance, lighting, reference placement, editing, and file naming change from one photograph to the next, the laboratory has to interpret differences that may come from the camera rather than the subject.
This guide presents a practical system for preparing clearer shade-tab photographs and compact visual case sheets. It concentrates on documentation quality and file handling, not clinical shade selection. Final restorative decisions should remain with appropriately qualified dental professionals and technicians using their established protocols.
What a Useful Shade Photograph Must Communicate
A useful image does more than show a shade tab somewhere near a tooth. It preserves several kinds of context at once:
- The relationship between the selected tab and the target tooth
- The general brightness and color response of the scene
- The position and orientation of the tab
- Surface character without large specular highlights
- Enough neighboring anatomy to understand the view
- A dependable connection to the correct case and image sequence
These goals sometimes compete. A tight crop reveals surface detail but removes orientation. A wider view preserves context but makes subtle differences harder to inspect. Heavy compression makes delivery convenient but can damage fine transitions and incisal detail.
The answer is not to force one photograph to serve every purpose. Capture a short, deliberate sequence in which each frame has a defined job.
Plan a Small, Complete Image Set
A compact set is easier to capture correctly and easier for a recipient to review. For many routine handoffs, the following structure is more useful than a folder containing dozens of near-duplicates.
| View | Primary purpose | Suggested framing | Reference item |
|---|---|---|---|
| Orientation view | Establish location and neighboring teeth | Wider anterior or relevant regional view | Optional gray reference |
| Shade comparison | Compare the tab with the target | Tooth and tab at similar depth and scale | Selected shade tab |
| Alternate comparison | Show the nearest plausible alternative | Same framing as the main comparison | Alternate shade tab |
| Detail view | Preserve texture, transitions, and characterization | Tight crop with controlled highlights | Tab edge or gray reference if practical |
| Special note view | Document a crack line, stain, translucency, or boundary | Framed around the relevant feature | Case-dependent |
Avoid capturing extra frames merely because storage is inexpensive. Redundant images make it harder to identify which exposure and comparison were intentional. If two photographs have the same purpose, keep the clearer one unless the pair demonstrates a meaningful difference.
Before beginning, decide whether the recipient expects RAW files, camera-original JPEGs, edited copies, or a PDF summary. This affects how aggressively you can crop and compress the delivery set. Preserve camera originals separately even when the handoff uses smaller derivatives.
Build a Repeatable Capture Setup
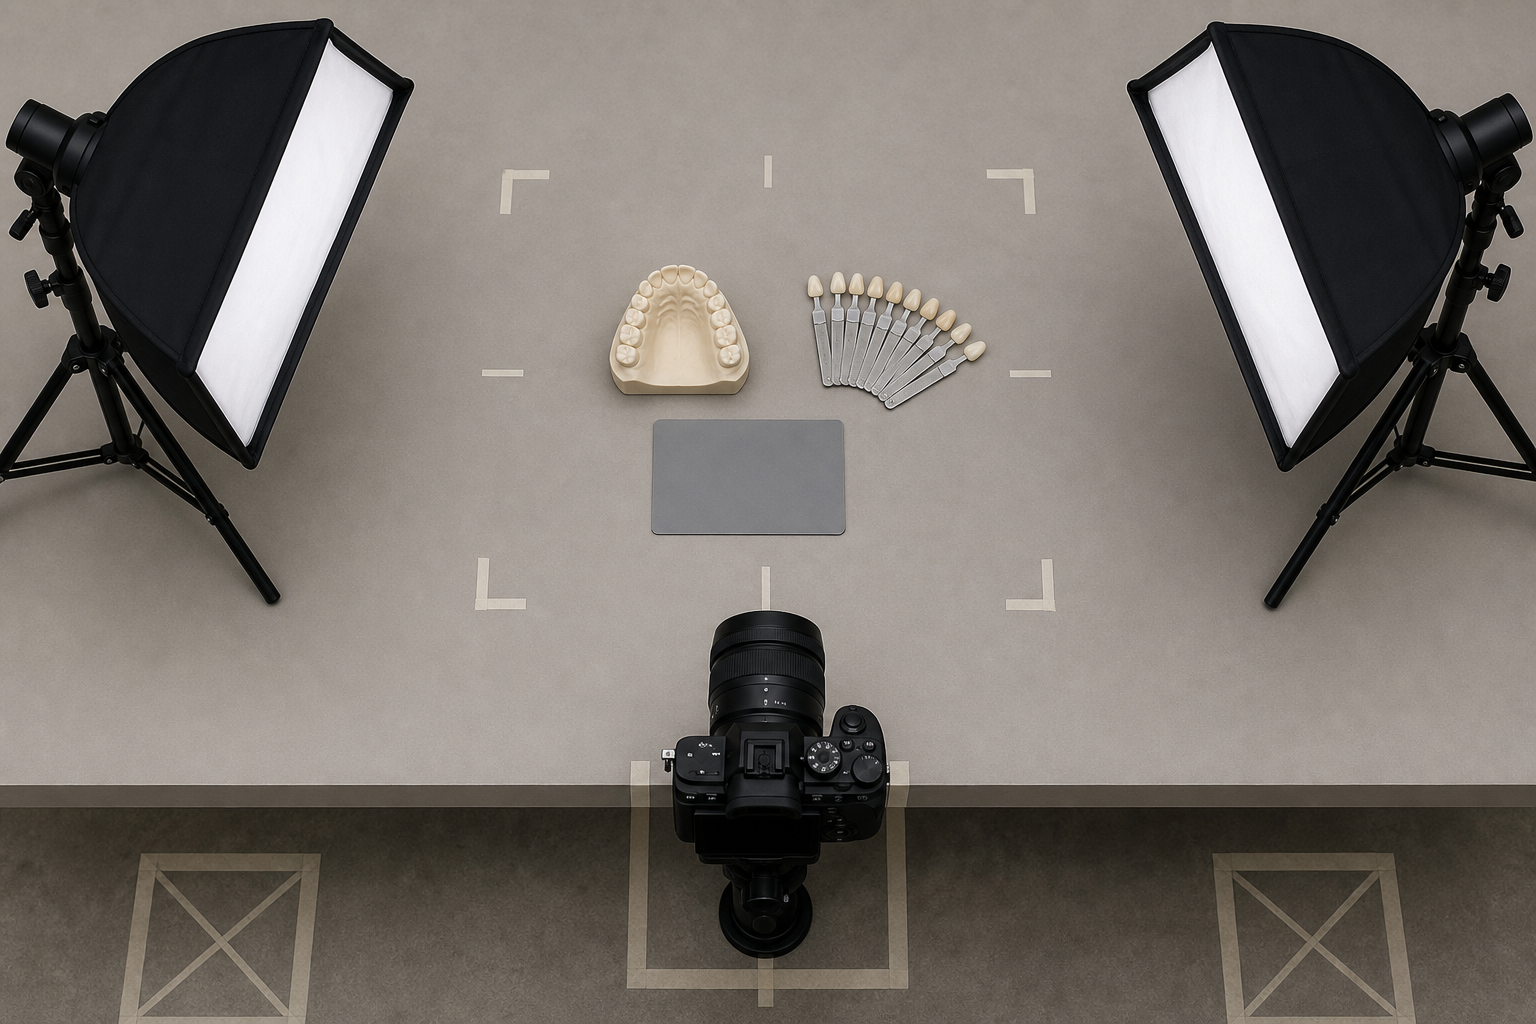
Consistency starts before the camera is raised. A modest setup used the same way each time is more dependable than elaborate equipment that changes between cases.
Stabilize the Camera Position
Use a repeatable camera-to-subject distance. A macro lens and appropriate camera support are helpful, but the central objective is to prevent dramatic changes in magnification and perspective between comparison frames.
If photography occurs in one room, place subtle position references for the operator, chair, light stands, or camera support. These marks need not be permanent. Removable tape can identify a starting position while still allowing clinical access and safe movement.
Keep the camera approximately perpendicular to the facial surface being documented when the intended view calls for it. A steep angle can change reflections and make the tab appear differently lit from the target tooth.
Control Mixed Lighting
Mixed illumination is a common source of confusing color. Daylight from a window, warm ceiling lamps, a dental operating light, and photographic flash may all have different spectral characteristics. Combining them gives automatic white balance an ambiguous scene to interpret.
Choose the established lighting arrangement for the practice and reduce competing sources where practical. Block variable window light or capture at a position where it does not dominate. Do not assume that a visually white room provides neutral illumination.
Diffusion helps reduce small, harsh reflections, but it does not remove every highlight. Check the tab and tooth separately because their surfaces may reflect the lights differently.
Include a Neutral Reference
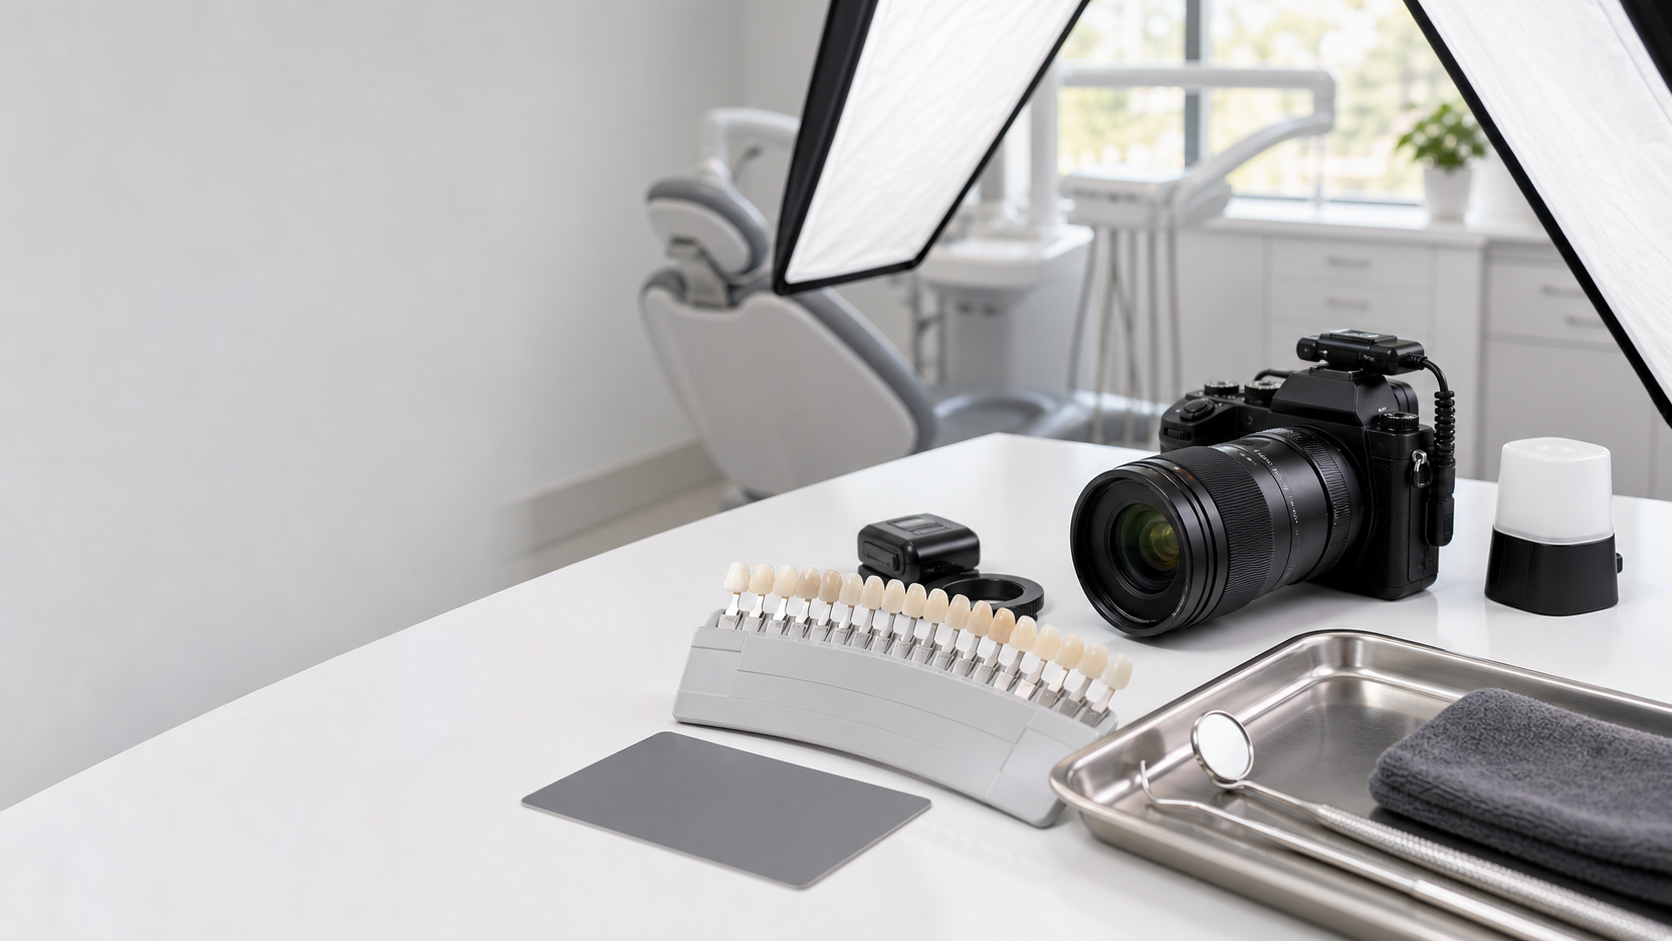
A photographic gray reference can help reveal exposure or white-balance drift between images. It should be clean, matte, undamaged, and intended for photographic color reference. A sheet of office paper is not a substitute: many papers contain optical brighteners and may not behave neutrally under different lights.
Capture the reference under the same light as the subject. A card positioned far behind, strongly tilted, or shaded by equipment is not describing the same illumination.
The reference does not have to remain in every final crop. Keep at least one uncropped reference frame for each lighting setup so that later adjustments have a documented anchor.
Position Shade Tabs Without Creating False Differences
The tab and target tooth should receive comparable illumination. If the tab is much closer to a flash, twisted toward a light, or held in shadow, the photograph records the lighting mismatch as well as the material difference.
Aim to keep the tab face near the same plane as the facial surface of the target. Match vertical orientation where possible and avoid covering the portion of the tooth that the technician needs to inspect. The tab identifier may be included in an additional frame if showing it clearly would compromise the principal comparison.
Use consistent handling practices:
- Verify that the tab is clean and free from fingerprints or residue.
- Place it close enough for meaningful comparison without obscuring key anatomy.
- Align the relevant part of the tab with the region being evaluated.
- Check that neither tab nor tooth has a large clipped highlight.
- Capture the selected tab and any alternate with unchanged camera and light positions.
When making multiple comparisons, change only the tab. Moving the camera, changing exposure, or allowing the subject-to-light relationship to shift makes the resulting images harder to compare.
Capture Exposure Without Chasing a Pretty Preview
A bright, high-contrast preview can look impressive while discarding useful tonal information. Camera screens also vary in brightness and may be viewed under room lighting that changes perception.
Use the histogram and highlight warnings available on the camera. Protect important bright regions from clipping, especially broad reflections on enamel and the shade tab. A few tiny specular points may be unavoidable, but extensive featureless white areas cannot be recovered reliably from a finished JPEG.
Manual exposure is valuable because it prevents the camera from reacting to small framing changes, dark retractors, gloves, or a lighter tab. Once the established exposure is confirmed for the lighting arrangement, keep it fixed through the comparison sequence.
Manual white balance or a consistent preset likewise reduces frame-to-frame drift. If RAW capture is part of the practice's established process, it provides more adjustment latitude, but RAW files do not correct poor lighting or clipped exposure automatically.
A Quick Capture Check
Before ending the session, inspect at least one frame at high magnification and confirm:
- The target region is in focus
- The tab face is readable as a visual reference
- Highlights do not erase large surface areas
- The tab and tooth share similar illumination
- No mirror, retractor, or finger blocks the critical region
- The neutral reference frame was captured
- Orientation and detail views are both present
This check takes less time than arranging a repeat session after discovering motion blur on a desktop monitor.
Edit Conservatively and Keep the Originals
Editing should make the documentation easier to inspect without inventing detail or concealing uncertainty. Keep untouched originals in a protected case folder and create separate derivatives for review, email, or PDF assembly.
A conservative editing sequence is:
- Confirm the correct case and remove accidental or unusable captures from the delivery selection.
- Apply any white-balance correction consistently across frames captured under the same setup.
- Make restrained exposure adjustments while protecting highlights.
- Correct orientation.
- Crop copies for their intended purpose.
- Apply modest sharpening only at the final output size.
- Export a clearly named delivery set.
Avoid selective color painting, strong saturation, beauty filters, automatic tooth whitening, background replacement near tooth edges, or local edits that change the apparent relationship between tab and tooth. General-purpose enhancement tools can alter clinically relevant appearance even when the result looks cleaner.
If a distracting peripheral object must be removed for presentation, keep the unedited version and disclose that the presentation copy was altered. For case-critical comparison frames, cropping is usually safer than reconstructive editing.
The AI Photo Editor may be useful for non-diagnostic presentation assets or surrounding visual cleanup, but it should not be used to infer, recolor, or regenerate the tooth, gingiva, shade tab, or reference area in a shade-matching image.
Crop for Comparison Without Losing Orientation
Create derivatives rather than overwriting camera originals. A practical delivery set can include one wider orientation image and several tighter comparison images.
Use the same aspect ratio and similar crop boundaries for selected-tab and alternate-tab comparisons. If one version is dramatically tighter, apparent contrast and scale can influence how the pair is perceived.
Leave enough room around the tooth and tab to show their relative position. Extremely tight crops may remove the lighting clues that help explain a highlight or shadow. Conversely, large unused borders make the relevant region too small when the image is viewed in a portal or on a tablet.
When a lab requests exact pixel dimensions, use the image resize tool on copies after cropping. Resizing should be the final geometric operation. Repeatedly shrinking and enlarging a JPEG introduces unnecessary resampling and can exaggerate edge artifacts.
Choose an Export Format Intentionally
JPEG is often practical for photographic delivery because it produces compact files and is widely supported. Use a high-quality setting that preserves fine transitions without creating excessive attachments. Do not repeatedly open and resave the same JPEG; return to the master or a lossless edited file for each new export.
PNG is appropriate for graphics, diagrams, and some annotated material, but it often produces unnecessarily large files for full-resolution photographs. WebP can be efficient for controlled web systems, although compatibility requirements should be confirmed before using it for a lab handoff.
If a portal or recipient requires another format, create a converted copy with the image converter. Keep the original file extension honest: renaming .heic to .jpg does not convert the underlying image.
Compression should be evaluated on the content, not only on the file size. Inspect thin boundaries, incisal transitions, subtle texture, and the edges of highlights at 100 percent magnification. The image compressor can produce lighter review copies, but retain higher-quality masters and avoid aggressive settings for comparison images.
Name Files So Their Meaning Survives Separation
A file called IMG_8472.jpg loses context as soon as it is downloaded, forwarded, or separated from a message. A useful naming convention identifies the case without exposing more personal information than the approved system permits.
One possible pattern is:
CASECODE_DATE_VIEW_SEQUENCE_VERSION.ext
Examples using fictional codes include:
K42_2026-07-18_orientation_01_original.jpgK42_2026-07-18_shade-selected_02_review.jpgK42_2026-07-18_shade-alternate_03_review.jpgK42_2026-07-18_detail-incisal_04_review.jpg
Use only identifiers allowed by the organization's privacy and records policies. Avoid placing a patient's full name, birth date, email address, or other unnecessary personal information in filenames. The safest identifier depends on the approved case-management environment and applicable rules.
Keep sequence numbers stable. If a revised export is created, change a version label rather than renumbering the entire set. Stable numbering lets a technician refer to a specific image without ambiguity.
Create a Compact Lab Case Sheet
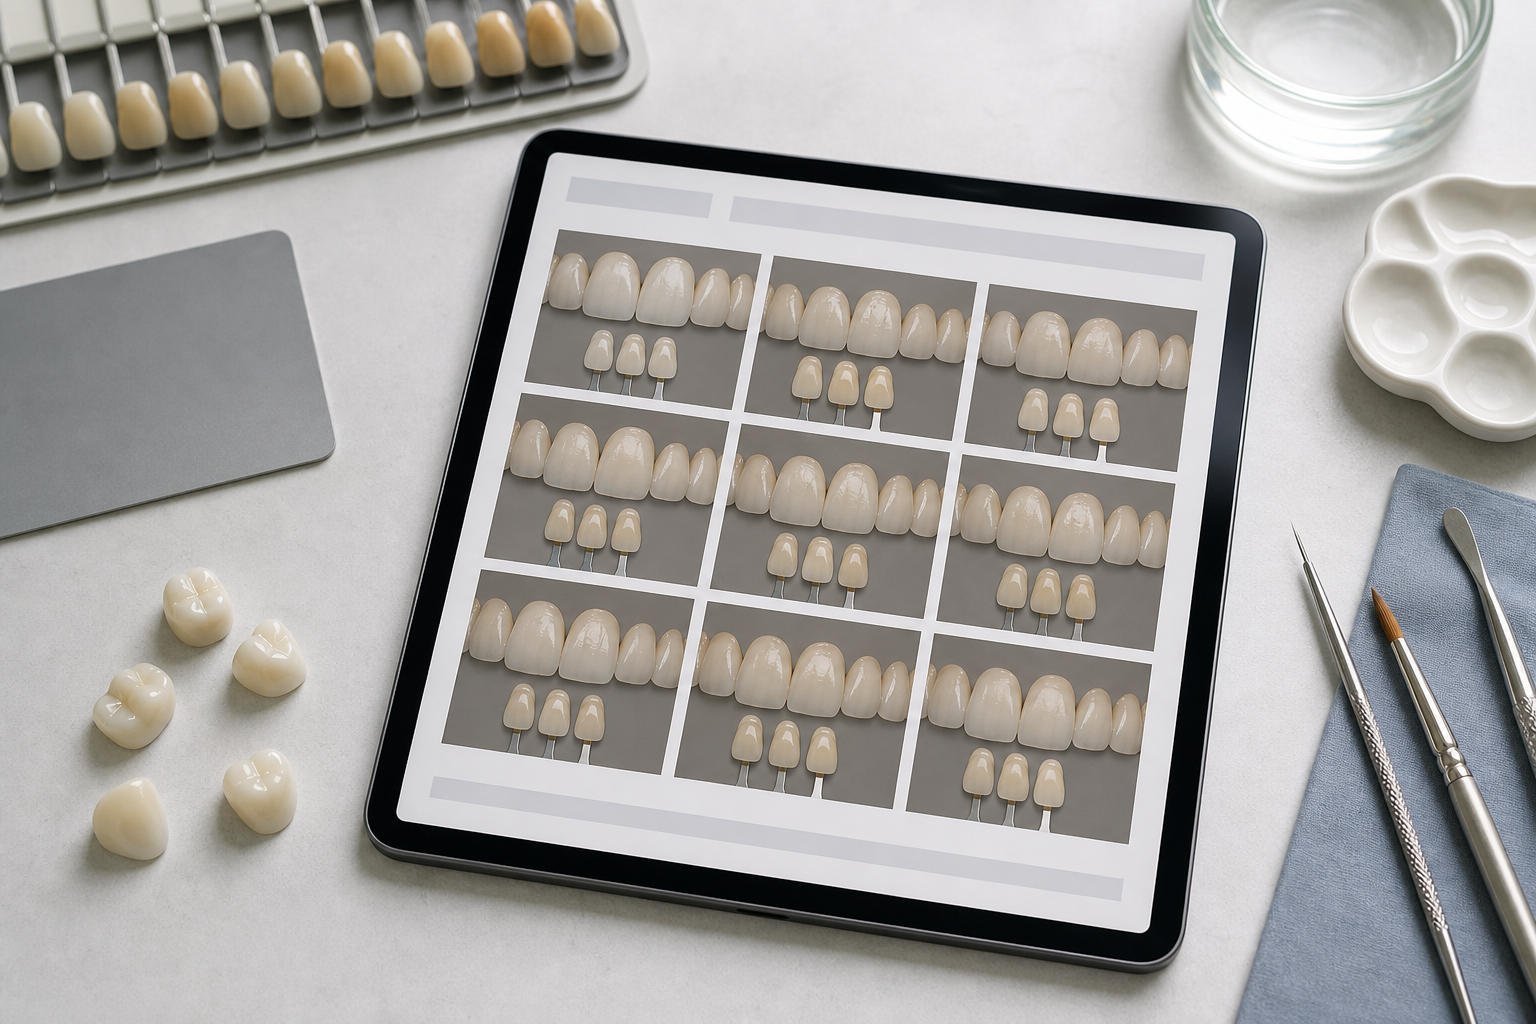
A visual case sheet is useful when image order matters or when several views must be reviewed together. It should complement original image files rather than replace them.
A clear case sheet might contain:
- A non-identifying case code
- Capture date
- Orientation image
- Selected-tab comparison
- Alternate-tab comparison, if relevant
- Detail image
- Short factual notes supplied through the approved process
- Version or export date
Do not crowd a page with every capture. Three or four sufficiently large images are usually more useful than a dense contact sheet of tiny thumbnails. Keep comparison images at matching sizes and avoid colored page backgrounds that may affect visual perception. A neutral, restrained layout is preferable.
You can assemble prepared images with Image to PDF. If administrative notes or other approved documents must be included, combine the resulting files with PDF Merge. Review the merged document page by page because portrait and landscape pages can produce unexpected scaling.
A PDF viewer may apply its own scaling or color handling, so the original photographs should remain available when precise inspection is needed. The PDF is primarily an organized communication layer.
Apply Privacy Controls Before Delivery
Clinical photographs may be sensitive even when they do not show a full face. Treat capture, storage, editing, and delivery as parts of the same privacy obligation.
Follow the practice's approved consent, retention, access, and transmission procedures. Do not move case images through personal photo libraries, consumer messaging accounts, or unapproved cloud storage merely because those routes are convenient.
Before export, check for indirect identifiers in:
- Filenames and folder names
- PDF titles and document properties
- Visible labels, appointment screens, or paperwork in the frame
- Embedded location information
- Free-form notes
- Email subjects and message bodies
Metadata handling should follow organizational policy. Removing metadata indiscriminately may discard useful capture information, while retaining everything may expose device, time, or location details. Decide which metadata belongs in the clinical master and which belongs in an external review copy.
Keep an auditable distinction between originals, edited masters, review exports, and PDF summaries. That separation helps prevent a compressed attachment from becoming the only surviving case image.
Run a Preflight Audit
Before sending the handoff, review the package as the recipient will receive it—not only inside the editing application.
Image Quality
- The subject is sharply focused at the intended region.
- Selected and alternate tab frames use comparable exposure and framing.
- No important surface is lost to clipping.
- Color correction is consistent across images from the same setup.
- Compression has not introduced obvious blocks, halos, or smeared detail.
- Wider context and close comparison views are both available.
File Integrity
- Every file opens in a standard viewer.
- Extensions match actual formats.
- Orientation is correct.
- Filenames identify view and sequence.
- Originals remain stored separately.
- The PDF contains the intended pages in the correct order.
Case and Privacy Controls
- The package is associated with the correct case code.
- No unrelated case image is present.
- Filenames follow the approved privacy convention.
- Visible and embedded identifiers have been reviewed.
- The chosen delivery channel is authorized.
- The recipient has access to full-quality files when required.
Perform this audit from the exported folder. Opening only the source files inside an editor will not reveal a failed conversion, incorrect PDF order, or overly compressed delivery copy.
Common Failure Patterns and Their Fixes
The Tab Looks Brighter Than the Tooth
Check whether the tab is closer to the light, tilted toward it, or positioned in a different plane. Repeat the comparison with the camera and lighting fixed and the tab aligned more closely with the target surface.
Every Frame Has a Different Color Cast
Disable automatic white-balance changes for the comparison sequence, remove competing light sources, and include a neutral reference under the same illumination. Correct images from one setup as a group rather than making unrelated adjustments by eye.
The Email Copy Looks Soft
Determine whether the mail service or messaging application resized the attachment. Deliver through an approved channel that preserves files, or provide a clearly labeled review copy while retaining the original-resolution set.
The PDF Is Easy to Send but Hard to Inspect
Reduce the number of photographs per page, enlarge the comparison views, and attach or otherwise provide the individual image files. A case sheet should organize evidence, not miniaturize it beyond usefulness.
The Folder Contains Too Many Similar Images
Select frames by purpose: orientation, principal comparison, alternate comparison, and detail. Archive additional captures according to policy, but do not make the recipient guess which frame represents the intended selection.
Make Consistency the Main Quality Standard
Dental shade-tab photography becomes more useful when every stage supports comparison. Stable lighting, a neutral reference, consistent tab placement, restrained editing, deliberate exports, and clear naming reduce ambiguity without requiring an oversized equipment list.
The most reliable handoff includes both visual evidence and context: an orientation view, comparable shade frames, an appropriate detail image, well-preserved originals, and a compact case sheet when ordered presentation is helpful. Just as importantly, it respects privacy controls and avoids edits that could change clinically relevant appearance.
A short, repeatable capture and export system will usually outperform a large collection of attractive but inconsistent photographs. Build the setup once, test it with the receiving laboratory, document the agreed conventions, and audit every exported package before it leaves the approved environment.