Film Negative Sleeve Contact Sheets: A Practical Archive Guide
Build reliable digital contact sheets for sleeved film negatives using controlled photography, careful inversion, consistent filenames, readable labels, and compact PDF indexes.
Film Negative Sleeve Contact Sheets: A Practical Archive Guide
A folder of individually scanned negatives is not necessarily a usable archive. The files may be sharp and beautifully corrected, yet still conceal the relationships that made the original sleeve meaningful: which frames belong together, where a sequence begins, which exposure was bracketed, and what the photographer wrote along the edge.
A digital contact sheet solves a different problem from a high-resolution scan. It is an index, not a master reproduction. Its purpose is to let a researcher, studio assistant, family historian, or photographer inspect an entire sleeve quickly and then locate the corresponding frame without opening dozens of files.
The challenge is preserving that context while producing positive, readable previews from transparent film. Negatives have extreme tonal values, film bases vary in color, plastic sleeves introduce reflections, and handwritten identifiers are often easier to lose than the photographs themselves. This guide presents a practical system for creating useful contact sheets with modest equipment while keeping the original archive structure intact.
Decide What the Contact Sheet Must Prove
Before photographing anything, define the questions the finished index should answer. A decorative thumbnail grid may look polished but fail as an archival aid if it disconnects images from their physical locations.
A useful sheet normally needs to show:
- The identity of the box, binder, or collection
- The sleeve number or existing archival reference
- The order of strips from top to bottom
- The position of every frame within each strip
- Blank, damaged, or heavily overexposed frames
- Edge markings, annotations, and inserted notes when relevant
- The filename pattern used for individual digital images
Do not silently remove frames that appear useless. A blank frame can explain a break in numbering, while an accidental exposure may establish sequence. If you omit it from the visual index, retain its position with a clearly distinguishable placeholder.
The contact sheet is also not the right place for aggressive restoration. Dust removal, local contrast changes, and color correction can be appropriate for presentation copies, but an archive index should remain predictable. Apply enough correction to make content identifiable, then reserve interpretive editing for separate derivatives.
Choose the Right Digitization Level
Not every collection needs frame-by-frame scanning at preservation resolution. Match the capture method to the intended use and the value of the material.
| Intended result | Sensible capture level | Main limitation |
|---|---|---|
| Fast box inventory | One overview photograph per sleeve | Small frames may be difficult to identify |
| Searchable visual index | Sleeve overview plus strip-level captures | Not sufficient for fine reproduction |
| Research access set | Individual frame captures plus contact sheets | More capture and naming time |
| Preservation master set | Calibrated high-resolution frame scans | Greater storage and quality-control burden |
For an unknown collection, begin with sleeve overviews. They reveal duplicates, empty sleeves, film formats, labeling patterns, and condition problems before expensive scanning begins. You can then prioritize individual frames based on subject value, demand, or preservation risk.
A hybrid approach is often best: photograph every sleeve as found, create positive previews for navigation, and produce high-resolution masters only for selected frames. The overview remains valuable even after individual scans exist because it records physical arrangement.
Record the Original Sleeve Before Rearranging Anything
Make an ordinary reflected-light photograph of the complete sleeve before placing it on a light source. This first image documents labels, grease-pencil notes, torn pockets, numbering, and inserted paper that may disappear against transmitted light.
Capture the front and back when both contain information. If a note overlaps a frame, photograph it in place, then make a second exposure with the note gently moved aside. Never remove film from an unfamiliar sleeve merely to make the picture cleaner; brittle negatives, unstable emulsions, and tightly packed pockets may require specialist handling.
Assign the sleeve an identifier at this point. Use the identifier in every later filename rather than relying on capture order. A simple pattern might be:
COLLECTION_BOX-SLEEVE_VIEW.ext
For example, an overview, strip capture, and individual frame could follow this structure:
MILLER_B03-S017_VIEW.jpg
MILLER_B03-S017_R02.jpg
MILLER_B03-S017_R02-F05.tif
Here, R02 means the second physical row, not frame number two printed on the film. Keeping row position and manufacturer frame markings separate prevents confusion when strips start halfway through a numbered sequence.
Build a Repeatable Capture Station
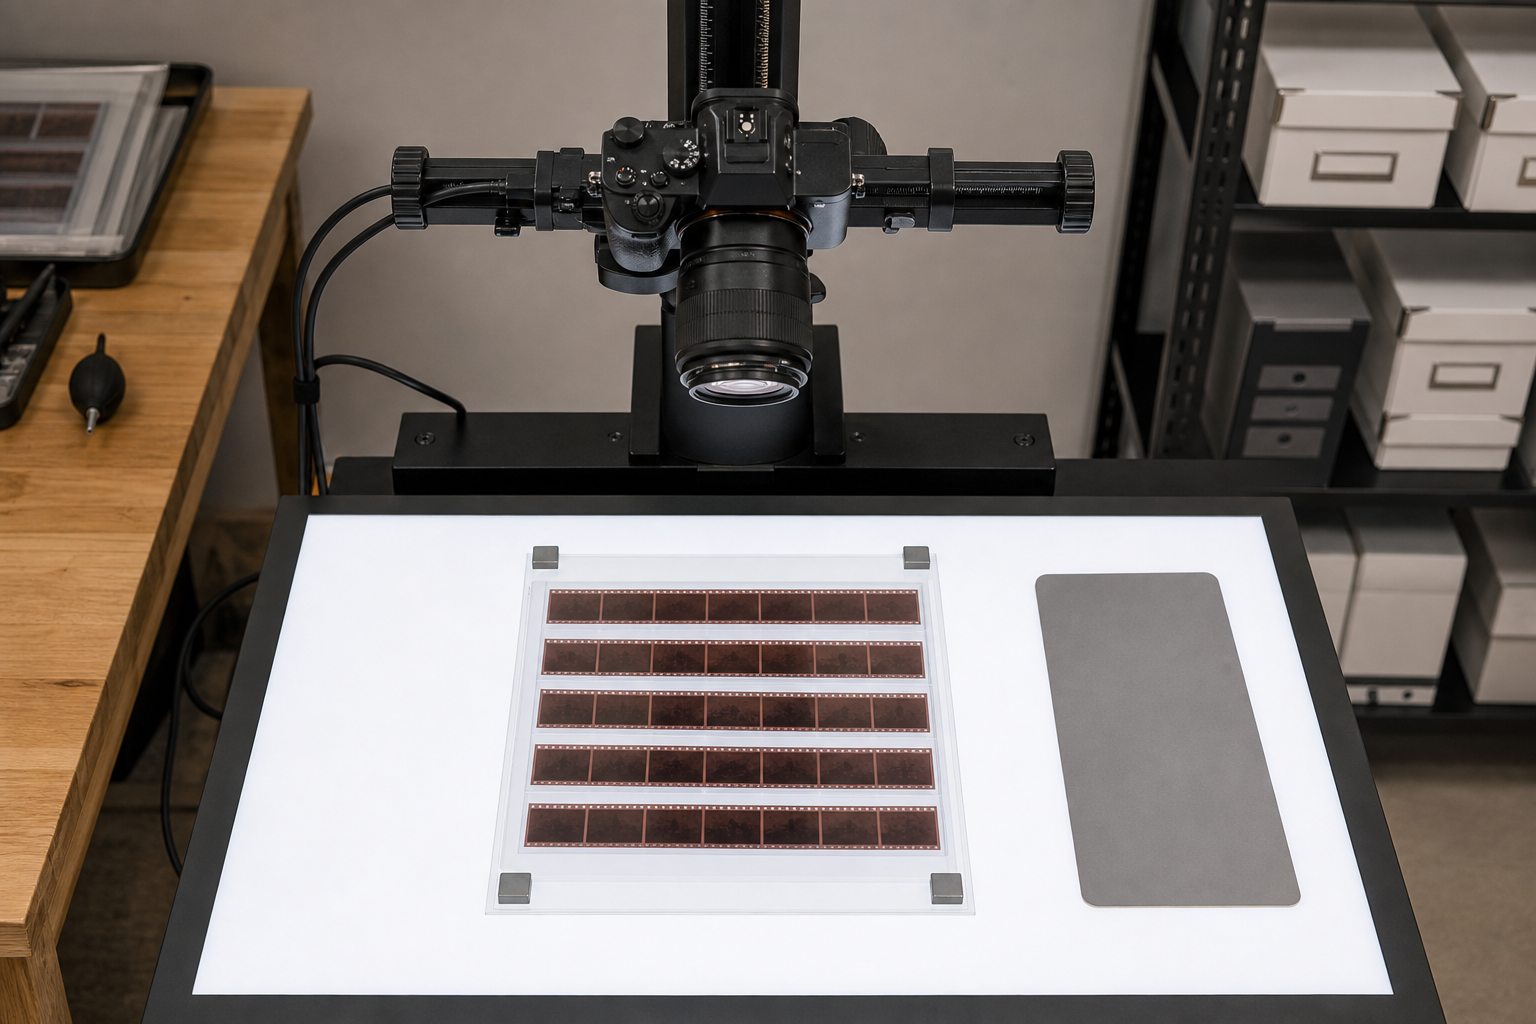
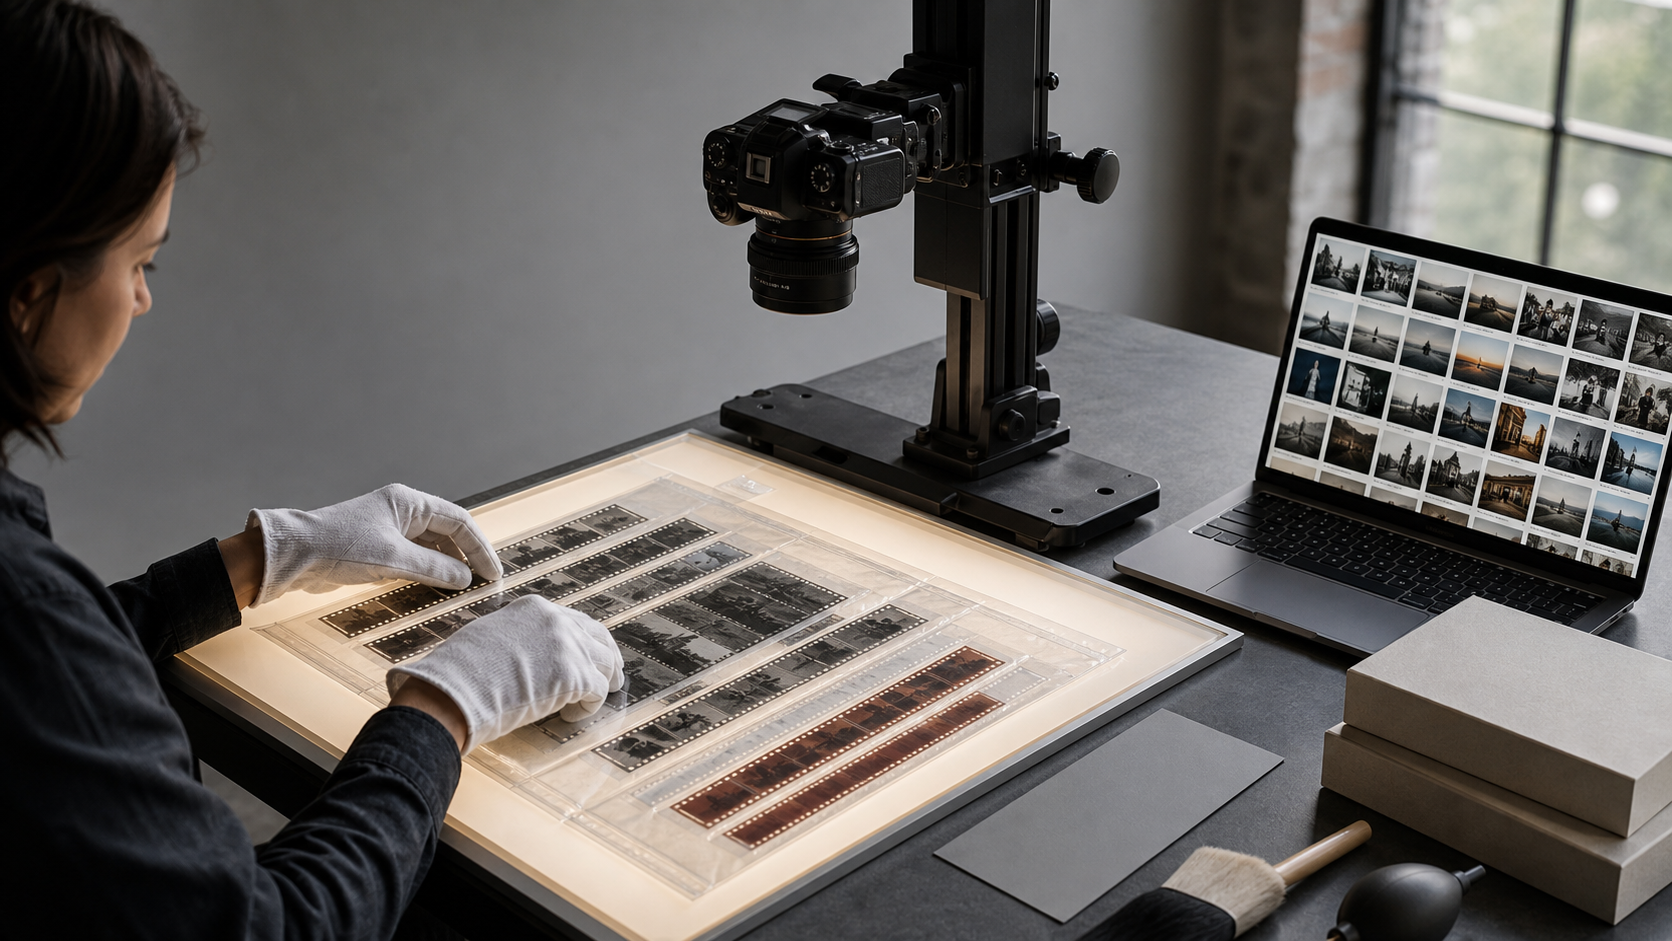
A stable overhead camera and an even light source are more dependable than handheld photography. A copy stand is ideal, although a rigid tripod with a horizontal arm can work if the camera cannot drift.
Use a light table or high-quality LED panel with a diffuser. Uneven tablet screens and improvised phone displays can introduce pixel patterns, color casts, or brightness bands. Clean the light surface before each session, but avoid cleaning film unless you understand its material and condition.
Align the camera sensor parallel to the sleeve. If one side of the rectangle appears wider than the other, correct the physical alignment before capture rather than depending on perspective correction later. Leave a narrow border around the sleeve so the complete edges remain visible.
For dependable exposures:
- Disable automatic rotation and unstable scene modes.
- Use a low ISO to control noise in dense negative areas.
- Select an aperture that balances sharpness with diffraction; extreme apertures rarely help.
- Focus on the film plane, not the sleeve surface or light panel.
- Use a timer or remote release to avoid vibration.
- Capture a neutral reference at the start of each session.
- Lock exposure and white balance for sleeves of the same film type.
Two pieces of clean, inert material can hold curled sleeve edges outside the image area. Do not place ordinary adhesive tape on archival enclosures or film. If the sleeve surface produces reflections, darken the room and shield stray light around the camera. A polarizer may reduce some glare, but test it carefully because it can interact with plastic and reveal stress patterns.
Capture Negatives Without Clipping Useful Detail
Negative film reverses familiar exposure judgment. Dense highlights in the original scene appear dark on the negative and require enough transmitted-light information to survive inversion. If those dark regions are clipped during capture, no later adjustment can recover them.
Consult the camera histogram, but remember that an entire sleeve includes clear gaps, labels, plastic, and film. Make a test capture, invert it, and inspect the densest important frame at high magnification. Bracket difficult sleeves if needed, especially when underexposed and overexposed frames share one strip.
RAW capture provides greater latitude for inversion and color correction. JPEG can be adequate for inventory overviews when speed and compatibility matter, but avoid repeated JPEG saves. Retain the original capture separately from the corrected positive derivative.
If one sleeve contains several film stocks, do not force every frame through a single color correction. Establish a neutral starting point for each distinct film base. For black-and-white film, convert after inversion rather than before if the color channels contain unequal amounts of recoverable detail.
Invert and Normalize the Film Carefully
A negative-to-positive conversion is more than pressing an invert command. Color-negative film includes an orange mask, while faded stocks may have uneven channel response. The aim for an index is consistent identification, not a definitive artistic interpretation.
Start by sampling unexposed film base from the same strip when possible. Use that reference to neutralize the base, invert the tones, and set conservative black and white points. Avoid crushing shadows simply to create a dramatic preview. Researchers may need to distinguish a faint figure, sign, or object near the edge.
Apply corrections in this order:
- Lens and perspective correction, if genuinely required
- Film-base or channel balancing
- Tonal inversion
- Neutral white-balance adjustment
- Gentle global contrast
- Modest noise reduction and sharpening for preview size
Keep the settings consistent within a strip, but permit exceptions for individual frames when an exposure is otherwise unreadable. Document substantial deviations in a note or filename suffix rather than presenting them as equivalent captures.
For isolated problem frames, the AI photo editor can help test restrained cleanup or reconstruction ideas. Treat such results as edited derivatives, not documentary masters. Never overwrite the original capture, and do not use generative changes where evidential accuracy matters.
Separate the Archival Master From the Access Preview
A practical archive benefits from distinct file roles. Mixing them leads to accidental compression, uncertain provenance, and repeated editing of the only good capture.
Maintain at least three layers:
- Capture original: The untouched camera or scanner file
- Corrected master: A lossless or minimally processed positive image with documented adjustments
- Access derivative: A smaller image used in contact sheets, web catalogs, or email
The corrected master may contain more resolution than a contact sheet can display. Create derivatives at the final intended dimensions rather than embedding full-size masters and relying on a document viewer to scale them.
Use the image resize tool to standardize preview dimensions while retaining the original aspect ratio. Then use image compression to reduce delivery size. Inspect thin details, grain, faces, handwritten notes, and dark areas after compression; a small numerical saving is not worthwhile if it makes frame identification unreliable.
When source files arrive in inconsistent formats, convert images into a shared access format before assembling the index. Keep format conversion out of the master folder so that derivatives cannot be mistaken for originals.
Design a Contact Sheet That Preserves Context
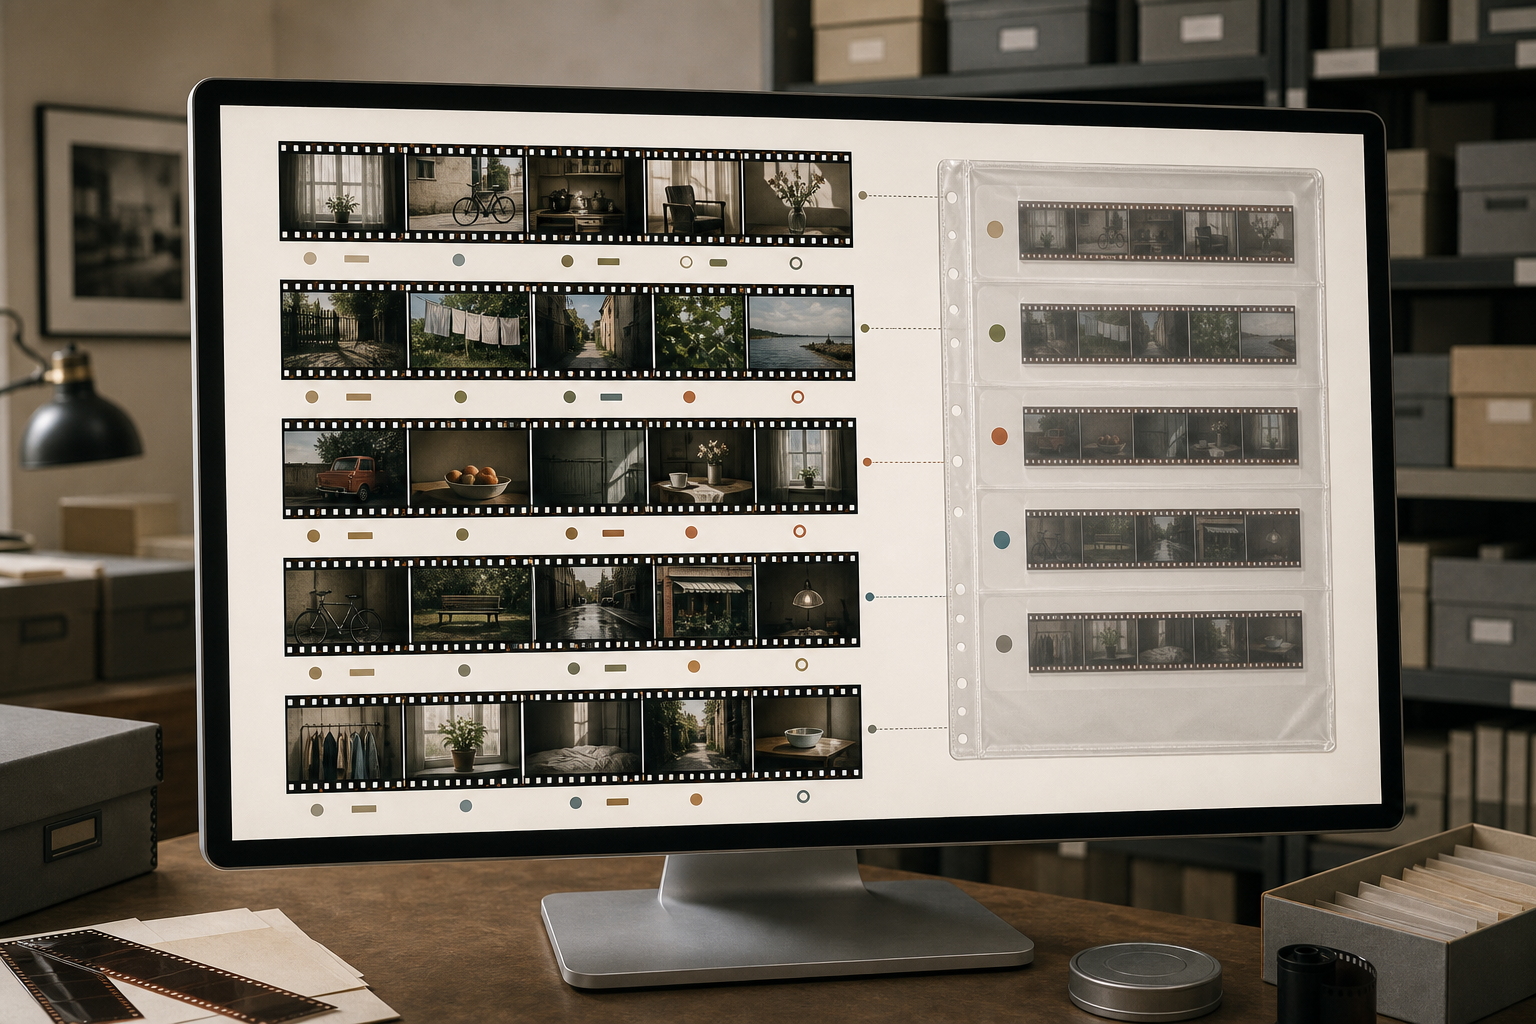
The strongest layout mirrors the physical sleeve. If it contains seven rows, the digital contact sheet should normally contain seven corresponding rows. This spatial match lets a user move between screen and archive without translating an arbitrary gallery order.
Each thumbnail should have a stable reference immediately beside or below it. Include the sleeve identifier, row position, and frame position. If the film edge displays a manufacturer number, record it separately, such as Edge 24A, rather than substituting it for the archive reference.
Use generous spacing. Dense black borders may blend into dark frames, while elaborate decorations consume space and distract from comparison. A neutral light background usually makes both black-and-white and color images easy to inspect.
A useful page can contain:
- A collection and sleeve identifier
- A small photograph of the untouched sleeve
- Positive thumbnails arranged in physical order
- Row and frame references
- A concise condition note
- The derivative creation date or version
- A pointer to the folder containing master files
Avoid placing long prose beneath every frame. Put repeated technical details in a page-level note and reserve frame-level comments for exceptions such as damage, uncertain orientation, double exposure, or missing material.
Set a Resolution and File-Size Budget
A contact sheet viewed on a laptop does not require print-master resolution. Oversized PDFs become slow to open, difficult to email, and frustrating to browse on shared drives. Excessive compression, however, turns grain and small subjects into blocks.
Choose the target from the real viewing condition:
| Use case | Thumbnail priority | Suggested test |
|---|---|---|
| On-screen inventory | Fast page loading | Identify subjects at normal laptop zoom |
| Research PDF | Moderate enlargement | Read signs or faces after one zoom step |
| Printed binder | Stable print dimensions | Print one page on the intended office printer |
| Web catalog | Responsive delivery | Test on a phone and a slower connection |
Do not rely on a nominal DPI value alone. Pixel dimensions, physical placement, compression, and viewer scaling all affect the result. Produce one representative page containing dense negatives, fine grain, handwriting, and low-contrast scenes. Test that page before processing the whole collection.
Assemble a Navigable PDF Index
PDF is useful when a sleeve or box should travel as a self-contained review packet. It preserves page order, supports printing, and is widely accessible. Create one page per sleeve for small collections, or divide large holdings into box-level volumes so a correction does not require rebuilding an enormous document.
Once the contact-sheet pages are ready, use image to PDF to assemble them in identifier order. Check orientation before export, and verify that no page was sorted alphabetically in a way that places S100 before S20. Zero-padded identifiers such as S020 prevent this problem.
If cover pages, collection notes, or condition reports already exist as PDFs, combine them with the visual index using PDF merge. Preserve the image files outside the PDF as well. A PDF is an access package, not a replacement for the underlying derivatives or masters.
For a large collection, consider separate volumes by box or date range. Keep the volume naming rule predictable, and include a short manifest stating the first and last sleeve identifiers in each file.
Run a Frame-by-Frame Quality Audit
Automated processing can make hundreds of previews quickly, but it can also repeat one unnoticed error hundreds of times. Quality control should compare the digital sheet with the physical sleeve, not merely inspect the PDF in isolation.
For every sleeve, verify:
- The identifier matches the enclosure
- All physical rows appear in the correct order
- Every frame position is represented
- Portrait frames have a consistent and sensible orientation
- No thumbnail is mirrored unintentionally
- Dense frames retain visible information
- Clear film areas are not mistaken for missing files
- Handwritten notes have been captured separately
- Corrected previews link logically to their masters
- The PDF page is legible at its intended viewing size
Mirroring deserves special attention. Depending on how the film was placed, emulsion-side orientation can produce reversed previews. Look for street signs, clocks, clothing closures, or known landmarks. Record the archive's orientation convention so later batches remain consistent.
Also test retrieval. Choose three random thumbnails, note their references, and locate the corresponding master files. A visually accurate contact sheet still fails if its identifiers do not lead users to the right images.
Handle Dust, Damage, and Sensitive Material Transparently
Dust is inevitable, but its treatment should match the file's role. Remove obvious sensor dust from access derivatives if it appears identically across many captures. Do not erase scratches, fingerprints, tape marks, or emulsion damage from documentary versions without retaining an unaltered source.
Physical condition may be more important than visual polish. Flag vinegar odor, sticky surfaces, bubbling, channeling, severe curl, mold-like growth, or color separation for professional assessment. Isolate suspect material according to the archive's policies rather than placing it on shared equipment.
Collections may also contain private, distressing, or restricted images. Contact sheets expose many frames at once, increasing the chance that a casual viewer sees sensitive content. Apply access controls at the folder and PDF level, create redacted access copies when required, and retain the unrestricted originals only in approved storage. Do not use visual redaction that can be reversed by simply extracting an embedded image.
A Compact Production Checklist
Before declaring a box complete, confirm the following stages.
Capture
- Photograph sleeve fronts, backs, labels, and inserted notes
- Assign identifiers before generating derivative names
- Keep the camera parallel and the transmitted light even
- Test exposure against the densest important negative
- Retain untouched source files
Processing
- Correct film base before final color judgment
- Keep changes consistent within each strip
- Separate corrected masters from access previews
- Mark interpretive or generative edits clearly
- Standardize dimensions and formats only in derivative folders
Assembly
- Match the contact-sheet layout to physical sleeve order
- Show blank and damaged positions rather than closing gaps
- Use stable row and frame references
- Test PDF size and readability on realistic devices
- Preserve page images outside the assembled PDF
Audit
- Compare every sheet with its physical enclosure
- Check orientation, mirroring, sequence, and missing frames
- Retrieve random masters using only contact-sheet references
- Record exceptions and condition concerns
- Back up the index, derivatives, and masters according to their value
Preserve the Map, Not Just the Pictures
The central purpose of a film-negative contact sheet is to preserve relationships. A perfect scan of one frame cannot explain where it sat in a sequence, what was written on its sleeve, or which neighboring exposures belong to the same event.
Start with the enclosure as an archival object. Capture it before rearrangement, assign stable identifiers, create conservative positive previews, and reproduce the physical sequence in the digital layout. Then package those previews at a size people can actually open and inspect.
This approach produces more than an attractive gallery. It creates a dependable map between shelves, sleeves, contact sheets, and individual files—the structure that makes a growing film archive understandable long after the original digitization session is over.