Fire Door Inspection Photo Packets: A Practical Image-to-PDF Guide for Facility Teams
Learn how facility teams can turn fire door inspection photos into clean, searchable PDF packets with readable labels, consistent sizing, OCR, and compact file sizes.

Fire Door Inspection Photo Packets: A Practical Image-to-PDF Guide for Facility Teams
Fire door inspections create a strange documentation problem. The evidence is visual, but the review often happens later, away from the building, inside email threads, compliance folders, maintenance tickets, or capital planning files. A single door can require photos of the full leaf, frame, hinges, latch, closer, glazing, labels, gaps, damage, field modifications, and corrected conditions. Multiply that by dozens or hundreds of doors and the result is usually a folder full of phone photos with names like IMG_4821.jpg.
That is not enough when someone needs to understand which photo belongs to which opening, whether the label is readable, or what changed after a repair. A useful fire door packet should be easy to review without special software, compact enough to send, and organized enough that a manager, contractor, or inspector can trust it.
This guide focuses on the image and PDF side of the job: how to capture, clean, OCR, resize, compress, and assemble fire door inspection photos into practical PDF packets. It does not replace code requirements, qualified inspection practice, or your organization’s safety policies. It helps you make the photo evidence easier to read, search, send, and archive.
Why Fire Door Photos Need More Structure Than Normal Maintenance Images
Most maintenance photos only need to answer one question: what is broken? Fire door documentation usually has to answer several questions at once:
- Which opening is shown?
- Is the full door assembly visible?
- Are labels and hardware details readable?
- Is the deficiency clear enough for someone who was not on site?
- Can the repair team locate the exact issue later?
- Can the final packet be stored with inspection records without becoming huge?
The problem is not just image quality. It is continuity. A photo of a missing screw is useless if it is separated from the door overview. A clear certification label is less useful if the file name does not identify the building, floor, or door number. A beautiful high-resolution image may still fail the practical test if the PDF is too large for the maintenance system.
A strong packet gives every image a job. Overview photos establish location and orientation. Closeups show proof. Label photos make identifiers searchable. Final repaired-condition photos close the loop.
What Belongs in a Fire Door Photo Packet
A packet does not need every photo taken in the field. It needs the photos that support a decision. For most inspection sets, the useful structure is consistent: one door, one mini story.
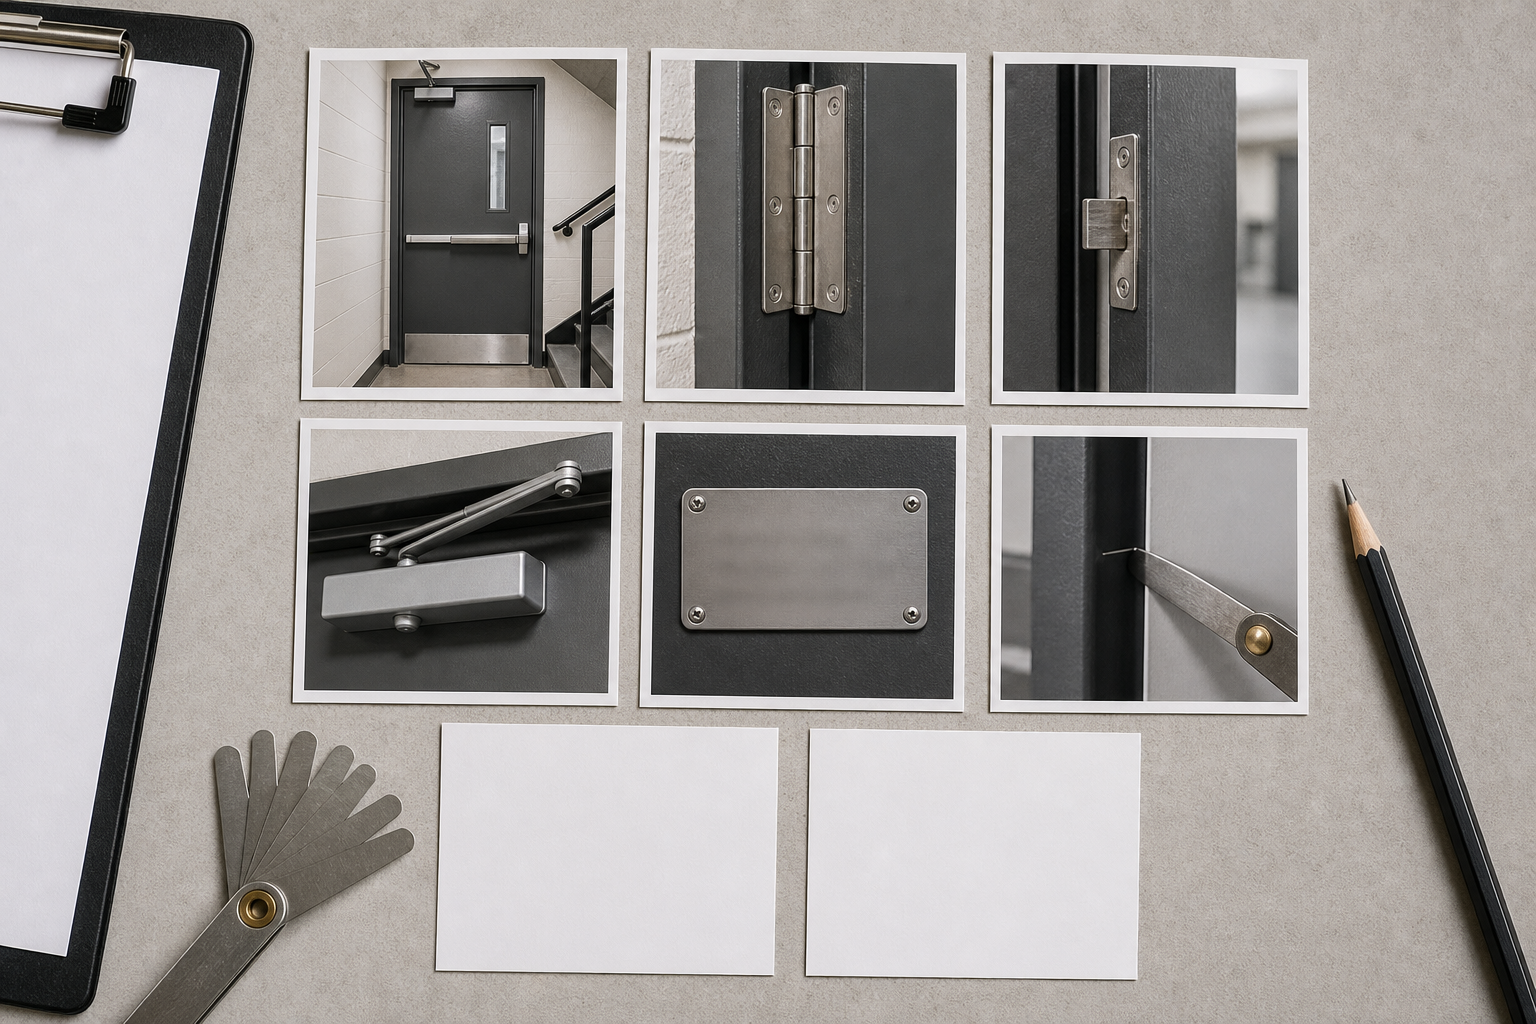
A practical door set often includes:
| Photo type | Purpose | Capture note |
|---|---|---|
| Door overview | Shows the full assembly in context | Stand far enough back to include frame and hardware side |
| Door ID or room marker | Connects the photo set to the location | Capture any room sign, opening tag, or plan reference if allowed |
| Certification label | Supports later verification | Shoot straight on, close enough for OCR if possible |
| Hinges | Shows condition, fasteners, modifications, wear | Include all hinges or a closeup of the issue |
| Latch and strike | Documents alignment and latching concerns | Avoid flash glare on metal surfaces |
| Door closer | Shows arm, body, fasteners, leaks, or missing cover | Include enough surrounding surface for context |
| Gaps and clearance | Supports review of clearance issues | Use a visible gauge or ruler where appropriate |
| Damage or field modification | Shows holes, cuts, kick plates, glazing, penetrations | Capture both closeup and wider context |
| Corrected condition | Confirms repair completion | Match the angle of the deficiency photo when possible |
The packet should not become a raw dump. If a contractor or manager has to scroll through ten near-identical blurry closeups, the useful images are harder to trust. Remove duplicates, keep the best angle, and preserve enough context to make the closeups meaningful.
Capture Rules That Make Later Editing Easier
The best PDF packet starts before any editing tool is opened. Fire doors are often in corridors with harsh overhead light, shiny hardware, dark finishes, and narrow spaces. Small capture habits make a big difference.
Use a consistent sequence for each door. For example: overview, ID marker, label, hinge side, latch side, closer, deficiency closeups, corrected condition. The exact order can vary, but the same rhythm helps when sorting later.
Keep the camera square to labels and hardware when readability matters. Angled photos can look acceptable on a phone screen but become hard to OCR after conversion. If a label is reflective, take one straight photo and one slightly angled photo to reduce glare.
Take an overview before every closeup. Closeups are excellent for proof, but they are poor for orientation. A reviewer should never have to guess where the damaged component sits on the door assembly.
Avoid digital zoom when possible. Move closer instead. Digital zoom often creates soft text and edge artifacts, which become worse after compression.
Check focus on labels, not just the overall image. Phone cameras sometimes focus on the door surface while the small metal label remains soft. Tap the label area before taking the shot.
Leave a little margin around the subject. Cropping can happen later. If the photo is too tight, you may cut off the frame, fasteners, or reference point needed for review.
Naming Photos Without Creating a Filing Burden
Perfect file naming in the field is rarely realistic. People are moving quickly, doors are spread across floors, and the inspection may happen while the building is occupied. Still, some naming structure is worth the effort after capture.
Use a simple pattern that survives sharing:
building-floor-door-detail-status
Examples:
northwing-02-214-overview-before.jpgnorthwing-02-214-label-before.jpgnorthwing-02-214-latch-deficiency.jpgnorthwing-02-214-closer-after.jpg
Keep names lowercase, avoid special characters, and use hyphens instead of spaces. This makes files easier to sort across operating systems and maintenance platforms.
If photos already have camera names, rename only the selected images that will enter the packet. Do not waste time naming every rejected duplicate. The packet is the deliverable.
For larger sites, split by building or floor before making PDFs. A 250-page all-site packet may look thorough, but it is often worse for review than five smaller packets grouped by zone.
Cleaning Photos Without Hiding Evidence
Inspection images should be clear, not cosmetically altered. The goal is readability, not beautification. Over-editing can make evidence look less trustworthy, especially if damage, labels, paint conditions, or hardware wear are relevant.
Safe edits usually include:
- Cropping empty floor, ceiling, or wall areas
- Rotating images so the door is upright
- Correcting exposure when a photo is too dark
- Reducing glare enough to reveal labels or hardware
- Resizing huge phone images for practical PDF assembly
- Compressing duplicates of the same resolution budget
Risky edits include:
- Removing stains, holes, scratches, dents, or cracks
- Replacing backgrounds around the door
- Sharpening so aggressively that label characters become distorted
- Changing color in a way that could misrepresent materials
- Cropping so tightly that the location context disappears
If an image needs heavy rescue, keep the original. You can include the cleaned version in the packet for readability while archiving the untouched source in the project folder.
For basic size and dimension preparation, ConvertAndEdit tools such as resize image and compress image are useful before PDF assembly. Resizing helps avoid enormous pages. Compression helps keep the final packet portable.
Using OCR for Door Labels and Location Markers
Searchability is the hidden advantage of a well-made packet. If the PDF contains OCR text from labels, room markers, or handwritten notes, someone can search for a door number instead of manually scanning pages.
OCR is most useful for:
- Door numbers
- Room numbers
- Fire rating labels
- Manufacturer labels
- Inspection tags
- Handwritten deficiency notes
- Temporary repair labels
- Floor or zone markers
Before running OCR, make sure the relevant text is large enough, upright, and not blurred. OCR cannot reliably fix a label that is photographed at a steep angle from across the corridor.
A practical approach is to run the clearest label and marker images through image OCR, then use the recognized text to confirm naming, captions, or packet order. You do not have to OCR every image. Prioritize the images that carry identifiers.
If OCR returns questionable text, do not silently trust it. Compare it with the original photo and correct the file name or packet caption manually. A wrong door number is worse than no searchable door number because it sends people to the wrong location.
Choosing Page Layout: One Photo Per Page or Contact Sheets
There are two common packet styles: one photo per page and contact-sheet pages. Each has a place.
| Layout | Best for | Tradeoff |
|---|---|---|
| One photo per page | Detailed review, label reading, contractor repair notes | Longer PDF, more scrolling |
| Two photos per page | Before-and-after pairs, overview plus closeup | Still readable if images are clean |
| Four to six photos per page | Summary review, quick deficiency browsing | Small labels may become unreadable |
| Contact sheet appendix | Large projects with many supporting images | Needs strong naming or captions |
For fire door evidence, one or two photos per page is usually safer for deficiency documentation. Labels, gaps, and hardware details get too small quickly. Contact sheets are better as an appendix or overview, not the only record.
If you must fit many images into fewer pages, group by door rather than by photo type. A page containing the overview, label, latch issue, and closer issue for Door 214 is easier to understand than a page containing only latch photos from ten different doors.
A Practical Preflight Checklist Before Export
Before turning images into a PDF, run a preflight pass. This is the fastest way to catch problems that would otherwise become expensive confusion later.
Use this checklist for each door set:
- The door overview is present.
- The door or location identifier is readable or documented in the file name.
- The label photo is upright and sharp enough to inspect.
- Deficiency closeups include enough context to locate the issue.
- Duplicate or near-duplicate photos have been removed.
- Dark images are bright enough to see hardware and edges.
- Very large images have been resized to a practical dimension.
- The selected images are named consistently.
- Before and after images are clearly separated when both are included.
- The final group order matches how someone will review the door.
For most packets, resizing the long edge of phone photos to a consistent range is enough. You do not need billboard-size images inside a maintenance PDF. The right size depends on your review needs, but the label and hardware details should remain readable at normal PDF zoom levels.
Compression should be visible only in file size, not in the evidence. If text edges become mushy, metal labels show blocky artifacts, or screw heads disappear into noise, compression went too far. Start with moderate compression, inspect a few sample pages, and adjust.
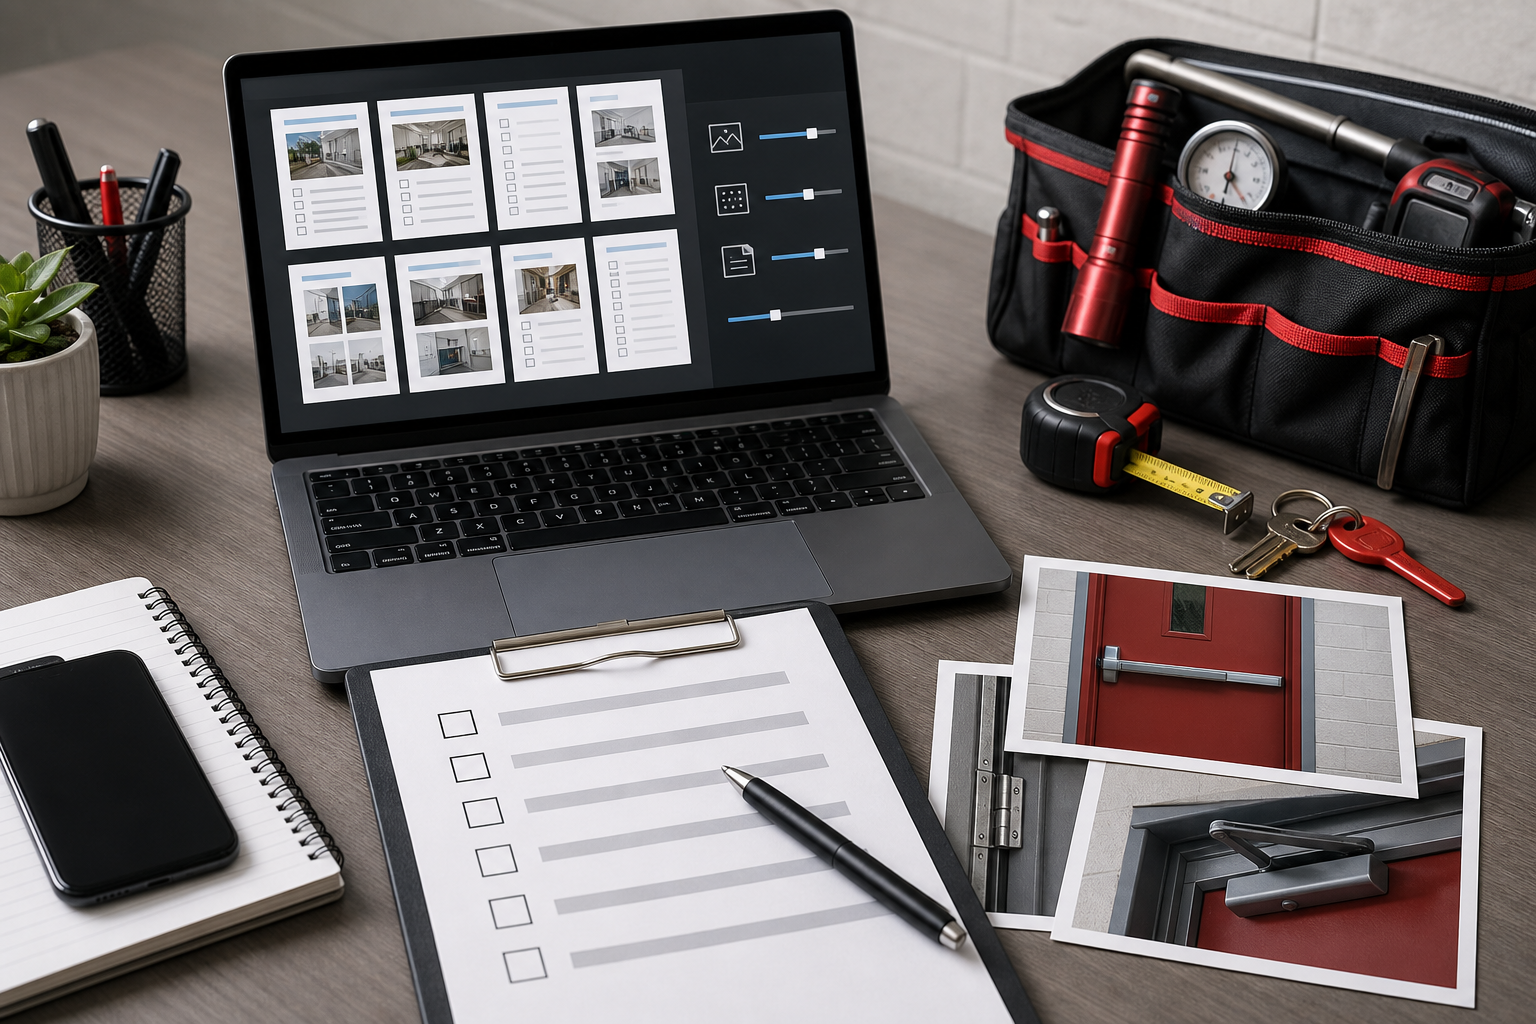
Building the PDF Packet
Once images are selected, cleaned, named, and sized, convert them into a PDF that follows the review order. ConvertAndEdit’s image to PDF tool is a practical choice when you want to assemble photo evidence into a document that is easier to send and archive than a loose image folder.
A useful packet order looks like this:
- Cover or summary page if your team already uses one
- Door sets grouped by building, floor, or zone
- Each door set ordered from overview to details
- Corrected-condition images placed near the matching deficiency
- Appendix images only if they add useful context
If you already have a separate inspection report PDF, do not force everything into one tool at the beginning. Build the photo packet first, then combine it with the report using PDF merge. This keeps the evidence package modular. If the report changes, you can replace that document without rebuilding every image page.
When combining PDFs, put the written report first if it is the primary review document. Put the photo packet first if the document is mainly for repair crews who need visual location evidence. There is no universal rule; the order should match the person opening the file.
Handling Before-and-After Repair Evidence
Repair documentation has a different review pattern from initial deficiency documentation. The reviewer wants to compare the condition, not search through the whole building again.
For before-and-after sets, pair images tightly:
| Pair type | Recommended layout | Why it works |
|---|---|---|
| Overview before and after | Two photos on one page | Confirms the same door assembly |
| Hardware issue before and after | Two photos on one page | Makes correction easy to verify |
| Label or rating concern | One photo per page if text is small | Preserves readability |
| Multiple repairs on one door | Door overview followed by matched pairs | Keeps context clear |
Use similar angles when documenting corrected conditions. If the before photo shows the latch from a direct side angle, the after photo should do the same. Matching angles reduce debate about whether the repair actually addresses the documented issue.
If a repair changes the visible condition dramatically, include a fresh overview. This is especially helpful when hardware was replaced, plates were added, holes were filled, or closers were adjusted.
Common Packet Mistakes and How to Avoid Them
The most common mistakes are not technical. They are organization mistakes that make technical tools less effective.
One mistake is building a PDF directly from every camera photo. This creates a bloated packet with duplicates, bad angles, and irrelevant images. Select first, export second.
Another mistake is compressing too early. If you compress before cropping, OCR, or review, you may damage text that needed to stay sharp. Keep a working copy at better quality, then compress the final selected images or finished PDF as the last step.
A third mistake is separating identifiers from evidence. A label photo on page 3 and a latch deficiency on page 47 may both be useful, but the connection between them is weak. Keep each door’s evidence together.
A fourth mistake is using screenshots of photos inside another document. This usually reduces quality and makes OCR worse. Use original image files whenever possible.
A fifth mistake is relying on folder order that may not survive upload. Some systems sort by date, some by name, and some by upload sequence. File names and PDF page order should both carry the structure.
Recommended File Size Targets
There is no perfect file size for every organization, but practical targets help. The goal is to keep the packet easy to open, upload, and email while preserving the details that matter.
| Packet type | Typical size goal | Notes |
|---|---|---|
| Small repair packet, 1 to 5 doors | Under 10 MB | Usually easy to email and archive |
| Floor packet, 10 to 30 doors | 10 to 40 MB | May need moderate image compression |
| Large building packet | Split into sections | Smaller PDFs are easier to review and replace |
| Label-heavy packet | Prioritize readability over size | Do not over-compress text-heavy images |
If a packet is too large, first remove duplicates and irrelevant photos. Then resize oversized images. Then compress. Do not start by crushing quality across the whole packet.
For images that need format conversion before assembly, convert image can help standardize mixed phone exports, downloaded files, and edited images. Consistent formats reduce surprises when assembling the final PDF.
Simple Review Routine for the Final PDF
After export, open the PDF like a reviewer who has never visited the site. This catches different problems than editing view does.
Check these items:
- Can you identify the building, floor, and door from the packet context?
- Does each door set begin with an overview?
- Are small labels readable at normal zoom?
- Do closeups make sense without verbal explanation?
- Are before-and-after images close enough together to compare?
- Is the PDF small enough for the intended storage or sharing system?
- Does search find expected door numbers or labels if OCR text was added?
- Are pages rotated correctly?
- Are any images accidentally duplicated or missing?
This review pass should be quick. If it takes a long time to understand the packet, the future reader will struggle too.
A Sample Door Packet Structure
Here is a simple structure for one door with a latch issue and completed repair:
| Page | Content |
|---|---|
| 1 | Door overview before repair |
| 2 | Door ID marker or location reference |
| 3 | Certification label closeup |
| 4 | Latch and strike deficiency closeup |
| 5 | Wider view of latch side showing context |
| 6 | Latch and strike corrected condition |
| 7 | Door overview after repair if visual condition changed |
For a larger inspection, repeat the same pattern per door. Consistency lets reviewers move quickly because they know what to expect. It also helps repair teams confirm that they are looking at the right location before starting work.
Final Thoughts
Fire door photo packets are not about making inspection records look polished for their own sake. They are about reducing ambiguity. A good packet lets someone understand the opening, verify the label, locate the deficiency, compare the repair, and store the record without fighting a messy image folder.
The practical system is simple: capture each door in a consistent sequence, keep identifiers close to evidence, clean images only for readability, use OCR where labels and room markers matter, resize before assembly, compress carefully, and export a PDF that follows the way people actually review the building.
When the packet is clear, facility teams spend less time explaining photos and more time acting on them.


