Sewing Pattern Piece Scan Cleanup for Printable Alteration Archives
Learn how to scan, clean, label, scale-check, and archive altered sewing pattern pieces without losing grainlines, notches, handwritten fitting notes, or print accuracy.
Sewing Pattern Piece Scan Cleanup for Printable Alteration Archives
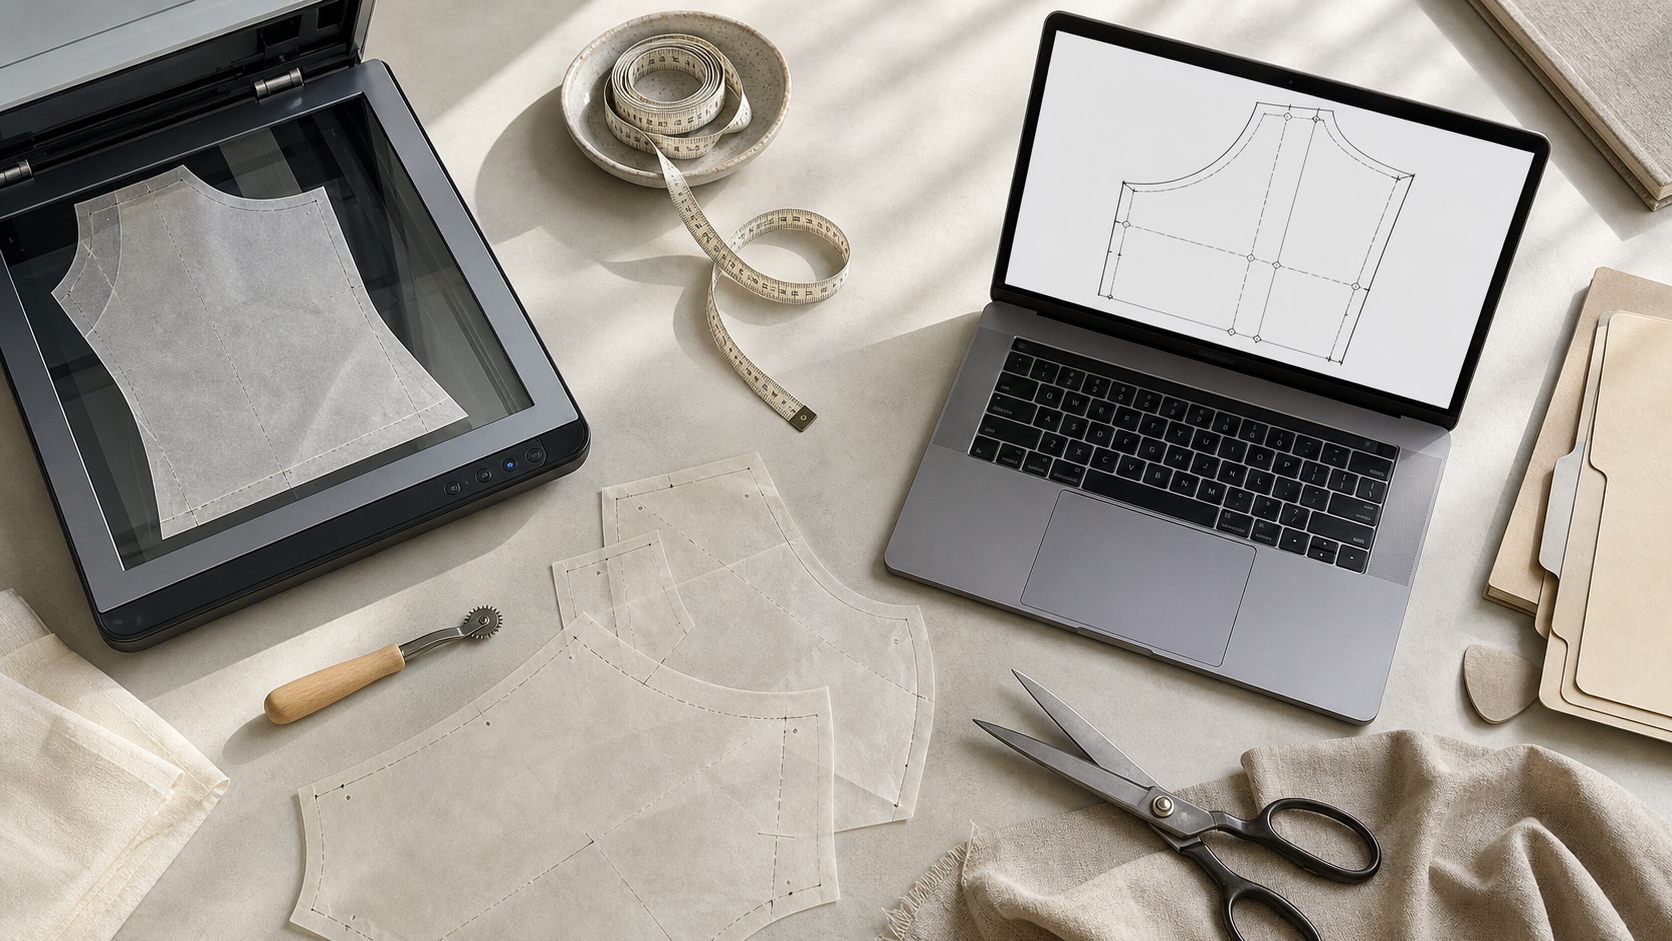
A successfully altered sewing pattern is more than a sheet of paper. It may contain a shortened bodice, a rotated dart, a carefully adjusted sleeve cap, or the exact shoulder correction that finally made a garment sit properly. Unfortunately, these changes often survive only as fragile tissue covered with pencil notes and strips of tape.
Scanning altered pieces creates a durable reference, but a basic scan is not automatically a usable archive. Pattern tissue can disappear against a scanner bed. Fine lines may become muddy. Tape produces shadows, folded edges distort the outline, and an innocent resize operation can make the next printout several percent too small.
A dependable archive must preserve both visual information and physical scale. It should let you identify the pattern, understand the alteration, and reproduce the piece without guessing which marks are original. This guide explains how to capture, clean, verify, and package altered sewing pattern pieces using ordinary equipment.
Decide What the Archive Must Preserve
Before scanning, decide whether the file is intended only as a visual record or may eventually be printed and used. That distinction determines how carefully you must control dimensions.
| Archive purpose | Scale requirement | Useful contents | Suitable output |
|---|---|---|---|
| Visual alteration diary | Approximate | Piece shape, notes, date, garment photo | Compressed PDF or images |
| Fitting reference | Preferably accurate | Alteration lines, measurements, version notes | High-resolution PDF |
| Reprintable working pattern | Exact | Full outline, grainline, notches, test square | Print-ready tiled PDF |
| Client or student record | Accurate and clearly labeled | Before-and-after pieces, explanation, measurements | Organized review PDF |
A visual diary can tolerate modest compression and small previews. A reprintable master cannot. If there is any chance that a piece will be printed later, treat scale as critical from the beginning.
Do not rely on a single digital file to explain everything. Preserve the marks that affect construction: cutting lines, seam lines, grainlines, notches, balance marks, dart points, lengthen-or-shorten lines, fold indicators, button placement, and matching references. Handwritten notes such as “remove 12 mm at back neck” may be more valuable than the printed pattern number.
Prepare Fragile Pattern Pieces Before Scanning
Scanner preparation should stabilize the piece without permanently changing it. Start by removing loose thread, fabric lint, and eraser debris from both the scanner glass and the pattern. Dust trapped under translucent tissue can resemble a printed dot or drill mark.
Flatten folds gently with clean hands. If the paper has been stored tightly folded, place it under a smooth board or large book for several hours. Avoid aggressive ironing. Heat can distort tape adhesive, damage heat-sensitive markings, and shrink some tracing materials.
Repair only tears that prevent the piece from lying flat. Use small amounts of archival mending tissue or removable matte tape on the reverse. Glossy tape can create bright reflections and dark borders in a scan. Long tape strips may also pull thin paper out of shape.
If an altered edge includes hinged or spread sections, check that they still sit in the intended position. Measure the gaps before adding temporary support. A spread dart or slash-and-spread adjustment can drift while the piece is being moved, silently changing the archived shape.
Keep these tools near the scanner:
- A clean metric or imperial ruler with fine markings
- A small opaque calibration square of known dimensions
- Low-tack drafting tape or removable weights
- A soft air blower or lint-free cloth
- A notebook for filenames and alteration versions
- A dark and a light backing sheet
The backing sheet matters more than it first appears. White tissue on a white scanner lid often has weak boundaries. A matte gray or black sheet behind the pattern can make the paper edge visible, although it may also increase show-through from marks on the reverse. Test both light and dark backings on a small piece before capturing an entire set.
Build a Scale Reference Into Every Scan
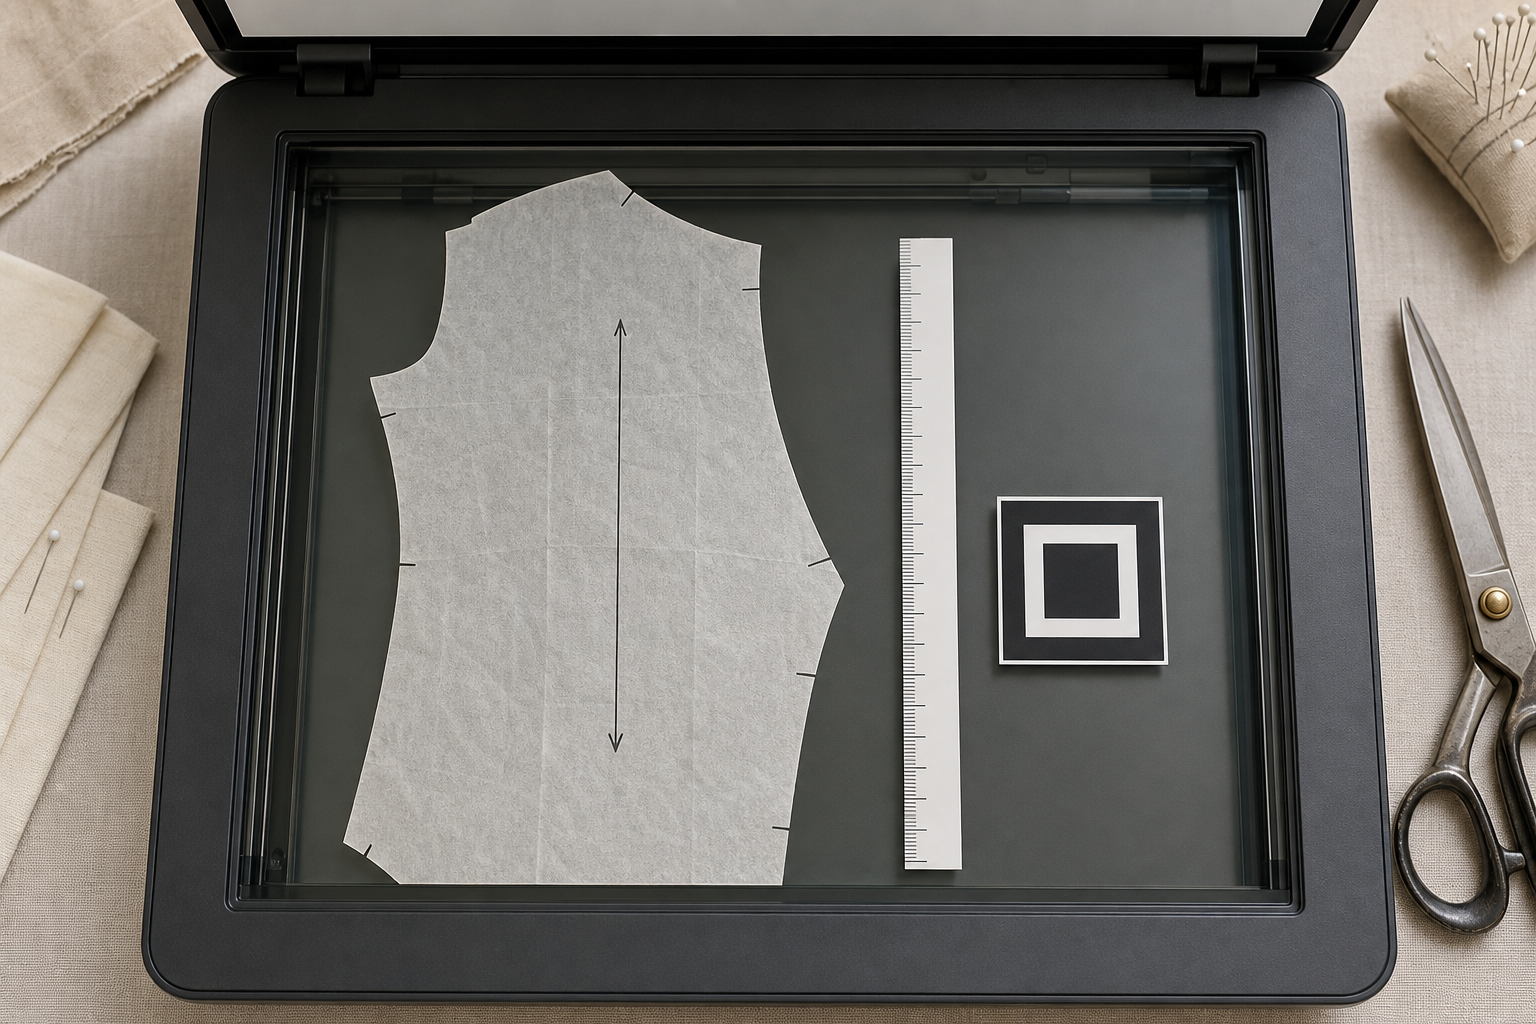
Place a ruler or calibration square directly on the scanner glass beside the pattern piece. It must be in the same plane as the paper. A ruler photographed above the piece or attached later cannot reveal distortion introduced during capture.
A square is particularly useful because it tests horizontal and vertical scale at once. A 50 mm by 50 mm reference is large enough to measure reliably while taking little scanner space. Keep it away from the cutting line so that automated cleanup does not confuse it with part of the pattern.
Scan flat whenever possible. Phone photographs are convenient for oversized pieces, but perspective distortion makes them risky for printable masters. If a camera is the only option, position it directly above the paper, keep the sensor parallel to the table, use a rigid stand, and include reference measurements near opposite sides of the piece.
For scanner capture, use these practical starting settings:
| Material and markings | Starting resolution | Color mode | Reason |
|---|---|---|---|
| Dark ink on white paper | 300 dpi | Grayscale | Adequate for ordinary outlines |
| Pencil on tissue | 400–600 dpi | Grayscale | Preserves faint, narrow marks |
| Multisize colored lines | 400–600 dpi | Color | Keeps size families distinguishable |
| Carbon transfer or chalk | 600 dpi | Color | Captures weak tonal differences |
| Visual reference only | 300 dpi | Color or grayscale | Balances readability and file size |
Avoid pure black-and-white capture at the scanning stage. A strict threshold can erase pale pencil notes before you have a chance to adjust them. Capture extra tonal information first, then simplify a copy during cleanup.
Large pieces may require several overlapping scans. Include at least 50–75 mm of overlap and place two small registration marks in each shared area. Never use the paper edge as the only alignment reference; tissue can curve or stretch between passes.
Use a Naming System That Explains the Piece
A folder filled with files named scan001.png and final-final-2.pdf will become unusable quickly. Assign names before editing so raw captures and cleaned versions stay connected.
A practical structure is:
pattern-garment-piece-size-alteration-version-state
For example:
m7352-jacket-front-size14-fba-v02-raw.tif
m7352-jacket-front-size14-fba-v02-clean.png
m7352-jacket-front-size14-fba-v02-print.pdf
Use whatever pattern identifier is meaningful to you, but remain consistent. If the source is self-drafted, substitute a project code. Add dates when the same piece changes during several fitting rounds.
Keep untouched captures in a raw folder. Perform edits on duplicates stored in clean or master. A destructive cleanup can remove a subtle notch, but the original scan gives you a way to recover it.
A small manifest can record information that does not fit comfortably in a filename:
- Pattern company, designer, or self-drafted project
- Garment view and original size
- Piece number and description
- Seam allowance status
- Alteration type and amount
- Scanner resolution
- Calibration square dimensions
- Fitting date and version
- Related muslin or garment photographs
Clean the Scan Without Erasing Construction Information
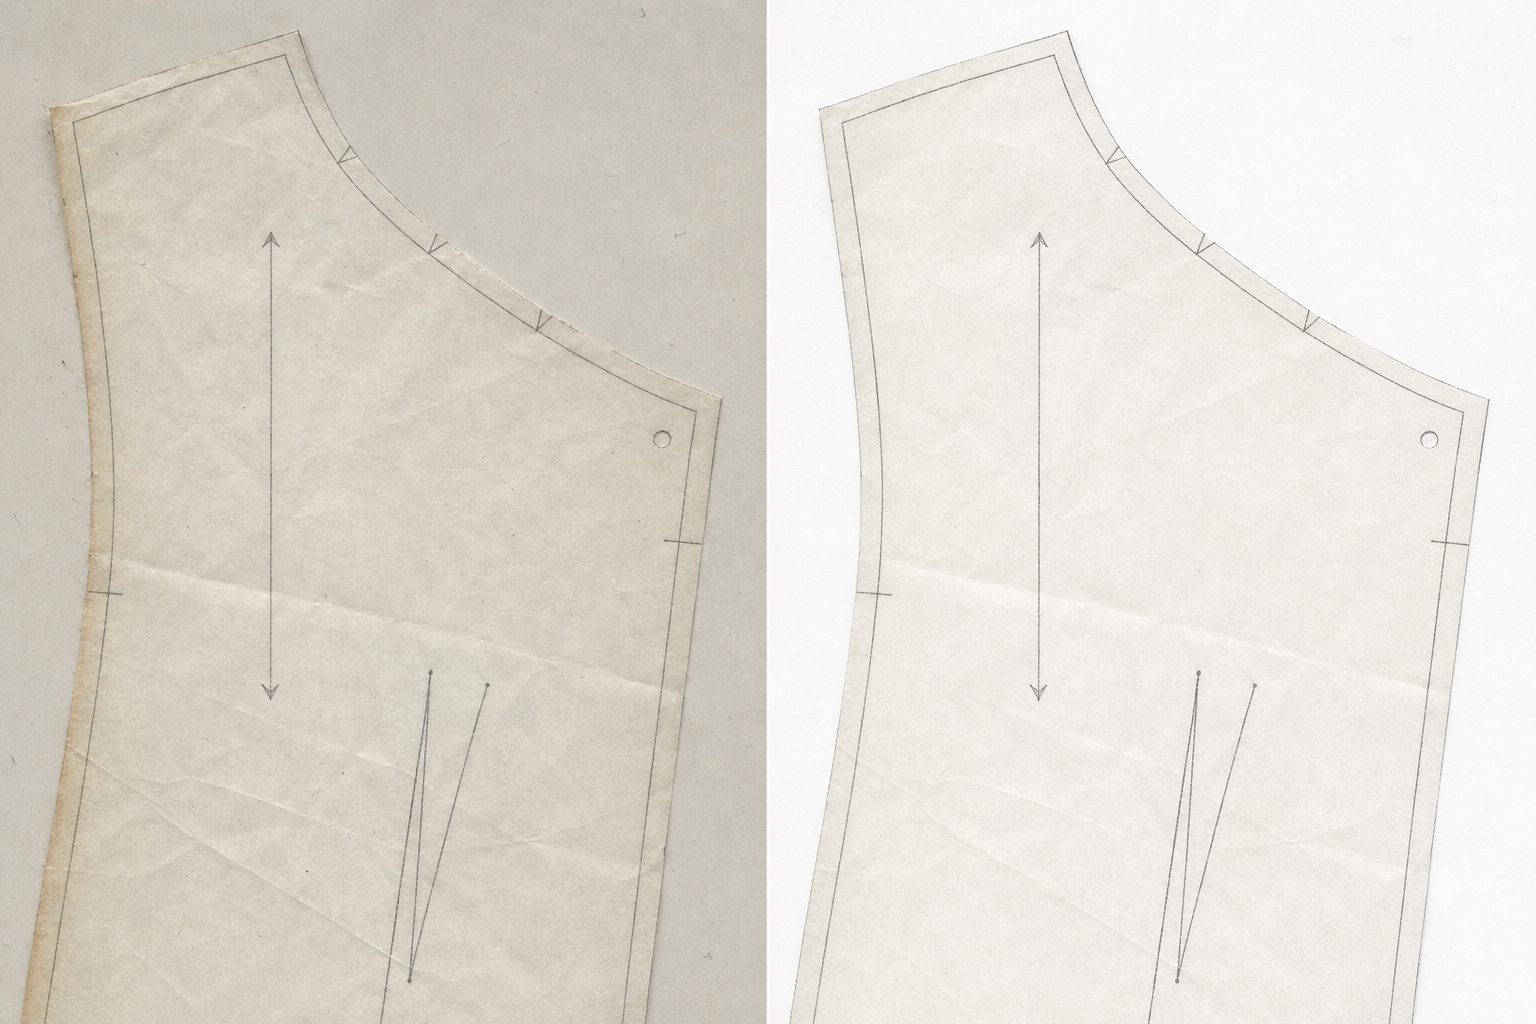
The goal is not to make the tissue look newly printed. It is to separate meaningful marks from irrelevant paper texture while retaining evidence of the alteration.
Begin with rotation and cropping. Straighten the image using a ruler edge, grainline, or scanner boundary rather than a curved cutting edge. Crop away unused scanner bed, but leave a modest margin around the piece and preserve the calibration reference.
Next, adjust levels or contrast gradually. Move the white point until the paper background becomes lighter, watching faint pencil and colored lines at high zoom. Then deepen the dark marks only enough to improve readability. If the back of the tissue shows through, local adjustments are safer than a severe global threshold.
An editor such as the AI Photo Editor can help remove isolated dust, tape glare, or scanner-bed distractions. Apply such edits conservatively. Automated reconstruction is inappropriate along a cutting edge, at a notch, or near intersecting pattern lines because a plausible-looking replacement may be dimensionally wrong.
Use this preservation order when marks compete with stains or shadows:
- Cutting and seam lines
- Grainline and fold direction
- Notches, balance points, and drill marks
- Dart legs and dart point
- Alteration boundaries and pivot points
- Placement lines for pockets, buttons, or closures
- Handwritten fitting measurements
- Printed decoration and nonessential tissue texture
Remove dust with a small brush or healing tool rather than blurring the whole image. Global blur makes thin dashed lines and small notches unreliable. Likewise, heavy sharpening can turn paper fibers into false marks.
When original and altered lines overlap, preserve both if they explain the change. Distinguish them using color on a separate annotation layer. For example, keep the source line neutral gray and trace the approved altered line in a restrained color. Do not paint permanently over the only copy of the original scan.
Treat Tape, Folds, and Pencil as Separate Problems
Tape usually produces a rectangular tonal shift or glossy highlight. Correct its brightness locally, but leave visible any taped join that documents a slash-and-spread alteration. The join itself can explain how the new shape was constructed.
Fold shadows are broad and soft. A gentle local lift can reduce them, while attempting to erase every trace may damage nearby dashed lines. Deep creases should be flattened physically and rescanned if they cross an important boundary.
Pencil needs a different approach. Increase local contrast around the writing and inspect the result at both 100 percent and fit-to-screen size. If a note remains hard to read, add a typed transcription beside it while retaining the original handwriting underneath or on a separate archival page.
Join Oversized Pieces Without Changing Their Shape
When a bodice, trouser leg, coat panel, or skirt piece exceeds the scanner bed, alignment becomes the most delicate stage. Assemble scans at their original pixel dimensions. Do not independently resize panels to make their edges fit.
Start with the panel containing the clearest scale reference. Add the next scan as a layer, reduce its opacity, and align registration marks in the overlap. Check multiple points rather than matching a single line. If one end aligns and the other does not, investigate rotation, paper movement, or scanner distortion before warping the image.
Small perspective or lens corrections may be necessary for camera captures, but free-form deformation should be a last resort. It can create a visually smooth outline that no longer matches the physical pattern.
After joining, verify three independent features:
- The calibration square still measures correctly in both directions.
- A long known dimension, such as center front or grainline, matches the paper original.
- Registration marks in each overlap coincide without local stretching.
Flatten only a delivery copy. Retain a layered master so alignment can be corrected later.
Separate Archival Masters From Sharing Copies
One file rarely serves every purpose well. Preserve a high-quality master and derive smaller files for viewing, sharing, or printing.
For the master, PNG or TIFF retains lines without lossy compression. Color may be worth keeping even when the piece appears nearly monochrome, especially if alterations use colored pencil. The image converter can create alternate formats while allowing the archival source to remain untouched.
JPEG is acceptable for garment photographs and compact visual references, but it can produce halos around narrow black lines. If JPEG must be used, choose a high-quality setting and compare notches, dashed lines, and small handwriting with the lossless original.
Compression should happen after cleanup and scale verification. Use image compression for review copies, not as a substitute for sensible cropping or format selection. Inspect the compressed result at high zoom before deleting nothing—masters should remain available even when the smaller copy looks correct.
| File role | Recommended characteristics | Avoid |
|---|---|---|
| Raw capture | Original resolution and color | Cropping or enhancement |
| Clean master | Lossless, corrected, layered when possible | Aggressive thresholding |
| Print copy | Exact dimensions, embedded scale test | Automatic fit-to-page |
| Review copy | Moderate dimensions and compression | Treating it as the master |
| Catalog thumbnail | Small, clearly identifiable | Expecting details to remain readable |
Package Related Pieces as a Useful PDF
A PDF makes a multi-piece alteration easier to browse than a loose image folder. Create a cover or index page with the pattern identifier, garment view, size, alteration version, date, and seam allowance status. Follow it with one page per piece or a sequence of overview and detail pages.
You can assemble cleaned images with the image-to-PDF tool. Keep page order predictable: front pieces, back pieces, sleeves, collars, facings, pockets, and minor components. If a piece spans several print sheets, place its overview before the tiled pages.
Include an unambiguous scale check on every printable page or at least every separately exported piece. A statement such as “print at 100 percent” is helpful, but the measurable square is the real test. Printer drivers may silently apply fit, shrink, borderless enlargement, or booklet settings.
If you maintain separate PDFs for instructions, alteration notes, and pattern pieces, combine them into one reference packet with PDF merge, while also retaining the source documents. A useful order is:
- Archive cover and version summary
- Photos of the fitted muslin or completed garment
- Written alteration record
- Clean pattern-piece overviews
- Full-scale or tiled print pages
- Measurement and scale-verification sheet
Do not place full-scale pieces on arbitrary page sizes merely to make them fit. If exact printing is needed, tile oversized pieces with deliberate overlap, trim marks, page numbers, and a clear assembly order.
Verify the Printed Result, Not Just the Screen File
A clean screen image can still print at the wrong size. Before declaring the archive complete, print one representative page at actual size with scaling disabled. Measure the calibration square using the same unit system in which it was created.
Then check a longer dimension. A 50 mm square might look acceptable even when a small percentage error becomes significant across a 700 mm trouser leg. Measure a grainline, center seam, or another known span near the full length of the piece.
Inspect the print for construction details:
- Are single and double notches distinguishable?
- Do dashed seam lines remain separate from cutting lines?
- Is the dart point visible without becoming an oversized dot?
- Can handwritten measurements be read?
- Are tiled joins outside critical curves where possible?
- Does the print retain any colored distinction used for alterations?
If the square is wrong, diagnose the print settings before resizing the source image. Common causes include fit-to-page, shrink-to-printable-area, incorrect PDF page dimensions, browser printing, and printer-driver enlargement. Altering a correct master to compensate for one printer setting creates a second, less reliable master.
Add Context That Future You Will Need
A pattern piece without fitting context can be difficult to interpret months later. Record why the alteration was made and whether it succeeded. “Added 20 mm” is less useful than “Added 20 mm at biceps after first muslin; sleeve mobility improved; retain for wool version.”
Photograph the relevant muslin from consistent angles when possible: front, back, side, and the specific fitting issue. These images need not be print-quality, but they should be named with the same project and version identifiers as the pattern files.
Record whether seam allowances are included. Also note any asymmetric fitting, since a corrected left and right piece can otherwise be mistaken for duplicate scans. For nested sizes, identify which size line was traced and whether grading occurred between areas.
When an alteration is experimental, label it as provisional. A visually polished scan can falsely imply that a version was approved. Simple states such as test, approved, and superseded prevent old pieces from returning to the cutting table by mistake.
Run a Final Archive Audit
Before storing the files, open them on a different device or in a second PDF viewer. This catches missing layers, unusual color profiles, corrupted exports, and page-size mistakes.
Use this final checklist:
- The title and filename identify the pattern, piece, size, and version.
- The untouched raw scan is stored separately.
- Cutting lines, grainlines, notches, darts, and alteration marks are visible.
- The calibration square is present and correct in both directions.
- Oversized joins align at several reference points.
- Seam allowance status is documented.
- Printable files have intentional page dimensions.
- A physical test print has been measured.
- Sharing copies are distinct from archival masters.
- Related fitting notes and photographs use matching identifiers.
- Superseded versions are labeled rather than silently overwritten.
- At least one backup exists outside the primary device.
A good sewing pattern archive does not need to be visually perfect. It needs to be trustworthy. Careful capture, restrained cleanup, explicit versioning, and physical scale checks preserve the decisions hidden in fragile tissue. When the garment is revisited years later, the archive should show not only the shape of the piece, but also what changed, why it changed, and whether it can safely be printed again.