
Coin Photography Background Cleanup for Consistent Reference Catalogs
A practical guide to cleaning coin photo backgrounds, preserving rim detail, controlling scale, and preparing consistent images for collection catalogs and sale records.
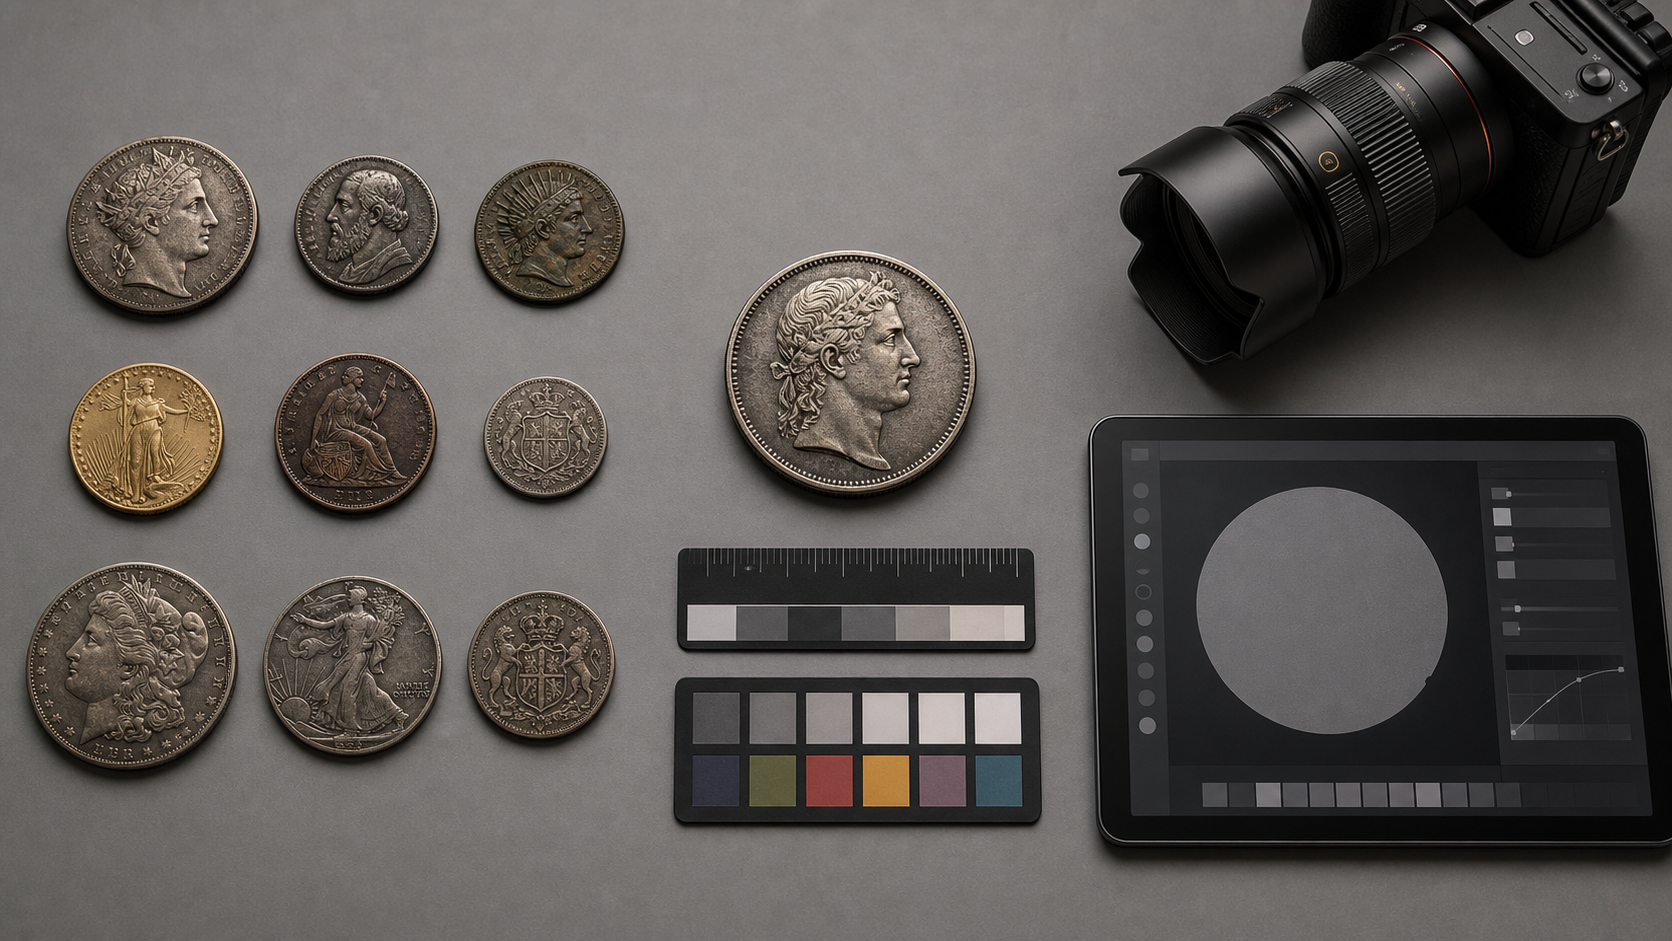
Coin Photography Background Cleanup for Consistent Reference Catalogs
Coin photography looks simple until a collection begins to grow. A single coin can be photographed on almost any clean surface, but a catalog containing hundreds of pieces exposes every inconsistency: shifting background colors, irregular margins, clipped rims, changing scale, harsh reflections, and files that cannot be matched reliably to inventory records.
The goal of catalog cleanup is not to make a coin look newer, brighter, or more valuable. It is to create a faithful and repeatable visual record. Surface wear, toning, scratches, edge damage, corrosion, and strike weakness may all be identifying features. An attractive edit that hides them can be less useful than an imperfect but honest photograph.
This field guide covers the narrow problem of preparing obverse and reverse coin images for reference catalogs, collection databases, insurance records, research notes, and restrained sales documentation. It focuses on background cleanup, rim preservation, scale control, consistent framing, and sensible export choices.
Decide What the Images Need to Prove
Before editing, define the purpose of the catalog. Different uses require different levels of visual consistency and different attitudes toward correction.
| Catalog purpose | Main priority | Appropriate editing | Avoid |
|---|---|---|---|
| Collection inventory | Fast identification | Crop, rotation, neutral background, exposure correction | Removing marks used to identify the piece |
| Research reference | Surface fidelity | Conservative color and contrast adjustments | Artificial sharpening or aggressive denoising |
| Insurance record | Clear identity and condition | Even framing, legible details, paired views | Cosmetic retouching that changes apparent condition |
| Online sale listing | Accurate presentation | Background cleanup and restrained tonal correction | Hiding scratches, spots, rim damage, or discoloration |
| Exhibit planning | Consistent visual comparison | Common scale and standardized margins | Resizing every coin to the same apparent diameter |
A useful written rule is: edit the capture environment, not the historical object. Dust on the background may be removed. Dust, deposits, or marks on the coin should remain unless you can prove that they are temporary capture artifacts and the image is not being used as a condition record.
Create two output levels if the same photographs serve several purposes. Keep a high-resolution archival master with minimal correction, then make standardized catalog derivatives from that master. Never treat a small compressed catalog image as the only surviving copy.
Build a Repeatable Capture Setup
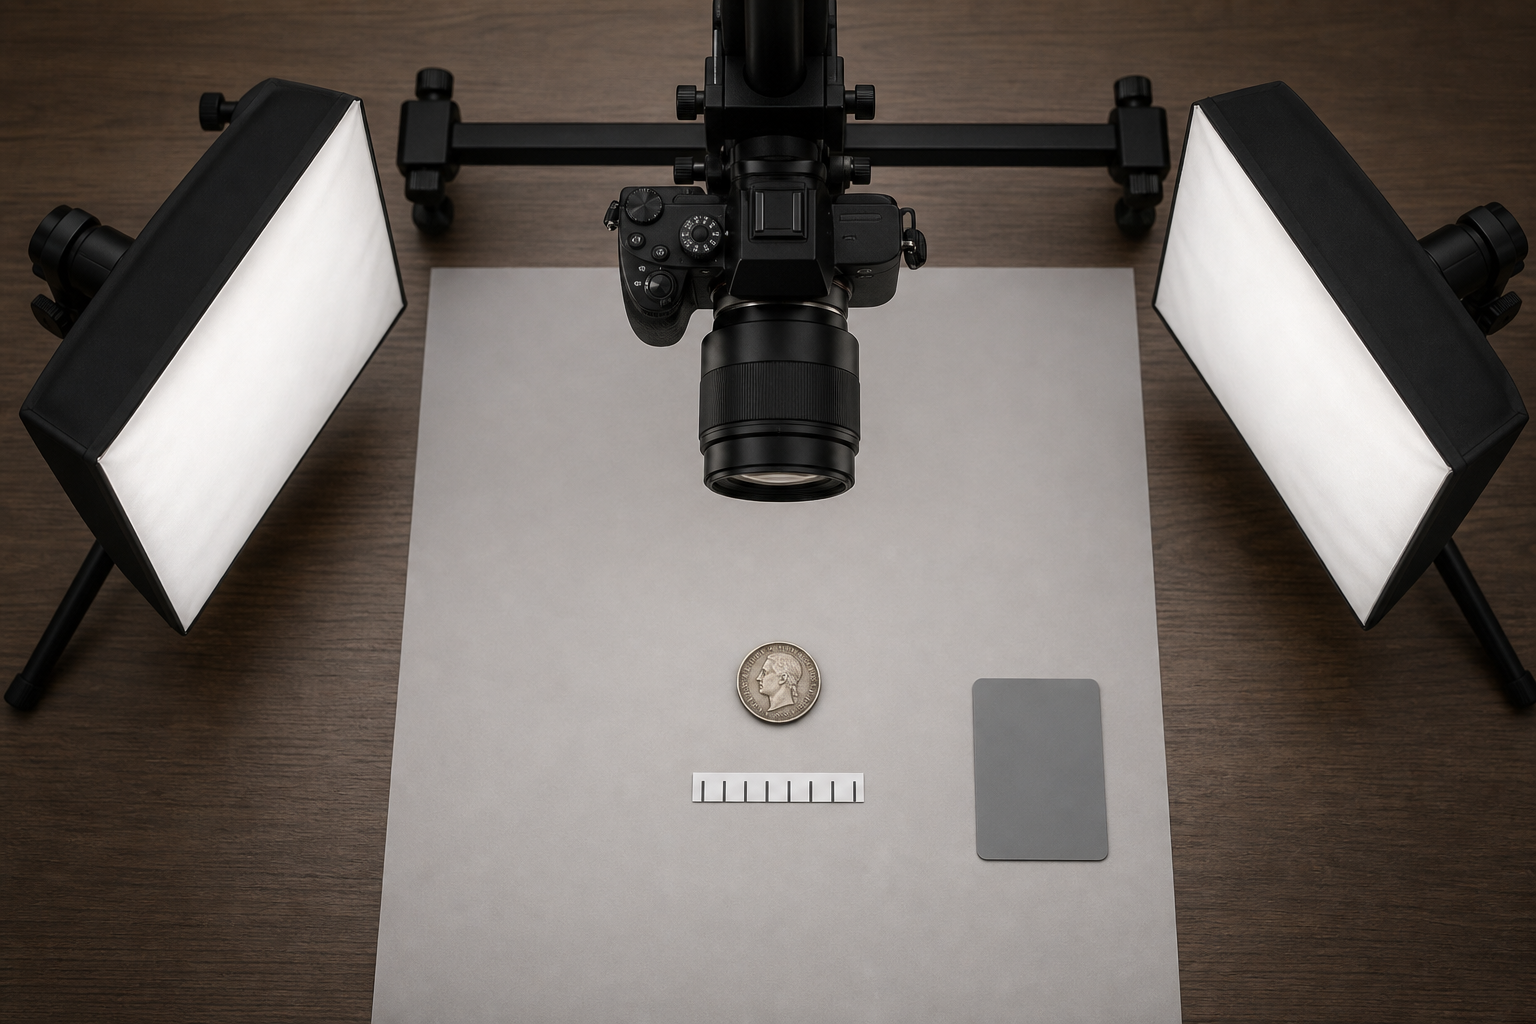
Good cleanup begins before the editing stage. A stable setup prevents hours of compensating for avoidable differences.
Use a rigid camera support or copy stand, a matte neutral background, and two diffused lights. Position the camera sensor parallel to the coin. Even a slight angle can turn a circular coin into an oval and make one side appear sharper than the other.
A medium gray background is often easier to manage than pure white or deep black. White can encourage underexposure of dark coins, while black can disappear into dark toning and make edge selection difficult. Gray also provides room for later adjustment without forcing the background toward an extreme value.
For every capture session:
- Clean the background and camera-facing surfaces around the holder.
- Lock the camera height, focal length, and focus method.
- Set a fixed white balance rather than automatic white balance.
- Photograph a neutral gray or color reference at the start of the session.
- Include a scale reference in at least one setup image for each object size group.
- Capture the obverse and reverse without changing camera height.
- Record the coin identifier before moving to the next piece.
A scale marker does not need to appear in every finished catalog image. It does need to be associated with the source set if accurate dimensions cannot be recovered from inventory data. Photographing it once and then guessing later is risky if the camera or crop changes.
Control Reflections Without Flattening the Coin
Coins combine shallow relief with reflective metal, so perfectly even illumination is not always ideal. Completely flat light can erase the visual cues that make lettering and relief readable. Extremely directional light creates bright hotspots and deep shadows that obscure other details.
Begin with two large diffused sources placed symmetrically. Move them higher or farther away when reflections become sharp. For difficult proofs or polished surfaces, a diffusion tent can produce a more controlled result, although the resulting image may need a modest contrast adjustment.
Do not rotate the coin independently between obverse and reverse captures if orientation matters. Establish a consistent twelve-o'clock direction based on the design or catalog convention. A soft nonmetallic pointer outside the final crop can help align pieces without touching their surfaces.
Establish a File Naming System Before Cleanup
Background cleanup is much safer when filenames already identify the object and view. Camera-generated names such as DSC_4187 provide no defense against a swapped obverse or reverse.
A compact pattern might be:
collectionID-objectID-view-capture.ext
For example:
roman-0142-obv-01.tifroman-0142-rev-01.tifroman-0142-edge-01.tifroman-0142-scale-01.tif
Use obv and rev consistently rather than mixing them with front, back, heads, or tails. Add an edge view when inscriptions, seams, damage, or minting characteristics make the edge relevant.
Keep source captures separate from edited derivatives. A practical folder structure has masters, catalog, and web directories. The master filename remains stable, while an output suffix can identify a derivative, such as roman-0142-obv-catalog.png.
If existing images arrive in mixed formats, normalize derivatives with the image converter while retaining the originals. Conversion should make distribution easier, not erase provenance.
Correct Rotation and Framing First
Rotate before detailed masking. Otherwise, a carefully cleaned boundary may be resampled twice: once during rotation and again during export.
Use a clear design feature to establish vertical alignment. Portraits can be deceptive because heads and crowns may be intentionally tilted. Lettering, shields, columns, crosses, or known die axes often provide better references.
Next, choose a framing rule. Two common systems are useful:
Fixed Canvas, True Relative Scale
Each coin is placed on the same pixel canvas using a shared physical scale. A 20 mm coin therefore appears smaller than a 30 mm coin. This is the best option for comparison plates, typology studies, and exhibits where relative diameter matters.
Fixed Rim Margin, Maximum Readability
Each coin fills the frame with the same percentage of empty space around the rim. This improves detail visibility in database thumbnails but removes immediate size comparison. Dimensions must be displayed separately in catalog metadata.
Do not accidentally mix the two systems. A catalog in which most pieces use fixed margins but a few use true scale will mislead readers even when every individual photograph looks polished.
Leave enough space to inspect the complete rim. A margin equal to roughly 5–10 percent of the coin diameter is usually comfortable, but consistency matters more than a particular number. Never crop flush against an irregular edge.
Use the image resizer only after the framing standard has been established. Resize copies, not the only master image, and preserve the aspect ratio.
Clean the Background Without Damaging the Rim
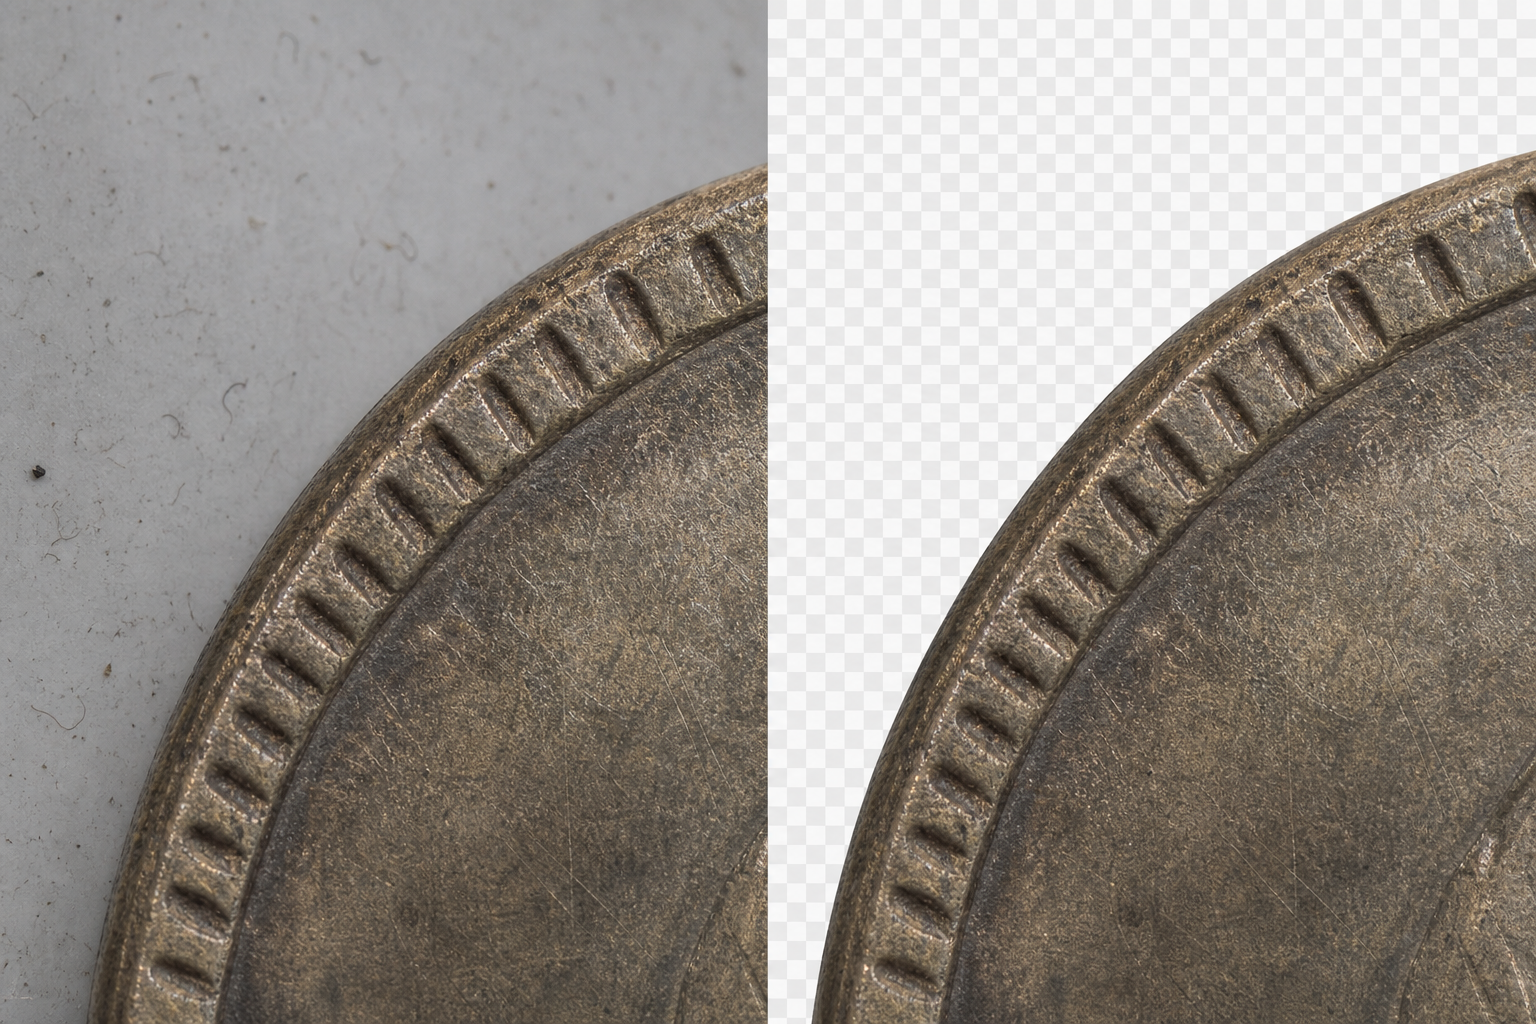
The rim is where background cleanup most often becomes destructive. Coin edges can include tiny chips, irregular flans, casting traces, serrations, wire rims, corrosion, or soft shadows. An automatic cutout may interpret these features as background noise.
Start by evaluating the boundary at high magnification. Inspect the entire circumference, not just one convenient segment. Ask four questions:
- Is the edge genuinely smooth or historically irregular?
- Does the coin cast a natural shadow that should remain?
- Are bright edge pixels reflections or part of the background?
- Do dark deposits connect visually to the background?
For a solid neutral background, create a conservative selection slightly outside the visible rim. Refine inward only where the boundary is certain. A one-pixel error can become obvious after sharpening or when the image is placed on a contrasting page.
Preserve Natural Edge Variation
Do not force an ancient hammered coin into a perfect circle. The irregular outline is evidence. Likewise, do not fill rim nicks or smooth clipped areas simply because they interrupt a clean silhouette.
When automatic selection removes fine projections, restore them manually from the source layer. If an edge remains ambiguous, retaining a narrow band of original background is usually more honest than cutting into the object.
Choose Solid Background or Transparency
A solid background is dependable for print sheets and internal databases. Transparency is useful when the same image must appear on several page colors or be arranged into comparison plates.
For transparent outputs, inspect the coin on white, black, and mid-gray test layers. A mask that looks correct on gray may reveal a pale halo on black. Conversely, overly aggressive decontamination can create a dark outline on white.
The AI photo editor can help remove an uneven capture background, but its result should be treated as a draft around reflective rims and irregular ancient coins. Compare the edited boundary against the original at full size before approving it.
If transparency is required, PNG is a safe catalog choice. WebP can reduce delivery size, but test edge quality in the actual browser and content system. Avoid JPEG for transparent assets because it cannot store an alpha channel.
Balance Color Without Erasing Toning
Color correction should neutralize the capture, not neutralize the coin. Copper may be brown, red, nearly black, or green with oxidation. Silver can contain gold, blue, charcoal, or rainbow toning. Those colors may be central to identity and condition.
Use the session reference to correct white balance. Then compare several coins photographed under the same setup. If every coin shifts in the same direction, the capture likely needs correction. If only one coin has an unusual color, the difference may be real.
Avoid sampling the coin itself as a neutral gray point. Silver is not necessarily neutral, and aged surfaces often contain legitimate color casts. Sample a known neutral reference or the controlled background instead.
Apply exposure changes cautiously. Raising shadows too far can make dark toning appear thin and reveal noise that resembles surface granularity. Reducing highlights aggressively can turn metallic luster into a dull painted texture.
A helpful audit is to compare the master and derivative side by side at the same zoom. Look specifically at:
- Fine hairlines and cleaning marks
- Color transitions near the rim
- Dark material inside lettering
- Specular highlights on high points
- Weakly struck or worn design areas
- Small spots used to distinguish similar pieces
If any of these become less truthful, reduce the adjustment.
Apply Sharpening at the Output Size
Sharpening cannot recover missed focus. It can only increase local contrast around existing detail. Coins tempt editors into excessive sharpening because lettering and relief respond dramatically at first. The same treatment soon produces white halos, dark grooves, and false grain.
Keep the archival master unsharpened or minimally sharpened. Resize the catalog copy, then apply a restrained output-specific pass. Check both 100 percent view and the intended thumbnail size.
Noise reduction deserves similar restraint. It may clean a smooth background but smear hairlines, die polish, or fine porosity on the coin. When possible, mask background noise reduction away from the object. Better yet, solve noise through adequate exposure and stable capture settings.
Create Matched Obverse and Reverse Pairs
A catalog pair should feel like two views of the same physical object. Confirm that both images share:
- The same canvas dimensions
- The same background value or transparency treatment
- The same scale rule
- Similar empty margins
- Compatible brightness and color balance
- Consistent vertical orientation
- Matching export format and quality
Place the two views beside each other during quality control. Differences that seem minor in isolation become obvious in a pair. A reverse image enlarged by five percent can falsely suggest a change in diameter, while a warmer white balance can make the metal appear different.
For print review or condition packets, combine approved pairs with the image-to-PDF tool. Keep object identifiers in the surrounding document layout rather than burning them across the coin image. This preserves a clean reusable derivative while allowing the PDF to carry inventory context.
Set Export Targets by Use
One export cannot efficiently serve preservation, print, database, and web delivery.
| Output | Suggested format | Key consideration |
|---|---|---|
| Archival master | TIFF or original high-quality capture | Preserve resolution and editing latitude |
| Transparent catalog image | PNG | Preserve alpha edges and fine detail |
| Web catalog image | WebP or high-quality JPEG | Balance loading speed and surface detail |
| Print comparison plate | High-resolution PNG or TIFF | Maintain consistent physical scale |
| Email review copy | Compressed JPEG or PDF | Keep identifiers readable without oversized files |
Compression should be assessed on the coin, not only by checking the file size. Fine lettering, dotted borders, reeding, and granular surfaces are vulnerable to compression artifacts. Use the image compressor on a duplicate and compare it with the approved catalog image at full size.
A practical web test includes a bright silver coin, a dark copper coin, a finely textured piece, and a coin with small lettering. If one compression setting handles all four acceptably, it is a better catalog default than a setting tested on a single easy example.
Run a Catalog Consistency Audit
Before publishing a batch, view the images as a grid. Grid review reveals drift that file-by-file inspection misses.
Check the following:
- Coin centers form consistent rows and columns.
- Margins do not jump between adjacent records.
- Backgrounds have no unexplained warm or cool shifts.
- No rim is clipped or surrounded by a selection halo.
- Obverse and reverse files are correctly paired.
- Relative scale is preserved where the catalog claims to show it.
- Dark coins retain surface separation from the background.
- Bright coins do not contain featureless clipped highlights.
- Every derivative maps back to a retained source file.
- File extensions and naming conventions are consistent.
Then open a representative sample on the devices or pages where readers will encounter it. A subtle edge halo may be invisible in an editor but obvious against a dark website theme. Thin details that survive on a large monitor may disappear in a mobile thumbnail.
For valuable, rare, or condition-sensitive pieces, ask a second reviewer to compare the derivative with the source capture and, when practical, the physical coin. The reviewer should look for unintended interpretation rather than artistic appeal.
Keep an Edit Record for Sensitive Collections
A simple edit record makes future corrections easier. It does not need to document every mouse movement. Record the source filename, derivative filename, capture date, editor, major adjustments, output dimensions, and whether the background was replaced or made transparent.
For example, a useful note might state that rotation, global white balance, exposure, background replacement, resizing, and output sharpening were applied, while the coin surface received no local retouching.
This distinction matters when images are reused years later without their original context. A clean edge alone does not reveal whether an object was carefully masked or extensively reconstructed.
A Conservative Standard Produces the Strongest Catalog
Consistent coin images are created through disciplined capture, restrained editing, and careful comparison. The best catalog does not make every piece equally bright, equally smooth, or equally colorful. It gives every piece an equal opportunity to be examined.
Standardize the camera position, lighting, orientation, scale rule, margins, filenames, and export settings. Preserve irregular rims and genuine surface evidence. Separate archival masters from delivery copies, inspect transparent edges on contrasting backgrounds, and review complete batches as grids.
When uncertainty remains, choose the edit that retains more original information. A slightly imperfect background can be corrected later. A clipped rim, erased scratch, or altered patch of toning may be impossible to reconstruct once the master and editing context are lost.
Artículos relacionados
 Practical Guides Architectural Finish Sample Board Photos: A Practical Guide for Searchable Material Records
  Practical Guides Microscope Slide Label Photo OCR: A Cataloging Guide for Teaching Collections
  Practical Guides Watch Movement Parts Tray Photos: A Practical Guide for Searchable Repair Records