Typewriter Typeface Specimen Sheet Digitization: A Practical Archive Guide
Learn how to photograph, clean, OCR, name, and preserve typewriter specimen sheets while retaining faint characters, alignment clues, ribbon texture, and machine identity.
Typewriter Typeface Specimen Sheet Digitization: A Practical Archive Guide
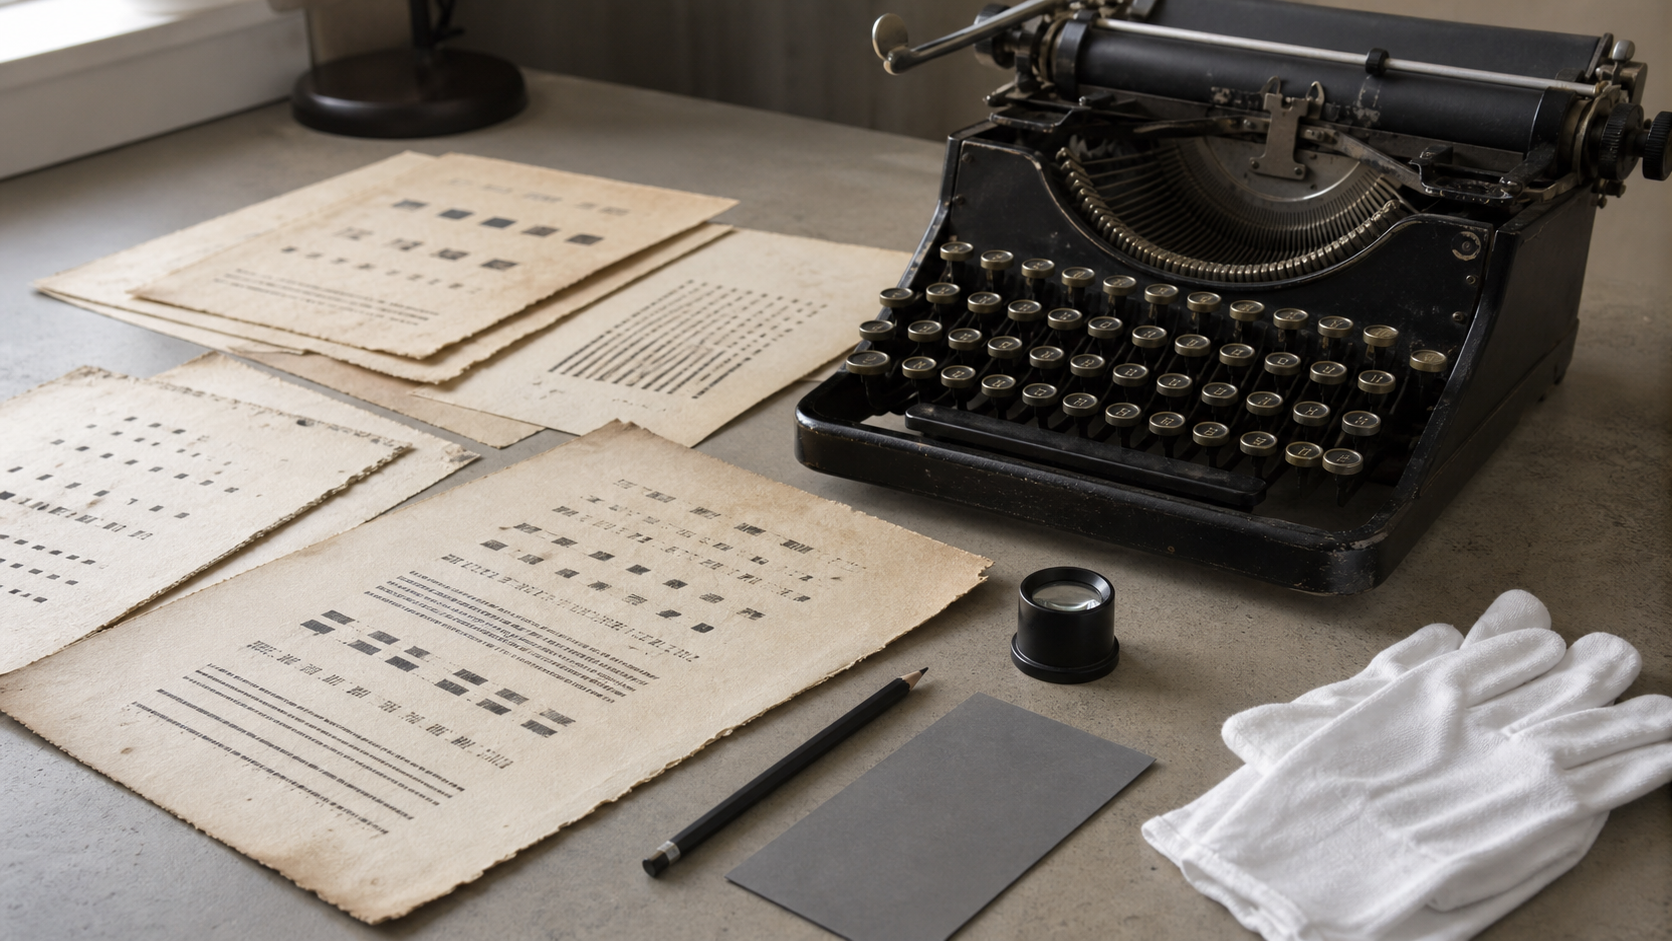
A typewriter specimen sheet is more than a page of letters. It can record the personality of a machine: chipped characters, a drifting baseline, uneven ribbon density, worn punctuation, recurring spacing faults, and the alignment of upper- and lowercase impressions. For collectors, repair shops, local museums, prop departments, and forensic teaching collections, those details may be more useful than a polished transcription.
That makes digitization surprisingly delicate. An aggressive black-and-white scan may help optical character recognition, yet erase the faint edge of a damaged slug. A warm photograph may look attractive, yet make comparisons between machines unreliable. Automatic perspective correction can straighten the page while subtly changing character proportions.
The practical answer is to treat the specimen as both a document and a mechanical impression. Preserve a faithful visual master, then create separate derivatives for reading, OCR, comparison, and sharing. This guide explains how to do that with modest equipment and repeatable decisions.
Decide What the Sheet Must Prove
Before moving a lamp or opening an editor, define the purpose of the record. A specimen made for identifying a typeface needs different treatment from one documenting a machine before repair.
| Intended use | Most important evidence | Main editing risk |
|---|---|---|
| Typeface identification | Character shapes, pitch, capitals, numerals | Resizing that softens small distinctions |
| Repair documentation | Baseline, strike strength, recurring defects | Straightening or cleanup that hides faults |
| Collection catalog | Machine identity, date, accession reference | Detached files and inconsistent naming |
| OCR and search | Clear character boundaries and reading order | Losing original texture through thresholding |
| Publication | Legibility, neutral color, tidy framing | Producing an attractive but misleading image |
| Before-and-after comparison | Matching scale, lighting, and crop | Changing capture conditions between sessions |
Write the primary purpose in the capture notes. If several uses matter, plan separate output files instead of forcing one image to satisfy all of them.
A useful specimen should also contain deliberate character groups. The alphabet alone is not enough. Numerals, punctuation, repeated letters, pairs such as rn and m, and sequences containing narrow and wide characters reveal spacing and wear. If you control specimen creation, include several lines at normal typing speed and one slow line with deliberate keystrokes. Do not ask an operator to restrike faint characters; the first impression may be valuable evidence.
Stabilize Identity Before Improving Appearance
The easiest archival failure is not poor image quality. It is losing the connection between a page and its machine.
Assign an identifier before capture. It might combine a collection code, machine number, and session date, such as TW-042_2026-07-18. Keep that identifier outside the historical sheet whenever possible. Place a temporary capture slate next to the page, photograph it once, then remove it for the clean master.
Record the following details in a catalog or simple spreadsheet:
- Collection or owner identifier
- Manufacturer, model, and serial number when known
- Typeface name or code when documented
- Character pitch, if measured
- Ribbon color and approximate condition
- Paper type and dimensions
- Operator and capture date
- Camera or scanner used
- Repair state, such as before service or after alignment
- Notes about known substitutions, damaged type slugs, or missing keys
Do not embed all of this into the image as a decorative label. A clean master is easier to reuse. Store descriptive data beside the file and place a compact identifier in the filename or metadata.
If the specimen arrives folded, curled, or brittle, resist the urge to flatten it with improvised weights. Photograph it safely and consult someone experienced with paper conservation when the artifact has historical value. Digital convenience is not worth a new crease or detached corner.
Build a Capture Station That Preserves Mechanical Evidence
A flatbed scanner is convenient for ordinary sheets, but it is not automatically the best choice. Scanner glass can compress curl, emphasize dust, or create reflections from glossy correction materials. Some scanners also apply hidden sharpening and contrast adjustments.
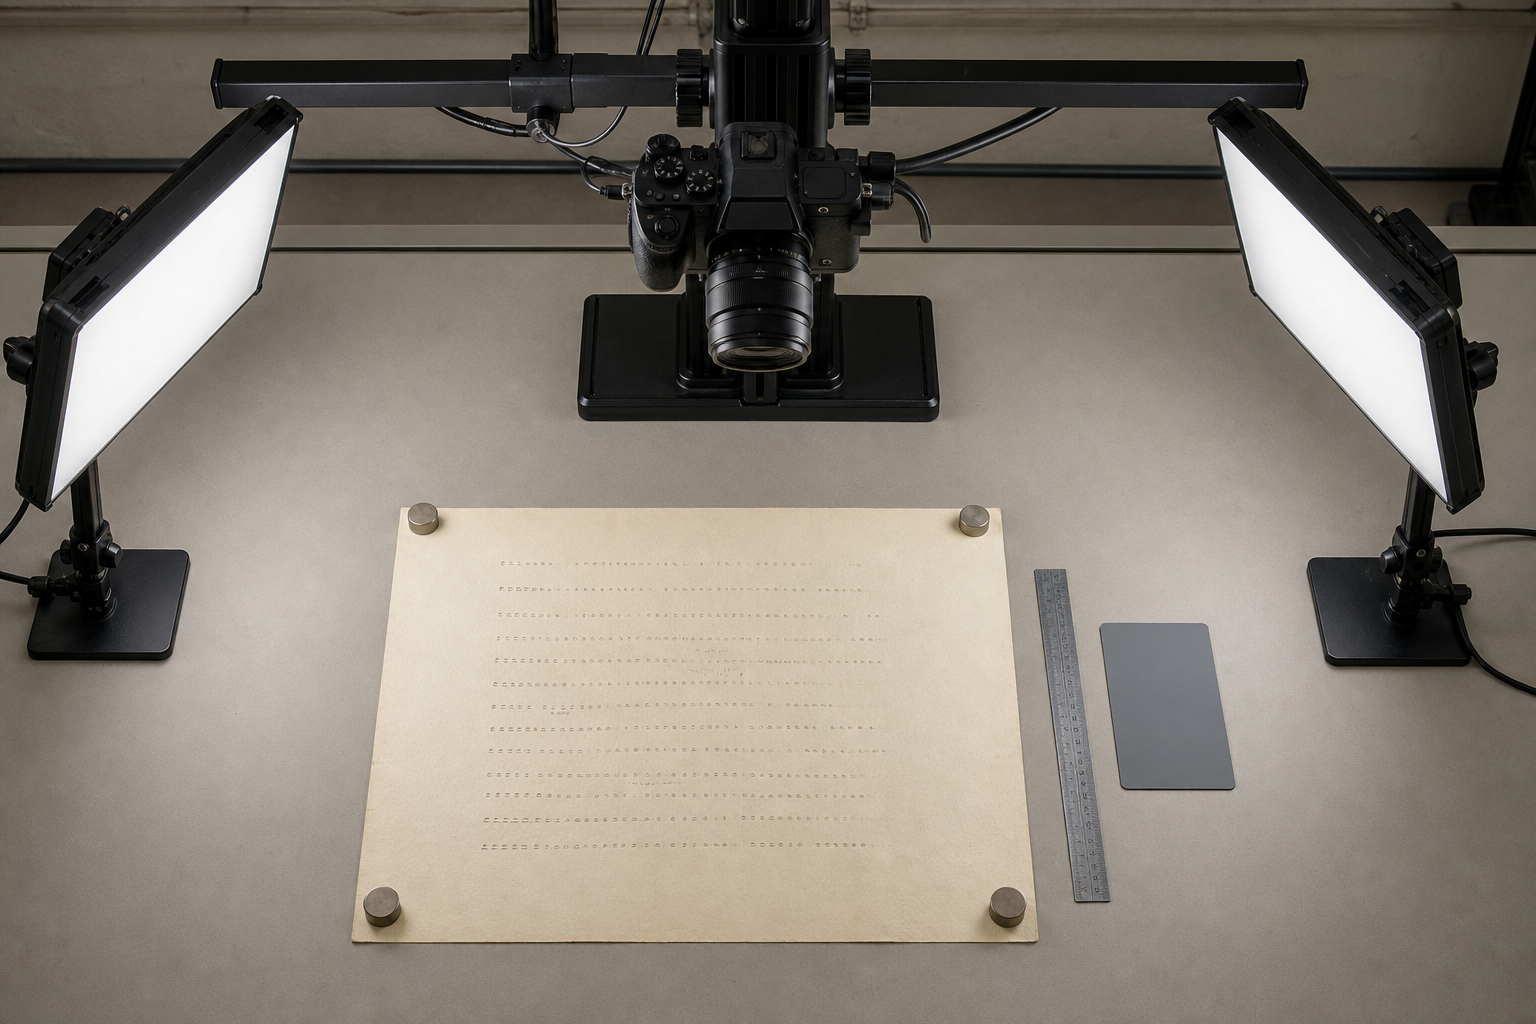
A camera station gives more control. Mount the camera directly above the sheet with the sensor plane parallel to the table. A copy stand is ideal, although a rigid overhead arm can work if it does not drift. Use the main rear camera on a phone rather than an ultra-wide lens, and keep the device far enough away to avoid edge distortion.
Place two diffused lights at equal angles on opposite sides. Symmetry reduces shadows from paper texture and curled edges. For an ordinary record, begin near 45 degrees. If you specifically need to reveal embossed strikes, erasures, or heavy impressions, make an additional raking-light exposure with one lamp lowered. Never substitute that dramatic exposure for the neutral master.
Include a small ruler and neutral gray reference card just outside the document area for one calibration frame. They support later checks of scale and color. Remove them for the uncluttered preservation frame.
Use these capture settings as a practical starting point:
- Select the camera's highest reliable resolution.
- Use low ISO to reduce noise around fine characters.
- Lock focus on the typed surface.
- Lock exposure and white balance for the entire batch.
- Disable portrait effects, filters, and automatic scene enhancement.
- Use a timer or remote shutter to avoid vibration.
- Capture a lossless or minimally processed format if the device supports it.
Inspect the corners at full size. A page can look square in the camera preview while one edge remains slightly soft. If corner sharpness differs, first check camera alignment and paper flatness rather than applying more sharpening later.
Capture More Than the Clean Front View
A compact session normally needs four to six frames:
- An identification slate with the sheet and machine ID.
- A neutral full-page master.
- A second neutral exposure if faint ribbon marks approach the paper tone.
- A raking-light frame when impressions or corrections matter.
- A reverse-side frame if strikes, annotations, or paper marks show through.
- A contextual photograph of the specimen with the associated machine.
The contextual frame prevents future confusion when several similar machines are processed together. It is supporting documentation, not a replacement for the square, evenly lit master.
Correct Geometry Without Rewriting the Specimen
Perspective correction should restore the page rectangle, not normalize the typing. Baseline drift, uneven margins, and vertical misalignment may originate in the machine and must remain visible.
Begin by rotating the entire photograph so the physical paper edges are level. If the camera was slightly off-axis, apply a restrained four-corner correction based on the sheet boundary. Avoid straightening individual text lines. An editor that automatically detects documents may overcorrect curled or deckled paper, so compare its result against the original.
Crop with a small border around every page edge. That border proves the sheet was not clipped and preserves clues such as torn corners, staple holes, and handwritten marginal marks. For a publication copy, you can make a tighter derivative later.
When consistent output dimensions are needed, use Resize Image only after geometry and cropping are settled. Preserve the aspect ratio, and do not enlarge a marginal capture merely to reach an arbitrary pixel count. Interpolation cannot recreate the fractured edge of a worn letter.
A helpful geometry audit is to overlay the corrected image on the original at partial opacity. Page edges should move into alignment, while internal character relationships remain unchanged. If text width varies noticeably from top to bottom after correction, revisit the corner placement.
Create Two Masters Instead of One Compromised Image
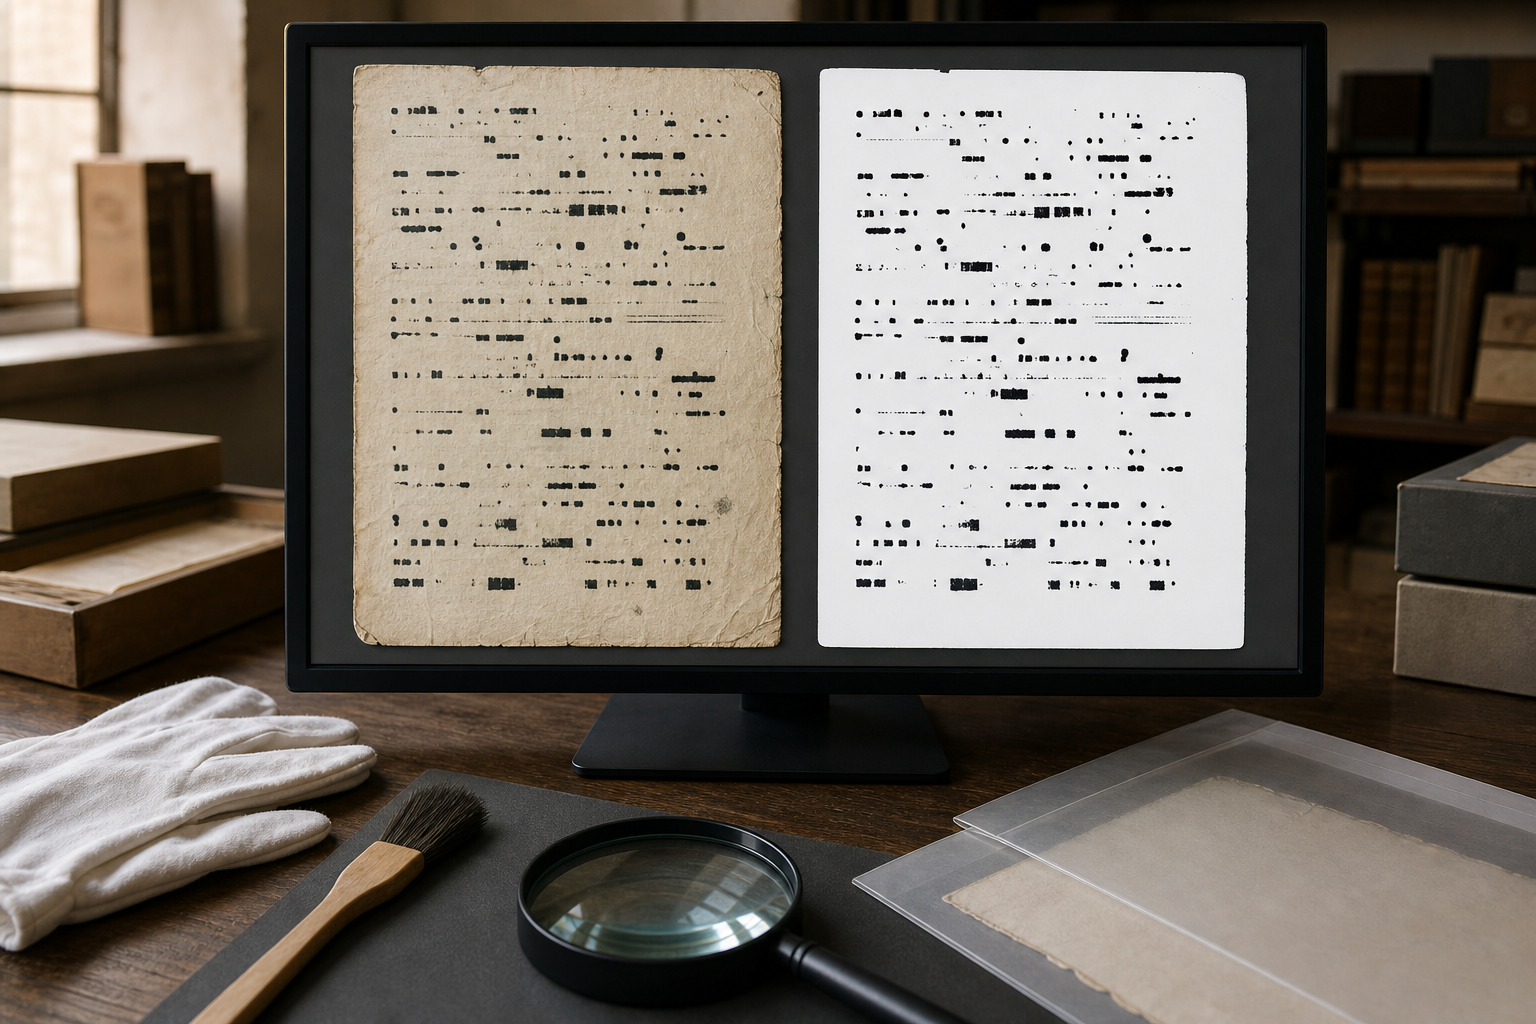
One master should preserve appearance; another derivative can prioritize machine reading. Keeping them separate prevents OCR-oriented edits from becoming the only surviving record.
The preservation master
The preservation master should retain paper tone, ribbon variation, faint characters, corrections, and surface texture. Make only defensible global adjustments:
- Neutralize an obvious lighting color cast using the reference card.
- Set exposure so the paper is bright but not clipped.
- Apply mild lens correction if the lens introduces known distortion.
- Remove empty capture-table margins through cropping.
- Use conservative noise reduction only when sensor noise obscures the impression.
Do not erase dust that was physically present on the specimen unless you also retain the untouched capture. A speck on the paper and a broken period can look remarkably similar.
Export a high-quality archival copy in PNG or another lossless format supported by your collection. If you need a smaller access copy, Compress Image can reduce delivery size, but inspect punctuation, serifs, and pale strikes at 100 percent afterward. Thin typewriter marks reveal compression damage earlier than photographs do.
The OCR derivative
Duplicate the preservation master before editing. Convert the duplicate to grayscale, then adjust tonal levels so the paper becomes more uniform without swallowing weak ink. Local contrast can help uneven ribbon impressions, but use it gently; strong settings often create halos around letters.
For stained sheets, a monochrome channel may separate ink from discoloration better than a simple grayscale conversion. Test the red, green, and blue channels individually. Brown foxing and purple ribbon ink can behave unexpectedly, so choose the channel by evidence rather than habit.
Create a high-contrast version only as a derivative. Adaptive thresholding may handle uneven lighting better than a single global threshold, but it can fragment lightly struck characters. Compare the processed page with the preservation master line by line.
If a particular section remains difficult, crop that region and use Image OCR as a reading aid. Save OCR output as a separate text file or catalog field. Never treat it as an unquestionable transcription.
Audit OCR Against Typewriter-Specific Errors
Typewriter specimens are hostile to generic OCR in predictable ways. Mechanical defects and historical keyboard conventions can create substitutions that look plausible in ordinary prose.
| Visible form | Common OCR result | What to inspect |
|---|---|---|
Lowercase l | 1 or uppercase I | Keyboard convention and surrounding sequence |
Uppercase O | Zero | Whether the machine has a dedicated zero key |
rn pair | m | Character spacing at full magnification |
Faint e | c | Missing upper-right ink impression |
Worn 8 | 3 | Left side of both bowls |
| Period | Dust or deletion | Repetition at the same baseline position |
| Apostrophe | Noise | Height relative to capitals |
| Overstruck correction | One invented symbol | Separate impressions and typing sequence |
Use the OCR output as an index, not as evidence replacing the image. A good verification method is double entry: transcribe once from the page, then review later against the preservation master without looking at the first version. Resolve differences explicitly.
Mark uncertain characters with a consistent convention, such as square brackets or an uncertainty flag in the catalog. Do not silently guess because a familiar pangram or alphabet sequence makes the answer seem obvious. The damaged shape may be the exact feature a later researcher needs.
Preserve Line Breaks and Spacing Carefully
A normalized text transcript is useful for searching, but a diplomatic transcript should retain line breaks, repeated spaces, obvious strikeovers, and missing impressions. Those features help reconstruct carriage behavior and typing habits.
Keep the two transcript types separate:
- A searchable transcript favors ordinary spelling and simple characters.
- A diplomatic transcript represents what is visibly present on the sheet.
Neither needs to imitate the typeface visually. The image preserves appearance; the transcript supports discovery and analysis.
Compare Machines at a Controlled Scale
Side-by-side comparisons fail when pages are captured at different magnifications. A slightly enlarged specimen can make one typeface appear wider, heavier, or more open than another.
Use the ruler from the calibration frame to establish physical scale. Prepare comparison crops from the same character sequence and export them at matching pixels per millimeter. Keep contrast settings consistent when judging strike strength. If different settings are unavoidable, state that in the comparison notes.
Choose character groups that expose useful distinctions:
HMWfor wide capitals and vertical alignmentaceosfor bowls and countersIl1for ambiguous narrow forms0OQfor numeral and capital construction.,;:'for punctuation positionnnmmrnfor spacing and joined-shape confusion888333for worn bowls
A contact sheet can place these crops into aligned rows. Include the machine identifier outside each specimen crop, not over the characters. The result is especially useful when identifying an undocumented machine or monitoring alignment before and after repair.
Package the Record for Long-Term Use
A strong record remains understandable after it leaves the original computer. Use predictable filenames and avoid labels such as final, new, or edited2.
A compact naming pattern is:
[machine-id]_[date]_[view]_[purpose]_[version]
For example:
TW-042_2026-07-18_front_preservation_v01.pngTW-042_2026-07-18_front_ocr_v01.pngTW-042_2026-07-18_raking-left_v01.pngTW-042_2026-07-18_transcript_diplomatic_v01.txt
Keep originals, preservation masters, access copies, OCR derivatives, and transcripts in distinct folders. Do not overwrite the camera original after rotation or cropping.
For an easy review packet, combine selected access images with an identification page using Image to PDF. A PDF is convenient for circulation, but it should remain a delivery format rather than the sole archive. Review the generated pages at high zoom to ensure no automatic scaling has softened the smallest punctuation.
If several machines belong in one report, assemble the individual documents with PDF Merge. Put a concise index first and maintain the same machine order in the folder, spreadsheet, contact sheet, and PDF.
Run a Final Evidence-Preservation Check
Before declaring the record complete, inspect it as if the physical sheet were no longer available.
Image check
- All four page edges appear in the preservation master.
- The image is sharp in the center and corners.
- No highlight clipping has erased faint ribbon marks.
- Paper tone is plausible and consistent across the batch.
- Perspective correction follows page edges, not typed baselines.
- Mechanical faults remain visible.
- Compression has not created blocks or ringing around characters.
Identity check
- Every file begins with the correct machine identifier.
- The contextual photograph shows the associated machine.
- Serial number and typeface claims are marked as known, inferred, or unknown.
- Capture date and repair state are recorded.
- File versions are unambiguous.
OCR and transcript check
- Ambiguous
I,l,1,O, and0forms were reviewed manually. - Line endings and spacing were checked against the image.
- OCR text is stored separately from the visual master.
- Uncertain readings are marked rather than silently completed.
- Searchable and diplomatic transcripts are clearly distinguished.
Package check
- Camera originals are retained.
- Preservation masters use a suitable high-quality format.
- Access copies open correctly on another device.
- The PDF is not the only surviving version.
- At least one backup exists in a separate location.
Preserve the Machine’s Imperfections
The most valuable typewriter specimen is not necessarily the cleanest-looking one. A weak lowercase e, a capital that sits high, or a punctuation mark that lands off-center may identify a type basket, document a repair need, or connect later correspondence to the same machine.
Successful digitization therefore balances readability with restraint. Capture square and evenly, retain a faithful master, produce OCR and publication copies separately, verify ambiguous characters, and keep machine identity attached to every derivative. The result will serve casual readers without discarding the small mechanical evidence that makes a specimen historically useful.