Beehive Frame Photo Maps: A Practical Guide to Visual Inspection Records
Learn how to photograph, organize, resize, and annotate beehive frame images so colony changes are easier to compare without opening the hive more often.
Beehive Frame Photo Maps: A Practical Guide to Visual Inspection Records
Written hive notes are indispensable, but they often compress a visually complicated inspection into a few phrases: brood pattern acceptable, stores moderate, queen not seen. Those notes may be enough for the immediate management decision. Months later, however, they rarely reconstruct where brood, pollen, capped honey, empty comb, or suspicious cells appeared across the box.
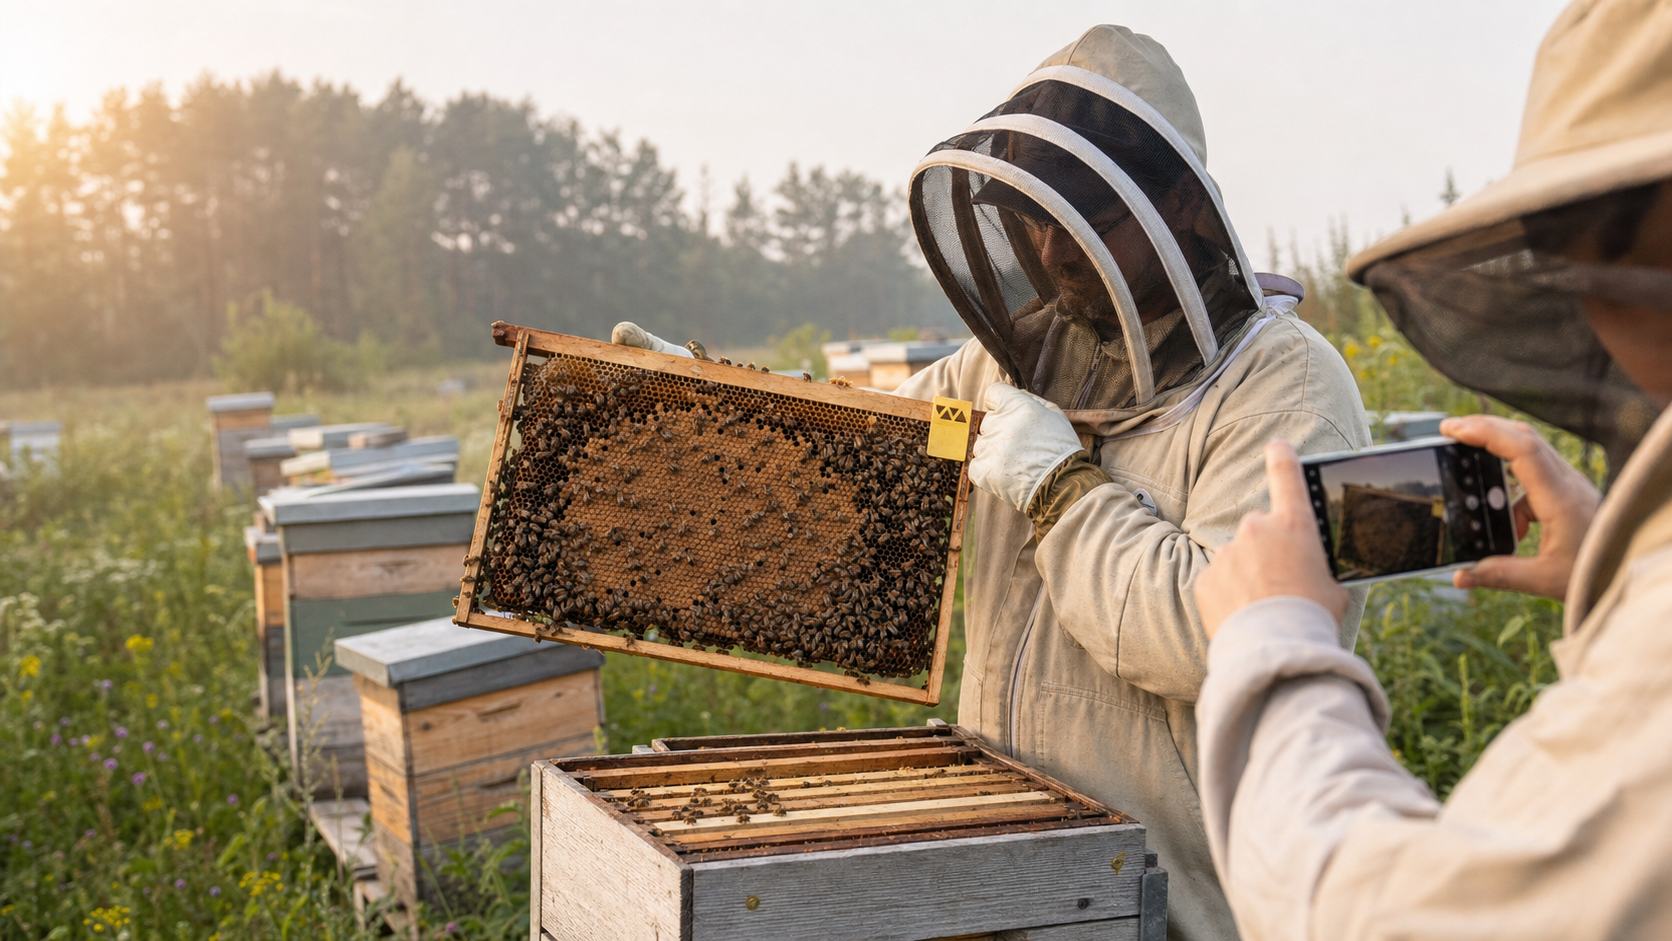
A frame photo map fills that gap. It is an ordered set of photographs showing both sides of selected frames, tied to a hive identifier, inspection date, box position, and short observations. The aim is not to replace hands-on inspection or expert judgment. It is to create a compact visual record that can be compared without repeatedly opening a colony.
This guide is designed for small apiaries, teaching yards, queen-rearing projects, and community beekeeping groups. It concentrates on disciplined capture and file preparation rather than automated diagnosis. Images can document visible conditions, but they should not be treated as proof that a colony is healthy or free of pests and disease.
Decide what the photo map needs to answer
Photographing every surface during every visit produces a large archive surprisingly quickly. Begin with the questions the record should help answer.
Useful questions include:
- Did the brood area expand, contract, or shift between inspections?
- Which frames carried most of the pollen and capped stores?
- Was new comb drawn evenly on foundation or starter strips?
- Where were queen cells, drone patches, damaged comb, or unusual spotting observed?
- Did a recently added frame move toward the center as planned?
- Which image should accompany a mentor consultation or teaching note?
Set a capture level before opening the hive. A minimal record might include an exterior view, one top-down box overview, and both sides of two representative frames. A full map might cover every frame in one brood box. Targeted documentation might capture only a queen cell frame, a test frame, or the boundary between brood and stores.
The best level is the smallest one that answers the current question. Less time with frames exposed generally means less disruption and fewer opportunities to lose track of frame order.
Establish a frame identity system
A photograph has little long-term value if nobody can determine which hive, box, frame, or side it shows. Use an identity scheme that remains understandable outside a particular phone gallery or note-taking application.
A practical identity has five parts:
| Field | Example | Purpose |
|---|---|---|
| Inspection date | 2026-05-18 | Sorts visits chronologically |
| Hive identifier | YARD2-H04 | Distinguishes colonies without relying on paint color |
| Box position | B1 | Identifies the lowest inspected brood box |
| Frame position | F06 | Records the slot counted from a defined wall |
| Frame side | A or B | Keeps the two faces paired |
Define the counting direction once. For example, frame one may always be nearest the entrance when viewed from behind the hive. Record that convention in the apiary notes because entrance orientation alone may become ambiguous when equipment is rotated or moved.
Avoid assigning permanent identities to frame positions unless the physical frames are also marked. A frame photographed in slot six today may occupy slot four after manipulation. If individual frame history matters, add a durable frame code on the top bar and record both that code and its current position.
Use markers that remain readable outdoors
A small marker placed near the frame is faster and safer than trying to remember the sequence later. It can show the frame number and side using large, high-contrast characters. Keep it outside the comb area and ensure it cannot fall into the hive.
Prepare markers before the inspection. Laminated cards, engraved tags, or reusable magnetic tiles attached to a separate stand are easier to read than hurried handwriting. Do not place adhesive labels, loose paper, or ink-bearing materials where bees can contact them.
The marker should support the record, not conceal comb. Put it beside or below the frame within the photograph. If a permanent top-bar code is visible, capture it in one wider identification image before taking the closer comb photograph.
Build a repeatable frame photography station
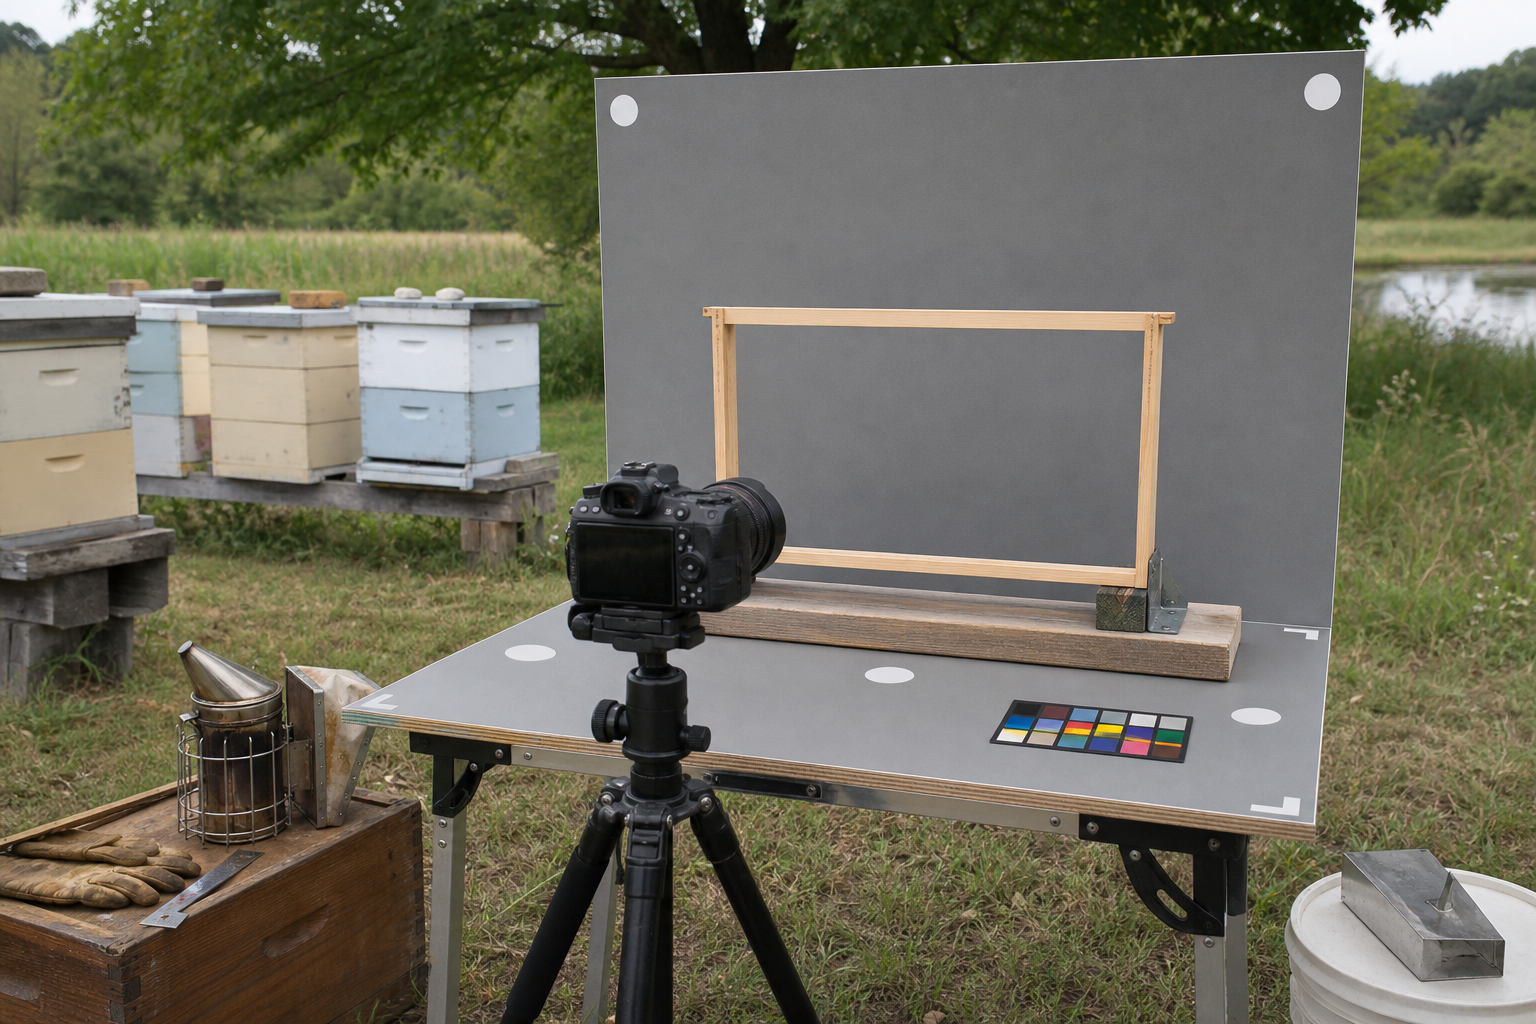
Consistency matters more than expensive equipment. A current phone or ordinary camera can produce useful records when the frame is held flat, evenly lit, and parallel to the sensor.
Choose open shade near the hive. Direct sun creates bright wax reflections and deep shadows inside cells, while patchy foliage can produce false-looking variations across the comb. A neutral gray or muted blue backing board helps separate the frame outline from grass, suits, and hive equipment. Keep the board far enough behind the frame that bees leaving the comb are not trapped against it.
A basic portable station can include:
- A stable frame rest that supports the top bar without crushing bees
- A washable neutral backing board
- Clearly marked camera and frame positions
- A small color and scale reference placed outside the comb
- Prepared frame-position markers
- A clean box or rack for temporarily holding frames in correct order
The setup must fit normal apiary safety practices. It should not block flight paths, create a trip hazard, or leave brood exposed while the photographer adjusts equipment. On cool, windy, or robbing-prone days, shorten or skip detailed photography.
Keep camera geometry predictable
Position the lens near the center of the frame and keep the camera face parallel to the comb. If one end of the top bar appears much wider than the other, perspective distortion is already significant. That distortion makes area comparisons less reliable and complicates later cropping.
Use the same orientation for every image. Top bar horizontal is usually easiest to review. Fill most of the photograph with the wooden frame while leaving a narrow border for straightening and cropping. Avoid digital zoom; move the camera closer while maintaining a safe, repeatable distance.
Tap to focus on the central comb, then check fine details near the edges. If the camera offers exposure compensation, slightly reduce exposure when pale wax or capped honey is losing texture. Disable aggressive portrait effects and artificial background blur.
Capture each frame without losing box order
Frame handling remains the priority. Photography should fit into an orderly inspection rather than turning the open hive into a studio session.
Begin with context images: the hive identifier, exterior condition, box stack, and a top-down view after the cover is removed. These establish which equipment was present and how the frames appeared before manipulation.
For a full box map, use this sequence:
- Confirm the counting direction and photograph the box overview.
- Remove the first frame according to normal safe handling practice.
- Place the correct position marker beside the backing area.
- Photograph side A with the top bar in the standard orientation.
- Turn the frame carefully and photograph side B.
- Return it to its original position or place it in an ordered holding box.
- Advance the marker and repeat without changing the counting direction.
- Take a final top-down image after all frames are returned.
If a frame must be moved, rotated, replaced, or removed, capture that fact explicitly in the notes. The final photograph should show the resulting arrangement. Otherwise, the photo set may accurately describe the beginning of the inspection while the written record describes the end.
Add detail views without breaking the sequence
Close-ups are useful for queen cells, eggs, patchy cappings, physical damage, marked queens, unusual debris, or comb-building details. Take the full-frame identification photograph first. Then capture the detail and immediately return to the normal sequence.
A detail image should overlap enough surrounding comb to make its location recognizable. A very tight macro photograph may show a feature clearly but give no clue where it appeared. When location matters, take three images: the entire frame, a medium view of the relevant region, and a close detail.
Do not spend extended time searching through images at the open hive. If a photograph may be inadequate, take one deliberate backup and continue. Review can happen after the colony is closed.
Create a visual map for each hive visit
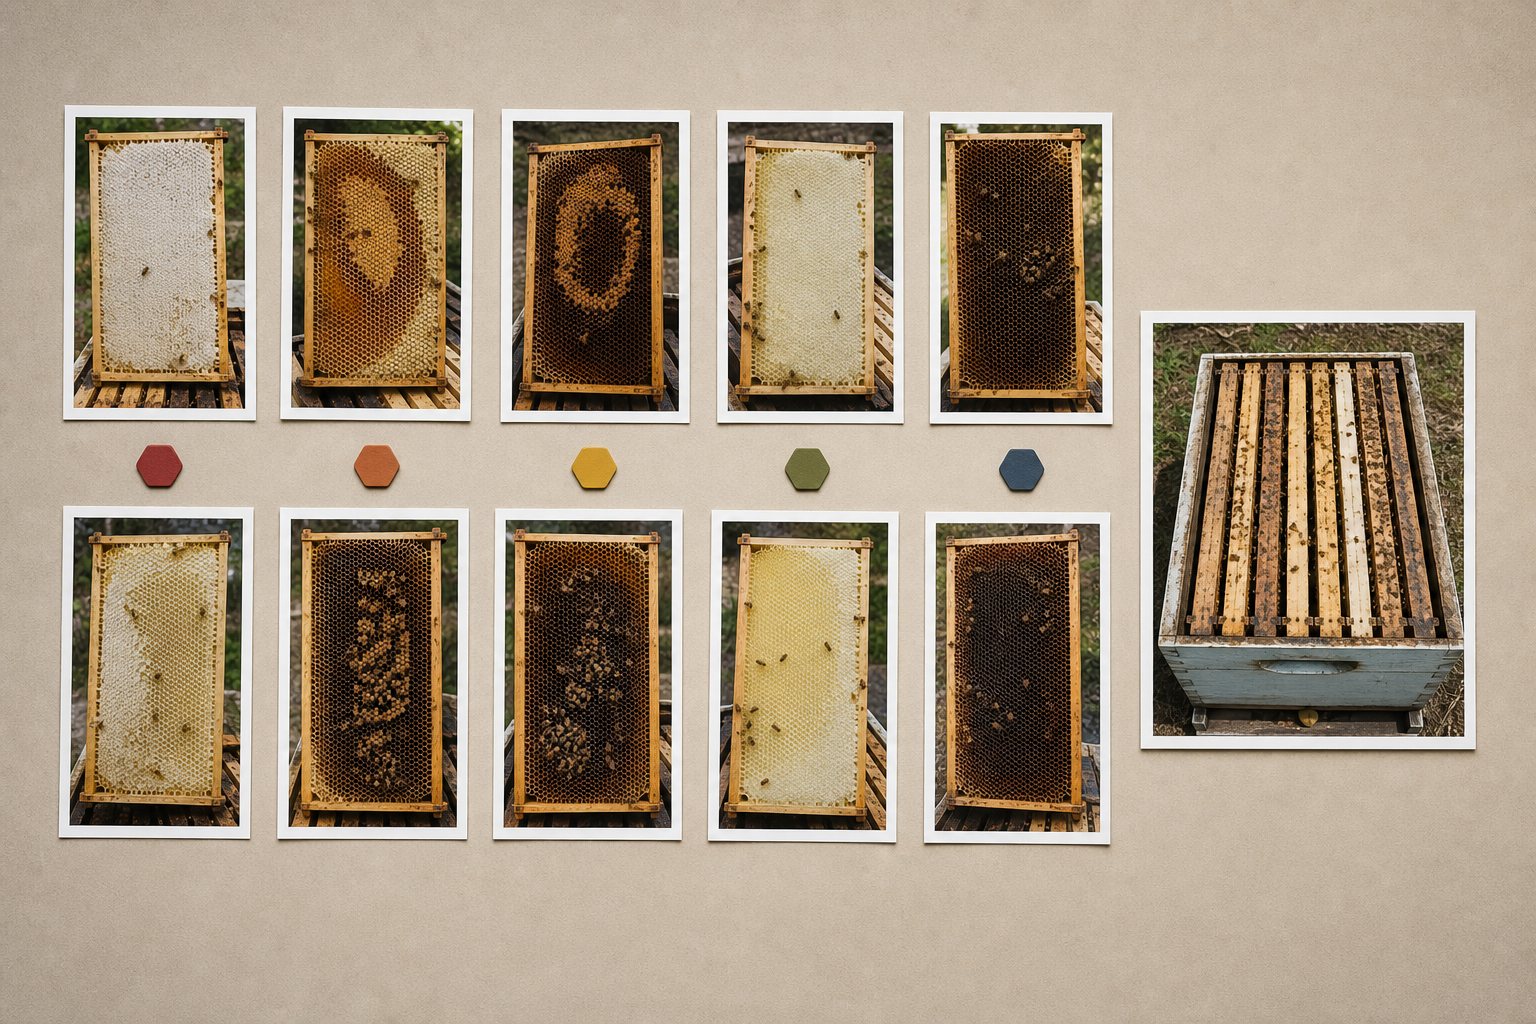
After the inspection, arrange the files so another person can understand them without relying on capture timestamps. Create one folder per visit using a sortable name such as 2026-05-18_YARD2-H04.
Rename images with padded position numbers:
2026-05-18_YARD2-H04_B1_F06_A.jpg
2026-05-18_YARD2-H04_B1_F06_B.jpg
Padding frame numbers to two digits keeps them in order when sorted alphabetically. Put detail views after the related frame using a suffix such as _detail01. If the camera created several failed attempts, select the clearest record before renaming so duplicate numbers do not enter the archive.
Create a contact sheet or page-based map with side A and side B adjacent. Arrange consecutive frames from left to right or top to bottom, then keep that direction consistent across visits. A top-down context photograph belongs at the beginning of the set. Short captions can record observations, but avoid covering comb with arrows or labels in the only retained copy.
For a portable review packet, prepare the selected images and combine them with notes using Image to PDF. If the overview, frame map, and inspection form were produced separately, merge the PDFs into one dated record. Retain the original photographs as well; a PDF is a convenient presentation copy, not the master image archive.
Prepare images without erasing evidence
Inspection photographs often need rotation, cropping, exposure correction, and size reduction. Apply restrained edits whose purpose is readability rather than beautification.
First, rotate every image to the common orientation. Straighten using the wooden frame edges, then crop consistently while preserving the identity marker and a small border. If a photograph contains distracting equipment beyond the frame, remove it only when doing so does not discard relevant context.
Basic tonal correction can recover detail from an image that is slightly dark. Avoid heavy contrast, saturation, sharpening, noise removal, or generative reconstruction. These treatments can exaggerate cell boundaries, hide small irregularities, alter wax color, or introduce details that were never recorded.
If a sensitive photograph needs cosmetic cleanup for a public presentation, preserve the untouched original and label the edited derivative clearly. For ordinary adjustments, the AI Photo Editor can help prepare a presentation copy, but visual changes should never silently replace the source used for husbandry records.
Choose dimensions for the intended review
Large originals are valuable for close inspection, but sharing full-resolution phone images can make a packet slow to open. Produce derivatives instead of shrinking the masters.
A practical set may contain:
| Version | Typical use | Preparation priority |
|---|---|---|
| Original | Archive and detailed review | Preserve camera file unchanged |
| Review image | Laptop or tablet comparison | Keep enough pixels to inspect comb regions |
| Contact-sheet thumbnail | Navigation and rapid comparison | Favor consistent dimensions |
| Message copy | Quick consultation | Reduce size but verify that the feature remains visible |
Use Resize Image to standardize review copies while maintaining aspect ratio. Then use Compress Image conservatively for email or shared folders. Inspect the result at 100 percent, especially around eggs, cell rims, cappings, and fine debris. If compression turns those regions into blocks or smears, increase quality or share a cropped detail from the larger file.
Never let a small messaging-app copy become the only surviving version. Many services rename files, remove metadata, and recompress images automatically.
Compare inspections without overinterpreting photographs
A useful comparison places the same box position, frame identity, side, and orientation next to each other. If frames moved between visits, compare by permanent frame code rather than position alone.
Start with broad, defensible observations:
- The visible brood area appears larger or smaller.
- Stored pollen is concentrated in a different region.
- A previously undrawn section now contains comb.
- Capped stores occupy more of the upper corners.
- A damaged edge has been repaired or extended.
- A marked feature is no longer visible in the photographed position.
Use language such as appears, visible, or not visible in this image. Photographs have blind spots. Bees cover cells, lighting changes color, viewing angles conceal depth, and a frame image captures only one moment. Absence from a photograph is not proof of biological absence.
Avoid estimating precise percentages unless the capture geometry and measurement method are controlled. Even then, record how the estimate was made. A rough visual map is excellent for orientation and discussion, but false precision weakens the archive.
Separate observations from decisions
Keep three distinct fields in the inspection record:
- Visible observation: what can actually be seen in the image.
- Field observation: what the beekeeper saw during handling but the camera may not show.
- Management action: what was changed or planned.
For example, a visible observation might state that capped brood occupies much of the center of frame seven. A field observation might record that eggs were seen but were not resolved in the photograph. The management action might be to reassess colony space at the next suitable inspection.
This separation prevents later viewers from treating an interpretation as a photographed fact. It is particularly valuable when images are shared with mentors, inspectors, students, or other members of a beekeeping association.
Protect location data and colony records
Apiary photographs may reveal GPS coordinates, distinctive landmarks, vehicle plates, people, house numbers, or neighboring property. Review metadata and visible backgrounds before sharing files publicly.
Keep the full archive in a controlled location with at least one backup. Use a neutral public hive identifier rather than the owner’s name or precise location. When asking for outside advice, share only the images and notes needed for the question.
A simple retention structure is:
- One folder for untouched originals
- One folder for resized or annotated derivatives
- One inspection summary containing the identity convention and actions
- One backup stored separately from the main device
If several people contribute photographs, agree on naming and access rules before the season becomes busy. Consistency is much easier to establish with ten files than with ten thousand.
Run a five-minute quality audit after closing the hive
Review the set on a larger screen as soon as practical. Problems discovered at this point can improve the next inspection even when reopening the colony is inappropriate.
Check that:
- The hive and visit date are unambiguous.
- Every photographed frame has the expected side A and side B.
- Frame numbers follow the stated counting direction.
- Images are sharp enough for their intended question.
- Markers do not cover relevant comb.
- Full-frame views exist for every close detail.
- Any frame movement is reflected in the final overview and notes.
- Original files remain unchanged.
- Shared copies contain no unwanted location or personal information.
Also record capture failures. Uneven shade, a distracting background, reversed frame order, and unreadable markers are system problems, not merely bad photographs. One short note about the cause can prevent the same mistake throughout the season.
A compact field kit and final checklist
A useful kit should be small enough that it actually reaches the apiary. Pack a charged camera or phone, frame-position markers, a neutral backing board, a stable rest, cleaning cloth, spare battery, and a paper fallback for notes. Weather protection for the electronics is sensible, but it must not interfere with safe hive handling.
Before opening the hive, confirm the purpose, capture level, counting direction, and file marker sequence. During the inspection, photograph context first, preserve frame order, capture the full frame before details, and document every manipulation. After closing, rename the selected images, make review derivatives, assemble the visual map, back up the originals, and record any uncertainty.
The resulting archive does not need to be visually perfect. It needs to be identifiable, consistent, restrained, and honest about what each image can show. With those qualities, frame photographs become more than a crowded camera roll: they become a dependable seasonal record for comparison, teaching, and better-informed conversations about the colony.