Knitting Machine Punch Card Scan Cleanup: A Practical Pattern Archive Guide
Learn how to photograph, clean, verify, and archive knitting machine punch cards so hole patterns remain readable, printable, searchable, and useful for future projects.
Knitting Machine Punch Card Scan Cleanup: A Practical Pattern Archive Guide
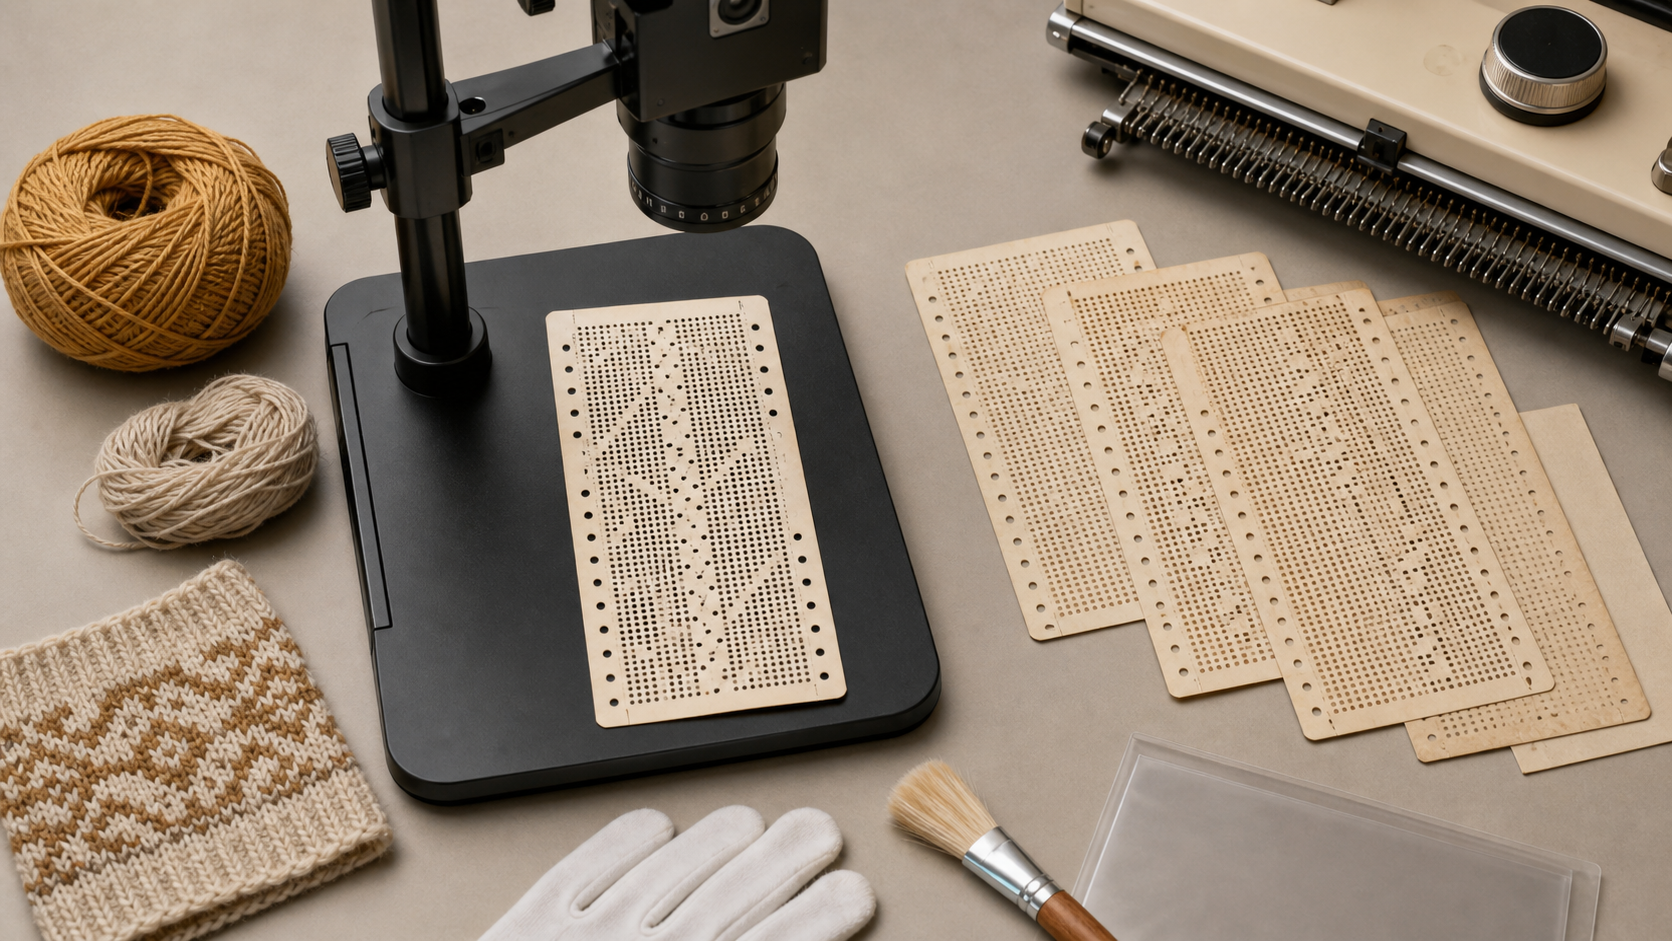
Mechanical knitting machine punch cards are deceptively difficult to digitize. A casual phone photo may preserve the general motif, but it often fails at the one thing that matters: recording every hole in the correct position.
Cards can curl, discolor, tear around frequently used holes, and cast shadows through their perforations. Pencil notes, printed row numbers, tape repairs, and faded registration marks add useful context while also confusing automated cleanup. If an image is cropped too tightly or processed too aggressively, a perfectly attractive scan can become an unreliable pattern record.
This guide presents a practical system for photographing or scanning punch cards, cleaning the images, checking the hole grid, and packaging the results for later use. It is intended for owners of vintage knitting machines, textile studios, repair groups, libraries, and makers preserving inherited pattern collections.
The goal is not merely to make a clean-looking picture. It is to produce a trustworthy archival master, a convenient reference copy, and, when appropriate, a printable working copy.
Understand what the image must preserve
A knitting punch card carries several kinds of information at once. The perforated grid controls needle selection, but the card may also contain printed boundaries, feed direction, pattern repeat indicators, handwritten yarn notes, or evidence of a previous repair.
Treat these elements as separate evidence rather than forcing one image to serve every purpose.
A useful archive normally contains three versions:
| Version | Primary purpose | Recommended treatment |
|---|---|---|
| Archival master | Preserve the card as found | Color image, generous margins, minimal correction |
| Pattern reference | Make the hole grid easy to inspect | Straightened, cropped, high contrast |
| Working copy | Printing or tracing for studio use | Exact scale, clean background, verified dimensions |
The archival master should retain stains, handwriting, damaged edges, and surrounding scale references. These details may help identify the card or explain an ambiguous hole later. The pattern reference can be cleaner, but it should still preserve the entire repeat area and its boundaries. A working copy requires the most verification because a scaling or alignment error can affect the physical card produced from it.
Never replace the original capture with the cleaned version. Keep both.
Identify the card format before capture
Before taking a picture, identify the machine family and card width if possible. Common systems use different numbers of columns, pitches, registration features, and card lengths. A pattern designed for one machine cannot be assumed to transfer directly to another simply because its image looks similar.
Record the following information in a notebook or companion file:
- Machine brand and model, if known
- Number of punch positions across the card
- Physical card width and repeat length
- Feed direction
- Whether the card is an original, commercial copy, or handmade card
- Any catalog number or handwritten pattern name
- Location of tears, tape, elongated holes, or uncertain marks
If the machine is unavailable, count the columns carefully and photograph any printed edge markings. Do not infer compatibility from the motif alone.
Cards joined into a continuous loop deserve extra attention. Photograph the join, note the overlap, and determine whether any rows are duplicated. If the loop must be opened for scanning, document its original assembly before removing clips or tape.
Prepare fragile cards without altering them
Loose fibers and surface dust can be removed with a clean, soft brush. Avoid liquids, household cleaners, and adhesive removers. Old card stock may absorb moisture unevenly, while plastic cards can react unpredictably to solvents.
Do not flatten a curled card with an iron or heavy improvised weights. For image capture, gentle restraint outside the pattern area is safer. Small clean weights can be placed beyond the card edges, or the card can be held beneath a clean sheet of glass if reflections are controlled.
Glass is not always the best option. It may introduce glare, Newton-ring patterns, or pressure on brittle paper. If the card lies reasonably flat without it, leave the surface uncovered.
For torn cards, place all detached pieces in their apparent positions but do not digitally conceal the damage in the master image. Photograph the front and back, especially when old tape or reinforcement affects the hole shapes.
Build a repeatable capture station
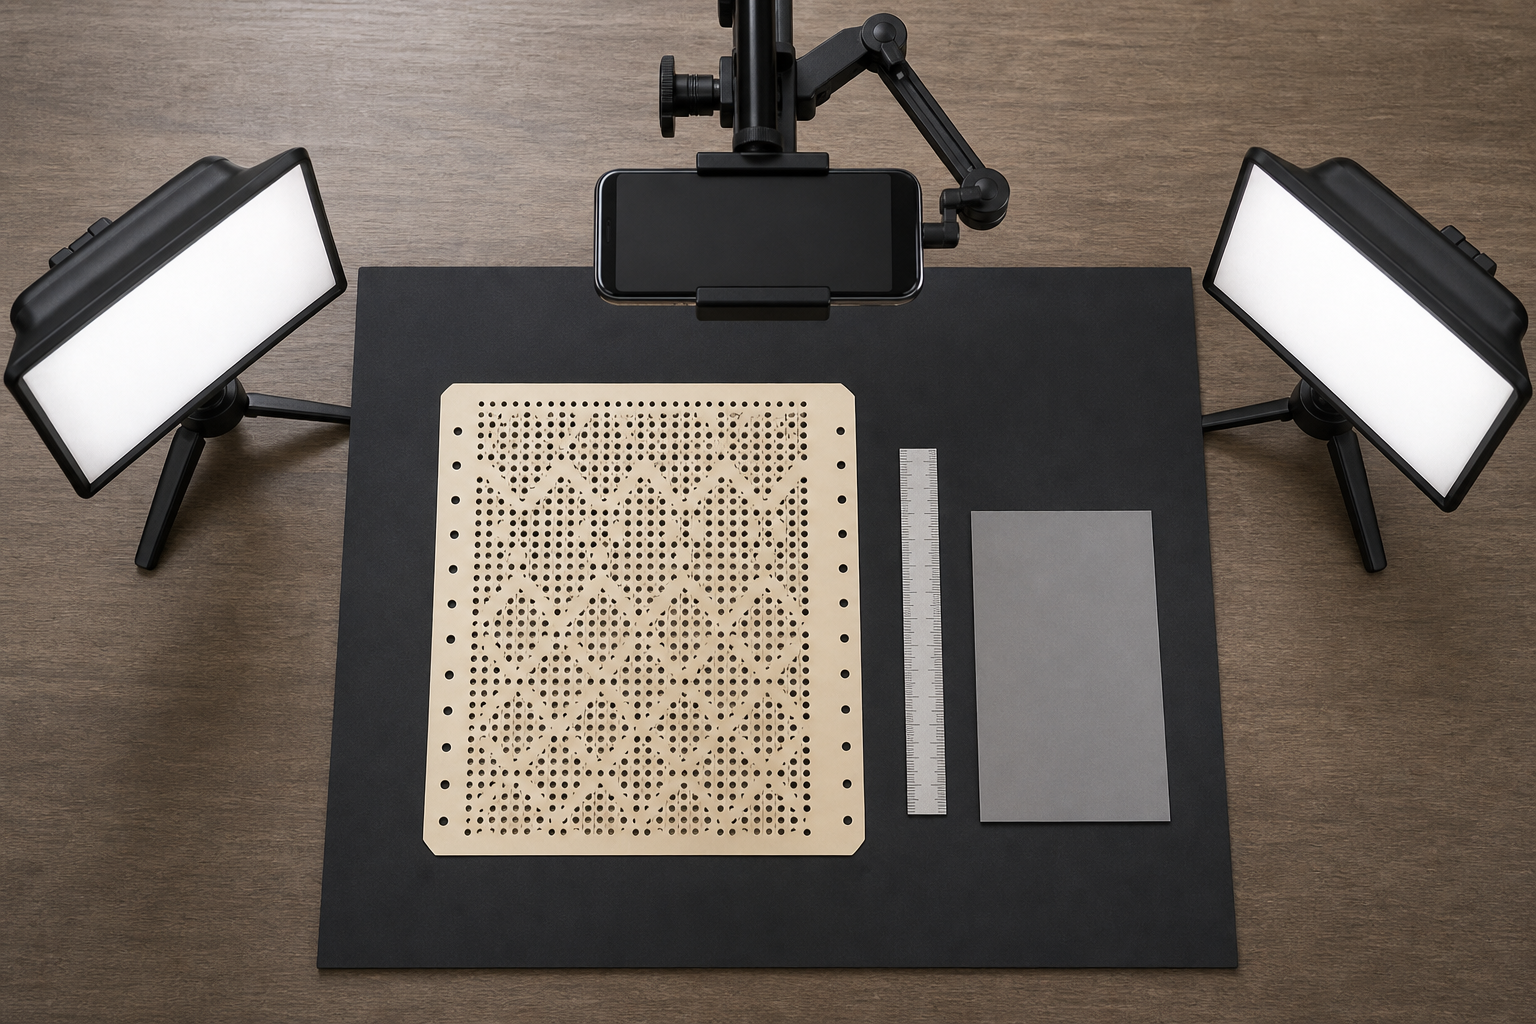
A flatbed scanner is useful for loose, flat cards, but a camera is often easier for long loops, curled material, and cards with dimensional repairs. Either method can work if geometry and lighting are controlled.
For a camera station, use:
- A rigid overhead mount or tripod
- A matte backing that contrasts with the card
- Two diffused lights at matching angles
- A small ruler or scale reference
- A neutral gray reference card when color accuracy matters
- A remote shutter or timer to prevent movement
Position the camera sensor parallel to the card. A card that appears narrower at one end is a warning that the camera is tilted. Perspective correction can help, but correct capture geometry preserves the grid more reliably.
Choose the backing based on the card material. A pale card with open holes is usually easiest to read over matte black or dark gray. A dark plastic card may require a light backing. Avoid textured fabric because fibers can appear inside holes and complicate later thresholding.
Place the ruler next to the card, not over it. Include at least one full row above and below the area of interest when possible. Wider margins make straightening and perspective correction safer.
Light the holes, not just the surface
The surface and perforations may need different lighting strategies.
With ordinary reflected light, the card receives light from above and the holes reveal the darker backing. This is usually best for preserving printing, handwriting, color, and texture.
With transmitted light, illumination comes from beneath the card. The holes become bright and easy to identify, but paper fibers, tears, and thin areas may also glow. A diffused light panel can work well, provided it does not show a pixel grid or uneven hot spots.
For valuable or ambiguous cards, capture both:
- A reflected-light color image for documentary context.
- A transmitted-light image for perforation verification.
These images should be taken without moving the card. If their alignment is consistent, they can be compared directly during inspection.
Select capture settings that protect fine edges
Use the highest practical camera resolution and avoid digital zoom. Low ISO and a stable mount reduce noise around hole boundaries. Moderate sharpening is preferable to aggressive in-camera processing.
On a phone, disable portrait effects, beauty filters, automatic document filters, and any feature that replaces the background. These tools can close small holes, reshape torn ones, or erase faint pencil annotations.
Check the first image at full size. Each hole should have a distinct edge and enough pixels to judge whether it is intentionally punched. If the smallest perforation is only a few pixels wide, move the camera closer or capture the card in overlapping sections.
Capture long cards in controlled sections
A long card may not fit into one high-resolution frame. Sectional capture is safer than moving farther away and sacrificing detail.
Keep the camera fixed and slide the card along a straight guide. Include several overlapping rows between adjacent frames. The overlap provides reference points and prevents a row from disappearing at a crop boundary.
A simple sequence might be:
- Overall front view
- Overall back view
- Top section with margin
- Middle sections with four to six overlapping rows
- Bottom section with margin
- Join or repair details
- Transmitted-light sections, if needed
Do not rely on automatic panorama stitching for the only record. Stitching software may bend a regular grid or merge similar rows incorrectly. Retain every original section even if you also create a composite image.
Use filenames that preserve sequence without depending on folder sorting quirks. For example, kh910_card017_front_01_master.tif is more informative than IMG_4821.jpg. Pad sequence numbers with zeros so that section 10 does not appear before section 2.
Straighten the card without distorting the grid
Begin cleanup on a duplicate. Rotate the image using a long printed edge, a column of holes, or a physical card boundary as the reference. The central grid is often more reliable than a worn outer edge.
If the image has trapezoidal distortion, apply perspective correction using four points that belong to a known rectangle. Do not drag corners merely until the card looks pleasing. Confirm the correction by comparing horizontal and vertical grid spacing in several areas.
Barrel distortion from a wide-angle phone lens can curve straight rows near the frame edges. Lens correction should be applied before perspective adjustment. For critical records, photographing from farther away with a less extreme lens and then cropping often gives better geometry than using an ultra-wide camera.
After straightening, leave a narrow border around the whole card. Cropping directly through edge markings makes later interpretation difficult. You can use the image resize tool to create smaller reference derivatives, but retain a full-resolution master before reducing dimensions.
Separate documentary cleanup from pattern cleanup
The color master needs restrained correction. Adjust exposure and white balance only enough to make the card readable. Preserve paper tone, pencil notes, discoloration, and repairs.
The pattern reference may use stronger processing:
- Convert a copy to grayscale.
- Adjust levels so the card and open holes separate clearly.
- Remove only isolated background dust that cannot be mistaken for card evidence.
- Inspect weak, torn, and partially punched holes individually.
- Export a lossless or high-quality reference copy.
Global thresholding can be useful, but it is not a substitute for inspection. Yellowed paper may have uneven brightness, particularly near taped areas. One threshold value might identify holes in the center while erasing them near the edges.
Local contrast adjustments can help with uneven illumination. Use them gently: strong clarity, edge enhancement, or noise removal may turn ragged damage into a convincing circular hole.
If the original capture has an unwanted background or obstruction, an AI photo editor can help produce a presentation copy. Do not use generative cleanup on the evidentiary master or the verified grid image. A visually plausible reconstruction is not proof of the original punching pattern.
Verify every hole before archiving
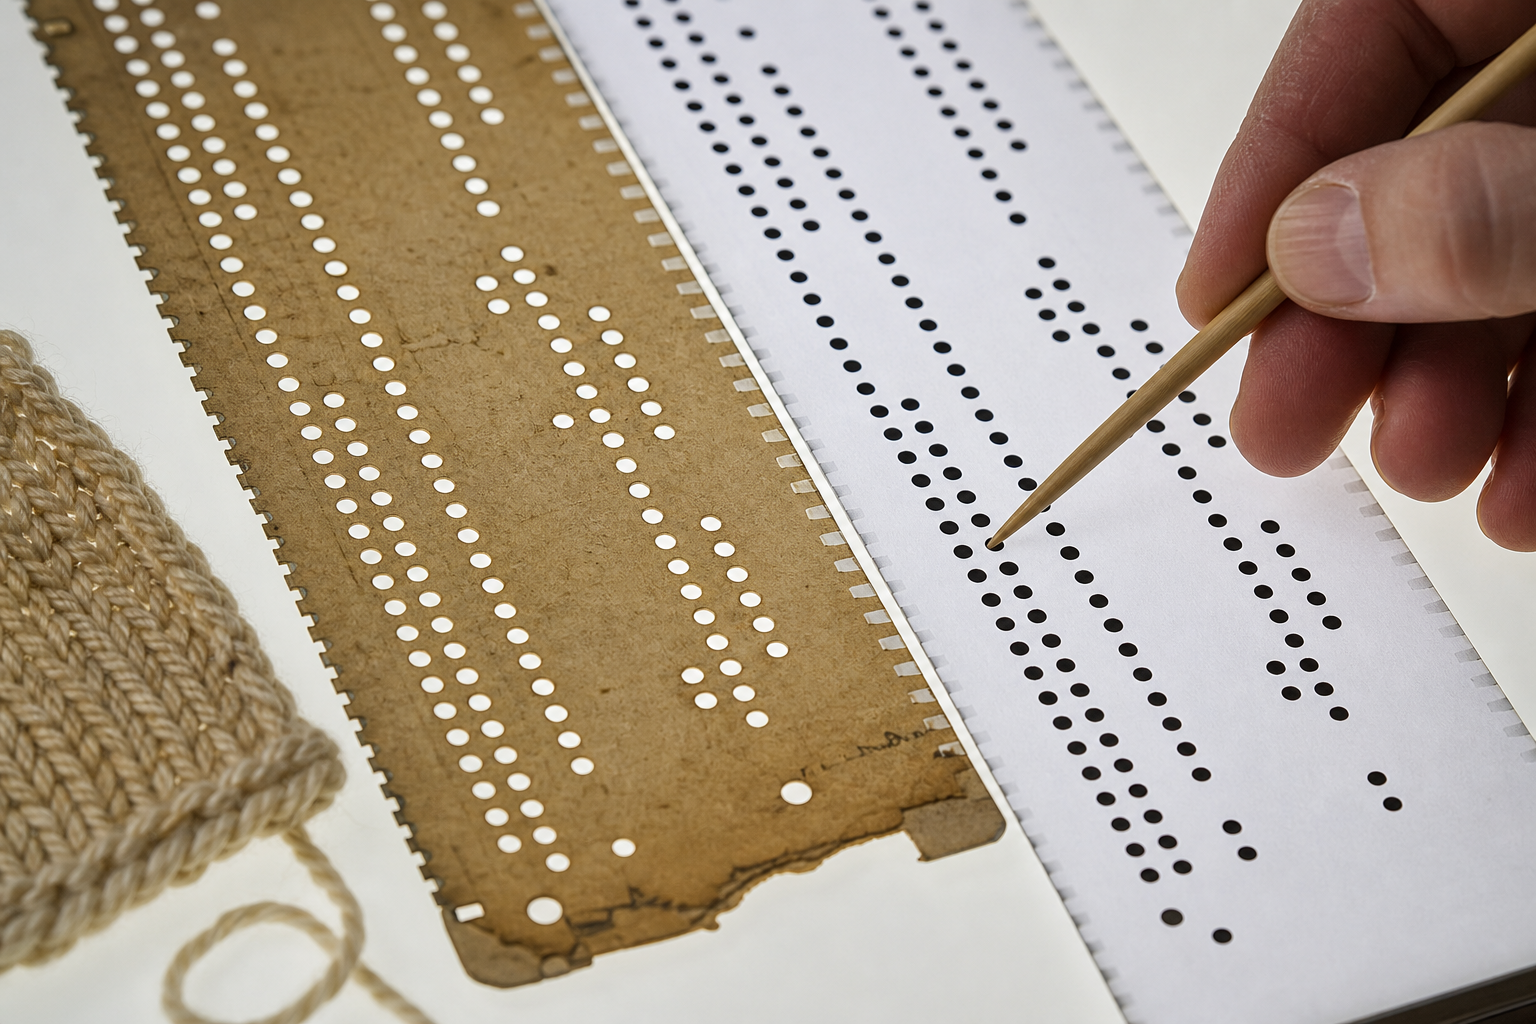
Verification is the most important stage. A clean image can still contain a one-cell error that changes the knitted result.
Inspect the card row by row at high magnification. Compare the reflected-light and transmitted-light captures when available. Mark uncertain positions in a separate annotation layer or companion diagram rather than silently deciding what the card was intended to contain.
Use a consistent status system:
| Mark | Meaning | Recommended action |
|---|---|---|
| Confirmed open | Clean perforation visible in multiple views | Record as punched |
| Confirmed closed | Intact material visible | Record as unpunched |
| Damaged | Tear or elongated hole crosses a grid position | Preserve and annotate |
| Obscured | Tape, stain, fold, or object blocks the position | Recapture or flag |
| Uncertain | Evidence supports more than one reading | Do not reconstruct silently |
Count both columns and rows. Confirm that the apparent repeat boundaries agree with the physical card markings. Repeating motifs can help reveal anomalies, but symmetry should never be used as the sole evidence for filling a questionable cell. The variation may be deliberate.
A second-person check is valuable for complicated patterns. Give the reviewer the original capture and the cleaned grid without explaining your assumptions. Independent checking is more likely to catch a missed or added hole.
Use a coordinate system for corrections
Describe uncertain locations with coordinates rather than phrases such as “the hole near the upper flower.” Choose a stable origin, such as the top-left grid position, and record column and row numbers.
A correction log might note:
- Column 7, row 18: elongated tear; likely open, not confirmed
- Column 14, row 26: obscured by tape on front; visible as closed from back
- Columns 2–4, row 41: edge damage outside active repeat
Keep the coordinate convention with the archive. If rows are counted in the card feed direction rather than top to bottom, state that explicitly.
Create a true-size printable copy
A printable card guide must preserve physical scale. Pixel dimensions alone do not guarantee this because print software can fit, shrink, or enlarge an image automatically.
Measure a known distance across several grid intervals on the original card. Longer reference distances reduce the effect of measurement error. Scale the cleaned copy so that the same interval measures correctly on paper.
Then perform a physical test:
- Print at 100% or actual size.
- Disable “fit to page” and borderless enlargement.
- Measure the printed scale reference.
- Place the print beneath or beside the original.
- Compare grid intersections at the top, middle, and bottom.
Agreement at only one point is insufficient. A copy can match at the top and drift at the bottom because of distortion or printer scaling.
PDF is convenient for distributing fixed pages, but the embedded image should still be checked. You can assemble front views, back views, and detail pages with image to PDF, then combine related documents using PDF merge. Include a visible measurement reference in the document itself so recipients can verify output size after printing.
Choose formats for preservation and everyday use
Format choices should reflect the role of each file.
| Asset | Suitable format | Notes |
|---|---|---|
| Camera original | Original RAW, HEIF, or JPEG | Preserve untouched source files |
| Archival master | TIFF or high-quality PNG | Avoid repeated lossy saves |
| Pattern reference | PNG | Good for hard-edged grids and annotations |
| Sharing copy | JPEG or WebP | Smaller, but inspect small holes after compression |
| Multi-page record | Useful for grouped views and notes |
When converting unfamiliar camera formats, create a standard derivative while retaining the source. The image converter can produce broadly usable formats for collaborators or older catalog systems.
Compression deserves special care. Thin grid lines and small holes are exactly the details that lossy compression can damage. If a compact sharing copy is necessary, compare it with the master at 200% or 400% magnification. The image compression tool is useful for generating lighter copies, but the smallest file should not become the archival authority.
Package each card as a self-contained record
A folder should remain understandable even when separated from the rest of the collection. Include enough context to identify the card without relying on memory.
A practical package can contain:
- Untouched front and back captures
- Clean color reference
- High-contrast hole-grid reference
- True-size printable PDF, if verified
- Detail photographs of joins and repairs
- A plain-text metadata file
- A correction or uncertainty log
- A sample swatch photograph, if the card has been tested
The metadata can record machine compatibility, card dimensions, yarn and tension notes, provenance, capture date, and the name of the person who verified the grid. Avoid putting essential metadata only inside a proprietary catalog application.
If a knitted sample exists, photograph it with a ruler and a neutral color reference. The swatch does not prove every punch position, but it connects the abstract grid to the resulting fabric and can reveal whether the archived orientation is reversed.
Common mistakes and their consequences
Using a white backing for a pale card
Low contrast makes open holes difficult to distinguish from the card surface. Choose a matte contrasting backing or add a transmitted-light capture.
Letting the phone choose document mode
Automatic document cleanup can erase handwriting, close holes, and replace shadows with artificial edges. Capture a normal high-resolution photograph first.
Cropping away feed and repeat indicators
A motif without orientation may be difficult to use. Preserve the entire card and edge markings in at least one image.
Treating repeated shapes as proof
It is tempting to repair an irregular repeat by copying neighboring rows. That creates a reconstructed design, not a faithful record. Keep reconstruction in a clearly labeled derivative.
Printing without checking scale
Page fitting can change the pitch enough to make a tracing unusable. Add a measurement reference and test the printed result.
Saving only a binary black-and-white image
Thresholded images discard stains, shallow punctures, writing, and repair evidence. They are useful derivatives, not replacements for color masters.
A final quality-control checklist
Before considering a punch card record complete, confirm that:
- The title contains the correct machine or collection identifier.
- Front and back were captured where repairs or annotations require both.
- The card is square to the image frame or has been carefully corrected.
- Every grid position is large enough to inspect.
- The first and last rows are not hidden by cropping.
- Feed direction and repeat boundaries are documented.
- Original captures remain untouched.
- Cleaned versions are clearly identified as derivatives.
- Uncertain and damaged positions are logged.
- Compression has not softened or closed small holes.
- Printable files include a scale reference.
- A physical print has been measured when exact size matters.
- Filenames sort in the intended order.
- The folder includes plain-language metadata.
- At least one backup exists on separate storage.
Preserve evidence before improving appearance
A reliable knitting machine punch card archive is built around evidence. Good lighting, square capture geometry, careful file naming, and row-by-row verification matter more than dramatic image enhancement.
The safest approach is layered: preserve what the card looks like, create a clearer image for studying its hole pattern, and produce a scale-checked working copy only when needed. That separation leaves room for future interpretation without confusing restoration with documentation.
Handled this way, even a faded, curled, or repaired card can remain useful long after its physical material becomes too fragile for regular trips through a knitting machine.