SDS Label Photo OCR Cleanup for Maintenance Binders
A practical guide for turning chemical container label photos into cleaner OCR text, searchable PDFs, and safer maintenance binder updates without layout software.
SDS Label Photo OCR Cleanup for Maintenance Binders
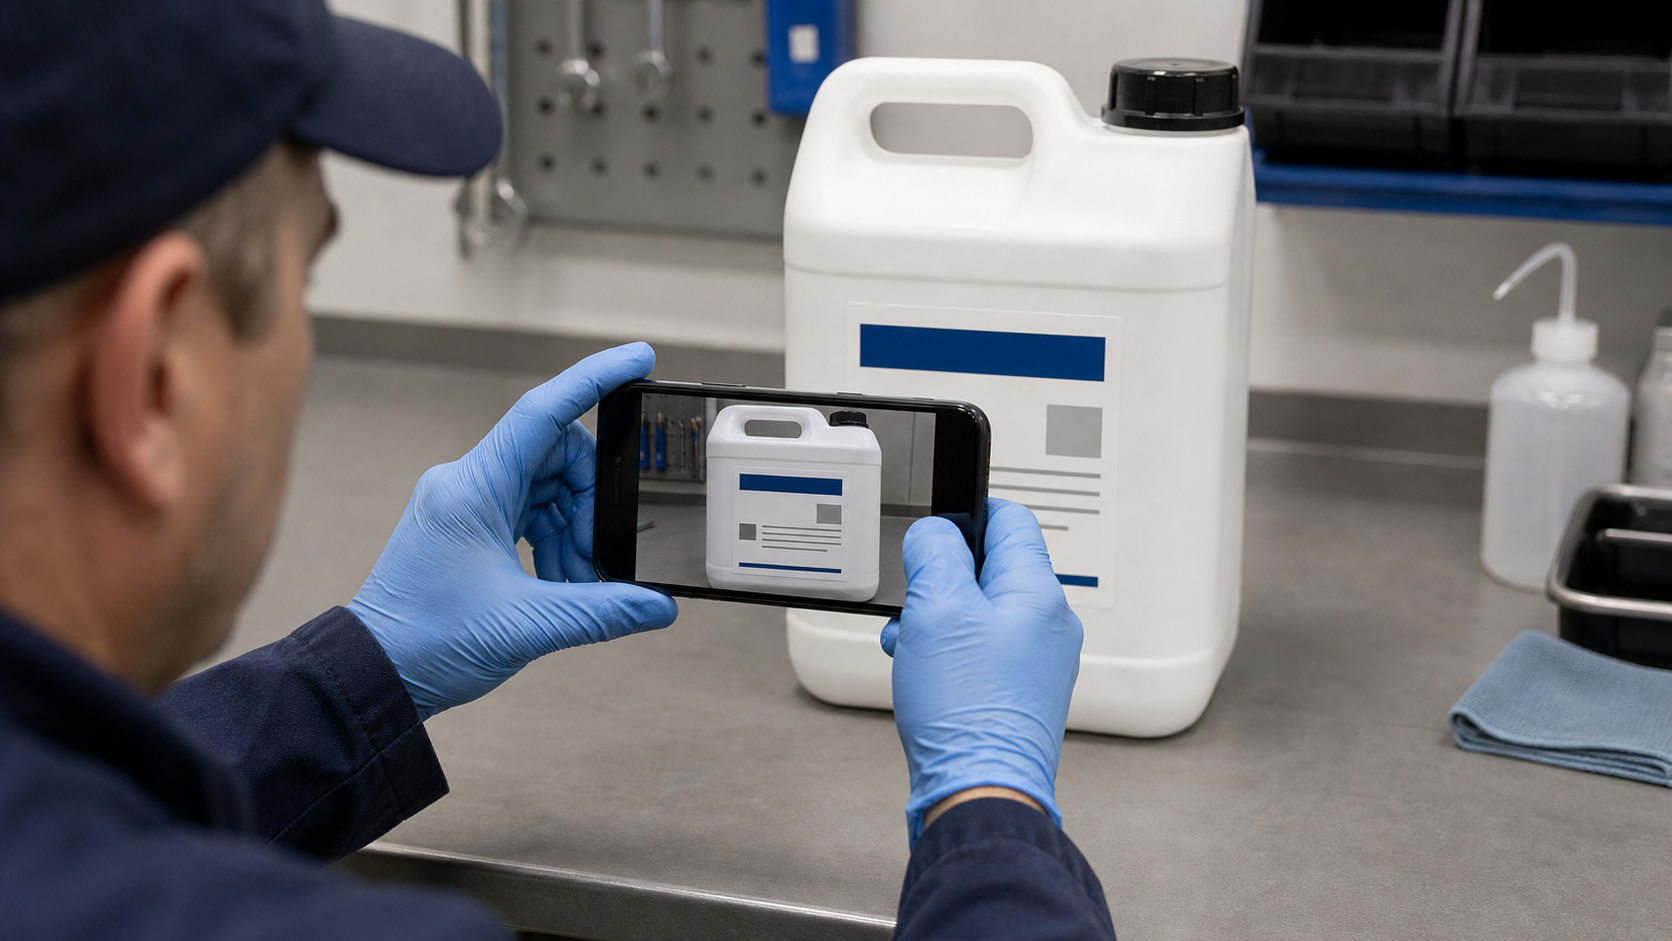
Safety Data Sheet binders are usually treated as a document problem, but the messy part often starts with photos. A maintenance lead finds a half-empty adhesive, lubricant, cleaner, paint, coolant, or treatment chemical in a cabinet. The original SDS might be missing, the product name may be partly worn, and the only available clue is a label photo taken under harsh shop lighting.
That photo has to become usable evidence. Someone needs to read the product name, manufacturer, hazard wording, revision date, lot details, or signal word clearly enough to search for the right SDS and update the binder. If the image is blurry, angled, shiny, shadowed, or buried in a camera roll, the task becomes slow and error-prone.
This guide is for small maintenance teams, facility managers, safety coordinators, school districts, property operators, and contractors who need a practical way to clean up SDS label photos and turn them into searchable reference packets. It is not legal advice and it does not replace your safety program, local rules, or manufacturer documentation. It focuses on the media-handling part: capturing better label photos, preparing them for OCR, checking the extracted text, and building a tidy packet for binder updates.
The goal is simple: create a repeatable evidence set that helps a human verify the product and locate the correct safety data sheet faster.
Why SDS Label Photos Fail OCR
OCR tools are good at reading clean, flat text. Chemical containers are rarely clean or flat. Labels wrap around curves, reflect overhead lights, pick up residue, and get scratched by normal use. Even a modern phone camera can produce a photo that looks readable to a person but confusing to OCR.
Common failure points include:
- Curved bottles that bend lines of text near the edges.
- Glossy labels with bright reflections over product names.
- Small hazard statements printed in narrow columns.
- Red, yellow, blue, or black label areas with poor contrast.
- Torn corners that remove part of the manufacturer name.
- Handwritten dates or storage notes crossing printed text.
- Photos taken too far away because the container was on a high shelf.
- Mixed backgrounds that make the label boundary hard to crop.
OCR cleanup is not about making the photo pretty. It is about making the important text easier to extract and easier to verify. A clean packet also gives the next person context: what container was photographed, which label panel was visible, and which extracted text was accepted after review.
For this kind of record, do not rely on OCR alone. Treat OCR as a starting point for human checking. If a product name or manufacturer is uncertain, keep the original photo in the packet and mark the text as uncertain in your own notes.
Decide What You Need From Each Label
Before editing anything, decide what information you are trying to recover. Otherwise, people spend time polishing details that do not matter while missing the fields that identify the product.
For SDS binder maintenance, the most useful fields are usually:
- Product or trade name.
- Manufacturer or distributor.
- Signal word, such as Danger or Warning, if present.
- Hazard pictograms, if visible.
- Product code, part number, or SKU.
- Lot or batch number, if relevant to your records.
- Revision date or label date, if printed.
- Emergency phone number, if you use it as a search clue.
- Container size and formulation clues.
Not every container will show every field. Some labels are too damaged. Some products have multiple similar names. Some private-label products require searching by distributor rather than manufacturer. The point is to capture enough evidence to find and verify the correct SDS, not to reconstruct a perfect label from a bad photo.
Use this table to decide how much cleanup is worth doing.
| Situation | Cleanup priority | Recommended output |
|---|---|---|
| Product name and manufacturer are clear | Low | Crop, OCR, save photo with text note |
| Product name is clear but manufacturer is unclear | Medium | Crop several panels, OCR each, build a small PDF packet |
| Label is glossy, curved, or partly damaged | High | Multiple photos, contrast cleanup, manual verification |
| Several similar products are in the same cabinet | High | One packet per product, consistent filenames |
| Label text may affect disposal or handling decisions | High | Preserve originals, verify against official SDS before action |
A practical cleanup pass should always preserve the original image. Do not overwrite it. Edited images are easier to read, but the original photo is the best record of what was actually on the container.
The Capture Standard: Make OCR Easier Before Editing
The cheapest OCR improvement happens before the file reaches any tool. A second photo taken properly is often better than ten minutes of correction.
Ask team members to capture labels with these habits:
- Fill the frame with the label, but leave a small border around it.
- Hold the camera square to the label instead of shooting from an angle.
- Tap to focus on the smallest printed text.
- Avoid flash on glossy labels unless it is the only way to get enough light.
- Move the container near a window, workbench light, or shaded area with even light.
- Take separate photos for front, back, side, and hazard panels.
- Photograph the whole container once for context.
- Retake any photo where the product name is not readable at normal zoom.
For curved containers, do not try to capture the whole wraparound label in one heroic shot. Take overlapping panels instead. OCR prefers one flatter section at a time. If the label wraps around a spray bottle or small jar, rotate the container and take three or four square-on images.
For shiny containers, change the angle of the light, not just the camera. A glare stripe that sits across the product name will often defeat OCR. Place the container on a plain surface and move a lamp to the side. If you must photograph in a mechanical room, use a piece of cardboard or paper to block harsh reflections.
For tiny text, distance matters. A photo taken from too far away may look acceptable on a phone screen but fail when cropped. Move closer and use the main camera lens rather than digital zoom when possible.
Prepare the Image Before Running OCR
Once you have the photos, prepare each one for reading. The goal is not heavy retouching. It is controlled simplification.
Start with cropping. Remove the bench, shelf, hands, neighboring containers, and background clutter. A tight crop gives OCR fewer shapes to misread. If you need to crop and standardize dimensions before sharing, a tool such as Resize Image can help create consistent review copies after the important label area is isolated.
Next, correct orientation. Text should be horizontal. If the photo is rotated even slightly, OCR may split words or read columns out of order. Straighten the label panel as much as practical. Do not stretch it aggressively if that makes letters look unnatural.
Then adjust contrast only enough to separate text from background. Pale gray printing on white plastic may need a contrast boost. White text on a dark label may need careful brightness control. Overdoing sharpness can create halos around small letters, so compare the edited version with the original before accepting it.
If the label has a colored background, test both the color image and a grayscale copy. Some OCR engines read color labels better. Others do better when color noise is removed. Keep whichever version produces fewer mistakes in the fields you actually need.
For damaged labels, make a separate cropped image for the damaged area instead of forcing one full-label image to do everything. A close crop of the manufacturer line can be more useful than a broad photo of the whole container.
Run OCR as a Draft, Not a Verdict
After cleanup, use OCR to extract the likely text. ConvertAndEdit's Image OCR is useful when you want to pull text from a label photo and then compare it against the visible image. Paste or export the OCR text into a note, spreadsheet, or document where a human can verify it.
For SDS label photos, OCR mistakes often look plausible. That is the danger. A 5 can become an S, a 0 can become an O, and a product code can lose a hyphen. Manufacturer names may be split across lines. Signal words may be read correctly while the actual product name is wrong.
Use this review pattern:
- Read the OCR output once without editing, looking for obvious garbage.
- Compare the product name against the photo at full size.
- Check manufacturer or distributor separately.
- Verify product codes character by character if they will be used for search.
- Mark uncertain words with a short note instead of guessing.
- Keep the edited image next to the extracted text.
A small amount of manual correction is expected. The value of OCR is that it reduces retyping and catches searchable fragments. It should not be treated as a final authority for safety information.
When searching for an SDS, use multiple confirmed clues. A product name alone may return outdated, regional, or similar-looking documents. Product name plus manufacturer plus product code is better. If the label includes a revision date, compare it with the SDS you find, but do not assume the label date and SDS revision date must match.
Handle Curved, Glossy, and Damaged Labels
Some label types deserve special handling because they create predictable errors.
Curved Bottle Labels
Curved labels stretch letters near the edges and bend text lines. Take overlapping photos of each readable panel. Crop each panel separately and run OCR on the clearest section. If a phrase crosses the curve, capture it again with that phrase centered in the frame.
Do not merge curved panels into a single artificial label image unless your team has a clear reason. It can make the packet look cleaner but may hide where text was uncertain. For maintenance records, separate source images are usually easier to audit.
Glossy Chemical Labels
Gloss is the enemy of small text. Reflections often erase the exact words needed for identification. Take one image with direct light and another with side light. If neither works, move the container to a darker background and use diffuse light from a larger source.
During editing, reduce highlights gently. Avoid filters that make the label look dramatic but destroy thin type. If a reflection covers a product code, the correct fix is usually another photo, not more editing.
Torn or Stained Labels
For torn labels, photograph the missing area and surrounding context. The surrounding words may help identify the product even when the product name is incomplete. Crop stained sections tightly and try OCR, but expect manual review.
If the container has handwriting on it, capture both the printed label and the handwritten note. Keep them distinct in the packet. Handwritten storage dates or internal location notes can be useful, but they should not be confused with manufacturer text.
Multi-Language Labels
Multi-language labels can confuse OCR order. If English appears in one column and French or Spanish in another, crop the English section separately if that is the section your team uses for SDS lookup. If your team needs another language for compliance or operations, make a separate crop for that language rather than mixing columns.
File Naming for SDS Photo Sets
A tidy naming pattern prevents repeated searches later. It also helps when several people contribute photos from different buildings or storage rooms.
Use filenames that include location, product clue, panel, and date. Keep them plain and searchable.
Example pattern:
building-room-productclue-panel-YYYY-MM-DD.jpg
Examples:
northshop-paintcabinet-acmeprimer-front-2026-07-04.jpgnorthshop-paintcabinet-acmeprimer-hazard-2026-07-04.jpgpoolroom-shelf2-tilecleaner-back-2026-07-04.jpg
Avoid filenames like IMG_4829.jpg or chemical label final final.jpg. They do not help anyone during review. If the product name is uncertain, use a clue and mark uncertainty in the review notes.
For edited images, add a short suffix:
originalfor the untouched capture.cropfor a cropped review image.ocrfor an image prepared specifically for OCR.
Do not create too many versions unless they serve a purpose. A good packet might contain one original context photo, two cropped label panels, OCR text, and the located SDS PDF.
Build a Searchable Binder Packet
Once the label text is reviewed, package the evidence in a form that other people can inspect. This is where image and PDF tools become useful.
For a single product, a practical packet can include:
- One full-container context photo.
- Cropped front label photo.
- Cropped hazard or back label photo.
- OCR text note or page.
- The matched SDS PDF, if your team has verified it.
- A short review note with date, location, and reviewer initials if your internal process uses them.
If your photos need to become a simple document, Image to PDF can turn cleaned label images into a review packet. If the SDS already exists as a PDF and you need to combine it with your photo evidence, PDF Merge can help assemble a single file for internal review.
For large binders, keep one packet per product rather than one giant catch-all PDF. Smaller packets are easier to update when a container is replaced or an SDS changes. They are also easier to send to a safety coordinator for targeted review.
If file size becomes a problem, compress review images after you confirm readability. Compress Image can reduce image weight, but check small text afterward. Compression that looks fine for photos can damage tiny label type. For safety-related records, readability matters more than shaving off every kilobyte.
Quality Checklist Before Adding to the Binder
Before a cleaned label packet becomes part of your maintenance record, run a short quality check. This keeps the system practical and reduces avoidable rework.
Use this checklist:
- The original photo is preserved.
- The label crop includes the product name or best available clue.
- The manufacturer or distributor is visible or marked uncertain.
- OCR text has been compared against the image.
- Product codes are checked character by character if used.
- Any guessed or unclear text is labeled as uncertain.
- The matched SDS was verified by a person, not assumed from OCR alone.
- The packet filename includes location and date.
- The PDF opens correctly and pages are in a logical order.
- Compressed images remain readable at normal zoom.
This checklist should be short enough for real use. If it becomes too elaborate, people will skip it. The best version is the one your team can actually apply while standing near a storage cabinet or processing a batch of photos at a desk.
Common Mistakes That Create Bad Records
The first mistake is editing away context. A tight label crop is useful, but the full container photo still matters. It helps reviewers confirm that the crop belongs to the correct container and not a neighboring product.
The second mistake is trusting a single OCR pass. If the output says a product name that almost matches a known chemical, people may stop checking. Always compare the text with the image, especially for similar product families.
The third mistake is over-compressing. Tiny SDS label text can fall apart under aggressive compression. If your packet is too large, resize nonessential context images first and preserve the clearest label crops at higher quality.
The fourth mistake is mixing several products into one unlabeled image set. If six containers were photographed on the same shelf, separate them immediately. Shared camera rolls become confusing quickly.
The fifth mistake is using cleanup to hide uncertainty. If part of a label is unreadable, say so. A clear uncertainty note is more useful than a polished image that implies confidence.
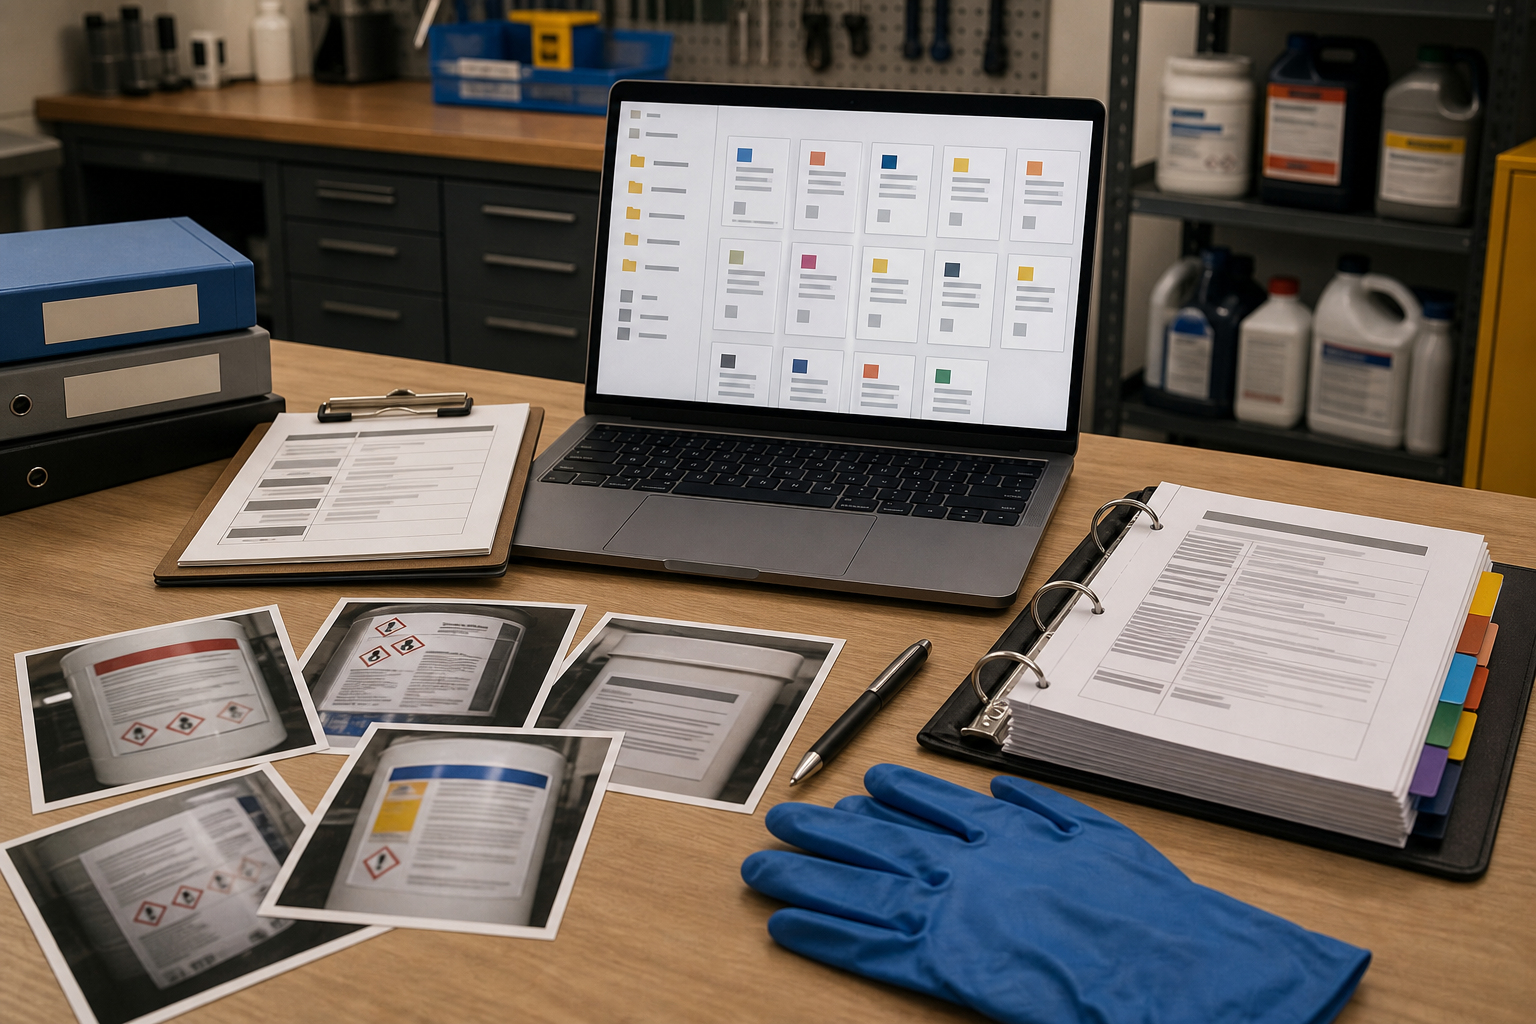
A Practical Example: Solvent Cabinet Review
Imagine a maintenance team reviewing a solvent cabinet before a scheduled safety check. They find four containers: a degreaser, a spray adhesive, a paint thinner, and an old cleaner with a stained label.
For each container, they take one full photo and two or three label panel photos. The spray adhesive has a curved label, so they photograph the front, side, and hazard panel separately. The old cleaner has a stained product name, so they take a close-up of the manufacturer line and another close-up of the lower product code.
Back at the desk, they crop each label panel. They run OCR on the clearest crop with Image OCR, then correct obvious mistakes while comparing against the photo. For the cleaner, the product name remains uncertain, but the manufacturer and partial product code are readable. They mark that uncertainty in the notes instead of guessing.
They search for the SDS using confirmed fields. Once the likely SDS files are found, a reviewer checks the manufacturer, product code, and product description. The verified SDS PDFs are combined with the photo evidence using PDF Merge. Each product gets a separate packet named by cabinet, product clue, and review date.
The result is not a fancy publication. It is a practical set of records that another person can open, inspect, search, and update later.
When AI Photo Editing Helps and When It Does Not
AI-assisted photo cleanup can be useful for removing distracting backgrounds, improving lighting, or making a label area easier to inspect. ConvertAndEdit's AI Photo Editor can be helpful for visual cleanup tasks when the goal is readability.
But SDS label work needs guardrails. Do not use AI editing to invent missing label text, reconstruct hazard statements, or fill in damaged product names. If a word is missing, the record should show that it is missing. For safety records, an honest gap is better than a confident-looking fabrication.
Good uses include:
- Reducing background clutter around a container photo.
- Improving uneven lighting when original text remains visible.
- Preparing a clearer non-official reference image for review.
- Creating a cleaner visual packet while preserving the original.
Risky uses include:
- Replacing unreadable text with guessed text.
- Removing stains that are part of the evidence.
- Changing label colors in a way that affects hazard recognition.
- Producing a polished image without keeping the original capture.
The rule is simple: editing may clarify what is present, but it should not create safety information that was not captured.
Final Review Standard
A strong SDS label photo packet does three things. It preserves the original evidence, makes the readable text easier to search, and shows enough context for another person to verify the match. It does not need graphic design polish. It needs clarity, consistency, and restraint.
Start with better capture habits. Crop and straighten the label. Run OCR as a draft. Review the output against the image. Build one searchable packet per product. Keep uncertainty visible. Use compression carefully. Merge files only when the packet becomes easier to inspect.
For small maintenance teams, this approach can turn scattered phone photos into useful binder updates without specialized layout software. More importantly, it reduces the chance that a blurry label, a guessed product code, or a misplaced image slows down the next safety review.