Asset Tag Photo OCR Field Guide for Maintenance Logs
A practical guide to capturing, cleaning, resizing, and packaging asset tag photos so maintenance teams can extract reliable OCR text without heavy software.

Asset Tag Photo OCR Field Guide for Maintenance Logs
Asset tags are small, boring, and surprisingly expensive to get wrong. A maintenance team might need one clear serial number to close a service ticket, confirm warranty coverage, match a spare part, or prove that a safety inspection covered the correct machine. When that number is trapped inside a blurry phone photo, the admin work grows quickly.
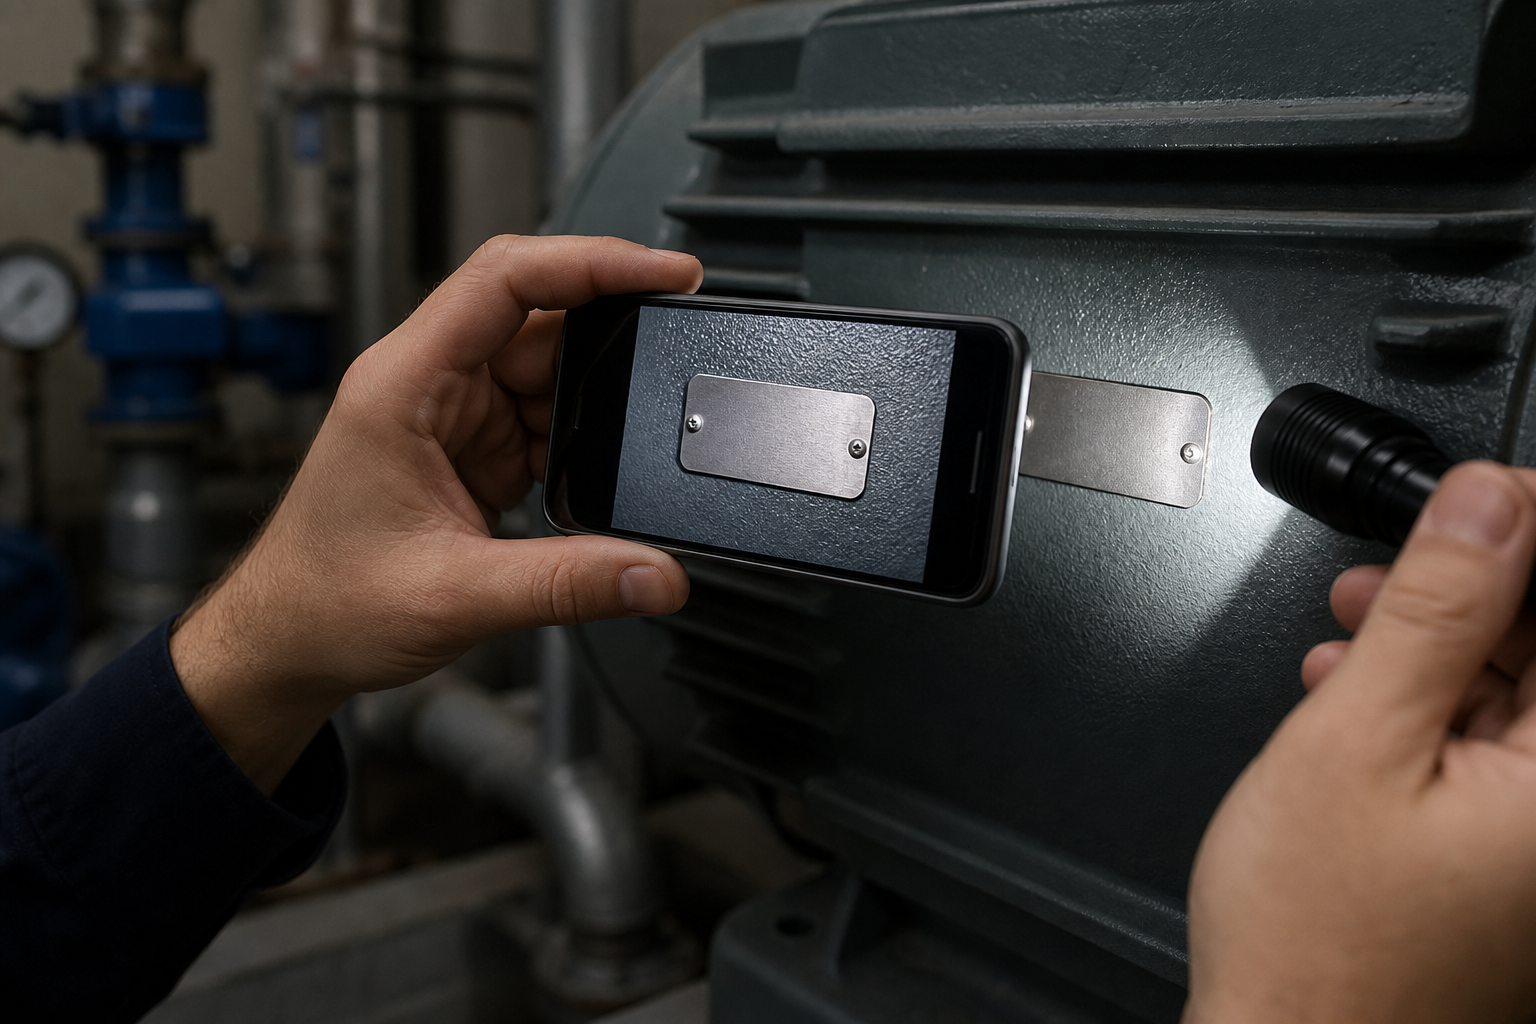
The hard part is that asset tags are rarely photographed in perfect conditions. They sit on curved housings, dusty frames, reflective metal plates, plastic labels, painted cabinets, ceiling-mounted equipment, and machinery that cannot be moved for a clean shot. The person taking the photo may be wearing gloves, standing on a ladder, working in low light, or rushing between tickets.
This guide is for teams that collect equipment photos and want better OCR results without building a heavy documentation system. It covers how to capture readable asset tag images, clean them for OCR, resize them for shared logs, and package them into practical records. The goal is not studio perfection. The goal is consistent, searchable maintenance evidence that survives handoff between field technicians, coordinators, vendors, and auditors.
Why Asset Tag OCR Fails
OCR tools perform best when letters are sharp, isolated, upright, and high contrast. Asset tag photos often violate all four rules at once.
The most common failure is blur. A tag may look readable on a phone screen, but the actual characters are smeared at full size. OCR does not guess from context as well as a person does, especially with serial numbers that mix similar shapes such as 0 and O, 1 and I, 5 and S, or 8 and B.
The second failure is glare. Many tags are laminated or printed on brushed metal. A bright reflection can erase half of a character while leaving the rest of the image looking acceptable. Glare is worse when the phone flash points directly at the tag.
The third failure is perspective. A label photographed from a steep side angle turns rectangular characters into slanted shapes. OCR may still read large text, but small asset IDs and model numbers become unreliable.
The fourth failure is clutter. A maintenance photo often includes the full machine, surrounding pipes, warning stickers, logos, handwritten notes, and shadows. OCR may read all of that noise and return a messy result, forcing someone to manually hunt for the correct ID.
A good asset tag photo system reduces these problems before the OCR step. The best results usually come from a modest capture checklist plus a light cleanup pass, not from trying five different OCR engines after the fact.
When This Guide Fits
Use this guide when your team needs searchable IDs from photos, but the source material is still controlled enough to improve.
It fits facility maintenance logs, HVAC service documentation, IT equipment audits, lab instrument records, rental equipment check-ins, warehouse machinery inspections, school district asset inventories, and vendor repair packets.
It is less useful when tags are physically destroyed, characters are scratched off, or the only available image is a heavily compressed thumbnail. In those cases, no cleanup step can reliably recover information that was never captured.
A practical rule: if a person can read the tag at full image size without zooming aggressively, OCR has a reasonable chance. If a person has to infer characters from context, OCR should be treated as a draft, not a source of truth.
The Capture Checklist That Saves the Cleanup Later
A field photo does not need to look polished. It needs to preserve characters. Give technicians a short checklist they can remember under real conditions.
Take One Context Photo and One Tag Photo
The context photo shows the equipment location and proves which unit was inspected. The tag photo is only for reading the ID.
Do not ask one image to do both jobs. A wide photo of the whole machine usually makes the asset tag too small. A tight tag photo may not prove where the tag came from. Two photos are faster than trying to rescue one compromised image later.
For each asset, capture:
- One wide photo showing the equipment in place
- One close photo filling the frame with the asset tag
- One optional backup photo from a slightly different angle if the tag is reflective
Keep the Phone Square to the Tag
The camera should face the tag as directly as possible. If the tag is on a vertical surface, hold the phone vertical. If it is under a panel or on a curved housing, move the phone until the plate looks rectangular in the preview.
A slight angle is acceptable. A dramatic angle creates character distortion that is hard to repair. The most common mistake is standing to the side because it feels more comfortable. Move your body first, then take the photo.
Turn Off Direct Flash When It Creates Glare
Phone flash can help in dark rooms, but it often creates a white reflection on laminated labels and metal tags. If glare appears in the preview, try side lighting instead.
Good options include a small flashlight held off to one side, a headlamp angled away from the phone, or ambient room light combined with a steadier hand. The light should reveal the characters, not bounce straight back into the lens.
Fill the Frame Without Cutting the Plate
The asset tag should take up most of the image, but the full plate should remain visible. Leave a small border around the tag. This helps later cropping and makes it easier to confirm that no character was clipped.
Avoid extreme digital zoom. If possible, move the phone closer instead. Digital zoom often creates soft edges around characters, especially in dim light.
Tap to Focus on the Characters
Most phone cameras choose focus automatically. That is convenient until the camera focuses on a bolt, cable, reflection, or background edge instead of the printed ID.
Tap the asset number or serial number before taking the photo. Wait a moment for focus to settle. If the phone keeps hunting, step back slightly and try again.
Take the Backup Shot Immediately
If the tag is important, take a second close photo before leaving the equipment. The backup should vary one thing: angle, distance, or lighting. Two nearly identical blurry images are not useful. One straight-on image and one slight side-lit image are much better.
The extra ten seconds can prevent a return visit.
A Simple Cleanup Pass Before OCR
Once images arrive from the field, the cleanup pass should be boring and repeatable. You are not retouching for marketing. You are making characters easier to read.
Start with the best close tag photo. If there are multiple options, choose the one with the sharpest characters, not the one with the nicest overall exposure.
Crop to the Tag Area
Crop away machinery, hands, cables, logos, safety stickers, and empty background. OCR engines often try to read every visible text fragment. A tight crop reduces false output and makes review faster.
Keep enough border to show the full tag, especially if the ID sits near an edge. If the label has a known format, such as asset number on top and serial number below, include both lines.
If the crop needs final dimensions for a shared log or ticketing system, use Resize Image after cropping so the tag stays readable without producing oversized uploads.
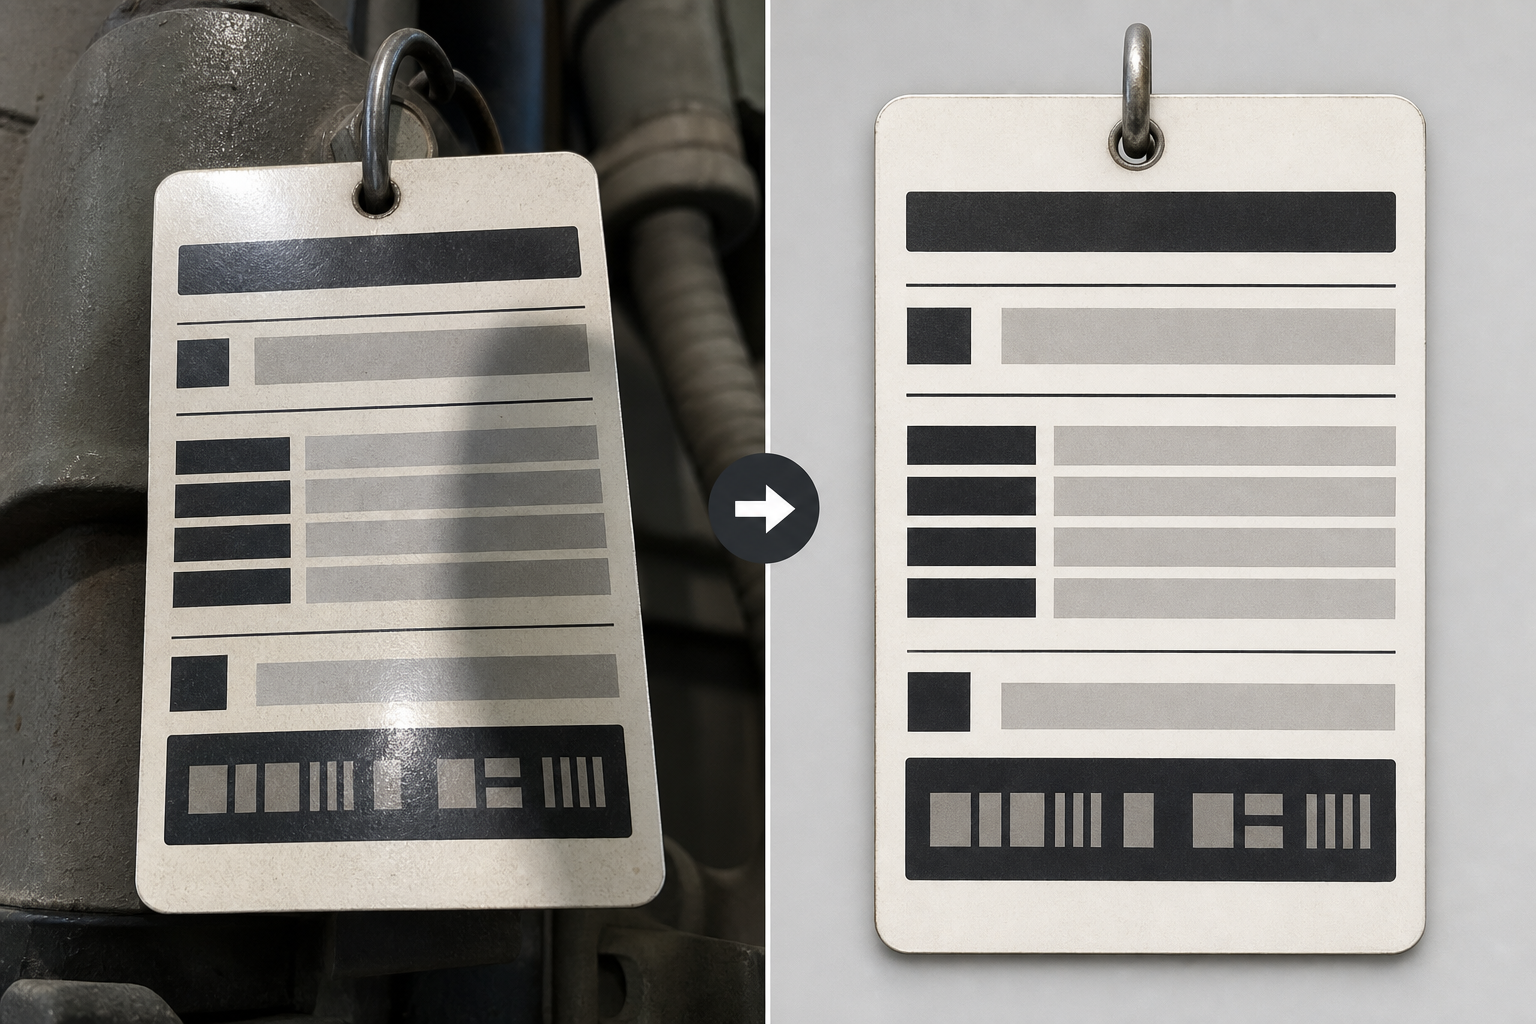
Straighten Before You Sharpen
If the plate is tilted, straighten it before adding contrast or sharpness. Straightening after sharpening can make character edges rough.
For mild tilt, rotate until the top and bottom edges of the tag feel level. For strong perspective distortion, it may be faster to request a new photo than to force a repair. Perspective correction can help, but it should not become a daily burden for routine maintenance documentation.
Improve Contrast Carefully
Small black text on a silver or white plate usually benefits from a gentle contrast increase. Faded thermal labels may need the opposite: slightly reduced highlights and increased midtone detail.
Do not crush the image into pure black and pure white. Overdone contrast can close holes inside letters and numbers. For asset IDs, preserving character shape matters more than making the image look bold.
Remove Visual Distractions Only When Needed
A smudge, sticker edge, or shadow may sit near the important ID. If it confuses OCR, remove or reduce it. For small repairs, an editor like AI Photo Editor can help clean distracting marks around the tag area.
Keep edits conservative. Do not alter the printed characters. If the image is used as inspection evidence, the cleaned version should still represent the original tag honestly. When in doubt, keep the original photo alongside the cleaned crop.
Compress After OCR Prep, Not Before
Compression is useful when images need to be uploaded to a ticketing system, emailed to a vendor, or stored in a shared folder. But heavy compression before OCR can blur character edges and introduce block artifacts.
Prepare the image first, run OCR or visual review, then create a smaller sharing copy with Compress Image. Keep a higher-quality original when the asset record has audit value.
Recommended Image Sizes for Tag Photos
There is no universal size that fits every tag. The right size depends on character height, label complexity, and storage limits. Still, teams benefit from a simple target range.
For most asset tag close-ups, keep the cleaned crop between 1200 and 2400 pixels on the long edge. This is usually enough for OCR while remaining manageable for uploads.
| Use case | Suggested long edge | Notes |
|---|---|---|
| OCR extraction only | 1600 to 2400 px | Better for small characters and mixed IDs |
| Ticket attachment | 1200 to 1800 px | Good balance of readability and file size |
| Vendor email packet | 1400 to 2000 px | Keeps details visible after forwarding |
| Long-term audit record | Keep original plus cleaned copy | Storage is cheaper than a return visit |
Avoid making a tiny 600 pixel crop the only stored version. It may look fine in a preview but fail when someone zooms in to verify a disputed character.
OCR Extraction Without Extra Noise
After cleanup, use OCR on the tight crop rather than the original wide maintenance photo. ConvertAndEdit's Image OCR is useful when you need to pull visible text from a tag image and paste it into a log, spreadsheet, ticket, or asset system.
The key is to treat OCR output as structured assistance, not automatic truth. Asset identifiers often contain random character sequences, so a spellchecker or language model cannot reliably correct them.
Review Ambiguous Characters
Build a review habit around the characters OCR commonly confuses:
- 0 and O
- 1, I, and l
- 2 and Z
- 5 and S
- 6 and G
- 8 and B
- RN and M on worn labels
If your asset numbers follow a known pattern, write that pattern near the review step. For example, an HVAC unit might always use three letters followed by six digits. A laptop asset sticker might always start with a department prefix. Pattern awareness catches many OCR mistakes.
Separate Asset Number, Serial Number, and Model Number
Many tags contain several identifiers. A common admin error is pasting the serial number into the asset number field or the model number into the serial field.
Use a small capture template:
| Field | What to paste | Verification cue |
|---|---|---|
| Asset number | Internal inventory ID | Often on a separate sticker or prefixed by company code |
| Serial number | Manufacturer serial | Usually near SN, Serial, or S/N label |
| Model number | Product model | Often shorter and repeated in manuals |
| Location | Room, rack, floor, vehicle, or site | Should match the context photo |
| Photo filename | Cleaned crop name | Links the text record to visual evidence |
This table can live in a spreadsheet, ticket form, or shared documentation page. The important part is that each extracted value has a place to go.
Keep OCR Output Close to the Image
Do not separate the extracted text from the source image too early. If a coordinator reviews a number, they should be able to open the crop immediately.
A practical file pair looks like this:
boiler-room-ah-03-tag-clean.jpgboiler-room-ah-03-ocr.txt
If your system stores notes directly with attachments, paste the OCR output into the attachment comment or ticket body. The goal is fast verification.
Packaging Photos for Maintenance Records
Asset tag photos often need to travel as more than loose images. A vendor may ask for a packet. An auditor may want one document per site. A manager may need a compact visual summary for review.
For small sets, convert cleaned photos into a single PDF with Image to PDF. This is useful when each asset needs a stable record that can be attached to a work order or stored in a folder.
A clean PDF record might include:
- Context photo of the equipment
- Close crop of the asset tag
- OCR text pasted into the work order or adjacent notes
- Date captured
- Site or room location
- Technician initials if your team uses them
For larger monthly or quarterly reviews, keep the source images in folders and create PDFs only for final packets. Loose images are easier to reprocess if an OCR pass needs to be corrected later.
Naming Files So People Can Find Them
Good filenames reduce duplicate work. Bad filenames create mystery attachments like IMG_4821.jpg, tag-final-final.jpg, and new photo 3.png.
Use filenames that identify location, asset, and photo type. Keep them plain enough for email, shared drives, and older systems.
A simple pattern:
site-location-assetid-photo-type-date.jpg
Examples:
north-plant-pump-0142-context-2026-05-19.jpgnorth-plant-pump-0142-tag-clean-2026-05-19.jpglab-2-centrifuge-a778-tag-original-2026-05-19.jpg
If the asset ID is unknown before OCR, use a temporary location-based name and rename after verification:
west-wing-room-212-unknown-tag-clean-2026-05-19.jpgwest-wing-room-212-ah17b392-tag-clean-2026-05-19.jpg
Avoid spaces, special symbols, and vague labels. The filename should help someone understand the image before opening it.
Choosing JPG, PNG, or WebP
For most maintenance tag photos, JPG is acceptable. It is widely supported, compact, and easy to attach to tickets. Use moderate compression rather than maximum compression.
PNG can be better for screenshots, scans, or labels with flat colors and very sharp edges. It may produce larger files for camera photos, especially when the image contains noise or texture.
WebP can reduce file size, but some older maintenance portals, vendor forms, or compliance systems may not accept it. If compatibility matters, JPG remains the safest choice.
Use Convert Image when you need to standardize mixed uploads from phones, scanners, and shared folders. A consistent output format saves time when records move between departments.
| Format | Best for | Watch out for |
|---|---|---|
| JPG | General phone photos and ticket attachments | Too much compression can damage small characters |
| PNG | Clean scans, screenshots, high-contrast labels | Larger files for real-world photos |
| WebP | Compact web publishing or internal portals that support it | Compatibility with older systems |
| Review packets and vendor handoff | Harder to reprocess than loose source images |
Quality Control Before the Record Is Closed
Before a maintenance record is closed, someone should perform a short check. This does not need to be a formal audit. It just needs to catch the mistakes that create return visits.
Use this checklist:
- The context photo shows the correct equipment
- The tag crop includes the full label
- The ID characters are readable at normal zoom
- OCR output was reviewed for ambiguous characters
- Asset number, serial number, and model number are in the correct fields
- The cleaned image was not compressed so heavily that characters blurred
- The filename includes useful location or asset information
- The original photo is retained when the record has audit value
For high-value equipment, add a second-person review. One person extracts the text. Another compares it against the image. This is especially helpful for warranty claims, regulated assets, and safety-critical equipment.
Common Edge Cases
Curved Tags
Some tags wrap around pipes, cylinders, handles, or rounded housings. OCR struggles when characters bend across the frame.
Take two or three overlapping photos rather than one wide angled shot. Capture the left side squarely, then the right side squarely. If the full ID cannot be seen at once, store both crops and transcribe the sequence carefully.
Embossed or Engraved Plates
Engraved metal tags may have low contrast because the characters are formed by shadows instead of ink. Side lighting helps more than direct flash. Move the light until the engraving casts small shadows inside the strokes.
Do not over-sharpen engraved plates. It can create bright halos that confuse OCR. A mild contrast adjustment is usually enough.
Dirty or Painted Labels
If dirt covers the tag, clean the tag physically before relying on image editing. A wiped label beats a digitally repaired photo.
For painted-over labels, take the best possible evidence photo and flag the record for manual verification. Do not ask OCR to solve a damaged source.
Tiny QR Codes Beside Human-Readable IDs
Some tags include both a QR code and a printed asset number. Photograph both, but do not assume the QR data matches the visible ID. Systems change, stickers are replaced, and duplicate labels happen.
If the QR code is operationally important, capture it straight on with enough border. Then still run OCR on the human-readable ID for the maintenance log.
A Practical System for Small Teams
A small team can get strong results with a lightweight routine:
- Technician captures one context photo and one close tag photo.
- Coordinator selects the sharpest tag image.
- Image is cropped, straightened, and lightly adjusted.
- OCR is run on the cleaned crop.
- Ambiguous characters are checked against the image.
- File is renamed using site, location, asset, type, and date.
- Final images are compressed for sharing, while originals are retained when needed.
- Important records are packaged as PDFs for vendors or audits.
This routine works because it separates jobs that are often mixed together. Capture proves the equipment. Cleanup protects readability. OCR speeds up data entry. Review protects accuracy. Packaging makes the result useful outside the immediate team.
Final Notes
Asset tag documentation improves when teams stop treating photos as casual attachments and start treating them as small records. The difference is not a large software rollout. It is a few consistent habits: square photos, readable crops, careful OCR review, predictable filenames, and sensible file sizes.
The strongest version of this system keeps both human and machine readers in mind. A person should be able to verify the tag quickly. OCR should receive a clean image with minimal noise. A vendor or auditor should receive a packet that makes sense without a long explanation.
When those pieces are in place, asset tag photos become more than proof that someone visited a machine. They become searchable maintenance evidence that saves return trips, reduces transcription errors, and keeps service records easier to trust.