Microfiche Reader Screen Capture Cleanup: A Practical Research Guide
Learn how to capture, straighten, clean, compress, and organize difficult microfiche reader images while preserving faint text, citations, and useful archival context.
Microfiche Reader Screen Capture Cleanup: A Practical Research Guide
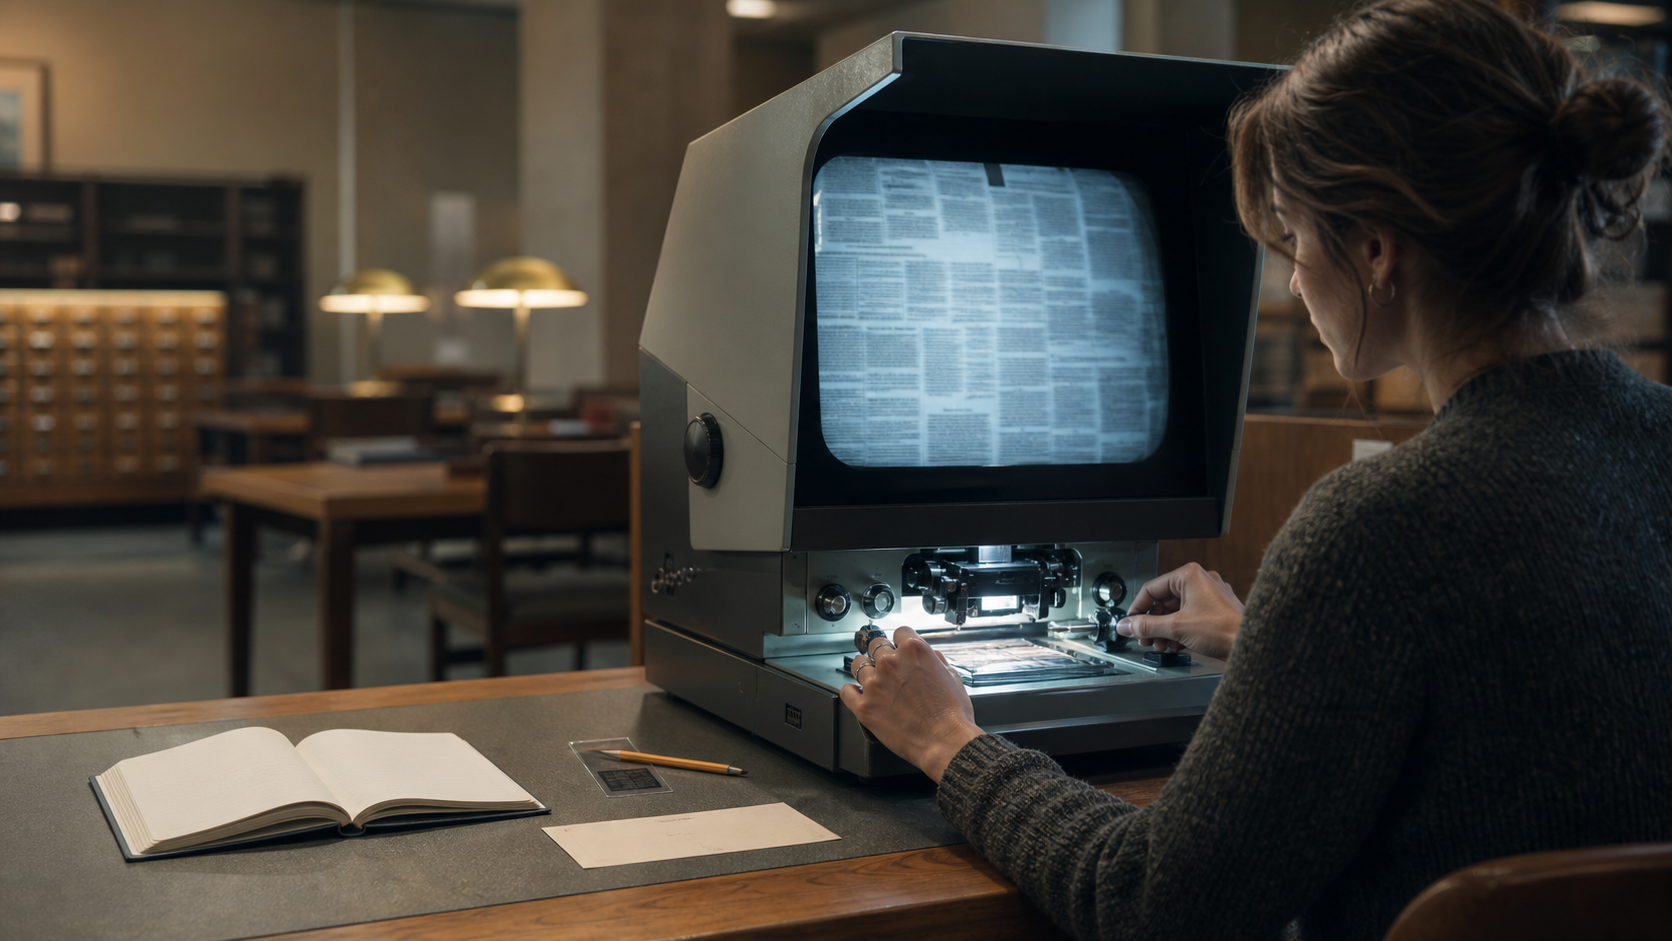
Microfiche research often ends with a folder full of imperfect screen captures rather than clean digital scans. A library reader may offer only a dim display, an aging printer, or an export function that produces heavily compressed files. Researchers therefore photograph the screen, save rough reader exports, or combine both methods.
Those captures can contain valuable evidence, but they also accumulate defects: keystone distortion, reflections, uneven illumination, moiré, clipped highlights, soft corners, dust, and text that nearly disappears into the film grain. Aggressive cleanup can make the page look neater while silently removing punctuation, narrow letter strokes, or marks needed to verify a citation.
This guide presents a careful method for turning microfiche reader captures into legible research records. It is designed for local historians, genealogists, students, librarians, and volunteers who need dependable files without pretending that a photographed display is equivalent to a preservation scan.
Decide what the finished file must prove
Before adjusting contrast, decide what the image is meant to preserve. A capture used only to read an article has different requirements from one supporting a published quotation or documenting a page location.
A useful research copy normally needs to preserve three layers:
- The target passage, photograph, table, or notice.
- Enough neighboring content to establish context.
- The source identity, including publication, date, page, fiche reference, or frame position.
Do not crop immediately to the one sentence you need. First retain a wider master capture showing the page structure. A headline, column boundary, page number, directory heading, or neighboring entry may later resolve ambiguity. Create a focused reading copy only after the contextual version is safely stored.
It also helps to distinguish three file roles:
| File role | Recommended contents | Editing limit |
|---|---|---|
| Capture master | Entire available screen or page area | Rotation and minimal exposure correction |
| Reading copy | Relevant columns or record block | Careful contrast, crop, and moderate sharpening |
| Citation detail | Specific passage plus identifying context | Enlargement and annotation on a duplicate |
This separation prevents one aggressively processed image from becoming the only surviving record.
Record the citation before touching the image
Microfiche frames can be frustrating to relocate. A frame counter may reset, handwritten drawer labels may be inconsistent, and several publications may share a reel. Record the source while the material is still visible.
At minimum, note:
- Repository or library name.
- Collection and publication title.
- Reel, fiche, envelope, drawer, or call number.
- Issue date or record range.
- Printed page number when visible.
- Reader frame counter, if available.
- Search subject and the reason the frame matters.
Photograph the fiche envelope or reader label as a separate reference image when local rules permit it. Do not rely on placing all citation information in a filename; filenames become unwieldy and may be truncated during transfer. A short research log in a spreadsheet or notes file is easier to search.
A practical identifier such as R07_F143_1928-04-16_p06 can connect the capture to that log. If the frame number is approximate, say so in the notes rather than presenting it as certain.
Capture the screen without adding new defects
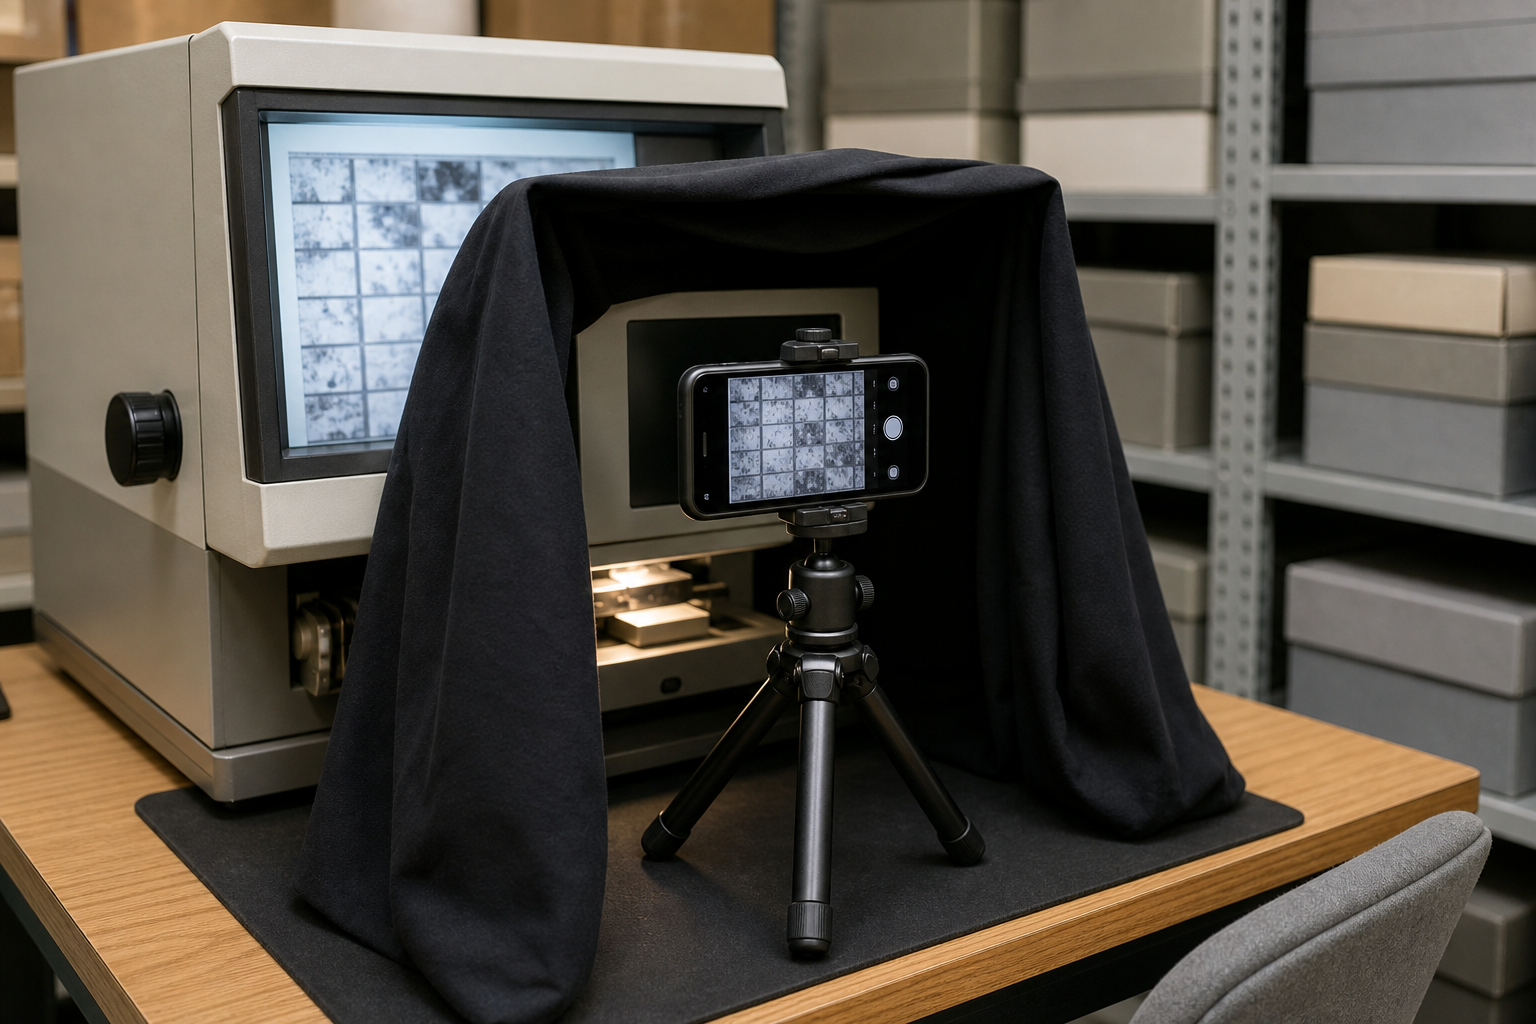
A good cleanup begins at the reader. Small changes in camera position and room lighting often recover more information than later editing.
Align the camera with the display
Place the lens as close as practical to the center of the reader screen and keep the camera sensor parallel to it. If one side of the page is visibly larger than the other, the camera is off-axis. Correcting severe keystone distortion later requires resampling, which can soften already fragile text.
Use a tripod, clamp, or stable support if the archive allows one. When working handheld, brace your elbows and take several versions of every important frame. A two-second timer or remote shutter can reduce motion.
Avoid using a wide-angle lens close to the screen. Step back and use a modest optical zoom when possible. This reduces edge stretching and makes the screen easier to square.
Control reflections before increasing brightness
Turn off the camera flash. It will usually produce a bright hotspot and may violate archive rules. Dim nearby task lights if permitted, reposition yourself to block reflections, or place a dark jacket behind the camera so the screen reflects a neutral surface rather than your face and the room.
A temporary dark cloth can help, but do not cover ventilation slots or attach anything to the reader. Ask staff before rearranging equipment or lighting.
Focus on representative text
Autofocus may lock onto scratches, dust, or the texture of the display. Tap or focus on a medium-sized line of text near the center. Magnify the live preview and check that enclosed letter shapes remain distinct.
Take one normal exposure and at least one slightly darker version. Microfiche screens often fool automatic exposure into washing out the brightest region. A darker capture may look less attractive but preserve more highlight detail.
If the camera offers anti-flicker settings, test the local electrical frequency. A mismatched shutter speed can create horizontal bands on some reader displays. In Europe, settings based around 50 Hz may help; in regions using 60 Hz, the alternative may be better. The exact result depends on the reader and camera, so inspect a test frame rather than assuming.
Select the strongest capture before editing
When several images show the same frame, compare them at high magnification. Do not select purely by overall brightness.
Inspect these areas:
- The smallest text relevant to the research question.
- Punctuation, accents, and thin numerals.
- All four corners for focus falloff.
- Bright regions for clipped letters.
- Dark regions for lost strokes.
- Horizontal or diagonal display bands.
A slightly crooked file with intact characters is preferable to a perfectly framed file blurred by camera movement. Keep alternate exposures until the research is complete; faint text visible in one version may be absent in another.
If reader software exported the frame directly, compare that file with the camera capture. The export may have better geometry but worse tonal clipping. Neither source should automatically replace the other.
Correct geometry in a conservative order
Geometry corrections should come before sharpening and final resizing. Otherwise, later transformations can magnify halos and compression artifacts.
Start with rotation. Use long baselines such as newspaper column rules, directory margins, or ledger rows rather than a short headline. Next, correct perspective only when it materially improves reading. Pulling every corner into a perfect rectangle can distort type if the original page was curved or misaligned on the film.
Crop in two stages:
- Make a broad crop that removes the physical reader bezel while retaining page edges and context.
- Create a duplicate with a tighter crop around the relevant item.
For a consistent research set, standardize orientation without forcing every image to identical dimensions. You can use the image resizer to prepare uniform reading copies after geometry and cleanup are complete. Preserve the larger capture separately.
When enlarging small text, use moderate increments. Doubling dimensions can make viewing more comfortable, but it cannot restore characters that were never resolved. Enlargement should expose the available evidence, not create the impression of additional detail.
Balance contrast without erasing characters
Microfiche material rarely has a clean white background and solid black type. Film density, reader lamps, source paper, and generations of copying all affect tone. The goal is readable separation, not a cosmetically pure page.
Begin with global adjustments:
- Move the dark point inward until text becomes clearer, stopping before thin strokes close up.
- Reduce glaring highlights while watching pale letter interiors.
- Adjust midtone contrast gently.
- Compare the result against the unedited capture at the same zoom level.
Do not make the background fully white by default. Uneven gray areas may contain faint characters, photograph edges, handwritten notes, or column rules. Strong thresholding is especially risky for worn type, carbon copies, and documents filmed from low-contrast originals.
Local adjustments can help when one side of the screen is darker, but use broad, feathered regions. Small painted corrections are difficult to audit and can accidentally alter evidence. If a passage requires substantial local recovery, retain both the lightly corrected page and the enhanced detail.
The AI photo editor can be useful for general visual cleanup or creating a clearer derivative, but documentary material needs restraint. Do not use generative reconstruction to replace missing letters, faces, signatures, seals, or page areas. Any interpretation should remain in notes, not be painted into the source image.
Choose settings by document type
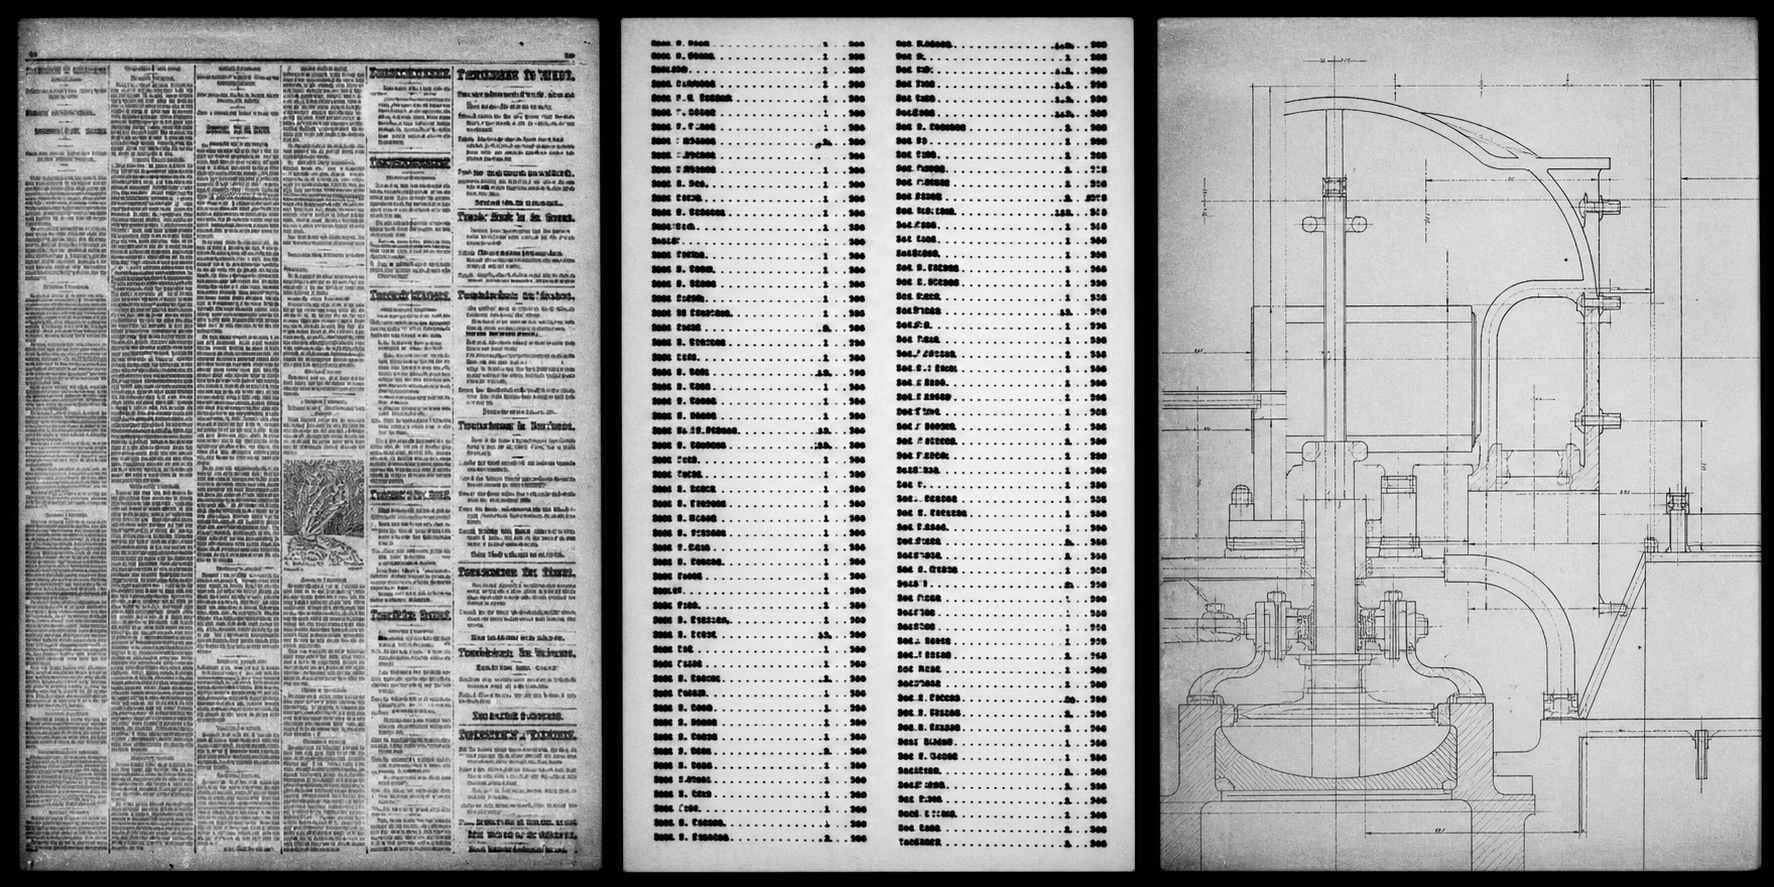
Different microfilmed materials fail in different ways. Apply settings according to the source rather than forcing an entire research folder through one preset.
| Material | Main risk | Useful emphasis | Avoid |
|---|---|---|---|
| Newspapers | Bleed-through and dense columns | Moderate midtone contrast | Heavy sharpening around small type |
| City directories | Tiny names and narrow numerals | Careful enlargement and dark-point control | Thresholding that merges adjacent lines |
| Ledgers | Faint handwriting and ruling | Local tonal balancing | Removing pale lines as noise |
| Photographs | Lost faces and highlight detail | Broad tonal recovery | Text-oriented black-and-white conversion |
| Maps | Fine boundaries and labels | High-resolution crop with mild sharpening | Strong compression |
| Technical drawings | Thin lines and annotations | Neutral background correction | Dust removal that deletes isolated marks |
For newspaper pages, examine lowercase letters such as e, c, and a. Excessive sharpening can close their interiors and make OCR less accurate. For directories, verify repeated digits because a softened 3, 5, or 8 may be misread even when names remain legible.
Photographic halftones often display moiré when the camera sensor, reader display, and printed dot pattern interact. A tiny change in distance or angle during capture may outperform digital filtering. If recapture is impossible, apply only enough reduction to make the subject intelligible; strong smoothing will remove facial and clothing details.
Apply noise reduction and sharpening in moderation
Noise reduction can suppress film grain, dust, and display texture, but those features overlap with real character strokes. Work at 100 percent magnification and evaluate several representative regions.
A safe sequence is:
- Remove obvious color noise if the capture should be neutral gray.
- Apply light luminance reduction only if grain obstructs reading.
- Add restrained sharpening after perspective correction.
- Inspect punctuation and isolated marks.
- Toggle the correction off and on before saving.
Watch for bright or dark halos around letters. These make a page appear crisp when zoomed out but reduce fidelity and can confuse OCR. Also check whether commas become periods or whether apostrophes disappear.
Dust removal should be manual and selective on documentary copies. Automated removal tools often interpret decimal points, ditto marks, stars, and handwritten ticks as defects. Preserve ambiguous marks unless you can confirm they are foreign to the filmed document.
Use OCR as an index, not as the record
OCR can accelerate searching, especially across directories and article clippings, but microfiche captures are hostile input. Skew, narrow columns, historical fonts, broken strokes, and show-through all increase error rates.
Prepare a duplicate specifically for recognition:
- Crop away the reader interface and unrelated columns.
- Rotate the text accurately.
- Increase contrast without closing character interiors.
- Keep enough resolution for the smallest type.
- Split complex multi-column pages when reading order is confused.
Submit that derivative to an image OCR tool, then compare the result line by line with the image. Names, dates, addresses, currency, and reference numbers deserve special attention. OCR output should help locate and transcribe material; the corrected image remains the evidence.
Mark uncertain characters explicitly in your research notes. For example, record Henderson [?] or retain both plausible readings rather than silently choosing one. Search common OCR substitutions when investigating names: rn may become m, cl may become d, and I, l, and 1 are frequently confused.
Export files that remain useful later
Keep a high-quality master in the original format when practical. For edited archival copies, PNG or a high-quality lossless format preserves fine text and avoids repeated JPEG damage. JPEG may be suitable for compact reference images, but choose a quality level that retains punctuation and line detail.
If an archive session produces camera formats that colleagues cannot open, use the image converter to create accessible derivatives. Do not discard the source files immediately after conversion.
Compression should be judged on the most difficult area, not on the page as a whole. A file may look unchanged at fit-to-screen size while small characters are surrounded by block artifacts. The image compressor can help produce shareable copies, but compare the output at actual pixels and keep the less compressed master outside the sharing folder.
Use predictable suffixes to distinguish versions:
_capturefor the original photograph or reader export._pagefor the straightened contextual copy._detailfor the focused research item._ocrfor the recognition-oriented derivative._sharefor the compressed delivery copy.
Avoid suffixes such as _final2 or _better, which reveal nothing about the file's purpose.
Assemble a reviewable research packet
A group of disconnected crops is difficult for another researcher to verify. For important findings, assemble a small packet in this order:
- Citation or collection note.
- Broad page or screen capture.
- Cleaned contextual image.
- Enlarged detail.
- Transcription with uncertainties marked.
- Any alternate exposure that changes the reading.
You can combine selected images with image to PDF when a single review file is more convenient. Check the resulting pages at normal viewing size and high zoom. The PDF should not replace the original image folder, because page fitting or later recompression may reduce detail.
Keep annotations outside the only clean image. If you need arrows or boxes for discussion, add them to a duplicate and make their color visibly different from the source. Never place an opaque arrow over a neighboring word merely to emphasize the target line.
Run a final evidence-preservation audit
Before sharing or archiving the files, compare every important derivative with its capture master.
Confirm that:
- The title uses the correct publication or collection name.
- The recorded date belongs to the visible issue or record.
- Page, reel, fiche, and frame references have not been transposed.
- The crop retains enough context to locate the item.
- Thin characters and punctuation survive cleanup.
- No automated tool invented or removed documentary content.
- OCR errors have not migrated into an unqualified transcription.
- Masters and derivatives are clearly distinguished.
- Compressed copies remain readable at 100 percent zoom.
- Any interpretive enhancement is identified in accompanying notes.
Finally, test the packet as if you had never visited the archive. Can you tell where the material came from, what was changed, and how to find it again? If not, add context now. Six months later, a perfect crop with no citation is often less useful than a modest capture supported by careful notes.
Preserve uncertainty instead of polishing it away
Microfiche cleanup is successful when it makes evidence easier to inspect without concealing the limitations of the source. Some characters will remain unclear. Some frames will have uneven exposure, damaged film, or missing edges that no editor can genuinely restore.
The strongest research set preserves those uncertainties. It keeps the broad capture, creates restrained reading copies, treats OCR as a draft, and records every locator available at the reader. That approach may produce files that look less pristine than heavily processed scans, but they are more transparent, verifiable, and useful to the next person who needs to check the record.