Redaction-Safe Screenshot Packs for Vendor Security Questionnaires
A practical guide for SaaS and operations teams preparing clean, readable, and privacy-aware screenshot evidence for vendor security questionnaires.

Redaction-Safe Screenshot Packs for Vendor Security Questionnaires
Vendor security questionnaires often ask for proof, not just promises. A procurement team may want to see single sign-on settings, audit log availability, role permissions, backup controls, incident response pages, or encryption configuration screens. For small SaaS teams, the fastest evidence is usually a screenshot. The risk is that screenshots are messy by default: they capture customer names, staff email addresses, internal project labels, API key fragments, account IDs, ticket titles, and admin-only navigation.
A good screenshot pack should satisfy two needs at the same time. It must be clear enough for a reviewer to understand the control being shown, and it must avoid exposing information that should never leave your company. That balance is harder than it sounds because security evidence is usually collected under time pressure, often by someone who knows the product well but is not trained in disclosure review.
This guide gives you a practical system for collecting, cleaning, redacting, resizing, compressing, and packaging screenshot evidence for vendor security questionnaires. It is written for operations, customer success, compliance, and founder-led teams that need to respond professionally without building a full compliance portal.
What Counts as Screenshot Evidence
Screenshot evidence is a visual proof point that supports a written answer. It should not replace the answer. Instead, it makes the answer easier to trust.
Common examples include:
- An admin page showing that SSO is enabled.
- A role management screen showing permission categories.
- An audit log page showing event types and timestamps.
- A backup settings page showing retention options.
- A device management page showing session controls.
- A security settings page showing password or MFA options.
- A notification settings page showing incident alert routing.
A reviewer does not need to inspect every private value on those screens. They need enough context to confirm that the control exists and is configured. That distinction should guide every editing choice.
The Main Redaction Risk Areas
Before you capture anything, know what usually leaks. Sensitive details are not limited to obvious secrets like passwords or tokens. In security questionnaires, the dangerous details are often ordinary business identifiers that become risky when collected in one place.
Watch for:
- Customer names, tenant names, and account names.
- Staff names, staff emails, avatars, and initials.
- Internal project names, labels, and ticket titles.
- API key prefixes, webhook URLs, and integration IDs.
- IP addresses, hostnames, regions, and environment names.
- Billing plan names, contract notes, or usage volumes.
- Browser tabs, bookmarks, extensions, and address bar content.
- Timestamps that reveal an incident, deployment, or customer activity pattern.
- Side navigation items that expose unreleased features.
- Notification badges that reveal operational backlog or unread messages.
The safest assumption is that every screenshot contains more information than the reviewer needs. Your job is to preserve the evidence while removing unnecessary detail.
Decide the Evidence Level First
Not every questionnaire answer deserves the same visual proof. Some requests need a single cropped screenshot. Others need a short packet with before-and-after context, configuration screens, and an exported PDF. Choosing the evidence level early prevents over-sharing.
| Request type | Best evidence level | Why it works |
|---|---|---|
| Yes-or-no control confirmation | One cropped screenshot | Shows the setting without exposing the whole admin area |
| Role or permission explanation | Two or three screenshots | Shows categories, not individual users |
| Audit logging proof | One cropped log screen plus written summary | Shows event coverage while avoiding customer activity detail |
| Backup or retention setting | One settings screenshot | Usually enough if labels and selected values are visible |
| Complex access review | Small PDF packet | Lets you group several redacted images with consistent naming |
The most common mistake is sending a full-screen capture when a narrow crop would answer the question. Cropping is not just cosmetic. It is a privacy control.
Capture Screenshots With Less Cleanup Needed
Good redaction starts before editing. If you capture cleaner screens, you reduce the amount of manual masking and lower the chance of missing a sensitive field.
Use a dedicated demo tenant whenever possible. Populate it with realistic but fake names, generic emails, and neutral project labels. If your product supports sample data, keep one environment ready for security review evidence. This pays off quickly when several customers ask similar questions.
Prepare the browser before taking screenshots:
- Use a clean browser profile with no personal bookmarks visible.
- Hide the bookmarks bar.
- Close unrelated tabs.
- Zoom to 100 percent unless small text needs a modest increase.
- Use a neutral browser window size that matches the page layout well.
- Avoid capturing the operating system dock, menu bar, or taskbar unless needed.
- Turn off browser extensions that add visible badges or overlays.
If the browser address bar contains a tenant slug, environment name, or long tokenized URL, crop it out. If the URL is relevant, include only a safe domain or explain the page location in the written answer.
Build a Redaction Map Before Editing
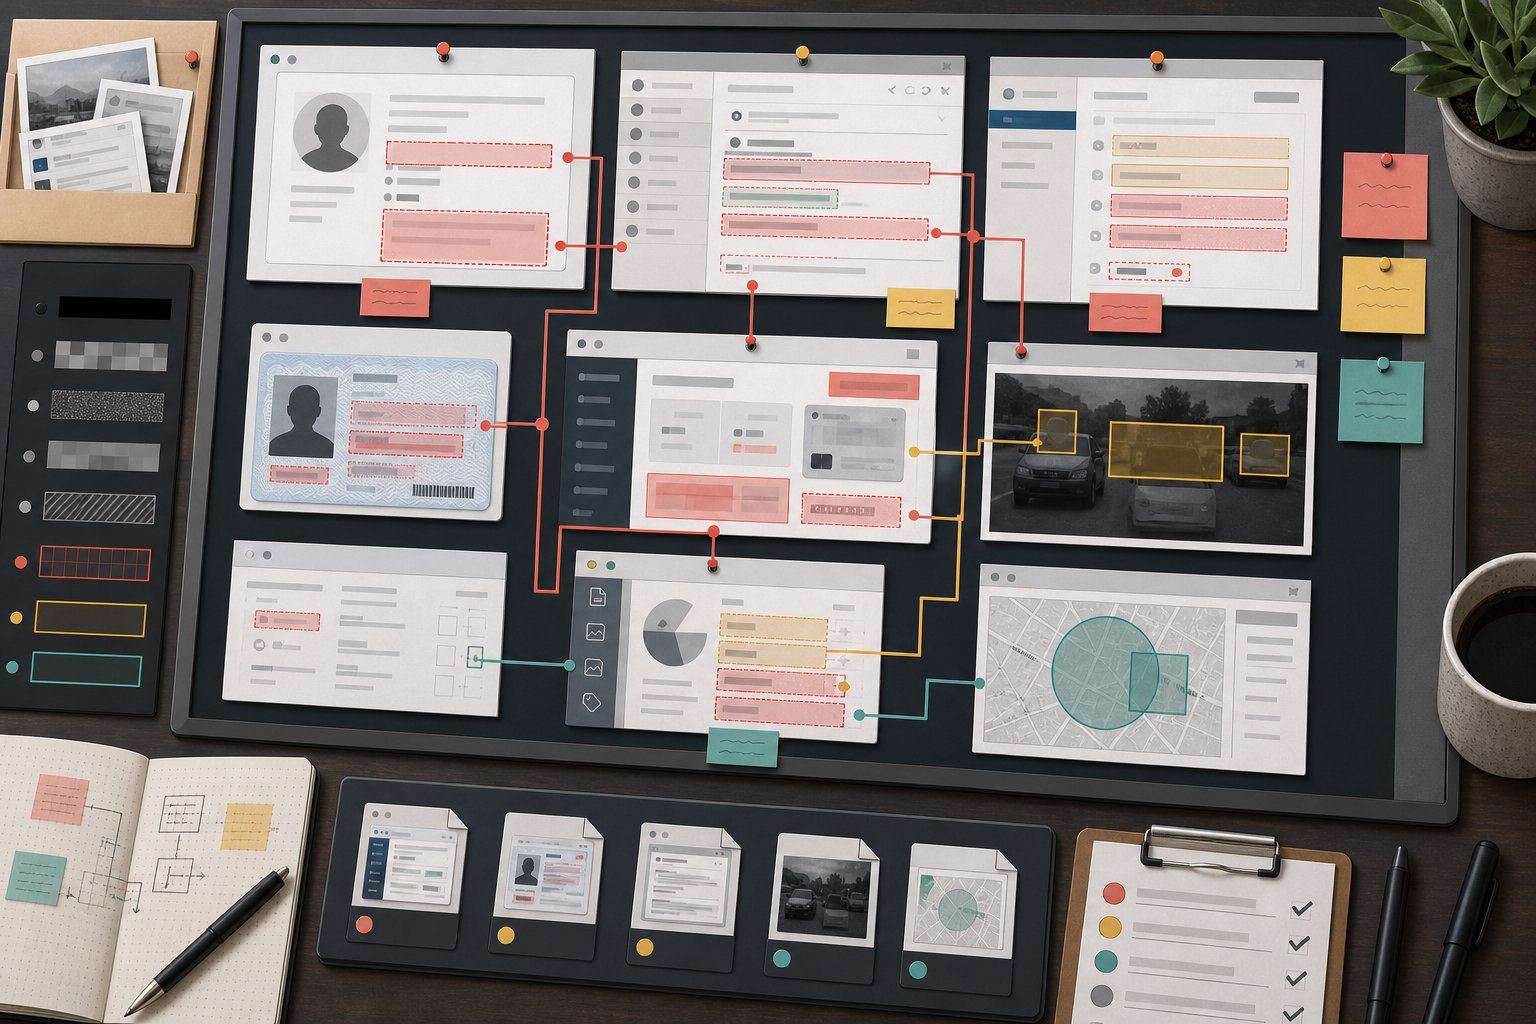
A redaction map is a quick pass where you identify everything that must be hidden before you start applying masks. This prevents random, inconsistent edits.
Open the screenshot and scan it in zones:
- Browser chrome: tabs, URL, bookmarks, extension icons.
- Product header: account switcher, organization name, search field, user menu.
- Side navigation: unreleased sections, internal-only labels, notification counts.
- Main content: customer records, user emails, keys, IDs, event details.
- Footer or metadata: build numbers, internal links, environment markers.
- Empty-looking areas: hover cards, tooltips, or faint overlays can still reveal data.
For each zone, choose one of three actions.
| Action | Use when | Example |
|---|---|---|
| Crop | The area is not needed at all | Remove browser tabs and address bar |
| Mask | The surrounding context matters | Hide staff emails in a role table |
| Replace with safe sample data | The text shape matters for readability | Change customer names to generic placeholders in a demo tenant |
Cropping is preferable when it preserves the meaning. Masking is best when the location of a field matters. Replacing data is best only when you can do it before capture or with a controlled editing method that does not mislead the reviewer.
Use Redaction That Cannot Be Reversed
A redaction is only safe if the hidden content cannot be recovered. Do not rely on semi-transparent shapes, blur, pixelation, or low opacity highlights for sensitive values. Blurring looks polished, but depending on the original text, size, and blur radius, it may still leak enough structure to guess names, emails, or short tokens.
Use solid masks for sensitive content. A simple black, gray, or neutral block is better than a stylish blur when the value matters. Keep the mask tight enough to show where the data appeared, but wide enough to cover the full value, including descenders, punctuation, and trailing characters.
If you need to remove a person, object, or visible private detail from a photo-like screenshot, an editor such as the ConvertAndEdit AI Photo Editor can help clean the area. Use that for visual cleanup, not for hiding secrets in a way that still leaves the original pixels available somewhere else. For true redaction, flatten the final image and export a new file.
A reliable redaction pass should include:
- Solid masks over private text.
- Crops that remove irrelevant browser or desktop areas.
- Flattened final exports, not layered source files.
- A final visual review at full size.
- A second review after compression or PDF packaging.
Keep the Evidence Readable
Security reviewers are often reading dozens of responses at once. If your screenshots are tiny, blurry, or heavily compressed, the evidence becomes frustrating. The goal is not high-resolution art. The goal is legible control proof.
Use these readability rules:
- Keep UI text large enough to read at normal laptop zoom.
- Crop around the evidence area instead of shrinking the entire screen.
- Leave a small amount of surrounding navigation so the reviewer knows where they are.
- Avoid aggressive JPEG compression on screenshots with thin text.
- Prefer PNG or WebP for crisp UI screenshots.
- Use consistent image widths in a multi-image packet.
If your source screenshot is too large, resize it after cropping. A tool like Resize Image is useful when you need consistent dimensions across a set of evidence images. For example, you might standardize all cropped screenshots to a maximum width of 1600 pixels so they remain readable in a PDF while staying manageable for upload portals.
Choose the Right File Format
The wrong format can make clean screenshots look unprofessional. UI screenshots contain fine text, thin lines, icons, and flat color areas. They behave differently from photos.
| Format | Best for | Watch out for |
|---|---|---|
| PNG | Crisp UI screenshots, redacted settings pages | Larger files when many images are included |
| WebP | Smaller files with good visual quality | Some older portals may reject it |
| JPEG | Photo-heavy evidence or mixed image pages | Can blur text and create artifacts around masks |
| Bundled evidence packets | Must be reviewed after export |
If a questionnaire portal accepts only certain formats, convert your images intentionally rather than letting a browser or email client alter them. ConvertAndEdit's Convert Image tool can help when you need to turn a screenshot into PNG, JPEG, or WebP for a specific upload requirement.
For most security evidence, start with PNG during editing. Convert only at the end if required.
Name Files Like a Reviewer Will Read Them
File names are part of the evidence. A folder full of files called Screenshot 2026-05-23 at 10.42.18 AM is harder to review and easier to mix up.
Use short, descriptive names that map to questionnaire topics:
- sso-enabled-redacted.png
- mfa-policy-admins-redacted.png
- audit-log-event-types-redacted.png
- backup-retention-settings-redacted.png
- role-permissions-overview-redacted.png
Avoid file names that include customer names, tenant names, employee names, ticket numbers, or internal control IDs unless those IDs are already approved for external sharing.
A simple naming pattern works well:
control-topic-view-redacted.ext
If you need ordered evidence, add a two-digit prefix:
01-sso-enabled-redacted.png
02-saml-settings-redacted.png
03-login-audit-events-redacted.png
This helps reviewers follow the packet without needing extra explanation.
Add Annotations Without Creating New Risk
Annotations can make screenshots easier to understand, but they can also clutter the image or accidentally disclose more than the original screen. Use them sparingly.
Good annotations point to the control being discussed. They do not explain your entire security program inside the image. Keep the written explanation in the questionnaire response or accompanying document.
Use annotations for:
- Highlighting the selected setting.
- Drawing attention to a role category.
- Showing where audit events are listed.
- Indicating the relevant part of a larger settings page.
Avoid annotations that include:
- Customer-specific notes.
- Internal debate or uncertainty.
- Long explanations.
- Security claims that legal or compliance has not approved.
- Labels that cover important UI text.
If an annotation is needed, make it visually distinct from redaction. For example, use a thin outline or arrow for emphasis and solid blocks for redaction. The reviewer should never wonder whether a shape is hiding private data or pointing to a feature.
Use OCR as a Safety Check
A manual review can miss text, especially in dense admin screens. OCR can help find visible words that should not leave the company.
After exporting a redacted screenshot, run OCR on the final image and scan the extracted text for sensitive terms. ConvertAndEdit's Image OCR tool can be useful for this kind of check. You are not using OCR to create the evidence; you are using it to catch leaks.
Look for:
- Real customer or company names.
- Staff emails and personal names.
- API, token, secret, webhook, or bearer strings.
- Internal labels like staging, beta, incident, escalation, or churn.
- Unexpected browser tab titles.
- Hidden-looking table values that remain readable.
OCR will not catch everything. It may miss tiny text, icons, or partial values. But if OCR does find sensitive content, assume the reviewer can see it too.
A useful review habit is to keep a denylist of terms that should never appear in external evidence. This can include customer names, internal domains, sensitive product code names, and employee email domains. Even a simple text search against OCR output can catch problems before files leave your team.
Compress Without Damaging Thin Text
Many vendor portals have upload size limits. Compression is usually necessary when you bundle several screenshots, but screenshots are easy to damage. Over-compressed images can make text fuzzy, create halos around redaction blocks, or distort icons enough that the evidence looks careless.
Use compression after cropping, redaction, and resizing. Do not compress first and edit later, because each export can add quality loss or artifacts.
For screenshot evidence:
- Prefer lossless or high-quality compression when text is important.
- Check redaction edges after compression.
- Review at 100 percent zoom, not only as a thumbnail.
- Avoid turning crisp PNG screenshots into low-quality JPEGs unless the portal requires JPEG.
- Keep one clean final archive copy before portal-specific conversions.
ConvertAndEdit's Compress Image tool can help reduce file size while you compare the result visually. The key is not the smallest possible file. The key is the smallest file that still reads clearly.
Package the Final Evidence Set
Some questionnaires accept separate image uploads. Others work better with a single PDF. A PDF packet can be easier for reviewers because it keeps related screenshots in one place and preserves order.
Use a PDF packet when:
- A control needs several screenshots.
- You want a stable order for evidence.
- The vendor portal allows only a few attachments.
- The reviewer asked for supporting documentation.
- You need to share the same set with legal, sales, or compliance before sending.
ConvertAndEdit's Image to PDF tool can turn final screenshots into a single review packet. Before sending, open the PDF and inspect every page. PDF conversion can scale images, add margins, or make small text harder to read. If the PDF looks cramped, resize or crop the source images and export again.
A clean PDF evidence packet usually includes:
- One screenshot per page.
- Descriptive file order.
- Consistent image scale.
- No unnecessary cover page unless requested.
- No private metadata in visible content.
If you need to combine several PDFs from different teams, a tool like PDF Merge can help assemble the final attachment. Keep the order simple: identity and access evidence first, logging and monitoring next, backup and retention after that, and any supporting controls last.
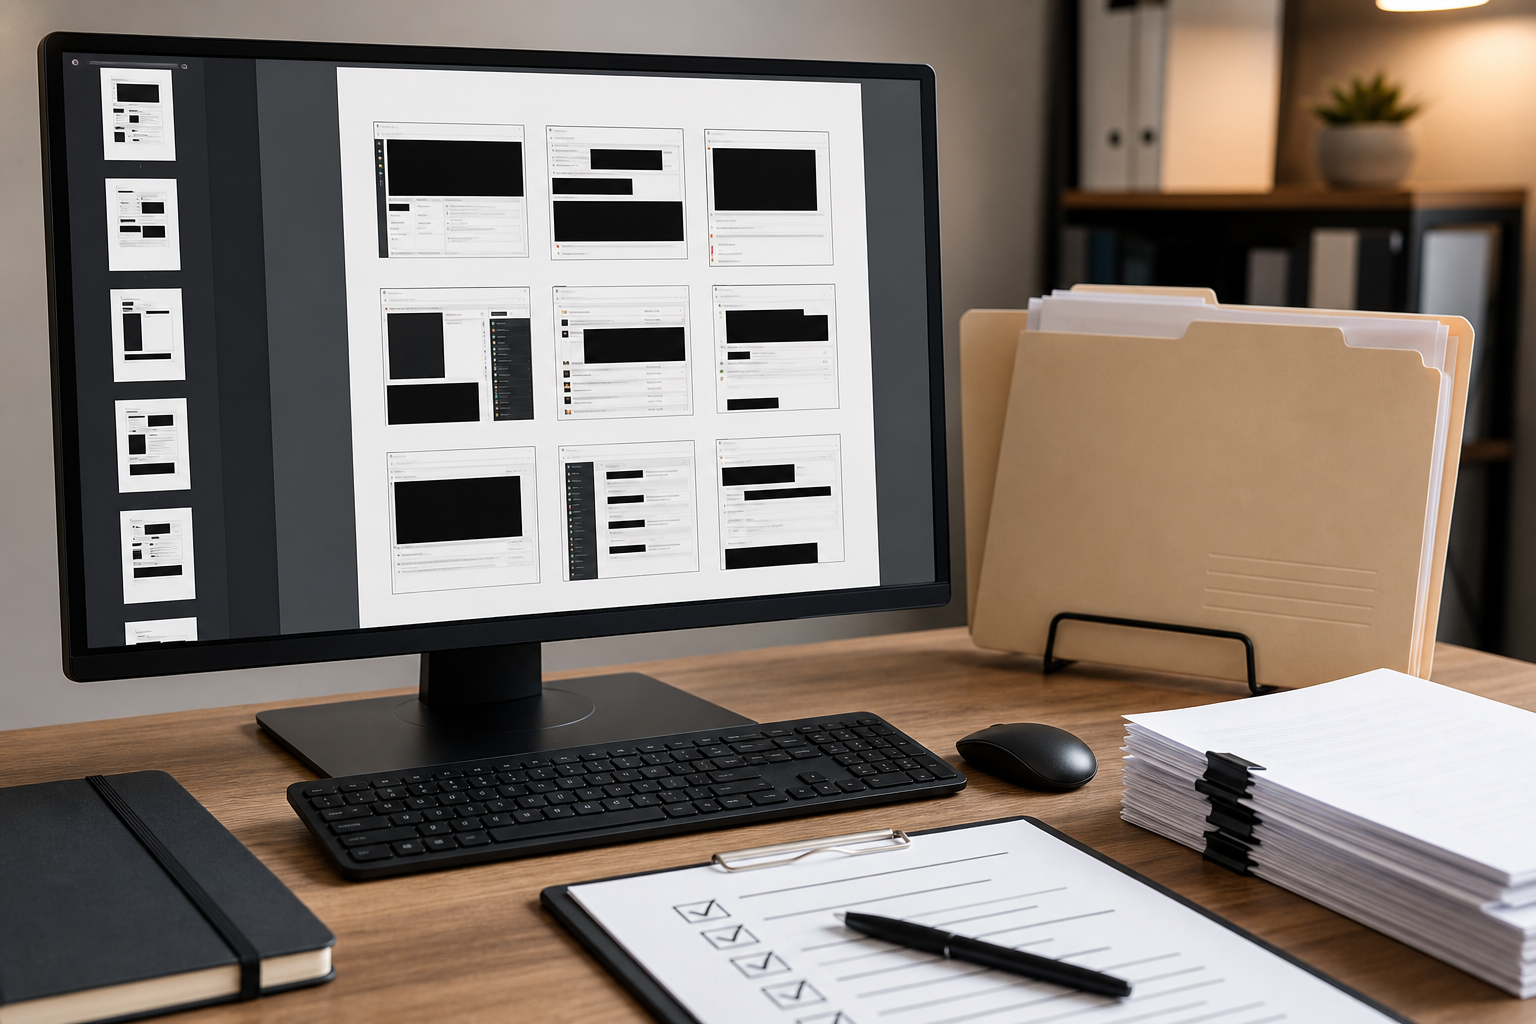
Final Review Checklist
Before sending the evidence, run one last check from the perspective of someone outside your company. They should be able to understand the control without learning anything extra about your customers, staff, roadmap, or infrastructure.
Use this checklist:
- The screenshot answers the specific questionnaire item.
- Browser tabs, bookmarks, and address bars are removed or safe.
- Customer names and staff identifiers are hidden or replaced with approved sample data.
- API keys, URLs, IDs, and environment names are not visible unless intentionally shared.
- Redactions are solid and flattened.
- Annotations are minimal and do not cover important evidence.
- Text remains readable after resizing and compression.
- File names are descriptive and do not reveal private details.
- The PDF, if used, has the correct page order and readable scale.
- OCR output does not reveal unexpected sensitive text.
- The final files match the written questionnaire answers.
The last point matters. If a written response says MFA is required for admins, but the screenshot shows a broader setting that appears optional, the reviewer may ask for clarification. The image and answer should support each other.
Common Mistakes That Slow Reviews Down
Several small mistakes can turn a simple evidence request into a follow-up thread.
The first is over-cropping. If you crop so tightly that the reviewer cannot tell which settings page they are viewing, the screenshot loses credibility. Leave enough surrounding UI to establish context.
The second is under-redacting. Teams often hide the central table but forget the header, sidebar, breadcrumbs, search field, or account menu. Sensitive data tends to appear in repeated interface areas.
The third is sending images that are too small. A reviewer should not need to zoom repeatedly just to read a setting label. If the original capture is huge, crop it instead of shrinking the whole screen.
The fourth is mixing formats randomly. A packet with PNG, JPEG, WebP, and PDF attachments may be acceptable, but it feels less controlled. Use a consistent format unless a portal requirement forces a change.
The fifth is relying on blur. Blur can be useful for non-sensitive background cleanup, but it is a weak choice for secrets, names, emails, and tokens. Use solid masks for those.
A Practical Example: SSO Evidence
Imagine a vendor asks: Do you support SAML SSO and can it be required for employees?
A poor evidence set would include a full desktop screenshot of the production SSO settings page, with the address bar visible, real employee emails in a side panel, a customer tenant name in the header, and a blurry redaction over the identity provider URL.
A better evidence set would include:
- A cropped screenshot of the SSO settings panel.
- Solid masks over tenant-specific URLs and IDs.
- The selected SAML option visible.
- The enforcement toggle or policy state visible if safe.
- A file name like sso-saml-enforcement-redacted.png.
- A written answer explaining the control in plain language.
If the page includes sensitive identity provider metadata, crop or mask it. The reviewer usually needs to see that SSO exists and can be enforced, not your exact metadata endpoint.
A Practical Example: Audit Logs
Audit logs are especially risky because they often contain real user activity. A screenshot can prove that logging exists, but it can also reveal customer behavior, admin actions, IP addresses, or incident timing.
For audit log evidence, consider using a demo tenant with sample events. If that is not possible, filter the log to a narrow set of event types and mask user identifiers, IP addresses, and object names.
Keep visible:
- Event type categories.
- The existence of timestamps.
- The presence of actor and target columns if relevant.
- Filter controls that show searchable log structure.
Hide:
- Real names and emails.
- IP addresses.
- Customer objects.
- Sensitive event details.
- Exact timestamps if they reveal operational incidents.
A reviewer can confirm audit capability without seeing your actual event history.
Keep a Reusable Evidence Library
After you prepare a clean screenshot set, do not let it disappear into a sent email thread. Save approved evidence in a controlled internal folder so future questionnaires are faster and more consistent.
The library should include:
- Final redacted screenshots.
- Final PDF packets.
- Source capture dates.
- Owner or reviewer name.
- The questionnaire topic each file supports.
- An expiration or review date.
Security evidence gets stale. UI changes, settings move, and control language evolves. A screenshot from two years ago may create doubt even if the control still exists. Add a review date so the team knows when to refresh the image.
A quarterly review is enough for many small teams. Refresh sooner after major UI changes, security setting changes, rebrands, or compliance updates.
The Standard to Aim For
A strong screenshot pack feels boring in the best way. It is clear, consistent, and limited. The reviewer sees the control they asked about, understands the context, and does not receive extra information that could create privacy or security concerns.
You do not need a heavy compliance system to reach that standard. You need careful capture habits, solid redaction, readable exports, and a final review before sending. Cropping, OCR checking, compression, conversion, and PDF packaging are small steps, but together they turn rushed screenshots into evidence your team can send with confidence.