EXIF-Safe Community Photo Handoff Workflow for Small Editorial Teams
A practical workflow for reviewing, resizing, converting, and publishing community-submitted photos without leaking metadata or creating messy asset libraries.
EXIF-Safe Community Photo Handoff Workflow for Small Editorial Teams
Community-submitted photos are useful because they feel specific. A reader sends a picture from a neighborhood event, a volunteer uploads images from a field day, a customer shares a real setup, or a partner provides snapshots from a local installation. Those images often have more trust than polished stock photography.
They also arrive with baggage.
A single image can include GPS coordinates, camera details, capture timestamps, original filenames with personal names, enormous dimensions, inconsistent color, accidental faces in the background, and enough file size to slow down a page that otherwise loads cleanly. The problem is rarely one dramatic mistake. It is usually a quiet chain of small omissions: somebody downloads a photo, crops it casually, uploads the original somewhere else, renames it by hand, and forgets which version is safe to publish.
This workflow is for small editorial, nonprofit, community, education, and support teams that receive real photos from real people and need to publish them without turning every asset into a miniature compliance project. It is not legal advice, and it will not replace your consent policy. It is a practical handoff system: intake, review, cleanup, export, and archive.
The goal is simple: every published image should be visually useful, reasonably lightweight, consistently named, and separated from the original submission.
Why Community Photos Need a Different Workflow
A marketing team working with planned product photography usually controls the camera, location, lighting, model release process, and file naming. Community photos are different. They are usually submitted through email, chat, forms, shared drives, or direct messages. They may be screenshots, camera photos, scans, forwarded images, or images previously edited by another app.
That variety creates four recurring risks.
First, originals can contain metadata you did not intend to publish. EXIF metadata may include camera model, capture time, orientation, lens data, and sometimes location. Not every platform preserves all metadata, and not every exported image includes the same fields, but your workflow should not depend on luck.
Second, community images tend to be oversized. A modern phone photo can be several thousand pixels wide even if it will appear as a 720-pixel image in a newsletter recap. Oversized images waste bandwidth, slow previews, and make CMS media libraries harder to work with.
Third, visual context can be sensitive. Background faces, badges, street signs, license plates, whiteboards, medical details, school names, and private workspaces can appear unintentionally. A safe workflow needs a review step before resizing and compression make those details harder to inspect.
Fourth, originals and derivatives often get mixed together. Once a team loses track of which file is the untouched submission and which file is the cleaned publishing version, later corrections become messy. The safest habit is to treat originals as read-only references and create a separate publish-ready version every time.
The Four-Layer Safety Model
A lightweight safety model keeps the workflow from becoming vague. For each community-submitted image, check four layers before publishing.
| Layer | What you are checking | Typical action |
|---|---|---|
| Permission | Are you allowed to use this image in this context? | Confirm consent, usage scope, credit preference, and removal path |
| Content | Is anything private, identifying, misleading, or distracting visible? | Crop, blur, exclude, or request a replacement |
| Metadata | Could the file reveal more than the visible image? | Export a clean derivative and avoid publishing originals |
| Delivery | Is the file suitable for the channel? | Resize, convert, compress, and name consistently |
The key is order. Permission and content review should happen before you create small web derivatives. Metadata and delivery cleanup should happen before the image enters the CMS, email tool, help center, or social scheduler.
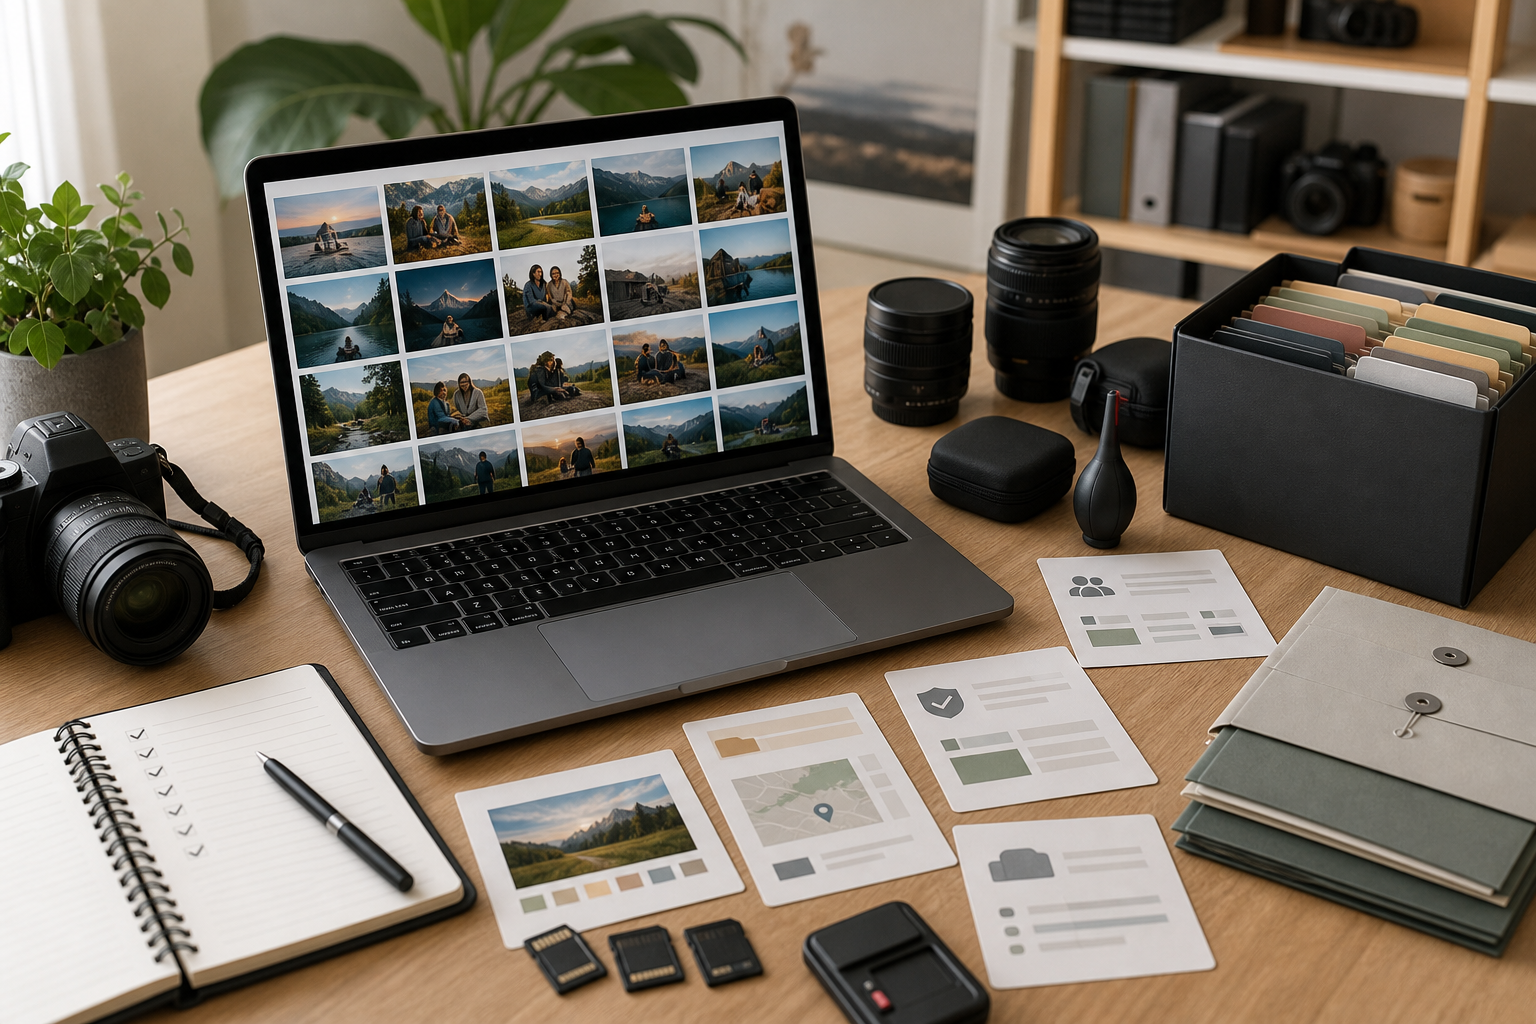
Build a Safe Intake Folder Before Anyone Edits
The first mistake many teams make is editing directly from the place where submissions arrive. Email attachments, chat downloads, and shared drive uploads are not a stable review system. Create a simple intake structure instead.
Use a folder pattern like this:
community-photos/
  2026-05-event-name/
    00-originals/
    01-review/
    02-editing/
    03-publish-ready/
    04-archive-notes/
The exact names do not matter as much as the separation. The 00-originals folder stores untouched files. No cropping, no resizing, no renaming for publication, no compression. If you need to preserve the submitter's original file for audit or rework, this is where it lives.
The 01-review folder is for copies used during editorial review. If your team needs to mark up images, create contact sheets, or compare options, do that outside the original folder.
The 02-editing folder is for working files. These may be cropped, adjusted, or converted while the editor decides what the final asset should be.
The 03-publish-ready folder contains only files that are safe to upload. This folder should be boring. Every file inside it should already be reviewed, cleaned, resized, converted, compressed, and named for its destination.
The 04-archive-notes folder can hold a simple text note, consent reference, usage limitations, image credits, or a list of rejected files. Avoid storing private personal details unless your organization has a clear policy for that.
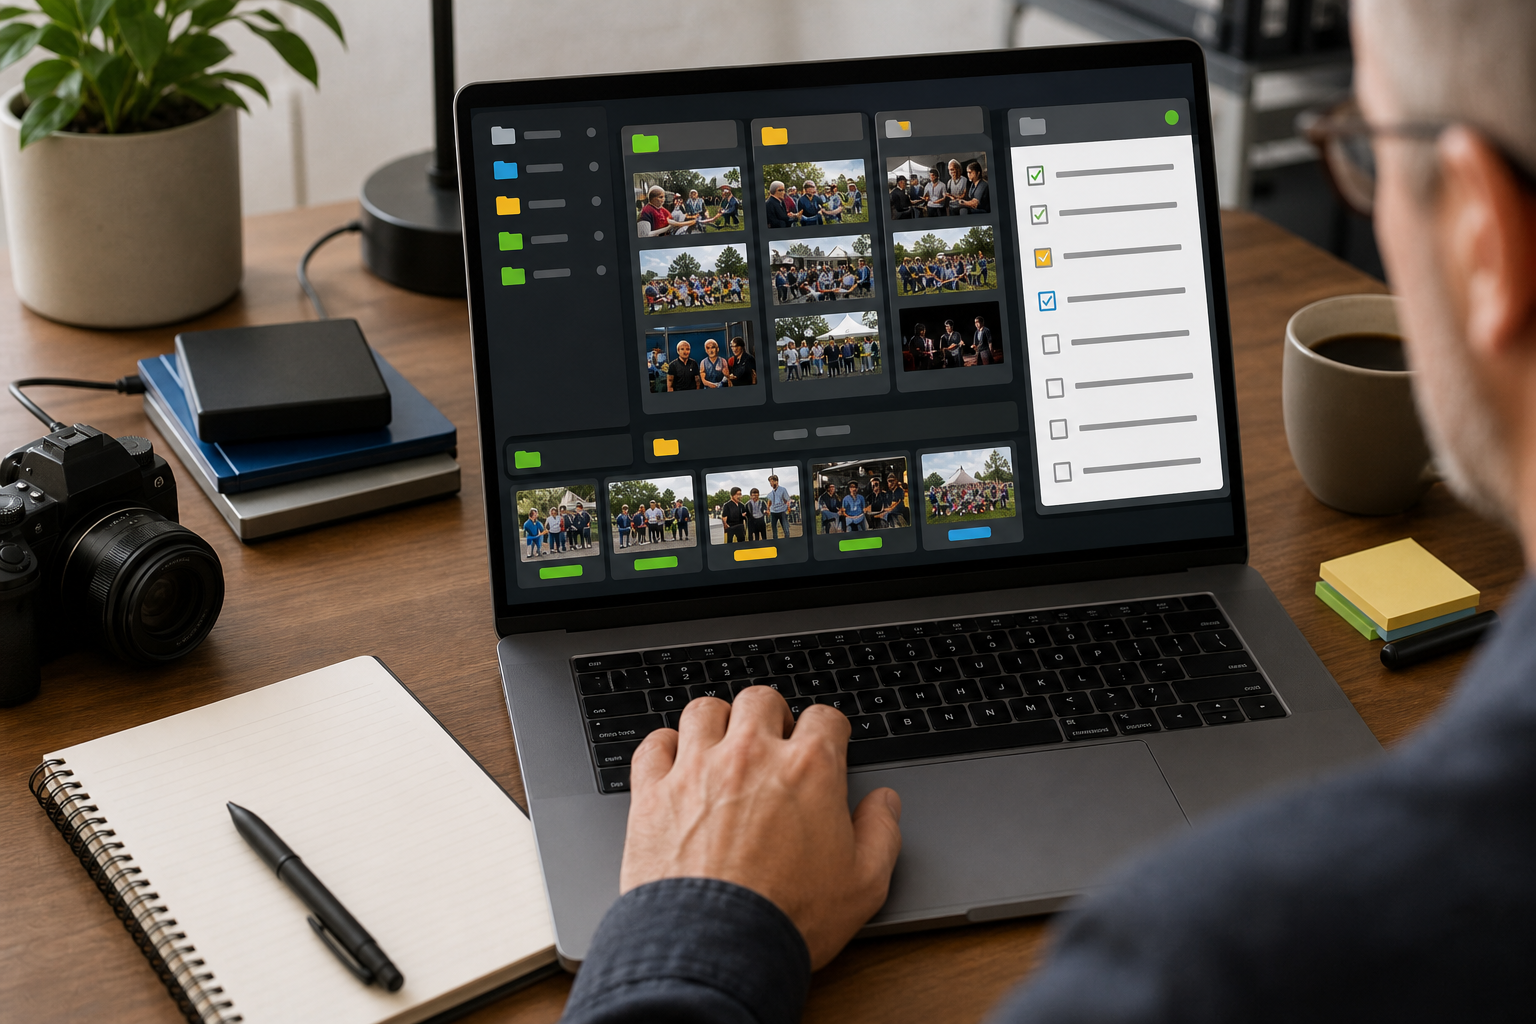
Use Status Prefixes Instead of Memory
For small teams, status prefixes are faster than complex asset management software. Add one of these prefixes while reviewing copies:
| Prefix | Meaning |
|---|---|
hold- | Needs permission, clarification, or a second review |
reject- | Do not publish |
crop- | Usable after cropping |
edit- | Needs visual cleanup |
ready- | Approved for export |
A file named hold-community-garden-03.jpg tells the next person more than IMG_4829.jpg. The prefix is temporary; the final publish-ready file should use a clean destination name.
Intake Checklist for Community Submissions
Before editing, capture the basic decision points. This can be a spreadsheet, a CMS draft note, or a short checklist in your project folder.
| Question | Why it matters |
|---|---|
| Who submitted the image? | Helps with follow-up and attribution |
| Where will it be used? | A homepage hero, internal recap, and public report have different risk levels |
| Is credit required or preferred? | Avoids publishing with the wrong attribution style |
| Are recognizable people visible? | May require consent or a different crop |
| Are children, patients, students, clients, or private homes visible? | Usually deserves stricter review |
| Is location sensitive? | GPS metadata and visible landmarks may both matter |
| Is there text in the image? | Signs, badges, forms, and screens can reveal private information |
| Is the original being preserved separately? | Prevents accidental overwrite |
This checklist does not need to be ceremonial. It exists to stop the most common failure mode: publishing the image that looked fine at thumbnail size but contained an obvious private detail when viewed full size.
Inspect the Visible Image at Full Size
Do the human review before you optimize. Open the image large enough to inspect corners, reflections, windows, badges, screens, and background people. If your team usually reviews images as thumbnails, add a rule: no community photo can be approved from thumbnail view alone.
Look for these details:
| Area | What to inspect |
|---|---|
| Background | Faces, house numbers, school names, office screens, private spaces |
| Foreground | Documents, ID cards, medical details, forms, receipts, badges |
| Reflections | Mirrors, windows, shiny devices, glass doors, monitor glare |
| Edges | People half-visible at the crop boundary, license plates, signs |
| Embedded text | Names, phone numbers, order numbers, QR codes, Wi-Fi details |
If the image includes a visible screen, treat it with extra care. Interface screenshots and device photos often contain names, email addresses, internal URLs, account IDs, browser tabs, or notifications. If the image is mostly valuable because of the screen content, consider extracting or reviewing the text with an OCR pass using Image OCR. That can help reveal small text you might miss visually.
Decide: Crop, Edit, Replace, or Reject
Not every image deserves cleanup. A practical review system needs clear exit paths.
| Situation | Best decision |
|---|---|
| The main subject is useful and the issue is near the edge | Crop |
| The issue is small and not central to the image | Edit or blur if your workflow supports it |
| The image is useful but too dark, tilted, or cluttered | Edit a copy, then reassess |
| The sensitive detail is central to the image | Request a replacement |
| Consent is unclear | Hold until confirmed |
| The image would misrepresent the event, person, or product | Reject |
Avoid heroic editing when a replacement would be cleaner. Small teams often spend too much time saving a risky image because it is already in hand. If a photo needs extensive removal of background people, signs, and private details, the safer and faster move is often to ask for another version.
For simple visual cleanup, a tool like AI Photo Editor can be useful when you need to remove a distracting object, tidy a background, or improve a working copy. Keep the editorial principle tight: use editing to make the intended subject clearer, not to fabricate a scene or change the meaning of the submission.
Metadata: What to Strip and What to Keep Separately
EXIF metadata is often invisible during normal editing, which is why it deserves a deliberate step. A clean publishing derivative should not rely on the original camera file. Export a new copy for the web, then upload that derivative instead of the original.
Common metadata categories include:
| Metadata type | Example | Publishing concern |
|---|---|---|
| Capture data | Date, time, camera model | May reveal timing or personal device details |
| Location | GPS latitude and longitude | Can reveal a home, school, workplace, or private site |
| Software history | Editing app, processing details | Usually not dangerous, but unnecessary |
| Orientation | Rotation instruction | Can cause display surprises if mishandled |
| Copyright/creator | Creator name or rights fields | May be useful internally but should be intentional |
Do not confuse metadata cleanup with rights management. Stripping metadata from a web derivative does not remove your obligation to credit the photographer if credit was agreed. Keep credit and permission notes in your editorial record, not as the only metadata attached to the image.
A good habit is to preserve the original privately, create a clean derivative, and store credit information in the CMS caption, article note, or archive document. That way the public file can be lean while your team still knows where it came from.
The Publish-Ready Export Recipe
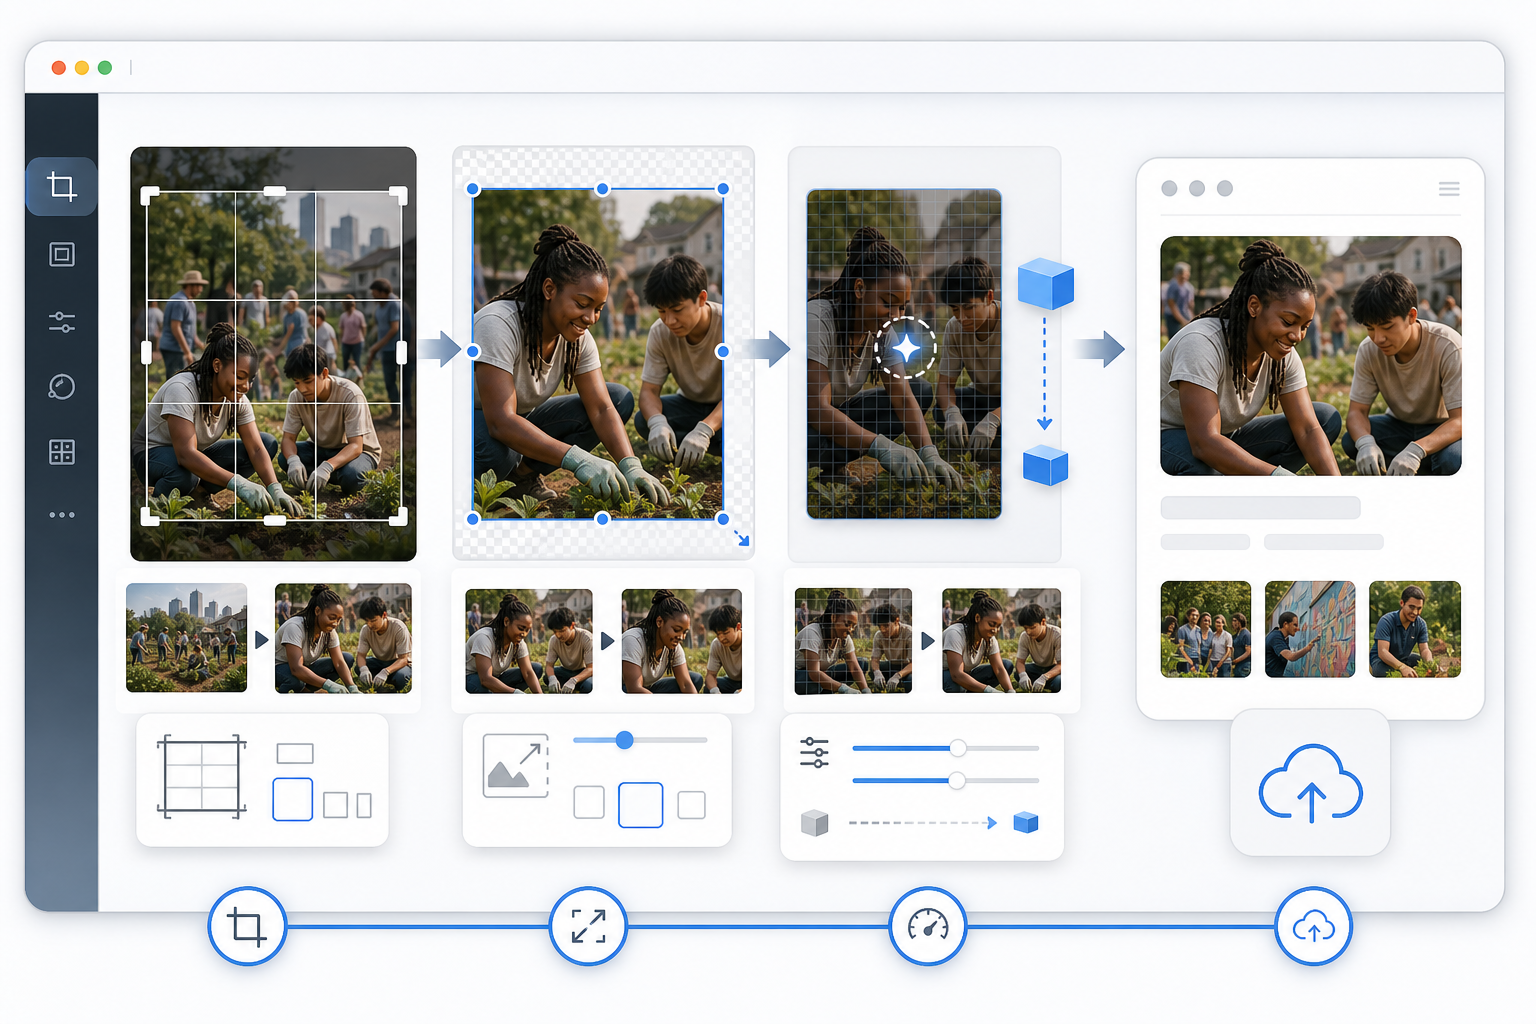
Once an image passes permission and content review, create the publish-ready file. This is where image tools become part of a repeatable handoff instead of a one-off scramble.
Step 1: Crop for the Real Placement
Do not crop for aesthetics in isolation. Crop for where the image will actually appear.
| Destination | Practical crop guidance |
|---|---|
| Blog body image | Keep the subject centered enough for responsive layouts |
| Hero image | Leave breathing room for overlay or responsive cropping, even if no text is embedded |
| Newsletter | Avoid tiny details that disappear on mobile |
| Help article | Preserve the evidence or instructional detail rather than dramatic composition |
| Social preview | Keep the subject recognizable in a small card |
If the image needs a strict size, start with the crop and then use Resize Image to create a correctly dimensioned derivative. Resizing before cropping can make you keep too much irrelevant context or lose control over the final composition.
Step 2: Convert to the Right Format
Format choice should follow the image content.
| Image type | Usually best format | Why |
|---|---|---|
| Natural camera photo | JPG or WebP | Good compression for photographic detail |
| Screenshot or UI image | PNG or WebP | Preserves sharp edges and text better |
| Image with transparency | PNG or WebP | Keeps transparent areas intact |
| Archive or review copy | PNG or high-quality JPG | Prioritizes stability over smallest size |
If your original submission arrives as HEIC, TIFF, large PNG, or another inconvenient format, use Convert Image to make a web-friendly version. The conversion step is also a useful moment to separate the public derivative from the original submission.
Step 3: Resize to the Largest Useful Display Size
Many teams upload phone photos at original resolution because they do not know the final display size. A better rule is to export for the largest realistic placement, not for every possible pixel.
For a typical editorial site, these working sizes are often enough:
| Use case | Suggested long edge |
|---|---|
| Inline blog image | 1200-1600 px |
| Full-width article hero | 1800-2400 px |
| Newsletter image | 1000-1400 px |
| Small CMS thumbnail | 600-900 px |
| Internal review image | 1600-2400 px |
These are not universal rules. Retina displays, art direction, and CMS behavior matter. But uploading a 4032-pixel phone photo for a 720-pixel content column is usually wasteful.
Step 4: Compress Without Smearing the Subject
Compression should be judged visually, not only by file size. For natural photos, moderate compression often looks fine. For screenshots, signs, documents, and images with small text, aggressive compression can create halos and blur.
Use Compress Image after resizing and format conversion. Check the final image at the size readers will actually see. If the image contains text, inspect the text. If the image is a portrait, inspect skin, hair, and edges. If the image shows a product or place, inspect the details that make it identifiable.
A good target is not "smallest possible." It is "small enough for the channel while still preserving the reason this image was chosen."
Naming Files So Future Editors Understand Them
Community photo names should not expose private submitter information, but they should still be useful. Avoid names like Sarah_home_address_before_after.jpg, IMG_8842-final-final2.jpg, or whatsapp-image-2026-05-10-at-18-22-13.jpeg.
Use a predictable pattern:
YYYY-MM-topic-location-or-context-sequence-size.formatExamples:
2026-05-community-garden-planting-01-1600w.webp
2026-05-library-workshop-speaker-02-1200w.jpg
2026-05-volunteer-cleanup-supplies-03-1400w.webp
This pattern gives you date, context, sequence, and size without relying on a person's private name. If credit is required, put it in the article caption or CMS credit field instead of the filename.
For multiple derivatives, keep the base name stable:
2026-05-community-garden-planting-01-2400w.webp
2026-05-community-garden-planting-01-1600w.webp
2026-05-community-garden-planting-01-800w.webp
This makes it easier to replace or regenerate a size later.
When to Use Image-to-PDF for Review Packs
Sometimes the final output is not a blog image. A community manager, school administrator, event organizer, or operations lead may need to review a set of images before anything goes public. In that case, turning selected review copies into a simple PDF can be easier than sending a folder of loose files.
Use Image to PDF when you need a compact review packet that can be commented on, approved, or archived. This is especially useful for event recaps, grant reports, field documentation, and partner approvals.
Keep one rule: the PDF review pack should contain review copies, not untouched originals. If the packet will be shared outside your team, use the same caution you would use for public publishing. Resize the images, avoid originals with metadata, and exclude anything still marked hold-.
A Practical Handoff Checklist
Use this checklist before moving files into 03-publish-ready.
| Check | Pass condition |
|---|---|
| Permission confirmed | Usage context is approved or clearly covered |
| Original preserved | Untouched file remains in 00-originals |
| Full-size review done | Sensitive visible details were checked |
| Decision recorded | File is approved, rejected, held, or replaced |
| Crop complete | Subject and privacy boundaries are intentional |
| Format chosen | JPG, PNG, or WebP matches content type |
| Resize complete | Dimensions match the largest useful placement |
| Compression checked | File is lighter without visible damage to key details |
| Filename cleaned | No private names, random camera strings, or confusing versions |
| Credit stored | Attribution is in CMS or notes if required |
For a tiny team, this can be a literal checklist in a shared note. For a larger team, it can become a review column in a content tracker. The important part is that approval is attached to a specific derivative, not vaguely to the original image.
Example Workflow: Local Event Recap Photos
Imagine a community organization receives 46 photos after a weekend event. The images arrive from five volunteers through email and chat. The team wants to publish six photos in a recap article and include twelve in an internal report.
A clean workflow could look like this:
- Download all submissions into
00-originals. - Copy candidates into
01-reviewand prefix uncertain files withhold-. - Inspect the candidates at full size for faces, badges, location details, and background screens.
- Reject images with unclear consent or central private details.
- Crop approved images for article use and save working copies in
02-editing. - Use Resize Image to create 1600px-wide article images.
- Use Convert Image to export WebP or JPG versions depending on site support.
- Use Compress Image to reduce file size while checking faces and signs for artifacts.
- Name final files with date, event context, sequence, and width.
- Move only approved final derivatives into
03-publish-ready. - Create a separate review PDF from selected report images if needed with Image to PDF.
- Store credit notes and usage limits in
04-archive-notes.
This is not complicated, but it is intentional. The team can now tell the difference between originals, review copies, working edits, and publish-ready assets. That alone prevents many avoidable mistakes.
Common Mistakes to Avoid
The most common mistake is uploading the original camera file because it looks better. It may look better because it is huge, not because it is appropriate for the page. Make a clean derivative instead.
Another mistake is reviewing only the center of the photo. Sensitive details often sit near edges: a badge on a lanyard, a face in the corner, a house number behind the subject, a browser tab on a laptop.
Teams also over-compress screenshots and under-compress camera photos. Treat those file types differently. A phone photo of a park can usually tolerate more compression than an image containing small interface text.
Do not use filenames as your consent system. A filename like approved-by-jamie.jpg is not a record. Keep approval notes where the team actually tracks publishing decisions.
Finally, avoid mixing rejected and approved files in the same upload folder. A clean 03-publish-ready folder should be safe enough that a busy editor can upload from it without re-litigating every file.
Lightweight Governance for Small Teams
A workflow only works if people can follow it when they are busy. Keep the rules short and visible.
A practical policy can be as simple as:
1. Originals are stored but never published directly.
2. Every community photo gets a full-size visual review.
3. Images with unclear consent stay on hold.
4. Public files are cropped, resized, converted, compressed, and renamed.
5. Credit and restrictions live in the editorial notes, not only in image metadata.
Assign one owner for the publish-ready folder. That person does not need to do every edit, but they should be responsible for what enters the CMS. Without ownership, a workflow becomes a suggestion.
For recurring programs, create a reusable folder template. For example, a school newsletter, local history project, volunteer report, or customer story program can reuse the same intake structure each month. The more familiar the structure becomes, the less likely people are to bypass it.
Final Pre-Publish Pass
Before the article, report, or page goes live, review the images in context. This final pass catches issues that file-by-file review misses.
Check whether the image implies something the article does not support. Check whether a crop feels misleading. Check whether captions match the visible subject. Check whether alt text describes the image without exposing unnecessary personal details. Check whether the page feels slow because one image slipped through at several megabytes.
Also check the mobile view. Community photos often contain small but important details, and those details may disappear on a narrow screen. If the image is only understandable on desktop, consider a tighter crop or a different asset.
The best community photo workflow is not the one with the most steps. It is the one that consistently separates original submissions from public derivatives, makes privacy review visible, and produces files that are easy for the next editor to understand.
When that system is in place, community images become less risky and more useful. Editors can move quickly without guessing. Reviewers know what they are approving. Published pages get lighter, cleaner assets. And the people who shared their photos are treated with the care that real-world submissions deserve.