Annotated SaaS Screenshot OCR: A Field Guide for Release Notes and Support Archives
A practical guide to cleaning, cropping, and exporting annotated SaaS screenshots so OCR can capture UI labels, callouts, and release-note evidence more accurately.
Annotated SaaS Screenshot OCR: A Field Guide for Release Notes and Support Archives
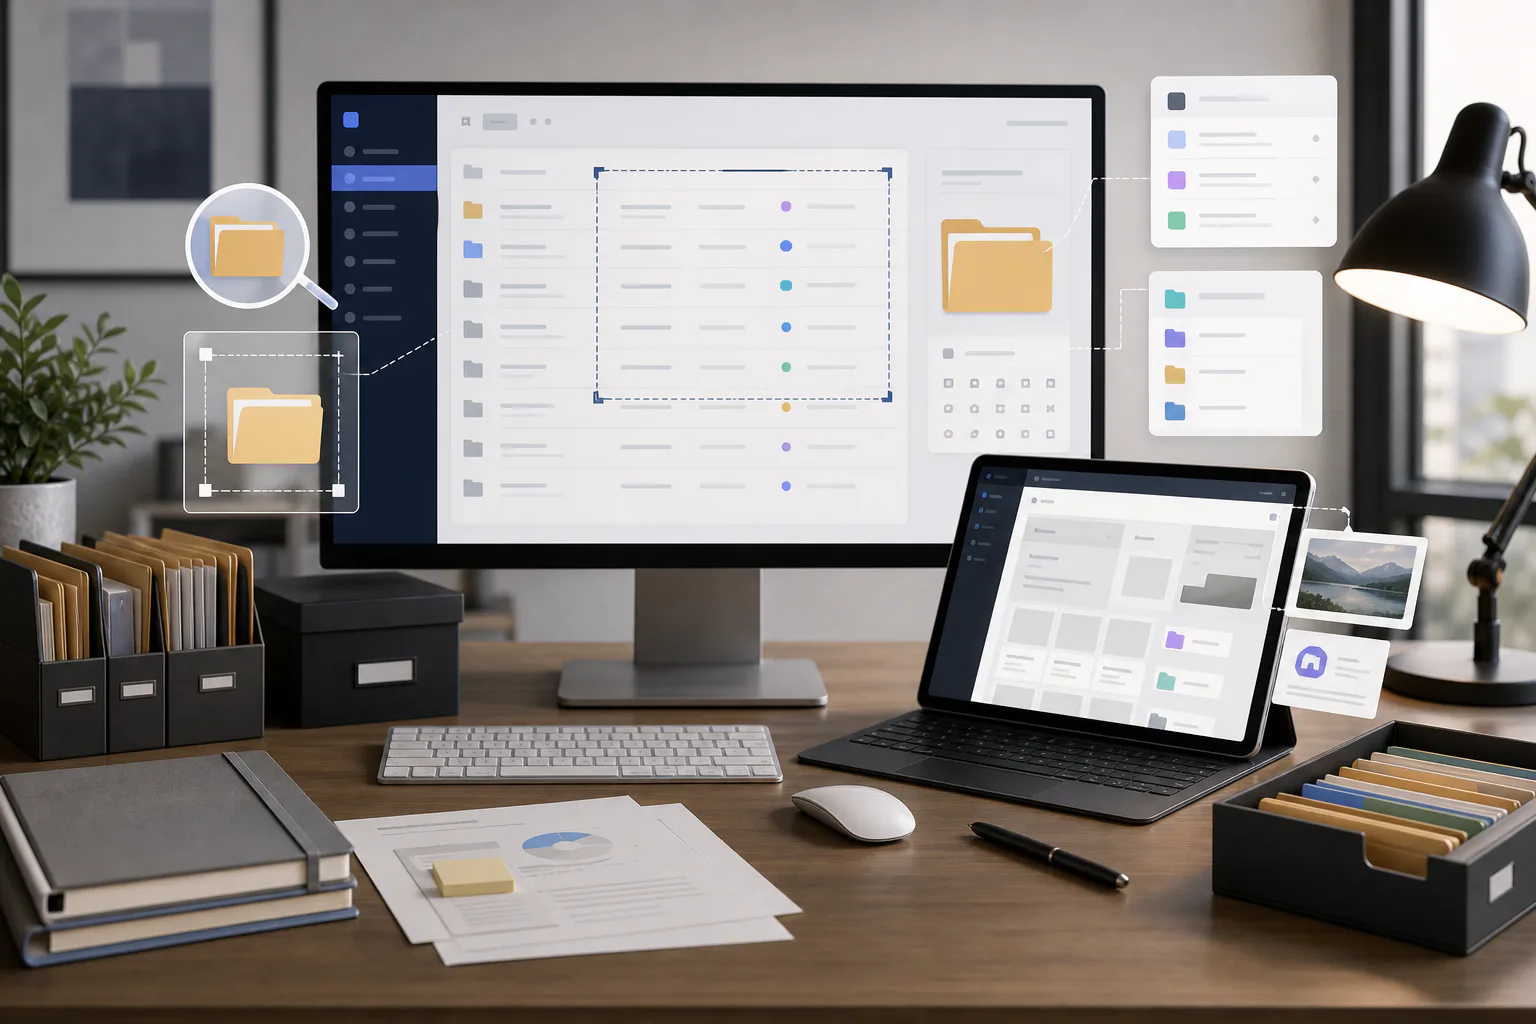
Annotated product screenshots are convenient when a team needs to explain a feature, preserve evidence for a release note, or answer a support question quickly. They are also surprisingly awkward when you later need to search them. A screenshot can contain interface labels, browser controls, tooltips, handwritten arrows, numbered callouts, status badges, timestamps, customer names, and fragments of a URL. Optical character recognition has to decide what matters, what is decoration, and what order the words should appear in.
That matters more than it sounds. Product teams often keep visual evidence in shared folders, ticket attachments, release folders, and internal knowledge bases. Six months later, someone searches for the name of a setting, a button, or an error state and expects the screenshot to surface. If the image was saved at a tiny size, heavily compressed, or covered with noisy annotations, OCR may miss the exact phrase that would have made the asset searchable.
This field guide is for small SaaS, documentation, QA, and support teams that need annotated screenshots to remain readable after the moment of publication. The goal is not to make images beautiful. The goal is to create screenshots that humans can understand immediately and that OCR can extract with fewer mistakes.
When Annotated Screenshot OCR Is Worth the Extra Care
Not every screenshot deserves a cleanup pass. A quick internal message can stay quick. The extra effort is useful when the screenshot becomes part of a longer-lived record.
Use this guide when screenshots are headed into:
- Release notes that need to be searched later by feature name.
- Support archives where agents look up past interface states.
- QA evidence folders attached to regression tickets.
- Training material that will be copied into slides or PDFs.
- Help center drafts where screenshots are reviewed before publication.
- Internal change logs for settings, permissions, billing, imports, or admin panels.
These images usually contain small UI text. They are often captured from dense product surfaces where labels and values sit close together. They may also include arrows, rectangles, and comments added by a teammate. That combination is exactly where OCR becomes fragile.
If a screenshot is purely decorative, skip the OCR preparation. If it contains terms that someone might search for later, treat it as a small document rather than a disposable image.
The Three Text Layers That Confuse OCR
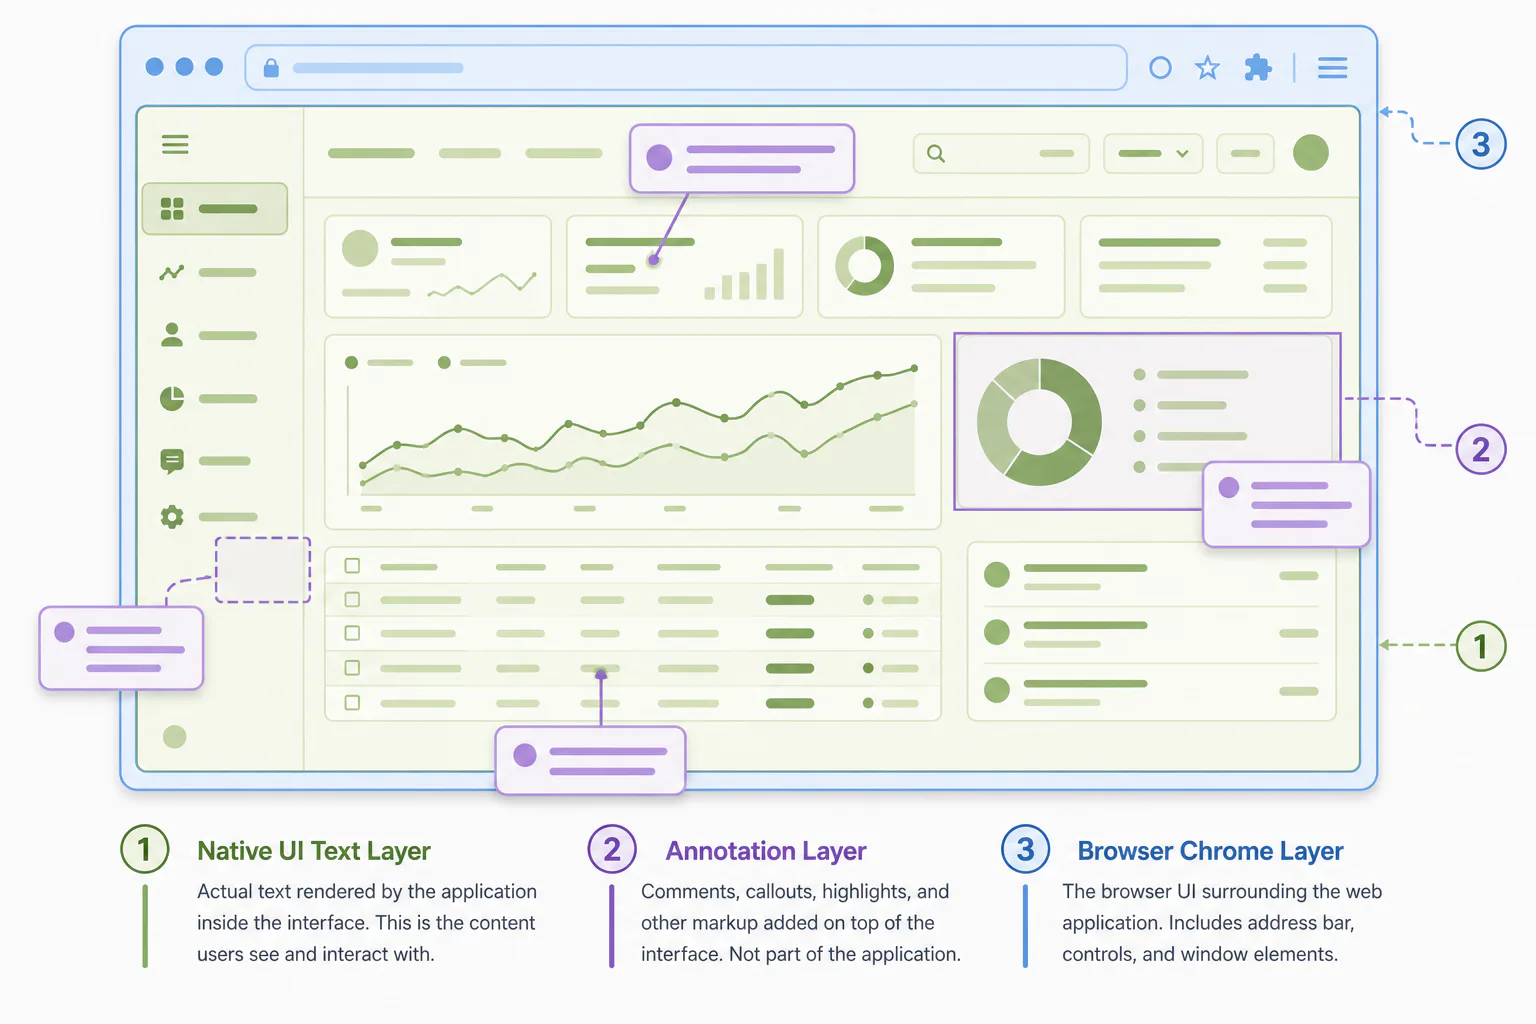
A normal document has a reading order. A screenshot does not. OCR has to infer one from visual spacing, contrast, and alignment. Annotated SaaS screenshots usually contain three competing layers of text.
Native Interface Text
This is the text inside the product itself: button labels, menu items, form fields, table headers, status badges, dropdown values, and error messages. It is usually the most important layer because it records the actual state of the software.
Native interface text is often small, light gray, or surrounded by icons. It may also sit inside cards, tabs, modals, sidebars, and tables. OCR can misread it when the screenshot is scaled down or compressed too aggressively.
Annotation Text
This is the text added after capture: arrows, labels, circles, numbers, sticky-note comments, and reviewer remarks. Annotation text can help humans, but it can confuse OCR if it overlaps the UI or uses a playful font, low contrast, or diagonal placement.
A good annotation explains the screenshot without covering the evidence. A poor annotation becomes louder than the interface and causes the extracted text to mix callouts with product labels.
Surrounding Capture Text
This includes browser tabs, bookmarks, address bars, operating system menus, video player controls, chat windows, and screenshot tool overlays. Sometimes this context is useful. More often, it pollutes the OCR output with irrelevant words.
Before sending an annotated screenshot through an OCR tool, decide which text layer you actually want to preserve. Most release-note and support screenshots should prioritize native interface text first, annotation text second, and surrounding capture text last.
Capture Settings That Make Later OCR Easier
The best cleanup happens before the screenshot is taken. If the original capture is sharp, every later step is easier.
Capture at the highest practical resolution. On a retina or high-density display, avoid downscaling the screenshot before you review it. Small UI labels need pixel detail. If you must resize for a CMS or email, keep a larger source copy for OCR and archive use.
Use browser zoom intentionally. A 90 percent browser zoom may fit more interface on screen, but it can make labels too thin. For OCR, 100 percent is usually a safer baseline. For dense admin tables, 110 or 125 percent may produce a better source image if the important labels still fit.
Prefer light backgrounds for text-heavy captures. Dark mode can be perfectly readable to humans, but some OCR tools struggle with thin light text on dark panels, especially after compression. If your product supports both themes and the screenshot is mainly documentary, the light theme is often easier to extract.
Hide irrelevant chrome. Collapse side panels, close browser bookmarks, remove floating chat widgets, and dismiss tooltips unless they are part of the point. A cleaner capture gives OCR fewer false targets.
Capture the exact state. If the screenshot is evidence for a release, bug, or support answer, make sure the relevant control is visible. Do not rely on an annotation to explain a missing state.
A Practical Cleanup Pass Before OCR
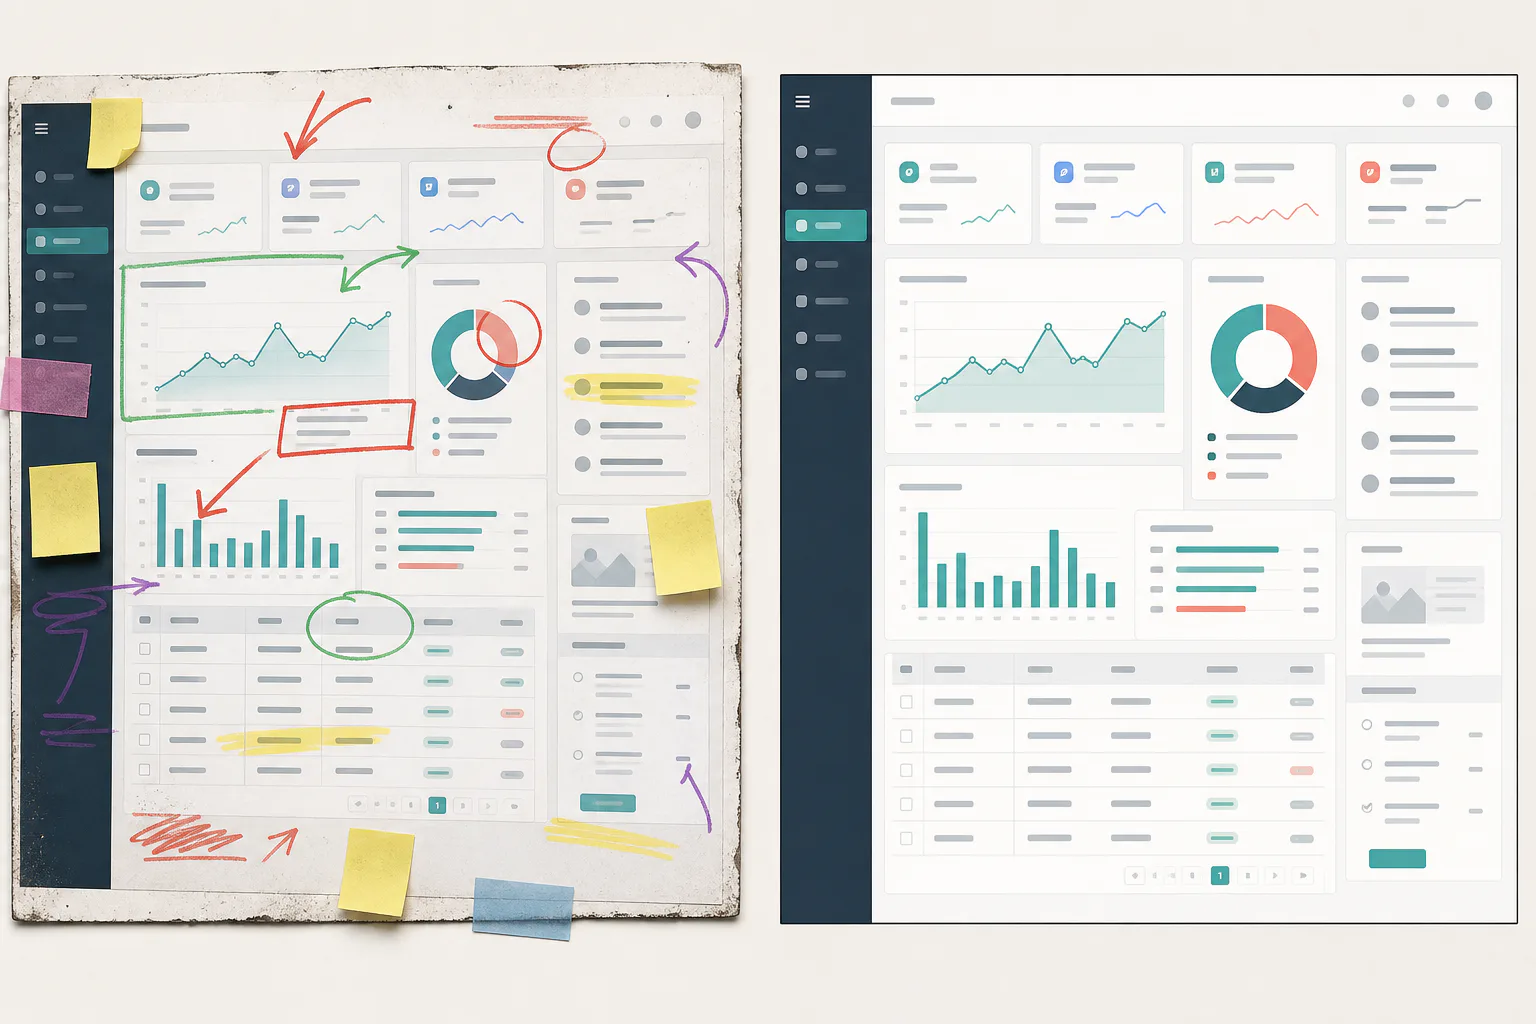
Once the screenshot exists, prepare it like a scan. The cleanup pass should protect important pixels, remove distractions, and produce a file that is easy to search or package.
Start with cropping. Use a tight crop around the product area, leaving only enough margin that annotations have room to breathe. If browser chrome is not needed, remove it. If the URL proves environment or account state, keep it deliberately rather than accidentally.
Next, normalize size. If the screenshot is huge, you can use a tool like Resize Image to create a review copy while keeping the original source. Avoid shrinking dense UI screenshots below the point where small labels become fuzzy. A good practical rule is to zoom the exported image to 100 percent and check whether the smallest important label is comfortable to read without squinting.
Then handle compression carefully. Use Compress Image when the file needs to fit a CMS, email, or ticket limit, but inspect the thin lines afterward. Heavy compression can create halos around text, break table grid lines, and turn small punctuation into noise. If OCR matters, a slightly larger file is better than a tiny unreadable one.
If the screenshot has irrelevant marks, blur, or accidental clutter, an editor can help. For cleanup that needs more than crop and resize, AI Photo Editor can be useful for removing distracting visual elements around the main interface. Keep edits conservative. Do not alter the product state, numbers, labels, or evidence that the screenshot is supposed to preserve.
Finally, run OCR on the cleaned version. Image OCR is the natural step when you need extracted text from the final image. Compare the result against the screenshot before you store it. OCR is a helper, not a witness.
Annotation Rules That Preserve Searchable Text
Annotations should guide the eye without damaging the record. The safest annotation style is boring, consistent, and placed outside the most important UI text.
Use solid high-contrast callouts. Thin pastel arrows may look gentle, but they can disappear after compression. Use a clear color that contrasts with the product UI and keep line weight consistent.
Keep labels outside the interface whenever possible. Place callout text in the margin and point into the UI with a line or arrow. This prevents the annotation from covering the exact label you may need OCR to capture later.
Avoid diagonal or curved text. OCR expects text to run horizontally. Angled labels may be missed or extracted in strange order. Keep annotation text level.
Number complex areas instead of writing long notes on the image. A small numbered marker paired with a separate written explanation is cleaner than a paragraph pasted over the screenshot. If the screenshot is later included in a Markdown article, support note, or PDF, put the explanation in body text where it remains accessible.
Do not outline every visible element. Too many boxes create visual noise and can break OCR segmentation. Highlight the smallest area that makes the point.
Preserve the original. Store an unannotated source image next to the annotated copy when the screenshot documents a release or a support case. The original is useful if an annotation later hides something important.
Decision Table: Clean, Crop, Convert, or Package
Different screenshot destinations need different treatment. Use this table before you export a final copy.
| Destination | Main Risk | Best Preparation | Useful Tool |
|---|---|---|---|
| Release note draft | Small UI labels become unreadable in CMS previews | Crop to the feature area, resize only after checking text | Resize Image |
| Support archive | Search misses button names or error messages | Remove irrelevant chrome, run OCR, save extracted text beside image | Image OCR |
| Bug ticket evidence | Compression hides state details | Keep original, attach a compressed review copy only if needed | Compress Image |
| Training handout | Multiple screenshots become hard to review | Convert selected images into a clean document packet | Image to PDF |
| Help center asset | Format mismatch or file weight slows publishing | Convert to the expected format and inspect edge clarity | Convert Image |
The table is not a strict recipe. It is a reminder to match the treatment to the risk. If searchability is the main goal, OCR quality matters most. If publishing speed is the main goal, size and format become more important. If the screenshot is evidence, preserve the source.
File Naming for Searchable Screenshot Archives
OCR helps, but filenames still do a lot of work. A good filename tells a person what the screenshot contains before they open it.
Use names that include product area, feature, state, and date. For example:
billing-plan-change-confirmation-2026-05-20.png
That is more useful than:
Screenshot 2026-05-20 at 14.03.22.png
For annotated versions, add a suffix:
billing-plan-change-confirmation-2026-05-20-annotated.png
For OCR text exports, mirror the image name:
billing-plan-change-confirmation-2026-05-20-ocr.txt
This makes it easier to keep the source image, edited image, and extracted text together. If your team stores screenshots in a shared file manager, consistent names also reduce duplicate captures.
Avoid stuffing filenames with every visible word. Use the core concept and the stable product area. The OCR text can hold the long tail of labels and messages.
Checking OCR Output Without Wasting Time
A full manual review of every extracted word is rarely realistic. Instead, inspect the words that matter.
First, search the OCR result for the feature name, button label, setting name, or error phrase that motivated the screenshot. If that key phrase is missing, the OCR result is not good enough for search.
Second, check numbers and short codes. OCR often confuses similar characters such as 0 and O, 1 and I, or 5 and S. If the screenshot contains invoice IDs, plan limits, dates, error codes, or version numbers, verify those manually.
Third, scan the first few lines for pollution. If the OCR result starts with browser bookmarks, unrelated tab titles, or a long URL that does not matter, your crop may be too loose. Re-crop and run OCR again.
Fourth, compare annotation labels. If annotation text appears before native UI text, that may be acceptable for human notes but poor for search. Consider moving annotation explanations outside the image and into accompanying copy.
A good OCR result does not need to be perfect. It needs to capture the terms people will use when searching for the screenshot later.
Building a Small Review Packet
For release or support reviews, a single image is often not enough. You may need a short packet that shows the before state, after state, and extracted text.
A simple packet can include:
- Original screenshot.
- Cleaned screenshot.
- Annotated screenshot.
- OCR text file.
- Short note explaining the product state and date.
When the audience prefers one document instead of loose files, convert the images into a compact PDF with Image to PDF. Keep the PDF simple. One screenshot per page is usually easier to inspect than a crowded grid, especially when UI text is small.
If the packet is for an external partner, review it for private data before sending. Screenshots often contain names, emails, workspace IDs, internal URLs, or billing details in corners that nobody noticed during capture. OCR can actually help here: search the extracted text for email symbols, customer names, account IDs, and environment names.
Common Failure Cases and Fixes
The OCR Output Misses Small Button Labels
The image was probably scaled down too far or compressed too heavily. Return to the largest available source, crop tighter around the relevant UI, and export with less compression. If the interface allows zoom, recapture at a larger browser zoom.
The Extracted Text Is Full of Browser Noise
Crop out tabs, bookmarks, address bars, extension icons, and operating system menus unless they matter. If the URL is needed as evidence, keep only the address area and remove unrelated browser decorations.
Annotation Text Appears in the Wrong Order
Move long notes out of the image. Use numbered markers in the screenshot and write the explanation below it in the article, ticket, or PDF. OCR handles normal body text better than floating labels.
Table Text Becomes Jumbled
Tables are hard because OCR has to infer rows and columns from spacing. Capture fewer columns, increase zoom, or split the table into several images. If row order matters, include a written summary beside the screenshot.
Dark Mode Text Extracts Poorly
Try a light theme capture for the archive version. If dark mode is essential to the story, increase contrast and avoid lossy compression. Check the smallest labels after export.
Redaction Breaks Context
Redaction is necessary, but careless blocks can hide labels that explain the screenshot. Redact values, not field names, whenever possible. For example, hide a customer email while leaving the label that says what the field represents.
Format Choices for OCR-Friendly Screenshots
PNG is usually the safest format for UI screenshots because it preserves sharp edges and flat colors. It is especially useful for text, icons, borders, and interface panels.
JPEG can be acceptable for photographic content, but it is risky for small UI text. Compression artifacts around letters can reduce OCR accuracy. If you must use JPEG, choose a quality setting that keeps thin text clean.
WebP can be a good publishing format when you need smaller files, but review the final output. Lossless or high-quality WebP can preserve interface detail well. Aggressive settings can blur the exact text you need.
PDF is a container, not a magic fix. Placing a blurry screenshot into a PDF will not make the text searchable unless OCR text is also added or stored alongside it. Use PDF when you need a review packet, not as a substitute for clean source images.
For format changes, Convert Image is useful when a publishing system expects a specific file type. Just make sure the conversion does not quietly reduce clarity.
A Repeatable Checklist
Use this checklist when a screenshot needs to remain useful after publication.
Before capture:
- Set browser zoom to a readable level.
- Hide irrelevant panels, widgets, and browser clutter.
- Choose light mode if the screenshot is mainly documentary.
- Confirm the important state is visible.
Before annotation:
- Save an unedited source copy.
- Crop to the product area.
- Keep room for callouts in the margin.
- Decide whether browser chrome is evidence or noise.
During annotation:
- Keep text horizontal.
- Place labels outside the main UI when possible.
- Use numbered markers for complex explanations.
- Avoid covering field labels, values, and error text.
Before OCR:
- Check the smallest important text at 100 percent zoom.
- Avoid aggressive compression.
- Remove accidental clutter.
- Export in a format that preserves sharp UI edges.
After OCR:
- Search for the key feature or error phrase.
- Verify numbers, codes, and dates.
- Remove noise by re-cropping if needed.
- Store the image and extracted text together.
Example: A Release Note Screenshot for a New Admin Setting
Imagine a product team is announcing a new admin setting for session timeout rules. The raw screenshot includes the full browser window, a bookmarks bar, a sidebar, the settings page, an open dropdown, a tooltip, and a red arrow pointing to the new option.
A fast publication pass might upload that image as-is. It would be understandable today, but hard to search later. OCR might capture bookmark names before the actual setting. The tooltip could interrupt the dropdown text. Compression in the CMS might blur the small option labels.
A better pass would look like this:
- Save the raw screenshot as the source.
- Crop out the bookmarks bar and unrelated browser frame.
- Keep the sidebar only if it proves the setting location.
- Move the annotation label into the right margin.
- Use one arrow pointing to the exact control.
- Export a PNG review copy.
- Run OCR and search for the setting name.
- Store the OCR text with the release note draft.
The finished screenshot still looks like a normal product image, but it now behaves more like a searchable record.
Final Thoughts
Annotated SaaS screenshots sit between design assets and documents. They need to be visually clear, but they also need to preserve searchable facts: labels, states, warnings, dates, and product terms. OCR is much more reliable when the screenshot is captured at a readable size, cropped with intent, annotated lightly, and compressed with care.
The practical habit is simple: treat important screenshots as records before you treat them as images. Keep the source, clean the copy, place annotations where they do not cover evidence, and verify the extracted text for the phrases people will search later. That small discipline can make release notes, support archives, and QA evidence much easier to trust months after the screenshot was taken.