Freight Damage Photo Packets: A Practical Guide for Stronger Claims
Build clear, compact freight damage photo packets with wide shots, detail images, labels, measurements, and PDFs that claims reviewers can navigate quickly.
Freight Damage Photo Packets: A Practical Guide for Stronger Claims
A freight damage claim often depends on a small collection of photographs taken during a rushed receiving inspection. Those images may later be reviewed by a carrier representative who never saw the pallet, packaging, loading dock, or damaged item in person. If the photographs lack context, sequence, or scale, even genuine damage can be difficult to evaluate.
A useful photo packet does more than prove that something is broken. It connects the shipment, packaging, impact point, internal protection, and product damage in a logical visual record. It also keeps files readable and compact enough to upload, email, or attach to a claim portal.
This guide presents a practical system for receiving teams, small manufacturers, equipment dealers, restoration shops, and operations staff. It focuses on ordinary phones and simple file tools rather than specialist inspection equipment. Carrier requirements vary, so always preserve the original shipment materials and follow the instructions in the bill of lading, delivery receipt, insurance policy, or claim portal.
Why Random Damage Photos Are Hard to Review
Imagine receiving twelve images named IMG_4812.jpg through IMG_4823.jpg. Several show torn cardboard at close range. One contains a blurry label. Another shows a bent metal bracket, but nothing demonstrates that the bracket came from the shipment in question. The damage may be real, yet the collection leaves basic questions unanswered.
A reviewer generally needs to understand:
- Which shipment and handling unit are shown?
- Where was the shipment when the condition was recorded?
- Was the exterior packaging visibly compromised?
- How was the item supported inside the package?
- Where is the product damage relative to the packaging damage?
- How large or deep is the affected area?
- Were all sides and all relevant labels documented?
The strongest packet answers these questions through visual progression. It moves from context to detail without forcing the reviewer to infer relationships between disconnected close-ups.
Start Before the Packaging Is Moved
When it is safe to do so, photograph the shipment in its first observed position. Moving a carton, cutting stretch wrap, or removing a crushed corner can erase useful evidence about orientation and impact.
Begin with a short receiving check:
- Confirm that unloading activity will not place the photographer in the path of forklifts or suspended loads.
- Record the shipment before removing straps, wrap, corner boards, or pallet covers.
- Photograph visible exceptions before signing or completing receiving paperwork when local procedures permit.
- Keep packaging, blocking, foam, straps, and broken components until the claim instructions allow disposal.
- Save original files even if edited copies will be placed in the final packet.
Safety takes priority over documentation. Do not enter an active loading zone, climb unstable freight, or reposition heavy goods merely to obtain a better angle. If a safe angle is unavailable, note that limitation in the accompanying inspection record.
Use a Four-Distance Shot Sequence
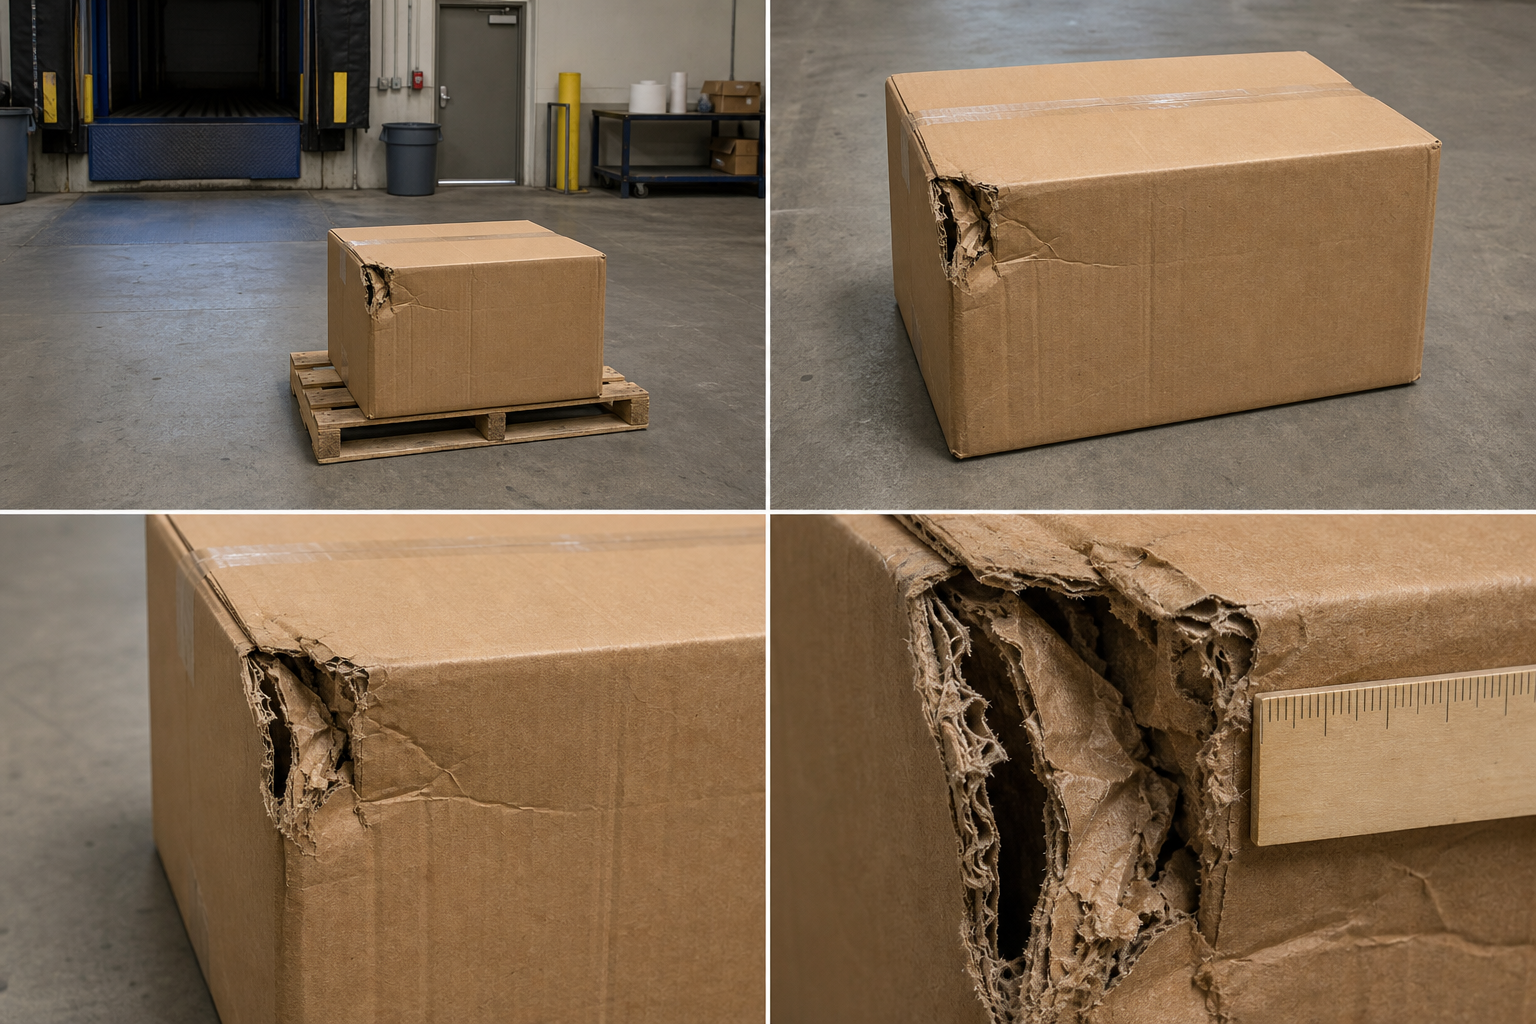
A repeatable sequence prevents the common mistake of taking only dramatic close-ups. For each significant area of damage, capture four distances.
1. Receiving-Area Context
Take a wide photograph showing the shipment in its surroundings. Include enough of the dock, trailer, staging zone, or delivery area to establish context without capturing unrelated confidential information.
This image is not intended to show tiny defects. It establishes where the shipment was observed and how it was positioned. If several pallets arrived together, the wide view can also show which handling unit is affected.
2. Complete Handling Unit
Photograph the full pallet, crate, carton, drum, case, or machine. Keep the camera level and include all edges. Capture more than one side if the unit is large or if exterior damage appears in multiple locations.
The complete view links the damaged area to a particular package. It may also reveal leaning, compression, displaced straps, broken boards, punctures, water staining, or an uneven load.
3. Damage in Local Context
Move closer while retaining recognizable package features around the damage. A crushed carton corner should appear with adjacent seams and panels. A fork puncture should be shown with enough of the pallet or crate to establish its height and position.
This middle-distance image is frequently the most informative photograph in the set. It connects the overall unit to the detailed defect.
4. Close Detail with Scale
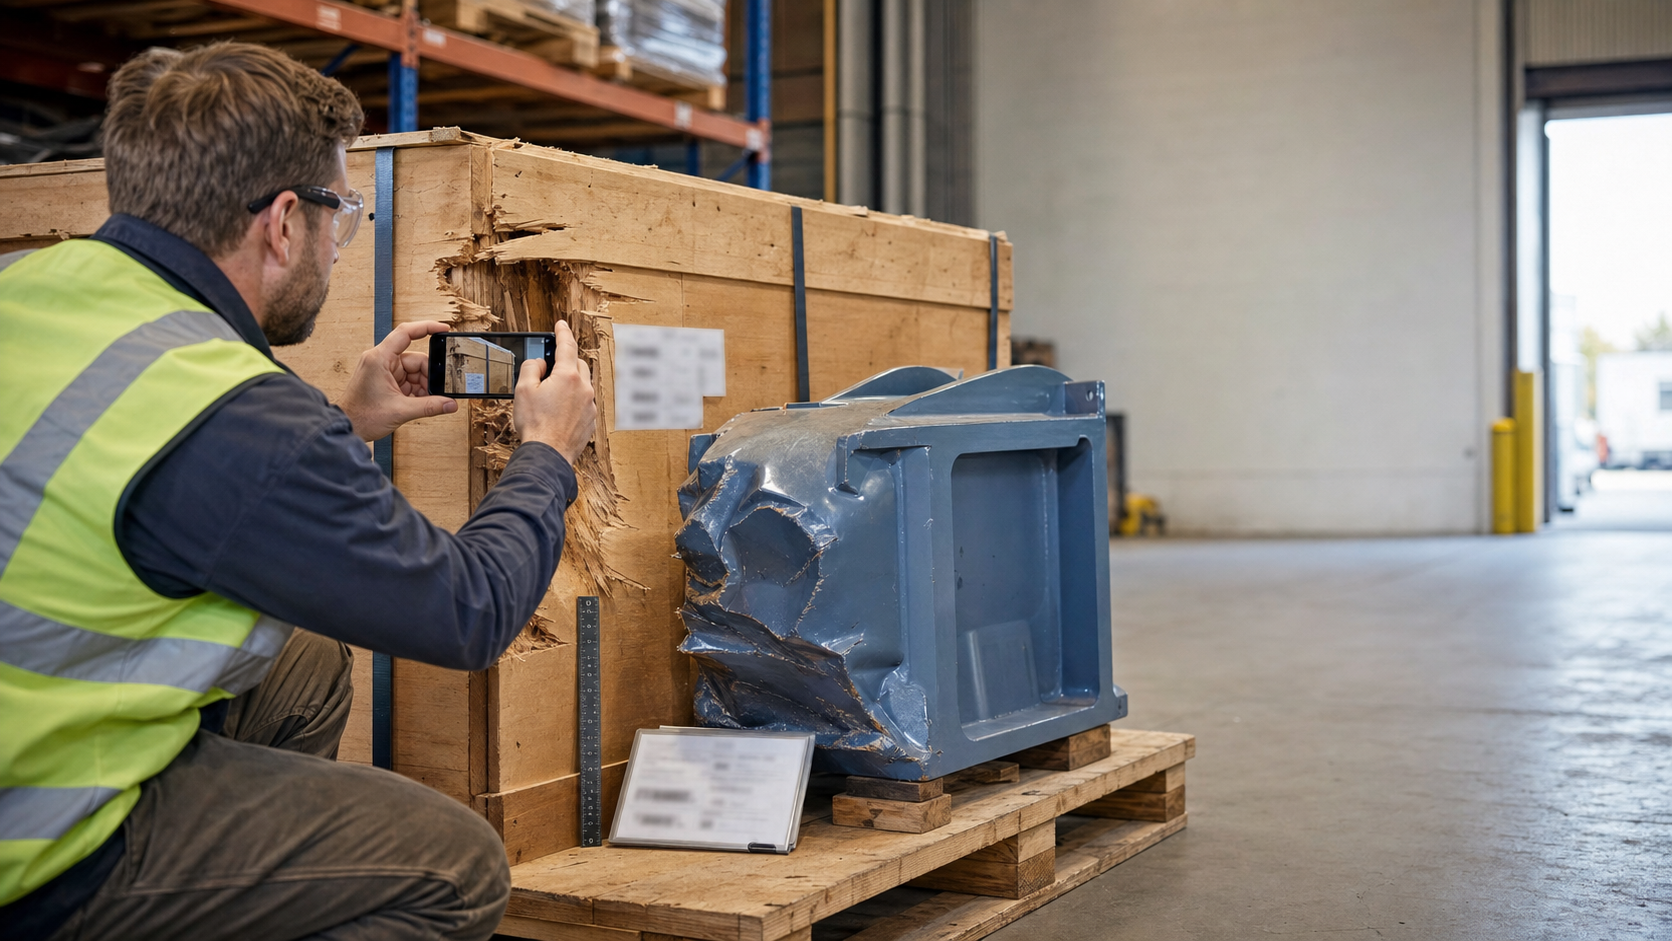
Finish with a sharp close-up. Where suitable, place a ruler, measuring tape, or scale marker beside the damage. Keep the measuring device on the same plane as the defect so perspective does not exaggerate or reduce its apparent size.
Capture one close-up without the measuring device as well. A ruler can hide small cracks, fibers, dents, or coating damage. For deep deformation, take a side angle that shows depth in addition to the straight-on view.
Photograph the Package as Evidence, Not Background
Packaging condition can explain how force reached the product. Treat the package as an inspected object rather than an obstacle to remove.
Document these elements when present:
| Packaging element | Useful views | What the images may clarify |
|---|---|---|
| Outer carton or crate | Every side, top, and bottom when accessible | Crushing, puncture, abrasion, moisture, or orientation |
| Pallet | Full base and damaged boards | Load support and handling impact |
| Straps and stretch wrap | Connections, breaks, and displacement | Whether the load shifted or restraints failed |
| Corner protection | Installed position and damaged pieces | Location and direction of compression |
| Internal foam or blocking | Before removal and after exposure | Whether the product was supported or displaced |
| Loose fragments | In place, then grouped for detail | Relationship between broken packaging and product damage |
Open the packaging in stages and photograph each layer before changing it. A simple sequence might show the unopened crate, removed lid, top blocking, wrapped product, exposed damaged side, and corresponding damage to the crate wall. This creates a visual chain instead of an unexplained jump from closed package to broken item.
Avoid staging fragments in positions where they were not found. If pieces must be moved for safety, photograph their original position first and record that they were relocated.
Make Shipment Labels Readable Without Losing Context
Labels connect the visual record to a shipment, but label photography often fails in two opposite ways. A distant photograph makes the identifier unreadable, while an extreme close-up removes every clue about which package carried it.
Take at least two label images:
- A contextual view showing the label attached to the package.
- A close, straight-on view in which relevant identifiers can be read from the original file.
Watch for glare from thermal labels, document pouches, and stretch wrap. Shift the light or camera slightly rather than tilting so far that the label becomes distorted. Tap the label on the phone screen to set focus, and check the result at full size before proceeding.
If you need searchable reference text for an internal register, an image OCR tool can extract identifiers from a clean label image. Verify every extracted character against the photograph, especially zeros, letter O, ones, letter I, and damaged barcode text. OCR output should support indexing, not replace the original label photograph.
Shipment labels can contain names, addresses, phone numbers, customer references, and tracking identifiers. Share only what the intended recipient needs. Create a redacted derivative if a packet will circulate beyond the claim participants, while retaining an unmodified original in the controlled claim record.
Control Light, Focus, and Perspective
Claims photography does not require studio lighting, but it does benefit from consistency. Mixed warehouse light, reflective wrap, dark machinery, and bright dock doors can confuse a phone camera.
Use these field techniques:
- Clean the camera lens before starting.
- Turn off portrait effects and decorative filters.
- Hold the phone with both hands or brace it against a stable surface.
- Avoid digital zoom; move closer when it is safe.
- Photograph reflective damage from two slightly different angles.
- Use a portable light from the side to reveal dents, ripples, and surface deformation.
- Keep one image under neutral ambient light so added lighting does not become the only representation.
- Review sharpness at full size before dismantling the packaging.
Side lighting is particularly useful for shallow dents and buckled sheet metal because it casts small shadows across surface changes. Straight-on lighting is better for printed labels and overall color. When color change matters, include a neutral reference card if one is available and avoid heavy automatic enhancement.
Perspective also matters. Photograph rectangular faces as squarely as possible. An oblique angle can make a carton appear more compressed or a gap appear wider than it is. Use angled images to reveal depth, but pair them with a straight-on reference.
Connect Exterior and Interior Damage
A persuasive packet makes spatial relationships easy to follow. If a crate has a puncture on its lower left side and the machine inside has a dent at the corresponding height, document that connection explicitly through photographs.
Use consistent orientation terms such as label side, opposite label side, top, and pallet base. Avoid switching casually between left and right, since those directions change with the photographer’s position.
A useful sequence is:
- Full label-side view of the package.
- Medium view of the exterior impact.
- Close exterior detail with scale.
- Interior packaging visible behind the same area.
- Full product view from the label side.
- Medium product view showing the corresponding region.
- Close product detail with scale.
Do not imply causation that the photographs cannot establish. The packet can show corresponding locations and observed conditions. Determining when or how damage occurred may require additional records or inspection expertise.
Include Product Function Only When It Can Be Shown Safely
Some freight damage is functional rather than visually dramatic: a door binds, a shaft no longer turns, a display is cracked beneath an intact cover, or a frame no longer sits level.
Still images can document alignment using straightedges, gap measurements, level indicators, or matched views of an undamaged counterpart. A short video may better demonstrate intermittent sounds, restricted motion, leakage, or a failed startup. Do not energize, lift, rotate, or test damaged equipment unless an authorized person has determined that it is safe.
If video is included, keep the spoken explanation factual and brief. State what is being tested and what is observed. For environments where reviewers watch without sound, subtitles can be produced with a video-to-subtitles tool. Check technical terms, serial references, and measurements manually before sharing.
Name Files So the Sequence Survives Uploading
Descriptive filenames make a packet easier to audit and rebuild. They are especially helpful when a portal rearranges attachments or when files are downloaded individually.
Use a compact pattern such as:
claim-reference_sequence_subject_view.ext
For example:
ACME-0719_01_dock-context.jpgACME-0719_02_crate-label-side.jpgACME-0719_03_crate-impact-context.jpgACME-0719_04_crate-impact-ruler.jpgACME-0719_05_internal-blocking.jpgACME-0719_06_machine-full-view.jpgACME-0719_07_machine-dent-ruler.jpg
Use leading zeros so alphabetical sorting preserves the intended order. Keep filenames free of sensitive personal data, vague labels such as bad, and conclusions such as carrier-caused. Describe what the image shows.
Retain the phone originals in a separate folder. Perform renaming, rotation, redaction, and compression on copies. If the claim becomes disputed, the originals preserve capture metadata and the untouched pixels.
Edit for Clarity Without Changing the Evidence
Claims images may need rotation, modest exposure correction, or cropping. The goal is faithful visibility, not cosmetic improvement.
Generally acceptable derivative edits include:
- Correcting orientation.
- Cropping irrelevant empty space while retaining context.
- Applying modest global brightness or contrast correction.
- Redacting unrelated personal or confidential information on sharing copies.
- Resizing copies for a portal or PDF.
Avoid removing objects, reconstructing missing areas, blurring damage boundaries, replacing backgrounds, or applying selective generative edits. Even an innocent-looking modification can weaken confidence in the record.
If an annotation is needed, keep the clean image and make a separate annotated copy. Use simple arrows or numbered callouts outside the defect where possible. Do not cover the evidence with labels. Maintain a clear distinction between originals, clean derivatives, and annotated derivatives.
Compress Images Without Erasing Fine Damage
A packet containing twenty modern phone photographs can become unnecessarily large. However, aggressive compression may erase hairline cracks, fine abrasions, label characters, wood splinters, or subtle deformation.
Start by removing obvious duplicates and accidental shots. Then resize copies to a sensible viewing dimension rather than repeatedly lowering quality. The image resize tool can create consistent derivatives, and the image compression tool can reduce their storage size.
Test representative images before processing the full set. Include one label, one wide warehouse view, one dark product image, and one close detail. Inspect the results at 100 percent magnification.
| Image purpose | Compression priority | Inspection point |
|---|---|---|
| Context view | Smaller file | Overall placement remains understandable |
| Package face | Balanced | Seams, punctures, and labels remain distinct |
| Label close-up | Legibility first | Every required identifier remains readable |
| Damage detail | Evidence first | Cracks, edges, and surface texture remain visible |
| Annotated reference | Balanced | Callouts and underlying damage remain clear |
Do not recompress the only copy of an image. Keep high-quality originals even if the submission portal accepts only reduced derivatives.
Build a Reviewer-Friendly PDF Packet
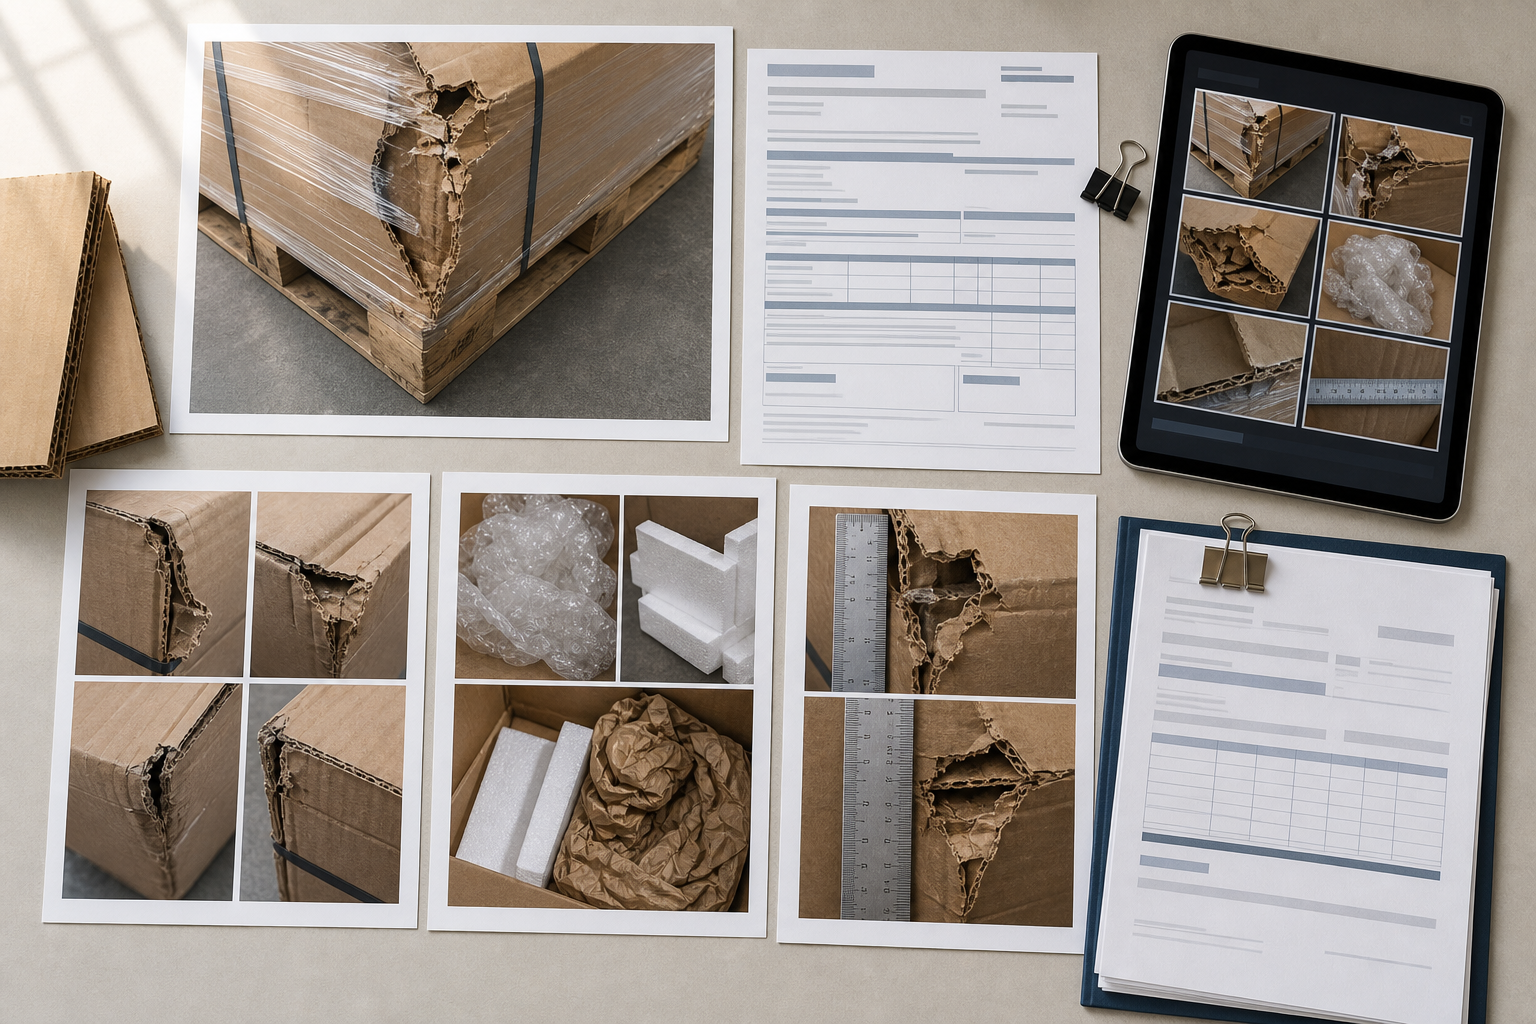
A single PDF can preserve reading order and reduce attachment confusion. It is particularly useful when photographs need captions, orientation notes, or links to supporting documents.
A practical packet structure is:
- Cover page with the internal claim reference, shipment date, receipt date, and handling-unit description.
- One-page visual summary with a package overview and product overview.
- Exterior packaging sequence.
- Opening and internal-protection sequence.
- Product condition sequence.
- Measurement details and annotated copies.
- Relevant supporting records, such as the delivery receipt or packing list, when appropriate.
- A final image index listing filenames and short factual descriptions.
Use one or two large images per page when detail matters. Dense thumbnail grids may be suitable for an index but should not be the only presentation of cracks, labels, or measurements. Captions should state observable facts: Puncture on label-side lower panel is stronger than speculation about who caused it.
Convert selected copies with an image-to-PDF tool, then combine supporting PDFs in the intended order with the PDF merge tool. Open the finished file on both desktop and mobile. Confirm page order, rotation, caption legibility, image detail, redactions, and total file size.
If a portal asks for individual originals as well as a summary PDF, provide both sets according to its instructions. The PDF is a navigation layer, not necessarily a substitute for source photographs.
Run a Final Packet Audit
Before submission, review the packet as though you had never seen the shipment. A short audit catches gaps that are obvious to the receiving employee but invisible to an external reviewer.
Identity and Context
- The shipment reference is consistent across the packet.
- At least one image connects the label to the full package.
- Wide views establish the initial setting and orientation.
- Multiple handling units are distinguishable.
Packaging Evidence
- All accessible package sides are documented.
- Exterior damage appears at wide, medium, and close distances.
- Internal packaging is shown before major rearrangement.
- Removed fragments and restraint failures are recorded.
Product Evidence
- A full product view precedes close details.
- Damage locations can be related to product orientation.
- Measurements are readable and placed on the correct plane.
- Functional demonstrations were performed only when safe and authorized.
File Quality
- Required labels and serial references are sharp.
- Images are correctly rotated.
- Compression has not erased fine defects.
- Original files remain stored separately.
- Shared copies reveal no unnecessary personal information.
PDF Quality
- Pages follow the physical inspection sequence.
- Captions describe observations rather than assumptions.
- Annotated images have clean counterparts.
- Supporting documents are relevant and readable.
- The final file opens correctly and meets the recipient’s upload limits.
A Compact Example: Crated Pump with a Bent Guard
Consider a pump delivered in a wooden crate. One lower crate board is split, the foam block behind it is compressed, and the pump’s metal coupling guard is bent inward.
A weak record would contain three close-ups of the bent guard. A stronger packet would begin with the crate in the receiving area, followed by full views of the label side and damaged side. It would show the split board in context and beside a ruler, then record the lid removal and the compressed foam before either is moved.
Next, it would show the entire pump from the same orientation, the guard relative to the pump body, and the deformation from straight-on and side angles. A measurement image would demonstrate the altered gap without claiming exactly when the deformation occurred. The final pages would include the relevant receiving document and a filename index.
That sequence allows a reviewer to trace a continuous visual path from shipment identity to exterior condition, internal protection, and product damage. No single image carries the entire argument; the strength comes from the relationship between images.
Treat the Packet as a Reconstructable Record
The best freight damage photo packets are calm, systematic, and easy to navigate. They preserve the scene before unpacking, move through consistent distances, connect package damage to product orientation, and retain originals alongside clearly identified derivatives.
The central test is simple: could someone who was not present reconstruct what arrived, where each defect was located, and how the package was opened? If the answer is yes, the packet is doing its job. Clear photography cannot decide every claim, but it can prevent avoidable ambiguity and give reviewers a far more useful record of the shipment’s observed condition.