Quilt Label Photography for Searchable Guild and Exhibition Archives
A practical guide to photographing quilt labels, preserving handwritten details, improving OCR accuracy, and building searchable records for guild, museum, and exhibition archives.
Quilt Label Photography for Searchable Guild and Exhibition Archives
A quilt label can hold more historical information than the decorative front: maker names, recipient names, dates, locations, commemorative events, pattern titles, guild affiliations, and clues about ownership. Unfortunately, labels are also among the hardest parts of a quilt to document well. They may be wrinkled, faded, partly detached, written in decorative script, or surrounded by patterned backing fabric that confuses text-recognition software.
For quilt guilds, local museums, exhibition committees, family historians, and community archive projects, a casual phone snapshot is rarely enough. The image must serve several purposes at once. It should preserve the label's physical appearance, make its writing legible, show where it is attached, and support accurate transcription into a catalog.
This field guide presents a practical method for creating consistent, searchable quilt-label records without specialist studio equipment. It emphasizes careful capture, restrained image correction, responsible OCR use, and preservation of uncertain readings.
Why quilt labels need their own documentation standard
A full photograph of a quilt is essential, but it seldom records the label adequately. The label may occupy less than one percent of the frame. Even a high-resolution overview can leave handwriting too small for reliable reading.
A label photograph also carries evidence that a plain transcription cannot preserve:
- The material and construction of the label
- Ink color, fading, bleeding, or embroidery
- Original line breaks and spacing
- Corrections made by the writer
- Stitching, adhesive, or later repairs
- The relationship between the label and the quilt backing
- Damage that may explain missing letters
Treat the photograph and transcription as complementary records. The transcription makes the information searchable; the photograph lets future researchers verify it.
Decide what the archive needs before photographing
Before setting up a camera, define the intended record. A small guild exhibition may need a maker name, title, year, and entry number. A permanent collection may also need dimensions, materials, provenance, condition notes, copyright information, and links to related documents.
A compact capture plan prevents inconsistent coverage:
| Intended use | Minimum photographs | Recommended output |
|---|---|---|
| Temporary exhibition intake | Quilt front, quilt back, label | JPEG images plus catalog entry |
| Guild history project | Quilt overview, label, maker portrait if permitted | JPEG or WebP access copies plus original files |
| Museum or study collection | Front, back, label context, label close-up, construction details | Preservation originals, access copies, verified transcription |
| Family history record | Full quilt, label, damaged areas, ownership documents | Image set combined into a PDF |
Assign a stable identifier before capture. A short code such as QG-2026-014 is safer than relying on filenames like grandmas_quilt_final2.jpg. The identifier should connect every image, transcription, consent form, and exhibition note associated with the object.
Prepare the quilt without stressing the textile
Do not flatten a historic label with an iron simply to improve the photograph. Heat, moisture, and pressure can alter old ink, synthetic transfers, adhesives, or fragile fibers. Avoid pins, removable tape, clips with strong springs, and improvised weights placed directly on the textile.
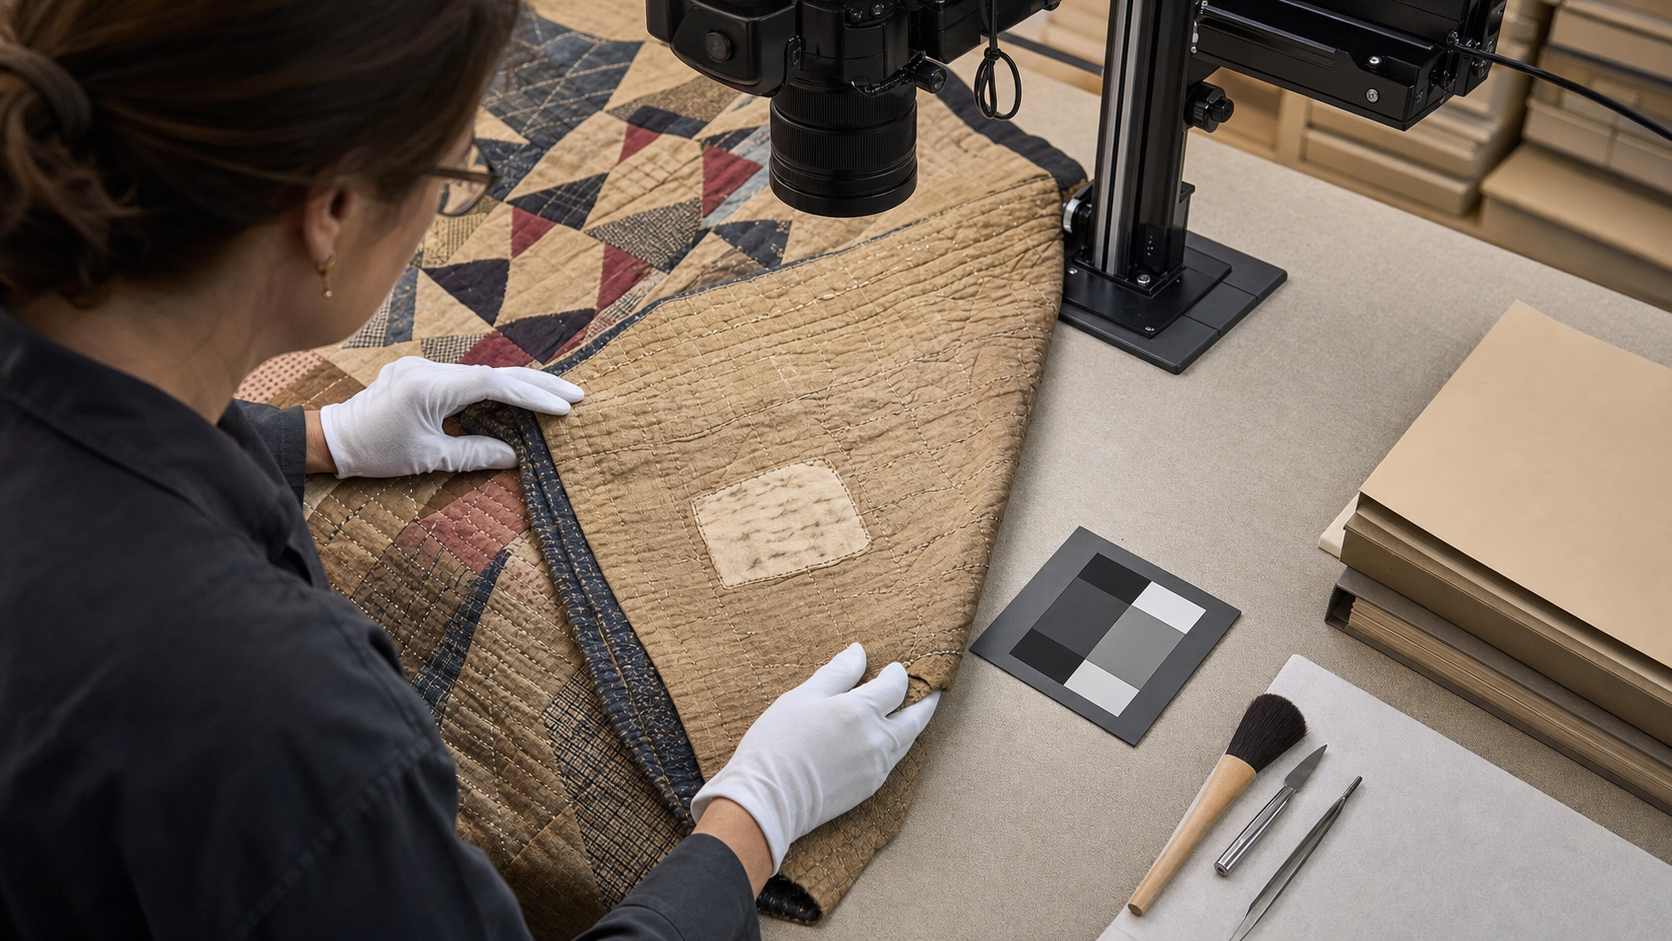
Start with clean hands and a clean support surface. Follow the holding institution's handling policy; some collections require nitrile gloves, while others prefer freshly washed bare hands because gloves can reduce dexterity. Support the quilt fully rather than letting its weight hang from a label or binding.
If the label is folded or distorted, photograph it as found first. A conservator or collection manager can then decide whether gentle repositioning is appropriate. The untreated frame preserves evidence of the object's actual condition at intake.
Useful equipment can remain modest:
- A phone or camera with reliable close focusing
- A tripod, copy stand, or rigid overhead arm
- Two diffused lamps with matching color temperature
- A neutral gray or white reference card
- A clean, plain support board
- A ruler or scale approved for collection photography
- A remote shutter or timer to prevent camera shake
Switch off mixed room lighting if it creates competing orange and blue color casts. Window light can work, but changing clouds make a long documentation session inconsistent.
Build a repeatable three-frame record
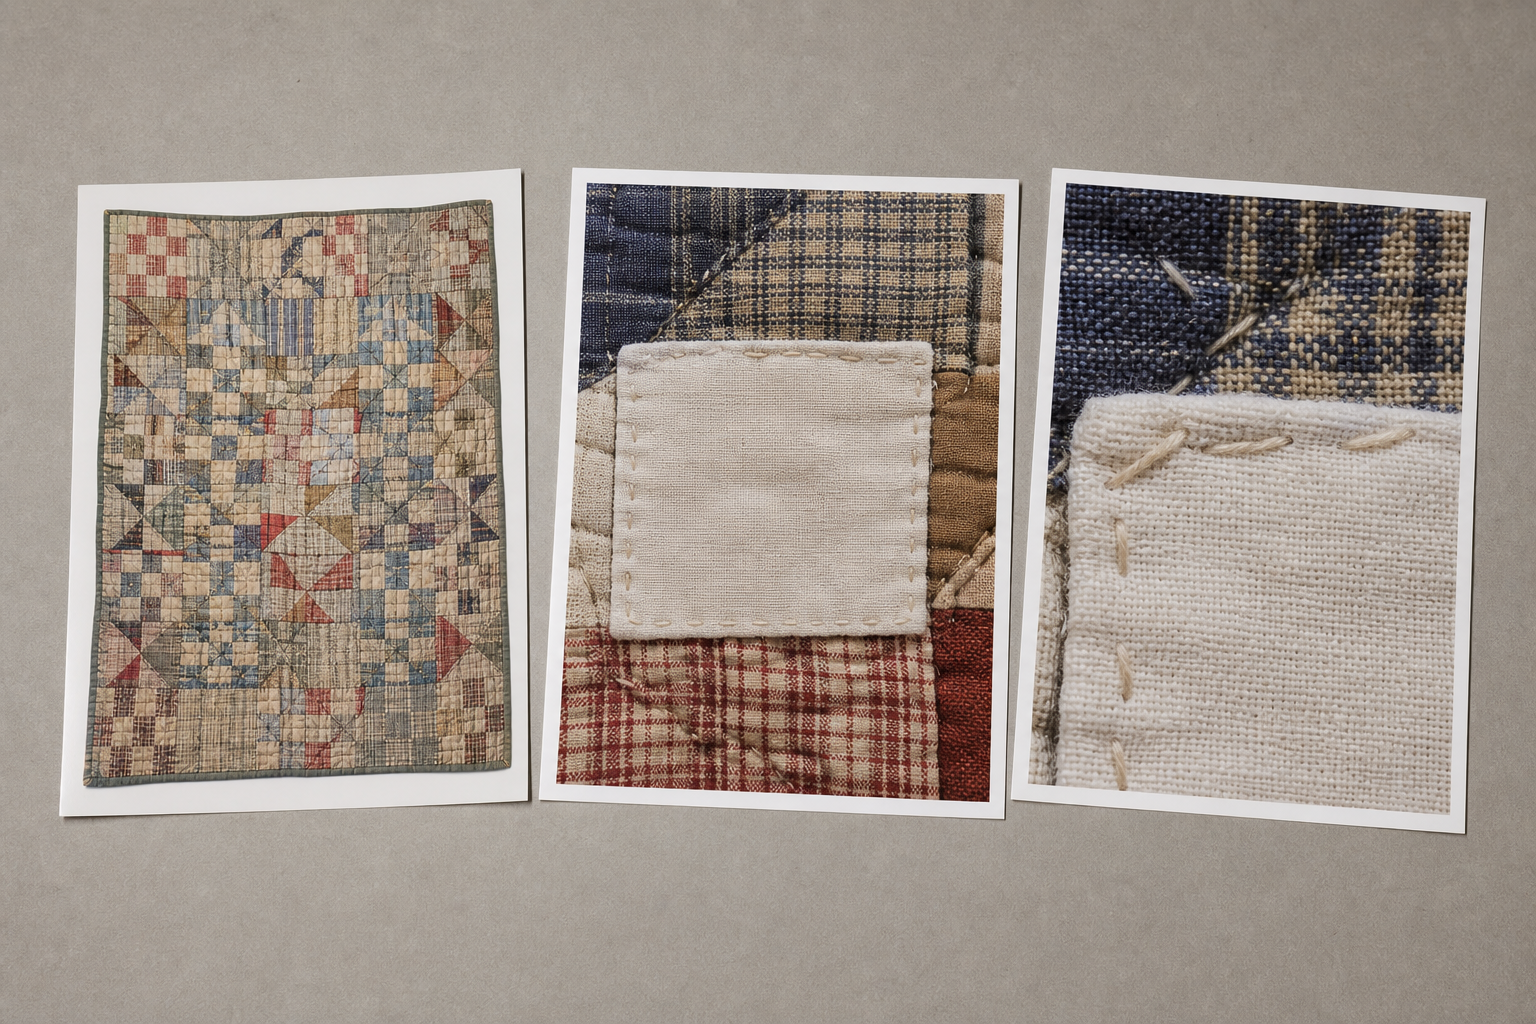
For each label, capture at least three distinct views. Each one answers a different archival question.
Frame 1: location and context
Photograph enough of the quilt back to show where the label sits. Include a recognizable edge, corner, hanging sleeve, or backing pattern. This frame establishes that the label belongs to the documented quilt and records its placement.
Keep the camera parallel to the textile. A sharply angled photograph may look dynamic, but it distorts the label and makes later measurement or OCR less reliable.
Frame 2: the complete label
Fill most of the frame with the label while retaining a narrow border of surrounding quilt fabric. Do not crop away seams, embroidered edges, detached corners, or nearby inscriptions. These details can help distinguish an original label from a later addition.
Use the camera's highest practical resolution. Tap or focus on the writing rather than on a nearby seam. Review the image at full magnification before moving the quilt; a thumbnail can conceal motion blur.
Frame 3: difficult writing or construction
Capture one or more close details of faded names, dates, embroidered lettering, signatures, stains, or attachment stitches. A close frame is especially valuable when a crease crosses a word or a label includes several writing methods.
If the project uses a scale, place it beside the label rather than over it. Capture an additional clean frame without the scale for publication and text recognition.
Control light for faded ink and textured cloth
Textile texture creates tiny highlights and shadows. Strong directional light can make the weave look dramatic while breaking handwritten strokes into disconnected fragments. Direct flash may produce glare on synthetic fabric, transfer film, metallic ink, or glossy laundry-marker lines.
Begin with two diffused lights positioned at roughly 45 degrees on opposite sides of the label. This produces even illumination and suppresses deep texture shadows. If the writing remains difficult to see, take an additional frame with one light moved lower to the surface. Raking light may reveal indentations, embroidery, or erased pencil, although it should supplement rather than replace the evenly lit record.
Watch the brightest fabric areas. White cotton can lose all visible weave when overexposed. Reduce exposure until the cloth retains texture, then lift the midtones gently during editing if necessary.
A neutral reference card in the first frame of each lighting setup helps correct color later. Accurate color matters because a warm cast can conceal brown ink on cream cloth, while aggressive automatic correction can make age-related discoloration look like damage.
Choose camera settings that favor evidence over style
Portrait-style blur is undesirable for documentation. The label, seams, and surrounding cloth should remain within the sharp zone.
On a camera with manual controls, use a moderate aperture such as f/5.6 to f/8, a low ISO, and a tripod-supported shutter speed. On a phone, avoid portrait mode and digital zoom. Move the camera closer while remaining within its reliable focusing distance. If the phone automatically switches lenses for macro capture, inspect the result carefully because some macro modules produce lower detail or stronger edge distortion.
Capture in RAW when the archive already has a plan for storing and processing RAW files. Otherwise, a carefully exposed, full-resolution JPEG is more useful than an unmanaged proprietary file. The crucial point is to retain the untouched original alongside any edited derivative.
Clean the label image without erasing evidence
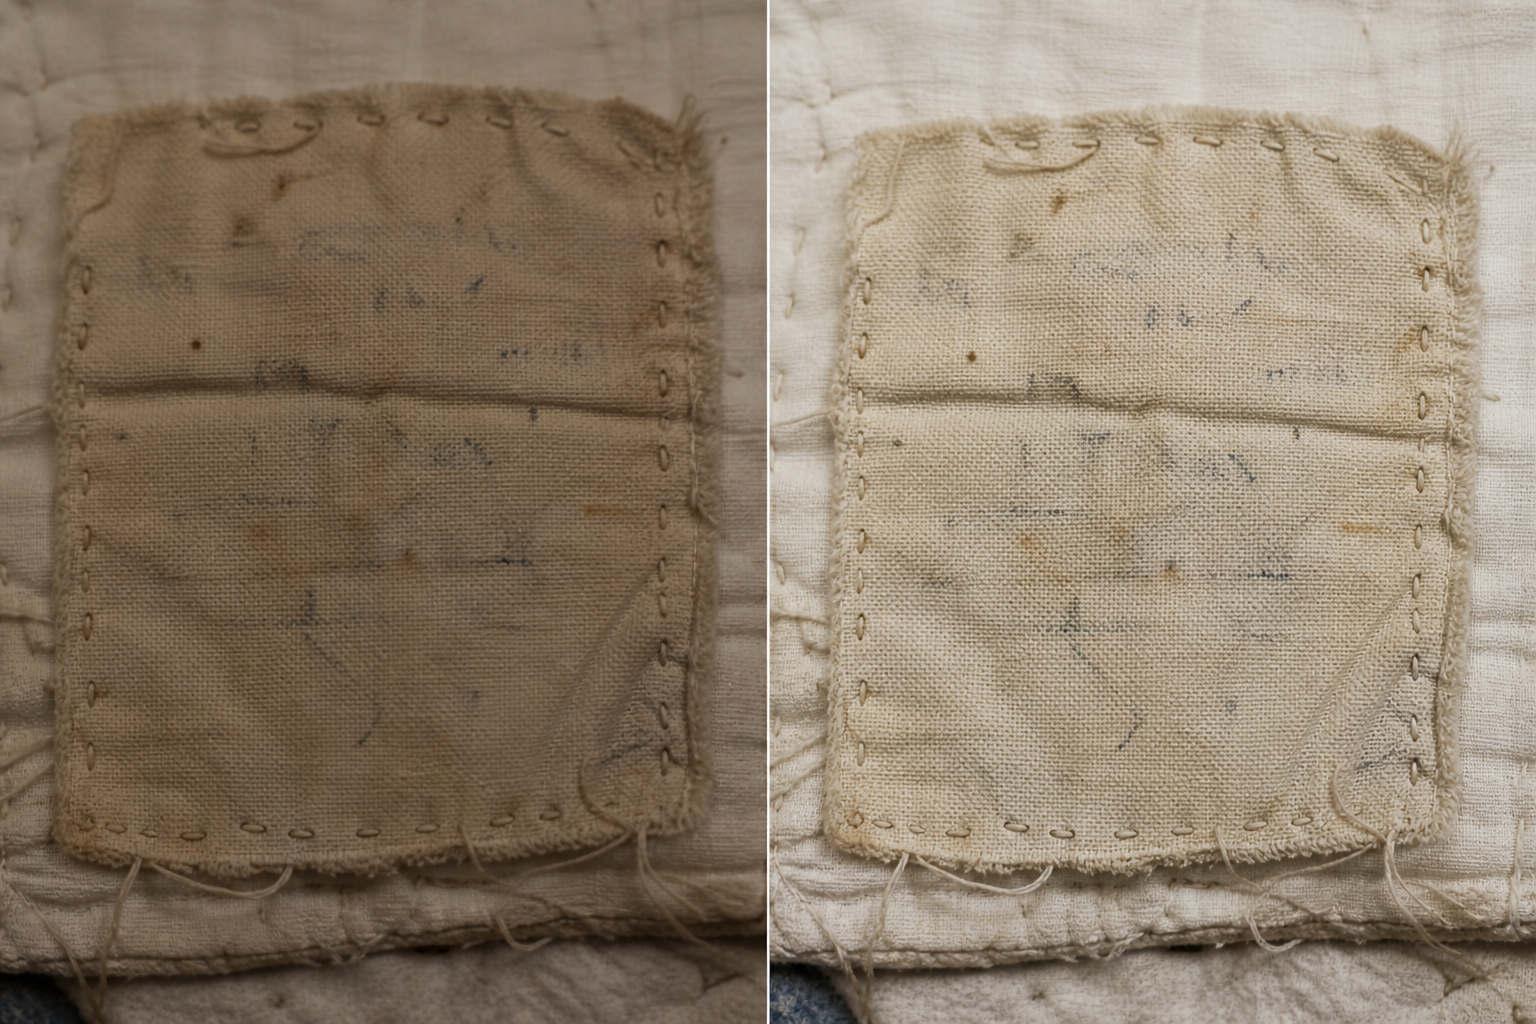
Editing should improve access while preserving the object's visual facts. Make adjustments on a duplicate, never on the only original.
A conservative correction sequence is:
- Rotate the image so the label edges are naturally aligned.
- Correct lens perspective only when the camera could not be positioned parallel.
- Set white balance using the reference frame or a known neutral area.
- Adjust exposure and midtone contrast modestly.
- Apply restrained noise reduction if a high ISO was unavoidable.
- Add light sharpening after resizing, not repeatedly at every stage.
- Crop an access copy while retaining the uncropped original.
Avoid whitening the fabric until it resembles new paper. Yellowing, staining, ink halos, and variations in the weave may be historically or materially significant. Likewise, do not use generative removal to reconstruct missing letters, erase stains behind words, or invent the edge of a damaged label.
The AI Photo Editor can help create a clearer access derivative, but archival guardrails still apply: preserve the original, keep adjustments reversible when possible, and document any operation that changes more than overall tone or framing.
For online catalogs, make a separate web copy with dimensions suited to the catalog layout. The image resizing tool can create consistent access dimensions without altering the preservation master. If page speed matters, test a duplicate with image compression and inspect names, dates, and thin pen strokes at 100 percent before publishing.
Test OCR, but treat it as a draft assistant
Handwritten textile labels are difficult OCR targets. Uneven cloth, decorative capitals, fading, stitched letters, and curved baselines all reduce accuracy. Even printed transfer labels can contain logos, borders, or illustrations that disrupt reading order.
Start OCR from the evenly lit close-up, not the full quilt photograph. Rotate the writing to its normal reading orientation and crop enough background to isolate the label without cutting off characters. If the label contains several columns or separate inscriptions, process them individually as well as together.
Use the image OCR tool to obtain a first-pass transcription, then compare every field against the image. Names and dates deserve special attention because a single incorrect character can disconnect the quilt from family or collection records.
Common recognition errors include:
| Label feature | Likely OCR error | Human verification tactic |
|---|---|---|
| Looping cursive capitals | S, L, and G confused | Compare repeated initials and signatures |
| Faded vertical strokes | Missing i, l, or 1 | Inspect an alternate exposure |
| Quilting stitches crossing ink | Extra punctuation | Compare the stitch path outside the word |
| Decorative border | False characters at line edges | Crop and rerun the central text area |
| Embroidered date | Digits merged or separated | Review the thread path at high magnification |
| Patterned backing visible through thin cloth | Random words or symbols | Use a tighter crop and gentler contrast |
Never silently guess an unreadable character. Use a consistent notation such as [illegible], [name?], or a question mark in a dedicated uncertainty field. Preserve original spelling, capitalization, and punctuation in the diplomatic transcription. A second normalized field can expand abbreviations or supply standardized place names for searching.
Separate transcription from interpretation
A trustworthy catalog distinguishes what the label says from what the cataloger concludes.
For example, a label might read:
Pieced by M. Carter, Riverbend, '78
The direct transcription should retain that wording. Separate catalog fields might record the probable maker as “Margaret Carter,” the location as a standardized municipality, and the year as 1978. Those expansions should cite another source or be marked as interpretations.
A useful record structure includes:
- Object identifier
- Image filename and capture date
- Label location on the quilt
- Writing method, such as ink, embroidery, print, or transfer
- Exact transcription
- Normalized names and dates
- Uncertain readings
- Photographer or recorder
- Verification status
- Related exhibition, donation, or maker records
- Rights and publication restrictions
Ask a second person to verify transcriptions containing names, dates, dedications, or accession information. Independent checking is more reliable than asking the original transcriber to reread their own entry immediately.
Name and convert files without losing the record chain
File names should sort predictably and connect every derivative to its source. One practical pattern is:
QG-2026-014_label_context_01.jpg
QG-2026-014_label_full_01.jpg
QG-2026-014_label_detail_ink_01.jpg
Use lowercase extensions consistently and avoid spaces, slashes, personal nicknames, or ambiguous words such as final. If a corrected derivative is required, add a controlled suffix such as _access rather than overwriting the source.
When an archive receives HEIC, TIFF, PNG, and JPEG files from many contributors, choose formats according to purpose instead of converting everything automatically. Keep accepted preservation originals in their native form when policy permits, then create standardized access copies. The image conversion tool is useful for producing compatible derivatives, but conversion should not discard the only high-quality source.
Embed essential metadata where the archive supports it, but do not rely on embedded metadata alone. Catalog systems, spreadsheets, and sidecar records are easier to audit and migrate. Keep the stable object identifier in both the filename and the catalog entry.
Assemble a review packet for remote verification
Guild historians and family members may recognize a signature or place name that collection staff cannot identify. A compact review PDF can gather the relevant evidence without sending an entire folder of oversized files.
Include the quilt overview, label context, close-up, proposed transcription, and clearly marked uncertainties. The image-to-PDF tool can combine these views into a convenient packet. Keep the photographic images large enough for reviewers to zoom into individual strokes.
Do not present uncertain text as established fact in the packet. Use prompts such as “Could this surname be Carter or Carver?” and show the exact detail that caused the ambiguity. Record who supplied each correction and when it was accepted.
If a packet contains donor addresses, living-person information, or restricted ownership documentation, remove those pages from the public copy. A convenient review file should not become an accidental disclosure channel.
Run a final quality audit
Before returning the quilt or closing an intake session, inspect the complete record. Recapturing a blurred label months later may be impossible.
Use this checklist:
- The quilt identifier is visible in the session record.
- Front and back views refer to the same object.
- A context image shows the label's location.
- The full label is sharp from edge to edge.
- Important handwriting is not clipped.
- Highlights retain fabric texture.
- At least one frame has even, neutral lighting.
- Faded or damaged passages have detail views.
- The untouched original is preserved.
- Edited files have distinct names.
- OCR output has been checked character by character.
- Guesses and expansions are labeled as interpretations.
- Names and dates received a second review.
- Publication rights and privacy restrictions are recorded.
- Files open correctly outside the capture device.
- A backup exists in a separate location.
Preserve both legibility and uncertainty
The best quilt-label record is not necessarily the brightest or most polished image. It is the record that another person can inspect, understand, and verify years later. That requires clear photographs, consistent identifiers, cautious editing, and honest treatment of uncertain writing.
A three-frame photographic set, supported by a checked transcription and sensible derivatives, is achievable for a volunteer guild as well as a formal collection. The method protects small physical details while turning otherwise hidden names, dates, and stories into searchable archival information.