Transparent PNG Edge Cleanup for Enamel Pin Marketplace Listings
A practical guide to photographing, cutting out, resizing, and checking enamel pin images so transparent edges remain clean across marketplace themes and screen sizes.
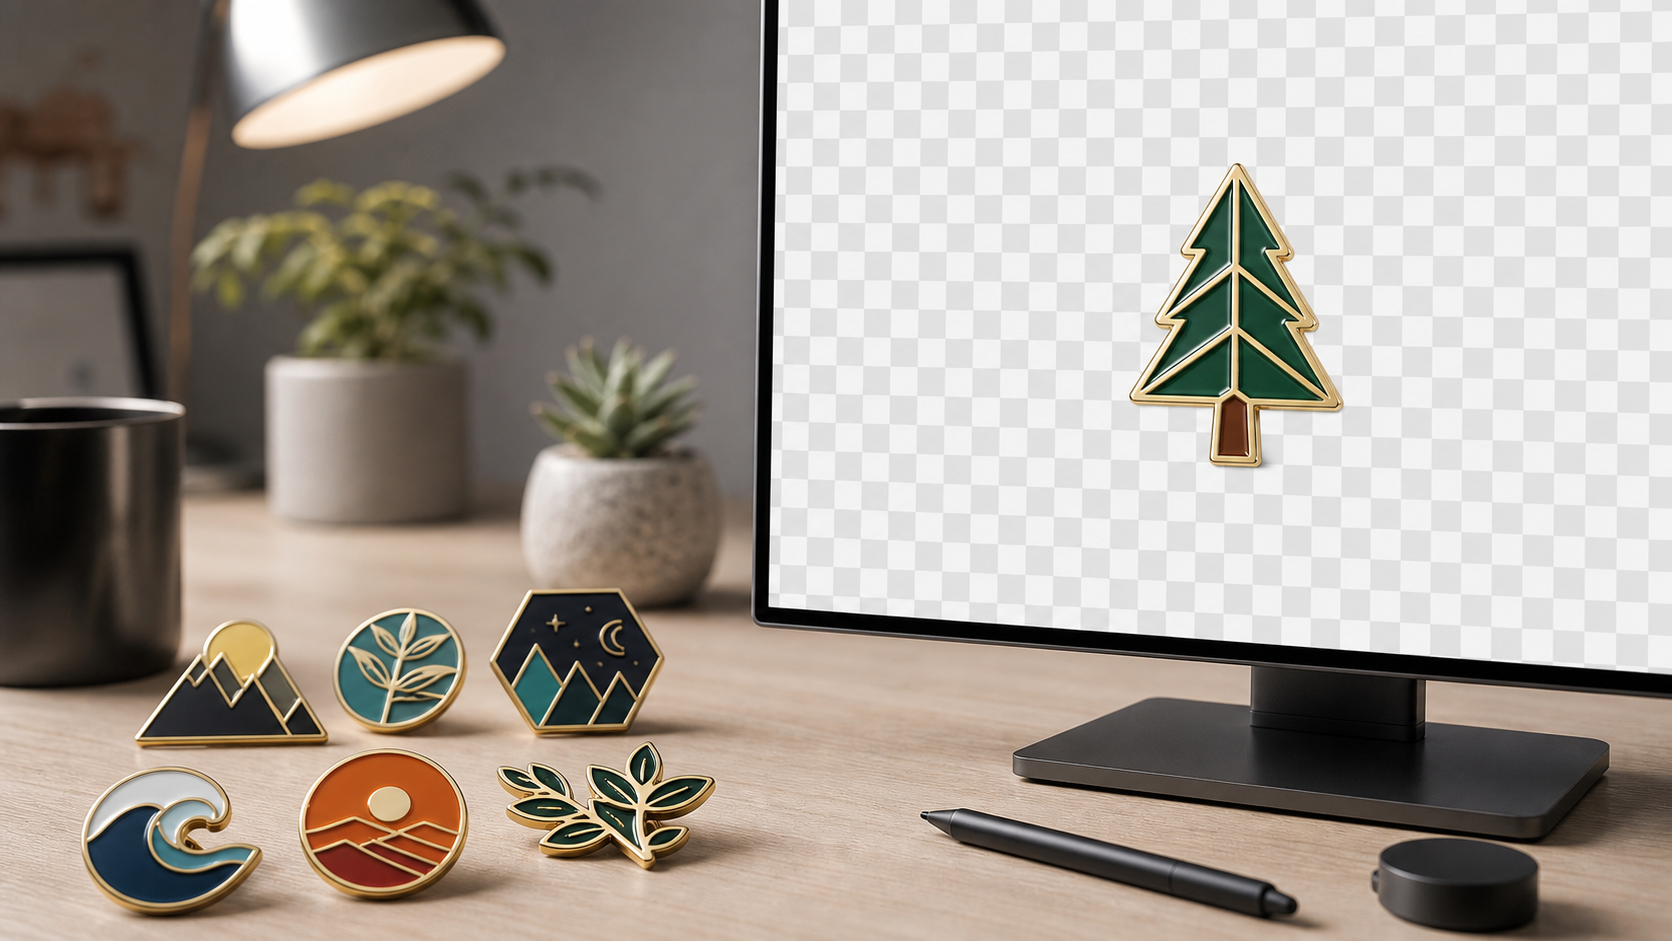
Transparent PNG Edge Cleanup for Enamel Pin Marketplace Listings
A transparent product image sounds simple: remove the background, export a PNG, and upload it. Enamel pins make that deceptively difficult. Their polished outlines reflect the photography surface, narrow posts create fragile selections, and pale highlights can disappear when the finished image is displayed on a white marketplace page.
The result may look acceptable over a transparency grid but fail after publication. A gray fringe appears around the metal. A white halo surrounds dark enamel. The pin looks smaller than neighboring products because its canvas has excessive empty space. Rubber clasps may even appear detached after an aggressive background removal.
This guide presents a repeatable method for preparing clean transparent PNGs for enamel pin listings. It is intended for small shops, catalog teams, convention sellers, and designers who need consistent assets without building an elaborate studio. The same principles also apply to badges, charms, brooches, small medallions, and other reflective accessories.
Define the Listing Standard Before Editing
Consistency begins with a small specification. If each photograph is edited by eye, differences accumulate across the catalog: one pin fills 90 percent of its canvas, another fills 60 percent, and a third has a warmer metal edge because it was photographed on a wooden desk.
Write down the following rules before preparing a batch:
- Master files retain the highest useful resolution from the camera.
- The product is centered by its visible silhouette, not necessarily its mounting post.
- The longest product dimension occupies a consistent percentage of the export canvas.
- Transparent exports use PNG unless the destination explicitly accepts another alpha-capable format.
- Every cutout is inspected over light, dark, and saturated backgrounds.
- Shadows are either consistently retained or consistently removed for the chosen listing set.
- A separate flattened copy is made when a marketplace requires a solid background.
A useful starting point is to let the pin occupy roughly 78 to 86 percent of the canvas on its longest side. This leaves enough breathing room for irregular shapes while keeping products visually comparable. The exact percentage matters less than applying the same rule throughout one storefront.
Do not resize the only master copy. Keep a full-resolution cutout, then create destination-specific versions with the image resize tool. That makes later marketplace changes much easier to handle.
Why Enamel Pins Produce Difficult Cutout Edges

Several physical characteristics make pins unusually unforgiving subjects.
First, polished metal behaves like a curved mirror. A silver rim photographed on white paper may reflect that paper and become almost white. An automatic cutout system can interpret the reflection as background and erase part of the rim. A dark camera, sleeve, or room may create black reflections that look like dirt after isolation.
Second, many pins contain narrow structures. Antennae, lettering-shaped metal dividers, chains, posts, safety-pin mechanisms, and small gaps can be only a few pixels wide in a marketplace export. A selection that is slightly too tight can sever them.
Third, enamel and epoxy surfaces often produce bright specular highlights. These highlights are legitimate product detail, but they resemble holes or background patches to tools that rely heavily on brightness.
Finally, the original background contaminates semi-transparent edge pixels. A pixel on the boundary may contain 40 percent product and 60 percent white backdrop. When that pixel is placed over a dark page, its stored white component becomes a pale halo. This is commonly called color contamination or edge matting.
Understanding these causes changes the editing goal. You are not merely deleting a background. You are preserving the believable transition between reflective metal and whatever background the marketplace uses.
Photograph for Separation, Not Immediate Perfection
A better source photograph reduces manual cleanup. The best capture background is not always the same color as the final listing background.
Choose a matte surface that contrasts with both the enamel colors and the outer metal. Mid-gray, muted blue, or subdued green often works better than pure white. Avoid a background that matches a dominant color in the product. A black-bordered pin on black card may be visually dramatic, but it gives a cutout tool very little boundary information.
Use soft, broad light. A small bare lamp creates hard reflections that clip to white and conceal engraved details. Window light through diffusion, a modest softbox, or a lamp bounced into white foam board produces more controllable highlights. Place neutral cards around the pin if the metal is reflecting colorful walls or clothing.
Keep the camera parallel to the pin face unless the listing intentionally shows depth. Even a small tilt changes the apparent border thickness from one side to the other. Use a tripod or stable support, enable a short timer, and capture enough resolution that the narrowest important feature is several pixels wide after export.
Before moving the product, capture supporting views:
- A straight-on front view for the transparent primary asset.
- A slight angle showing metal thickness and surface finish.
- A rear view showing posts, clasps, stamps, or maker marks.
- A scale view beside a ruler or familiar object, if marketplace rules permit it.
Only the primary view necessarily needs transparency. Context images often look more credible with a real surface and natural shadow.
Prepare the Source Without Damaging Fine Detail
Begin with global corrections while the background is still present. Adjust exposure so the brightest metal highlights retain some tonal information. Neutralize an obvious color cast, but do not force every reflective region to identical gray. Metal looks metallic because it contains a range of dark and light reflections.
Remove isolated dust from the background if it might confuse automatic selection. Inspect the pin face for fibers, fingerprints, adhesive residue, and packaging lint. Cleaning these artifacts before background removal avoids mistaking retouching marks for edge defects.
Use moderate sharpening, if any. Heavy sharpening creates bright and dark outlines around the silhouette. Those outlines remain after isolation and can resemble a halo. Noise reduction should also be restrained because strong smoothing may merge a narrow metal border into the backdrop.
If the source is stored in an unsuitable format, create a high-quality working copy with the image converter. Avoid repeatedly converting between lossy formats. Each JPEG generation can introduce block artifacts near diagonal edges, precisely where the cutout needs accurate information.
Make the Initial Cutout Conservatively
Use an automatic background removal or an assisted editor for the first pass, then assume that detailed inspection will still be necessary. The AI photo editor can help establish the initial separation and address obvious background regions, but reflective edges should always receive a human check.
Favor a slightly generous mask over an aggressive one. It is easier to remove a thin remnant than to reconstruct a missing antenna, chain link, or polished border. At high magnification, look for four common problems:
- Missing sections where bright metal blended into the capture surface.
- Background wedges trapped inside narrow concave corners.
- Rough stair-stepping along curves and diagonal edges.
- Partially erased posts, clasps, chains, or cutout holes.
Do not judge the cutout only at extreme zoom. A boundary can appear imperfect at 800 percent yet look natural at delivery size. Alternate between close inspection and a 100 percent preview.
Treat Interior Holes Separately
Pins shaped like letters, frames, loops, scissors, arches, or animals may contain intentional open areas. These holes often need separate selection because they are disconnected from the outer background.
Check each hole against the original photograph. Enamel recesses can look like openings, while real openings can appear filled by shadow. If uncertain, compare the rear or angled reference view rather than guessing from color alone.
Small holes require particular caution. A genuine opening that becomes smaller than one pixel after resizing may produce a flickering or dirty-looking mark. In that case, preserve it in the master but assess whether the marketplace-sized copy reads better with a carefully simplified opening.
Remove Halos Without Cutting Into the Metal
A halo is best corrected by repairing contaminated boundary pixels, not by repeatedly shrinking the entire mask. Uniform contraction can remove the fringe, but it also makes the product subtly smaller and damages narrow features.
Use this sequence:
- Place the cutout over a dark neutral background and locate pale contamination.
- Compare the same location over white to distinguish contamination from a genuine bright reflection.
- Refine only the affected edge section.
- Replace contaminated edge color with a nearby product color while retaining partial transparency.
- Preview again at the actual export dimensions.
For a gold-plated edge photographed on white, the correct replacement is rarely flat yellow. Sample a nearby midtone from the same metal rim and apply it gently. Preserve variations that communicate curvature.
Dark halos require the same restraint. A dark line may come from the original background, but it may also be a legitimate reflection or recessed edge. Examine the unedited source before removing it.
Preserve Natural Antialiasing
A transparent edge should usually contain partially transparent pixels. Deleting every pixel that is not fully opaque creates a hard, jagged silhouette. Excessive feathering causes the opposite problem: a soft outline that makes a small metal object appear out of focus.
For compact marketplace images, an edge transition of roughly one or two output pixels is often enough. This is not a fixed radius to apply blindly. It describes the visible result at final size. A large master file may need a wider transition before reduction so that resizing produces a clean boundary.
Decide Whether the Shadow Belongs in the Asset
Natural shadows provide depth, but transparent product catalogs demand consistency. A pin with a soft lower-right shadow looks misplaced if another product has no shadow or uses light from the opposite direction.
Use the following decision table:
| Listing context | Shadow recommendation | Reason |
|---|---|---|
| Marketplace search grid | None or a very subtle consistent shadow | Keeps products comparable and avoids cropped shadow edges |
| Brand storefront with controlled cards | Soft standardized shadow | Adds depth when every card uses the same presentation |
| Documentation or parts catalog | Usually none | Prioritizes silhouette and construction details |
| Promotional composition | Scene-dependent | The shadow should match the designed background and light direction |
| Printable inventory sheet | None | Prevents muddy output and saves toner |
If you retain a shadow, keep it on a separate layer or save a shadow-free master. Real photographed shadows often contain the color of the capture surface, so simply reducing their opacity may leave a gray or blue stain on a new background.
Standardize Canvas Size and Visual Scale
Two pins with identical pixel dimensions can look mismatched if one nearly touches the canvas edges and the other floats in wide transparent margins. Measure the visible object bounds, not merely the document size.
For each product:
- Trim accidental transparent excess.
- Determine the longest visible dimension of the complete pin or pin set.
- Resize proportionally to the catalog standard.
- Place the object on a fixed square or destination-specific canvas.
- Align by visual mass and check the result beside neighboring listings.
Visual centering sometimes differs from mathematical centering. A crescent moon, long-tailed animal, or pin with a hanging chain may feel off-center even when its bounding box is perfectly centered. Make small optical corrections while preserving a documented maximum movement, such as a few percent of the canvas width.
Sets require a separate rule. If two pins are sold together, scale them according to their true relative sizes rather than enlarging the smaller item independently. Arrange them with enough space that their edges and shadows do not merge at thumbnail size.
Run a Three-Background Edge Audit
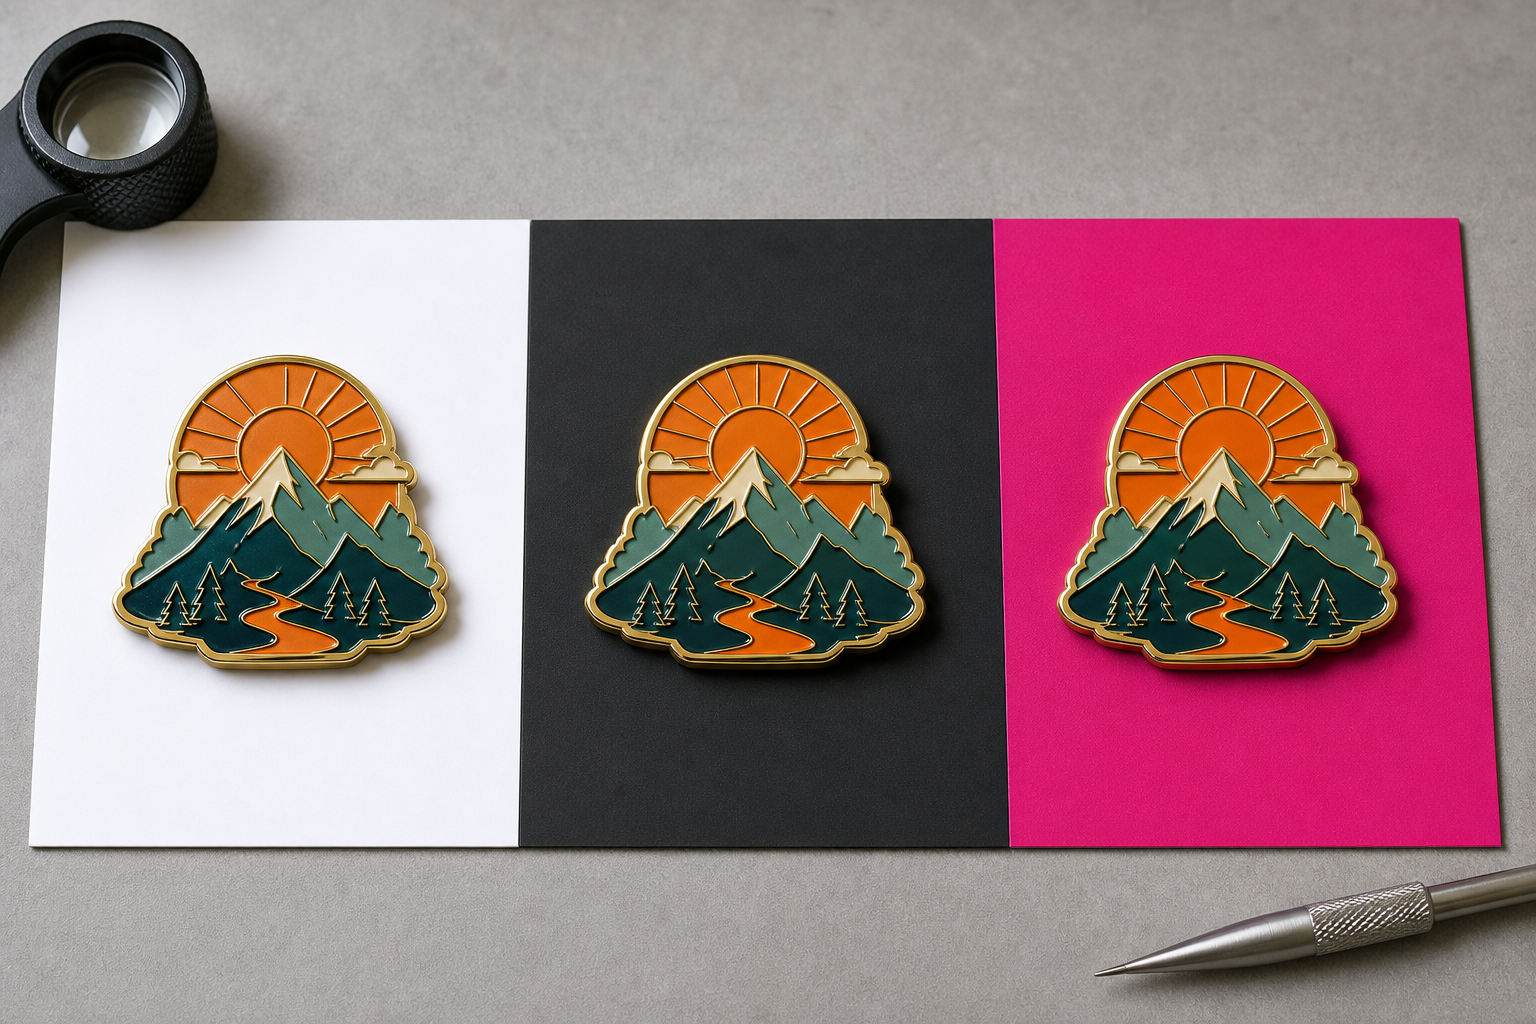
The transparency grid is an editing aid, not a realistic publishing environment. Every finished cutout should be inspected over at least three solid backgrounds:
- White or very light gray reveals dark contamination and dirty shadows.
- Charcoal reveals white fringes and missing pale metal.
- A saturated color such as magenta or green reveals semi-transparent leakage that neutral backgrounds can hide.
Use backgrounds temporarily; do not flatten them into the transparent master. Inspect the full silhouette, then focus on narrow features, interior holes, and reflective corners. Also view the image at its expected listing size. A defect that matters in the master may disappear after reduction, while a weak antenna or clasp may vanish completely.
A useful audit combines visual questions with simple pass criteria:
| Check | Pass condition |
|---|---|
| Outer rim | Continuous, without obvious background-colored fringe |
| Interior openings | Match the physical product and contain no leftover backdrop |
| Fine structures | Remain connected and recognizable at listing size |
| Transparency | No isolated opaque dust pixels outside the product |
| Visual scale | Matches comparable catalog items |
| Centering | Feels balanced in a search-grid thumbnail |
| Shadow | Matches the chosen catalog standard |
If possible, inspect the asset in a browser mockup with both light and dark themes. This catches theme-dependent problems before publication.
Export PNGs That Survive Marketplace Processing
PNG is the safest general choice for a full alpha channel. Export in an RGB color space intended for ordinary web display, commonly sRGB. Preserve transparency and avoid indexed-color settings when they visibly reduce edge quality or enamel gradients.
File-size reduction should happen after the visual result is approved. Transparent images can become unexpectedly large because every pixel still carries color and alpha information. Begin by removing unnecessary dimensions and metadata, then apply lossless or carefully judged compression with the image compression tool.
Always reopen the compressed result and repeat the dark-background check. Some optimization methods reduce the number of available transparency levels or colors. That may be harmless for flat artwork but visible around reflective edges and soft shadows.
Use descriptive filenames that remain meaningful outside the storefront database. A practical pattern is:
design-name_finish_view_size.png
For example, a shop might use moth-pin_silver_front_1600.png. Avoid relying solely on internal product numbers unless every person handling the files can resolve those numbers quickly.
Build a Master-and-Derivative File Set
A compact file structure prevents future edits from degrading the asset. Keep:
- The original camera file.
- A corrected full-resolution source with the background intact.
- A full-resolution transparent master.
- A marketplace-sized transparent PNG.
- Any required white-background or lifestyle derivative.
The transparent master should not contain destination-specific sharpening, a baked-in card color, or a permanently flattened promotional shadow. Derivatives can be regenerated when platform dimensions change.
If listing images must also be assembled into a printable stock or review packet, convert approved frames with image to PDF rather than using screenshots of the marketplace page. Direct image input preserves predictable dimensions and avoids browser interface clutter.
Troubleshooting Common Pin Cutout Failures
The silver rim disappears on white pages
The cutout may be correct, but the product lacks enough tonal separation from the page. Compare the source to determine whether the rim genuinely contains near-white reflections. Restore missing mask areas first. If the rim is present but visually weak, make a subtle localized tonal correction in the derivative rather than adding a heavy universal outline.
A pale outline appears only on dark themes
This usually indicates white background contamination in partially transparent boundary pixels. Repair the edge color while preserving antialiasing. Contracting the entire mask should be a last resort because it can damage thin structures.
The edge looks crunchy after compression
Reopen the pre-compression export and compare it at the same scale. If the original is clean, the optimization settings are too aggressive. Restore a broader color palette or more transparency levels, and prioritize edge fidelity over a small additional size reduction.
Tiny posts or chains vanish in thumbnails
Confirm that the features exist in the full-resolution master. If they do, experiment with output scaling and restrained destination sharpening. Do not thicken parts so much that the listing misrepresents the product. An angled supporting photograph can communicate construction details that the main thumbnail cannot show reliably.
The pin looks smaller than neighboring products
Check transparent padding and the percentage of canvas occupied by the visible silhouette. Trim accidental empty space, then apply the documented scale rule. Do not enlarge each asset until it merely looks similar; products with genuinely different dimensions should retain an intentional relationship when that relationship matters to buyers.
Final Publication Checklist
Before uploading an enamel pin cutout, verify the following:
- The H-shaped posts, chains, antennae, clasps, and other narrow parts are intact.
- Bright reflections have not been mistaken for transparency.
- Interior holes match the real object.
- No white or dark fringe appears on contrasting backgrounds.
- Antialiasing is smooth at the actual listing dimensions.
- The image uses the catalog's standard canvas and visual scale.
- Optical centering has been checked in a thumbnail grid.
- The shadow treatment matches other products in the same collection.
- The file is in the required color space and format.
- The optimized export has been reopened and visually inspected.
- The full-resolution transparent master remains archived separately.
- Supporting angle and rear photographs show details that transparency cannot communicate.
A Clean Edge Is Part of Product Accuracy
Transparent listing images are not just decorative assets. They influence how buyers perceive finish quality, scale, and construction. A clipped rim can make plating look uneven. A broad halo can make the product appear cheaply composited. Inconsistent padding can suggest that two similarly sized pins are dramatically different.
The most reliable approach is conservative: capture clear separation, preserve a high-resolution master, refine reflective edges locally, and inspect every export on backgrounds that expose contamination. Once canvas size, scaling, shadow treatment, and audit criteria are documented, a small shop can produce a coherent catalog without re-solving the same decisions for every design.
That consistency also makes future reuse easier. The same clean master can support marketplace cards, collection announcements, line sheets, convention menus, and printed inventory records while the original product boundary remains accurate.