Barcode Shelf Label Photo OCR Cleanup for Inventory Counts
A practical guide for turning rushed shelf label photos into cleaner OCR notes, count sheets, and searchable PDFs for stockrooms, retail aisles, and small warehouses.
Barcode Shelf Label Photo OCR Cleanup for Inventory Counts
Inventory counts often fall apart in small, ordinary ways. A shelf label is photographed at an angle. A bin location is half hidden behind shrink wrap. A barcode is sharp enough for a human to recognize but too noisy for OCR. A temporary sticker sits over part of the printed SKU. By the time the count file reaches a manager, the team has a pile of photos, a spreadsheet with gaps, and several items marked as unknown.
This guide is for teams that use shelf label photos as supporting evidence during cycle counts, backroom audits, retail resets, stockroom cleanups, or small warehouse reconciliation. It focuses on making label photos easier to read, easier to convert into searchable notes, and easier to file as proof after the count is finished.
The goal is not to replace a proper barcode scanner or inventory platform. The goal is to make the photo-based parts of the count less messy. When a phone camera is the fastest tool available, a few capture rules and cleanup steps can save hours of manual correction later.
You can use this guide whether you are preparing a handful of images for a supervisor or building a searchable packet from hundreds of shelf photos. Along the way, ConvertAndEdit tools such as Image OCR, Image to PDF, Resize Image, Compress Image, and Convert Image can help turn raw phone images into cleaner review files.
Why Shelf Label Photos Are Harder Than They Look
Shelf labels are small, reflective, and often surrounded by visual clutter. They may include a barcode, SKU, item name, vendor code, location code, price, date, quantity marker, and handwritten note. OCR software has to separate all of that from shadows, shelf edges, packaging, dust, plastic label holders, and motion blur.
A human can usually infer what a label says because we understand context. OCR does not have that advantage. It sees contrast, shapes, edges, and character patterns. If a barcode line bleeds into nearby text, if the label is tilted, or if the image is compressed too aggressively, the extracted text can become unreliable.
The most common problems are predictable:
- The label is photographed from above or below, causing stretched characters.
- The phone focuses on the box behind the label instead of the label itself.
- Clear plastic holders create glare across the SKU.
- Wide-angle phone lenses curve the shelf edge near the frame corners.
- Labels are captured together in one wide aisle photo, leaving each label too small.
- Screenshots from inventory apps are mixed with real photos, creating inconsistent text sizes.
- Images are sent through chat apps before OCR, adding heavy compression.
A cleaner count packet starts before OCR. It starts with deciding what each photo must prove.
Decide What the Photo Must Capture
Before taking photos, define the minimum useful information. For shelf label counts, that usually means three things:
- The location: aisle, bay, shelf, bin, or slot.
- The item identity: SKU, barcode, item name, or vendor number.
- The count context: visible stock, empty slot, damaged label, mismatch, or exception.
Not every image needs to show every detail. A photo used to prove an empty location needs more surrounding shelf context. A photo used to extract a SKU needs the label close and sharp. A photo used to show a mismatch may need both the product and the shelf label in the same frame.
Use this simple decision table before the count starts:
| Count situation | Best photo type | OCR priority | Human review priority |
|---|---|---|---|
| Normal item verification | Tight label photo | SKU, item name, location | Confirm label belongs to slot |
| Empty shelf or missing item | Wider shelf photo plus tight label photo | Location code | Show empty physical space |
| Product-label mismatch | Product and label together, plus tight label | SKU and item name | Compare package to label |
| Damaged or faded label | Multiple close photos from different angles | Any readable text | Preserve visual evidence |
| Reset or relabeling project | Sequence of labels in order | Location and item text | Keep shelf order clear |
The mistake is trying to make one photo serve every purpose. A single wide shot may be useful as evidence, but it rarely produces dependable OCR. A tight label shot may be great for OCR, but it may not prove where the label was located. For exceptions, take both.
The Capture Standard: Make the Label Boring

The best OCR photo is visually boring. It has no dramatic angle, no glare, no artistic depth of field, and no clever framing. It is square to the label, evenly lit, and close enough that the printed characters are comfortably visible.
A practical capture standard for shelf label photos:
- Hold the phone parallel to the label.
- Fill most of the frame with the label, but leave a small border around it.
- Tap the label on the screen to focus before shooting.
- Avoid using digital zoom unless the camera quality remains sharp.
- Take a second photo if glare crosses any part of the SKU or location code.
- Keep fingers, scanners, pens, and lanyards out of the frame.
- Photograph one label at a time when OCR matters.
If the label is behind a glossy plastic strip, shift your position slightly left or right rather than tilting the phone steeply. A small side move can remove glare while preserving the label shape. If the area is dim, use steady overhead light or a small portable light. Phone flash often creates a bright reflection on plastic holders, so test it before relying on it.
For very small labels, move closer instead of taking a wide photo and cropping later. Cropping cannot recreate detail that was never captured. If the printed characters are only a few pixels high in the original image, OCR will struggle even after cleanup.
A Good Label Photo Has Four Traits
A usable label photo is not just sharp. It is structured.
| Trait | What it means | Quick check |
|---|---|---|
| Square | The label edges look horizontal and vertical | The barcode is not leaning sharply |
| Close | Text occupies enough pixels | You can read the SKU without zooming far in |
| Even | No bright glare or deep shadow covers text | White label areas look consistent |
| Isolated | The label is not lost among packaging | OCR can ignore nearby clutter |
If you can train a team on only one rule, use this: one label, straight on, close enough to read. That rule prevents most downstream cleanup problems.
File Naming That Helps Later
Many inventory photo sets become painful because the images arrive with names like IMG_4821.jpg, IMG_4822.jpg, and IMG_4823.jpg. If the photos are reviewed immediately, that may be tolerable. If they are reviewed days later, it becomes a guessing exercise.
A simple naming pattern helps the count packet stay understandable:
site-area-aisle-bay-sequence-status
Examples:
north-stockroom-a03-b02-001-normal.jpgnorth-stockroom-a03-b02-002-empty.jpgnorth-stockroom-a03-b02-003-mismatch.jpgstore12-salesfloor-c07-b05-014-damaged-label.jpg
If renaming every image during the count is too slow, group photos into folders by area or aisle as soon as possible. Even a basic folder structure is better than one giant camera roll. For small teams, the person taking photos can call out the location while another person logs it in a sheet. For solo counts, take a quick area marker photo before each section, such as the aisle sign or bay number, then capture the labels in order.
Do not depend entirely on image timestamps. Timestamps are useful, but they do not explain where a sequence began, whether a count was interrupted, or why a photo was taken.
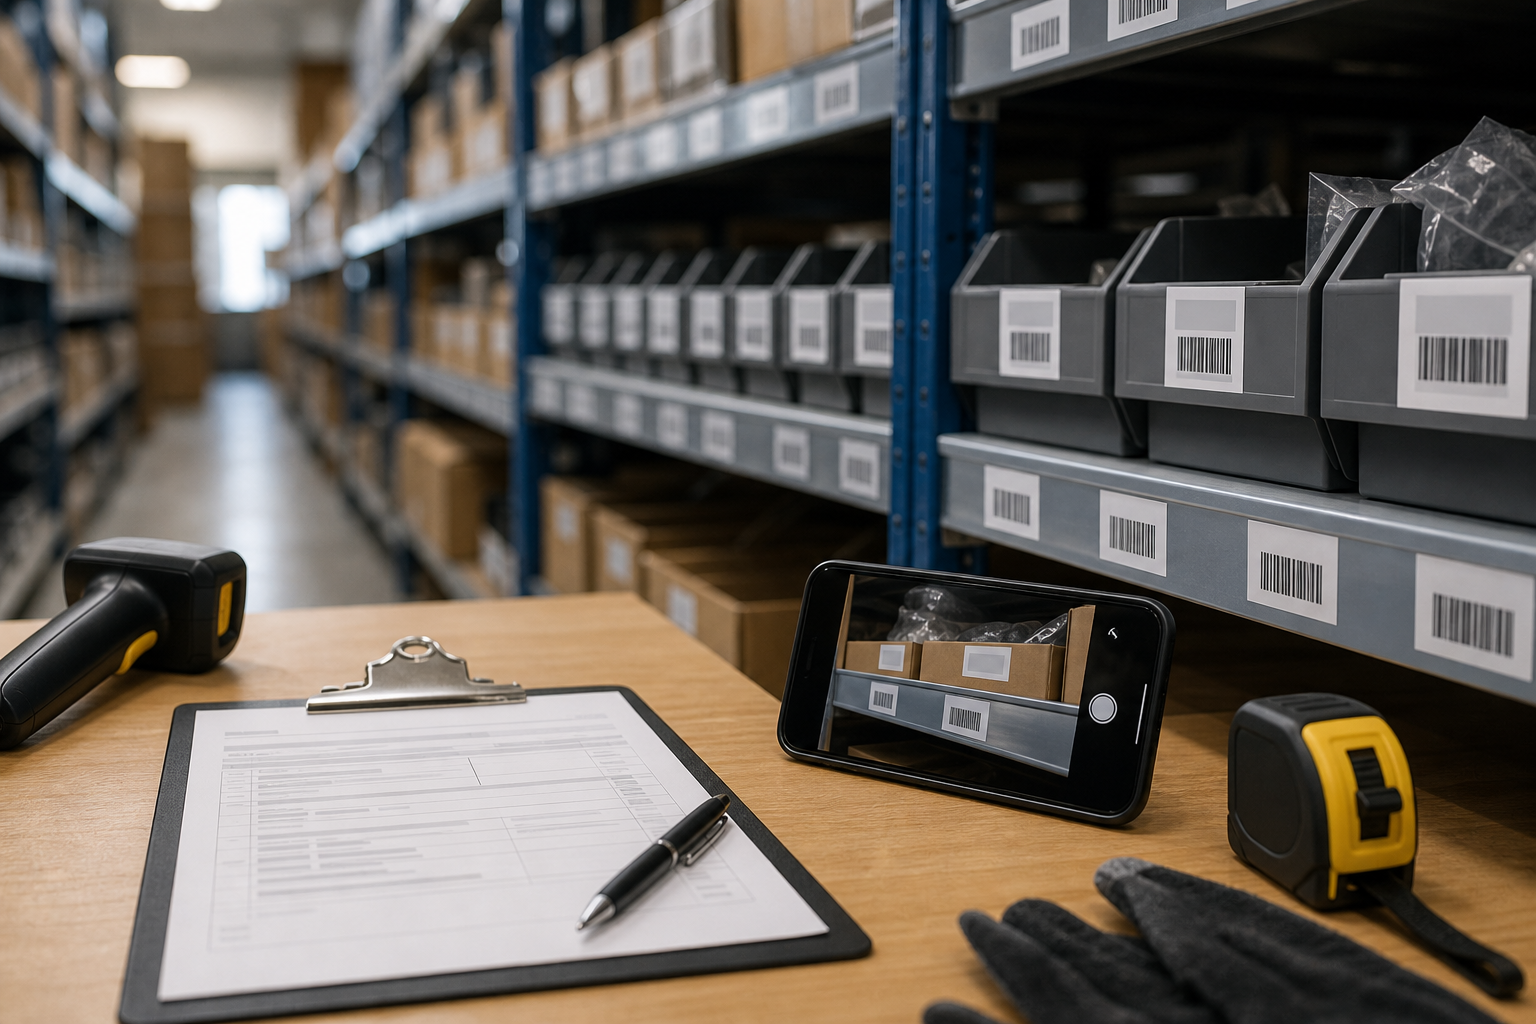
A Practical Cleanup Pass Before OCR

After capture, run a quick cleanup pass before text extraction. This is where many teams either do too much or too little. The point is not to make the images beautiful. The point is to remove barriers that prevent text from being recognized.
Start with these edits:
- Crop away packaging, shelf rails, hands, and floor space that are not needed.
- Straighten the label so text lines are level.
- Increase clarity or contrast only enough to separate characters from the background.
- Avoid filters that create halos around letters or barcode lines.
- Keep a copy of the original if the image is part of an audit record.
If images are huge, resize them to a practical review size with Resize Image. Keep enough resolution for text to remain crisp. For many label photos, the useful target is not a tiny web thumbnail but a clear review image where the label can be read without strain.
If the files are too large to share or archive, use Compress Image after cleanup. Compression should be conservative for OCR images. Thin characters, barcode lines, and small location codes can become blocky if the file is crushed too hard.
If your photos arrive in mixed formats, use Convert Image to standardize them before building the packet. A consistent set of JPEG or PNG files is easier to organize than a folder mixing HEIC, WebP, PNG, and JPEG images.
What Not to Fix
Do not over-edit evidence photos. Heavy sharpening, extreme contrast, artificial background removal, and aggressive denoising can make a label look cleaner while changing the visual record. If a count dispute depends on what the label actually looked like, preserve the original.
A good rule is to create two layers of records:
- Originals: untouched images kept for evidence.
- Review copies: cropped, straightened, and prepared for OCR.
This gives the team cleaner working files without losing the raw source.
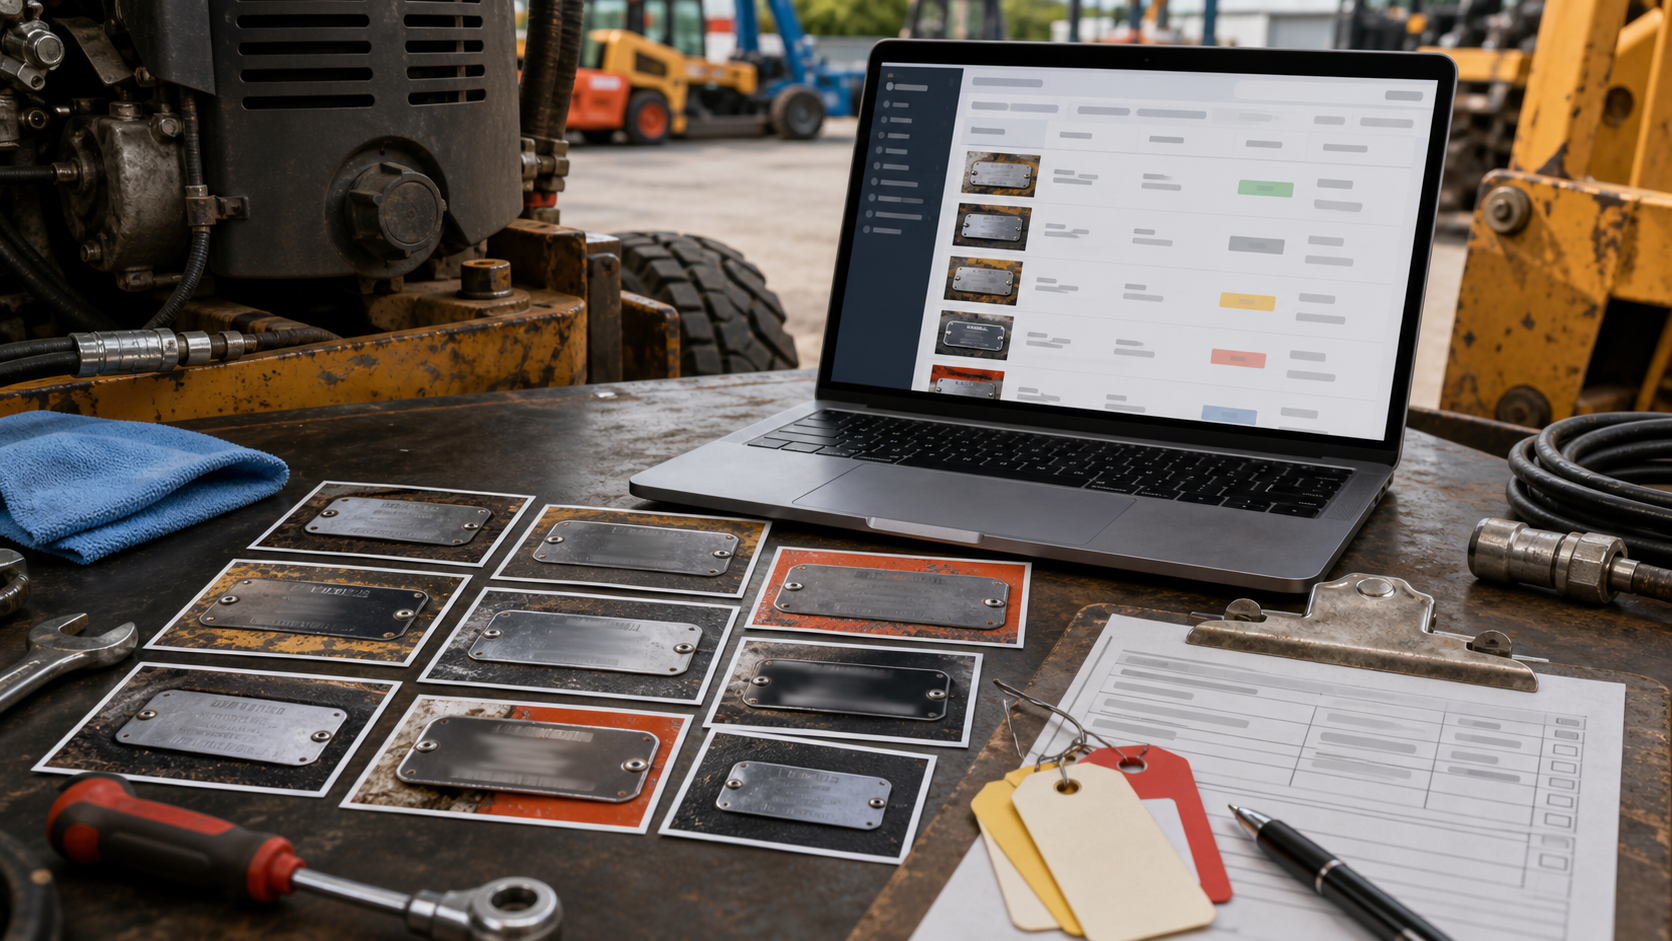
OCR: Extract Text, Then Verify the Risky Fields
Once images are cleaned, use Image OCR to extract readable text from the label photos. OCR is helpful for building searchable notes, locating SKUs quickly, and reducing manual typing. It should still be reviewed when the output affects stock adjustments, purchase orders, shrink reporting, or customer commitments.
Pay special attention to characters that are commonly confused:
| Printed character | Common OCR mistake | Why it matters |
|---|---|---|
| 0 | O | SKU and location codes can change completely |
| 1 | I or l | Bin and item identifiers may become invalid |
| 5 | S | Vendor codes and serial-like strings can break |
| 8 | B | Product IDs can point to the wrong item |
| Z | 2 | Location labels may be misread |
| RN | M | Item descriptions can become misleading |
For inventory work, the risky fields are usually SKUs, barcodes, bin locations, lot codes, and quantity markers. Item descriptions can tolerate minor OCR errors if humans can still search and understand them. Identifiers are less forgiving. One wrong character can send the reviewer to the wrong shelf or wrong product.
A useful review method is to separate OCR output into three confidence groups:
- Clean: clear label, clean OCR, no correction needed.
- Check: mostly readable, but one or two characters need human review.
- Exception: label is damaged, blocked, faded, or inconsistent with the product.
This prevents the team from treating every image as equally risky. Most labels may pass quickly, while the small exception group receives proper attention.
Build a Searchable Count Packet
After OCR and review, turn the image set into a practical packet. A searchable PDF is often easier to share with managers, auditors, finance teams, or external partners than a folder of loose images.
Use Image to PDF when you need a single document containing the cleaned label images. A good count packet should be easy to skim and easy to search. If every image is inserted randomly, the PDF will still be frustrating even if the OCR text is good.
Organize the packet in the same order as the physical count:
- Site or store.
- Area or department.
- Aisle.
- Bay or shelf.
- Sequence number.
- Exception status.
Add a short cover note outside the images if needed, but keep the image pages focused. The reviewer should be able to move through the packet and mentally follow the shelves.
For larger counts, split packets by area rather than creating one enormous PDF. A 40-page stockroom packet is easier to review than a 500-page all-site file. Smaller files also reduce the chance that email, chat, or storage systems will compress or reject them.
When a PDF Is Better Than a Spreadsheet Attachment
Spreadsheets are excellent for final counts. They are not always ideal for visual proof. A PDF packet is better when reviewers need to see the shelf condition, confirm a damaged label, or inspect product placement.
| Need | Better format | Reason |
|---|---|---|
| Calculate totals | Spreadsheet | Structured numeric data |
| Confirm label condition | PDF with images | Visual evidence is preserved |
| Search for a SKU across photos | Searchable PDF or OCR notes | Fast lookup with context |
| Share exception evidence | Portable and easy to review | |
| Import into inventory system | CSV or spreadsheet | Machine-readable fields |
For many teams, the best result is both: a spreadsheet for counts and a PDF packet for evidence.
Compression Without Destroying Small Text
Inventory image packets can get large quickly. A single modern phone photo may be several megabytes. A few hundred photos can become too heavy for email or slow to upload to shared storage.
Compression helps, but OCR images need care. The most damaging compression artifacts are usually found around thin black text, barcode lines, and high-contrast label edges. If the compressed file creates fuzzy blocks around characters, OCR accuracy may drop.
Use these compression rules:
- Crop first, compress second.
- Resize overly large images before compression.
- Compare a few compressed samples at full size before processing the entire set.
- Avoid repeated compression through multiple apps or messaging platforms.
- Keep originals separately if the photos support an audit.
A practical test is to open the compressed image and read the smallest important field without zooming excessively. If the location code or SKU looks smeared, the file is too compressed. Try a larger output size or a less aggressive setting.
For PDFs, compress source images before building the final document when possible. This gives you more control than relying on an email client or chat app to shrink the file later.
Special Cases: Glossy Holders, Curved Shelves, and Faded Labels
Some shelf environments are especially hostile to clean OCR. The capture and cleanup choices should change depending on the problem.
Glossy Plastic Label Holders
Glare across plastic holders is one of the most common causes of failed OCR. The fix is usually physical, not digital.
Try these steps:
- Move the phone slightly to the side.
- Lower or raise the camera a few inches while keeping the label square.
- Block direct overhead reflection with your body or a clipboard.
- Take two images from different angles if the label remains reflective.
- Avoid flash unless testing proves it helps.
Do not rely on editing to remove a bright reflection that covers printed text. If the characters are washed out in the photo, cleanup may not recover them.
Curved or Angled Shelf Rails
Some labels sit in curved rails or flexible strips. The text may bend slightly across the image. OCR can still work if the text is sharp and close. Take the photo from the center of the label, not from the end of the shelf. Avoid placing the label near the edge of the phone camera frame, where lens distortion is often worse.
If a long strip contains several labels, photograph each label separately. A wide strip photo may be useful for shelf order, but individual label photos are better for text extraction.
Faded Thermal Labels
Faded labels require gentle handling. Increasing contrast can help, but overdoing it may erase faint characters or create false edges. Take several photos under different lighting conditions. Sometimes side lighting makes faded print easier to read; sometimes diffuse light works better.
For faded labels, human review is essential. OCR output can be used as a starting point, but the final identifier should be checked against inventory records or a physical scan.
Exception Photos: What to Capture When Something Is Wrong
Exception photos should tell a complete story. If an item is missing, damaged, mislabeled, or stocked in the wrong slot, a tight label photo alone may not be enough.
For each exception, capture:
- A wide context photo showing the shelf or bin.
- A close label photo for OCR.
- A product photo if the item present does not match the label.
- Any handwritten note, temporary sticker, or replacement label.
- The surrounding slot if location order matters.
Use consistent status terms in filenames or notes. For example: empty, mismatch, damaged-label, overstock, blocked, duplicate, missing-barcode. Consistent terms make it easier to search the final packet.
Avoid vague labels like problem or check later. They do not help a reviewer understand what kind of action is needed.
Quality Control Before Sharing
Before sending the packet, run a quick quality check. This does not need to be a full audit. It is a short pass to catch preventable problems.
Use this checklist:
- The file names or folder structure match the count order.
- Originals are preserved if audit evidence matters.
- Review copies are cropped and straightened where needed.
- OCR output has been checked for high-risk identifiers.
- Exception photos include enough context.
- The final PDF opens correctly and pages are in order.
- File size is reasonable for the sharing method.
- No unrelated personal images are included from the camera roll.
- No sensitive internal notes are visible unless they belong in the packet.
The last two points are easy to miss. Phone photo folders often contain accidental images. A quick review prevents embarrassing or sensitive material from being bundled into an operational document.
A Small Team Example
Imagine a small electronics stockroom doing a quarterly count. The team has 18 aisles, each with bins of adapters, cables, replacement parts, and accessories. Their inventory system is reliable, but several shelves have old labels and some products have moved without clean relabeling.
A practical plan might look like this:
- Photograph each aisle sign before starting that aisle.
- Capture one close label photo per bin.
- Take a wider shelf photo only for empty, blocked, or mismatched slots.
- Move images into folders named by aisle.
- Crop and straighten only the photos that need OCR or exception review.
- Run OCR on label images and check SKUs with confusing characters.
- Create one PDF packet per aisle using image order.
- Keep originals in a dated archive folder.
This approach does not require a complex system. It simply separates normal count evidence from exceptions and prevents all photos from becoming one undifferentiated pile.
Common Mistakes to Avoid
The most expensive mistakes are usually ordinary ones.
Taking Only Wide Aisle Photos
Wide photos feel efficient during capture, but they often fail during review. Individual labels become too small, and OCR has too much clutter to interpret. Use wide photos for context, not as the main OCR source.
Sending Photos Through Chat Before Cleanup
Many chat apps resize and compress images automatically. That is fine for casual review but risky for OCR. Transfer original files directly when possible, then create compressed review copies intentionally.
Cropping Too Tight
A crop that cuts off part of the label may remove location context or damage a barcode edge. Leave a small border around the label. The image should feel focused, not amputated.
Trusting OCR Without Identifier Review
OCR can be excellent and still make a single-character mistake. For inventory, that single character can matter. Always verify high-risk fields before making stock corrections.
Mixing Evidence and Edited Copies
If edited images overwrite originals, the team loses the raw record. Keep originals untouched and use edited copies for OCR and sharing.
The Best Output Is Easy to Search and Easy to Defend
Shelf label photo cleanup is not glamorous, but it has real operational value. Clean images reduce rework. Searchable text helps managers find exceptions quickly. Well-ordered PDFs make counts easier to review after the team has left the aisle.
The practical standard is simple: capture labels square and close, clean only what helps readability, verify risky identifiers, and package the results in a format that matches how the count will be reviewed.
ConvertAndEdit can support the file preparation pieces: extract text with Image OCR, prepare images with Resize Image and Compress Image, standardize formats with Convert Image, and assemble review packets with Image to PDF. The tools do not replace good count discipline, but they make the photo evidence easier to handle.
When the next inventory count produces a folder full of rushed phone images, the difference between chaos and a useful record may be a few boring habits: one label at a time, straight on, readable text, organized files, and a final packet that someone else can understand without standing in the aisle.